This site is supported by our readers. We may earn a commission, at no cost to you, if you purchase through links.
Ready to take your crafting skills to the next level? Then it’s time for you to learn how to sew a headband! With just a few materials and some simple steps, making your own headband can be an easy and gratifying project.
Follow this guide and in no time at all, you’ll be sewing up stylish headbands with ease. Here is what is needed: fabric (about 18 x 4¾), elastic (9 x 2¾), as well as needle and thread or a sewing machine.
Let’s get started on creating that perfect custom-made accessory for any occasion!
Table Of Contents
Key Takeaways
- Sewing a headband can enhance crafting skills and provide a satisfying and easy project.
- Making your own headbands ensures they match any outfit and allows for customization with different fabrics and embellishments.
- The basic steps involve cutting fabric strips, folding and stitching them, and attaching elastic for an adjustable fit.
- Pressing the fabric before stitching and using small stitches for security are important for a clean and professional finish.
Basic Headband Tutorial
You can create a stylish and adjustable headband using cotton fabric, elastic, scissors, ruler, iron, safety pin, and thread with just seven easy steps – perfect for making a child’s version or even a reversible one!
Begin by selecting your desired fabric type. Cotton is ideal, but you could also use stretchy knit fabrics to add more design features.
Cut out two strips of the same length that are twice as wide as the headband should be when finished.
Fold each strip in half lengthwise with wrong sides together and press flat using an iron. Then topstitch along both long edges, leaving a 1/4-inch seam allowance from the edge for strength.
Now join both pieces together at one end, forming either an overlapping straight line, twisted knot, or zig-zag stitch depending on your desired look.
To finish off, cut 2 inches of elastic that matches your chosen colors. Fold over the extra fabric in the middle, creating a small pleat, and secure with stitching before attaching it securely at either end, ensuring the correct fit and tension put onto the material.
Finally, customize further by adding embellishments such as ribbon trims, beads, etc.
Materials Needed
Now that you have the basic headband tutorial down, let’s discuss what materials will be necessary for this project.
For starters, it’s important to select a fabric type of your choice – cotton works great, but feel free to experiment with stretchy knits if desired. You’ll need two strips of the same length, twice as wide as you want your finished headband to be.
Other supplies include scissors, a ruler, an iron (with appropriate press settings), a safety pin or needle threader for attaching elastic ends together easily and securely. Pins or clips are also handy when pressing fabric pieces flat before stitching them together at one end with a ½ inch seam allowance from edges for strength.
Be sure to adjust the width accordingly using these measurements so you can personalize it just right! Finally, make sure the file format is correct when selecting threads in order to match up perfectly with fabric choices.
Cutting and Folding Fabric
Once you have all the materials gathered, it’s time to begin cutting and folding your fabric – grab those scissors and ruler!
Start by measuring a strip of cotton or other medium-weight fabric that is twice as wide as you want the final headband to be. Cut two strips according to this measurement, then proceed with pressing one end flat.
Make sure there are no wrinkles in order for it to lay flat when stitching together later on.
Then fold each piece in half lengthwise so that both ends meet evenly before pressing once more along the edges – this will create a clean finished look when attaching elastic at one end later on.
When creating pleats, make sure they are centered from top down while adjusting the width accordingly for newborn babies up through adult sizes – these can also be reversed depending upon the desired design outcome!
To thread elastic easily without any kinks, use a safety pin attached securely onto either side, then pull through until the desired fit has been achieved before securing with stitches at the center back seam allowance about ¼ inch from the edge for optimal hold and comfortability upon wearing the finished product!
Stitching and Pressing
After folding the fabric strips and pleating them as desired, it’s time to stitch and press the headband to give it a finished look. Ironing is essential in order to achieve crisp edges for sewing. Use paper sizes or larger pieces of fabric when ironing so that no details are missed.
Seam allowance should be about ¼ inch from the edge all around while keeping elastic tension tight enough but not too much. Different fabrics will require different amounts of pressing depending on their choice.
Lightweight materials may need more pressing than heavier ones do. Attach one end with a safety pin before threading through using straight stitches at either side for a secure hold when finished. Make sure both elastic parts meet evenly after stitching together tightly. Finally, fold over any extra material at the center back, then carefully place pins across lengthwise before pressing firmly once more.
Adding Elastic
To achieve a great hair day, it’s time to attach the elastic pieces onto your headband for an adjustable width. Before starting, measure out the length of elastic needed and cut enough off so that when tied in a knot, it fits snugly around your head.
Pleating fabric is ideal if you want extra fullness on top, while strong ties are necessary at either end for customizing width. Once ready, begin stitching with small stitches along both sides of the elastic until firmly attached to each edge of your finished headband piece.
For added assistance, there are free printable PDF files available online or through blog posts about how to sew a headband, along with diagrams and other instructions if desired.
Creating Different Headband Styles
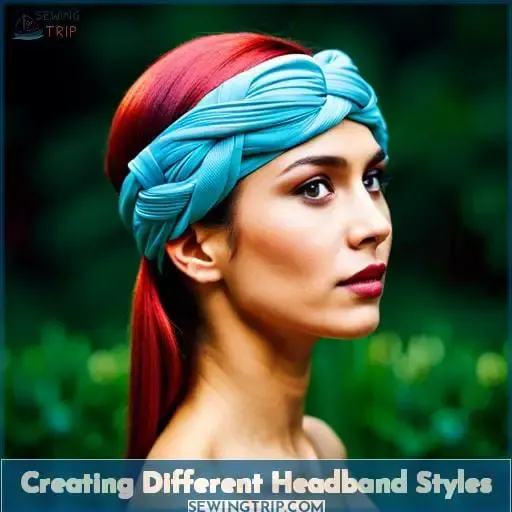
With just a few simple steps and materials, you can create stylish headbands to suit any taste or occasion. Mix and match colors for unique combinations, or accessorize with different fabrics for versatile styles.
With the help of an easy step-by-step tutorial and your sewing machine settings set correctly, it won’t be long before you have yourself some beautiful new hair accessories.
And if your fabric stash is overflowing with scraps that need using up, then this project is the perfect way to go! So get creative with color combos and patterns; use contrasting textures for extra texture; experiment by creating something totally original – whatever suits your style best – and enjoy achieving those great hair days in no time at all!
Adding Decorative Elements
Ready to take your headband-making skills up a notch? You can turn any plain cotton fabric into a fashionable statement piece with the right embellishments. Adorning trims, adding bows or buttons – it’s all about choosing colors and materials that match your style.
Why not try something cute like a knotted headband? All you need is one small piece of fabric for the top layer, plus one tube of stretchy fabric for the underlayer and elastic band at each end.
With just these few simple steps, you’ve crafted yourself a unique accessory that will make heads turn no matter where you go! Get creative with different fabrics and color combinations to suit every outfit; creating stylish hair accessories has never been so easy or fun!
Tips and Tricks for a Perfect Headband
By following a few simple tricks, you can easily create stylish headbands that will make heads turn and give your look the perfect finish! Take pink accessories, for example; by using a small piece of fabric with decorative stitching, you can craft an eye-catching accessory to complement any outfit.
For child-sized headbands, it’s important to adjust the elastic widths so they fit comfortably around their smaller heads.
- Start by creating the main part of the headband – fold two long edges together and press firmly along both sides with an iron.
- Sew down each side for extra support before attaching elastic ties at either end that will stay securely in place when worn.
- Once completed, trim off any excess fabric from the folded edge and then carefully stitch both ends together near the center back of the band where it meets tightly against the scalp area.
- Finally, add embellishments like bows or buttons depending on what design fits best with your style – now all that’s left is achieving great hair days!
Frequently Asked Questions (FAQs)
How long should the elastic be for a child’s headband?
Measure the circumference of your child’s head and subtract 1 inch to determine the appropriate length of the elastic for their headband. Ensure that it is snug but not overly tight, allowing them to wear it comfortably and with ease.
Is it possible to make a reversible headband?
Yes! You can create a reversible headband by cutting two fabric pieces, folding and stitching the edges together, and then attaching elastic at both ends.
How can I make sure that the headband fits properly?
Measure the circumference of your head and adjust the width of the headband accordingly.
Are there any additional tools I need to make a headband?
Are you ready to create your own headband? All you need is fabric, elastic, scissors, a ruler, and pins.
How can I customize my headband with decorative elements?
Make your headband stand out and add pizzazz with decorative elements such as ribbons, buttons, and beads! Incorporate a touch of sparkle to give it an additional wow-factor that is sure to catch attention.
Conclusion
You can now make a headband to fit your style and needs. With the right materials, you’ll have a great accessory in no time. There are so many options to make a headband unique and fashionable. Did you know that you can make a reversible headband or add decorative elements like ribbons and buttons? With a few quick steps, you can have a great hair day.

