This site is supported by our readers. We may earn a commission, at no cost to you, if you purchase through links.
First, always check the nap direction (think of it like petting a cat—it matters!).
Flip the fur over and cut only the backing with a craft knife or scissors to avoid a furry mess.
After cutting, gently pull apart loose fur and comb the edges.
Use a walking foot for your sewing machine, and keep seams around ¼ inch wide.
Avoid pinning—binder clips work better.
Once sewn, comb the fur over the seam to hide it.
Ready for more tips?
Let’s make that fur look flawless!
Table Of Contents
Key Takeaways
- Always check the nap direction before cutting or sewing to ensure consistency and a professional look.
- Use a razor blade or X-acto knife to cut only the backing, avoiding fur fibers and reducing mess.
- Use a walking foot, heavy-duty thread, and longer stitch length (3.0mm or higher) to handle bulky faux fur easily.
- Comb seams after stitching to release trapped fur and create a seamless, polished finish.
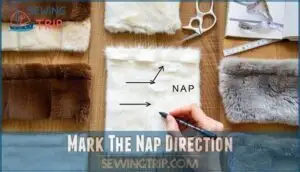
Mark The Nap Direction
Before you sew faux fur, take time to figure out the nap direction—it’s like petting a cat; smooth one way and rough the other.
Nap consistency is key for professional-looking results, so always make certain the fur direction matches across all pieces.
To start, lay out the fur fabric flat and run your hand across it. The direction that feels smooth is the nap.
Flip the fabric over and use marking tools to draw arrows on the backing, indicating the nap. This helps with pattern layout and grain alignment and reduces fabric waste from mistakes.
Trust me, nothing ruins a project faster than mismatched nap directions. Marking your fur’s nap is the first stitch in mastering faux fur sewing!
Cut The Backing
Once you’ve sorted out the nap, it’s time to cut the faux fur backing. Forget scissors—they can chop fur fibers and leave a mess. Instead, grab a razor blade or X-acto knife. These tools let you cut only the backing material while keeping the fur intact.
Forget scissors—use a razor blade to cut faux fur backing cleanly, leaving the fluffy fibers untouched and mess-free.
Lightly glide along your marked lines, applying steady pressure. Using a sharp blade is like giving the fabric a secret handshake—clean, precise, and respectful to its design.
Hair length impacts this process, too. Longer fur piles need more gentle handling to avoid unnecessary tangles. And, trust me, preventing fur loss from the start saves you loads of cleanup later.
A razor blade cutter can help achieve cleaner cuts. By focusing on razor techniques and proper tools, you’ll master faux fur cutting like a pro!
Pull Apart and Comb The Fur
After cutting the backing, it’s time to handle the fur itself.
Pulling apart and combing the fur helps avoid clumps, keeps fibers smooth, and guarantees pile alignment for a polished look.
Imagine detangling hair after a windy day—it’s kind of like that but fuzzier.
Use these steps for neat results:
- Fiber Separation: Gently tug apart fur hairs where you made the cuts to keep fibers intact and fluffy.
- Comb Selection: A wide-tooth comb works best for straightening the fur without damaging it.
- Detangling Knots: Comb fur from edges toward the center to remove loose fibers and align the pile.
Uniformity techniques like this set you up for success when sewing faux fur.
It’s tedious, but precision now makes the final project shine!
For superior results, consider the comb’s product details.
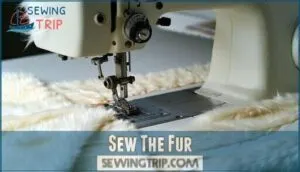
Sew The Fur
Getting those furry layers to cooperate can feel like herding cats, but sewing faux fur is easier with the right tools and tricks.
Start with a longer stitch length (3.0mm or higher) to handle the bulk, and adjust your machine’s tension settings to avoid puckering. A walking foot attachment is your secret weapon for even feeding of the fur fabric.
Choose heavy-duty thread for smooth stitching, as the weight of faux fur can strain standard thread. For all your sewing needs, consider exploring options for specialized fur attachments.
Here’s a quick reference guide to keep things tidy:
| Step | Tool/Setting | Faux Fur Tips |
|---|---|---|
| Stitch Length | 3.0mm or higher | Prevent puckering; manage bulky fabric |
| Thread Choice | Heavy-duty thread | Strong enough for thick fur layers |
| Tension | Looser settings | Reduces snagging and uneven stitching |
Remember, sewing fur fabric is all about patience! Keep seams consistent, and let the walking foot do the heavy lifting.
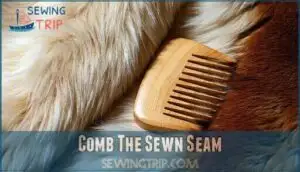
Comb The Sewn Seam
Once you’ve stitched your faux fur seams, it’s time to make them shine. Grab a wide-tooth comb or soft brush—your tools for seam concealment.
Gently comb along each seam, freeing any trapped fur and guaranteeing smooth fur distribution across the surface. Don’t skip this step, or you’ll end up with tangled junctions and obvious faux fur seams.
As you work, fluff the pile in the direction of the nap to keep things consistent. Use fingers for stubborn spots, but don’t overdo it—patience is key!
Brush selection matters; avoid anything too stiff that might damage the fabric. To prevent fraying, consider using zigzag or faux-overlocked seams.
Taking this time guarantees clean, neat seams and adds a polished touch to your fur fabric sewing project. Voilà—your seam finishing is picture-perfect!
Top 7 Faux Fur Sewing Tips
Sewing faux fur isn’t as tricky as it seems when you’ve got the right approach.
With these seven essential tips, you’ll tackle common challenges like pile management and bulky seams like a seasoned pro.
Nap Direction
Understanding nap is key when working with faux fur. Nap direction impacts the fabric’s look, so consistency is non-negotiable in sew faux fur projects.
- Check nap direction: Brush your hand over the fur to see which way feels smooth. That’s the nap!
- Pattern layout matters: Align pieces to follow the nap consistently.
- Mind yardage calculation: Extra fabric is needed for proper nap alignment.
- Avoid visual discrepancies: A mismatched nap can make seams look strange.
Planning and attention to detail guarantee your faux fur looks polished, not patchy!
Cutting Technique
When working with faux fur, precision is key.
Use a razor blade for cutting faux fur—only slice through the backing, not the fibers.
Always lay the fabric in a single layer, secure patterns with weights, and trace seam lines with washable markers.
Clip seam allowances carefully to avoid bald spots, keeping edges clean and fur intact for sewing perfection.
Hinge Seams
When you’ve mastered cutting faux fur, it’s time to focus on seams.
Hinge seams are your ticket to creating secure, nearly invisible seams with minimal bulk.
Instead of overlapping edges, align them edge-to-edge and use a zigzag stitch.
This technique works wonders for fur density, giving a polished finish without puckering.
To make stitching smoother, use a walking foot attachment on your sewing machine for even fabric feeding.
Skip excessive seam allowances—1/4 to 1/2 inch is plenty.
Once sewn, gently pull out fur trapped in stitches for seamless blending.
Remember, trim excess bulk with care, but don’t overdo it—you’re aiming for professional-looking, sturdy construction.
Hinge seams make sew faux fur projects look effortless and runway-worthy.
Stay Seamlines
A polished seam isn’t just about how it looks—stability matters too. Stay seamlines are your secret weapon for keeping faux fur seams sturdy and preventing stretching, especially along tricky curves.
To get it right every time, follow these steps:
- Seam Reinforcement: Use a 3/8-inch-wide bias tape or sew-in interfacing along seamlines. This keeps the fur stable without losing its fluff.
- Adjust Stitch Length: Go with a longer stitch (around 3.0mm). It reduces bulk and prevents puckering.
- Trim Smartly: Remove excess fur from the seam allowance to avoid lumps.
- Tackle Fur Seam Finishing: After sewing, pull out loose pile from stitches for a flawless finish.
Stay seamlines keep your faux fur projects feeling pro-level! Remember to verify the fabric pile direction to guarantee a professional finish.
Avoid Hand Sewing
Skip hand stitching if you want your faux fur project to shine.
Sewing machines are your best friend here—outfitted with a walking foot, of course.
Use stretch stitches or zigzag seams for strength and flexibility.
Adjust your machine’s stitch length to handle the bulk.
Plus, machine stitching avoids messy clip prevention hassles, delivering cleaner results.
Save time, skip frustrations, and watch your faux fur look sleek and professional!
Next Steps
Now that you’ve tackled avoiding hand sewing, it’s time to explore advanced techniques that perfect your faux fur projects. Start by laying your fabric in one direction—trust us, it saves headaches later.
Use a razor or X-acto knife to cut just the backing, keeping the fur intact. Have a comb handy to fluff fibers and clean edges before sewing.
When stitching, test scraps first to get comfortable with adjustments like hinge seams or stay seamlines. Selecting the right machine is vital, as brand comparisons matter for superior results.
A presser foot like an edgestitch or zipper foot is a game changer for precise topstitching. Trim bulky seams carefully, making your project look polished. With these fur sewing techniques, your creations will shine like runway-ready masterpieces!
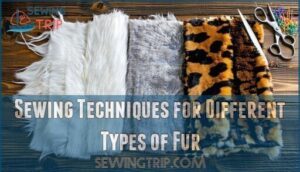
Sewing Techniques for Different Types of Fur
Sewing faux fur can feel like taming a shaggy beast, but with the right fur sewing techniques, it’s a breeze!
Here are key fur fabric tips:
- Consider Pile Height – Longer piles require extra care to avoid bulking seams.
- Check Density Matters – Denser fur may need a sharper needle and slower stitching.
- Mind Backing Stability – Stabilize stretchy backings to prevent shifting.
- Enhance Fur Appearance – Comb seams to hide stitches and fluff fibers.
Follow this fur sewing tutorial for flawless faux fur projects! Mastering straight stitching techniques is essential for achieving even seams.
Frequently Asked Questions (FAQs)
How to sew faux fur?
Line up your faux fur’s nap, trim seam allowances carefully, and use a zigzag or stretch stitch.
Comb fibers away from seams, test stitches first, and keep cleanup tools handy—loose fur gets everywhere!
How to sew two pieces of faux fur together?
Match the nap directions first, then use a zigzag stitch or long straight stitch to join the edges.
Keep fur on top, comb fibers away from seams, and trim excess fluff for tidiness.
How do you cut a fur pattern?
Cutting a fur pattern isn’t rocket science, but it’s close.
Use a razor blade or X-Acto knife to slice the backing only, avoiding the pile.
Work in single layers, aligning nap direction carefully.
How do you sew fur & linen together?
Pairing fur and linen requires a strong needle, a walking foot, and patience.
Keep the fur nap facing down, trim bulk from seams, and use a zigzag stitch.
Work gently to avoid shifting fabrics.
What types of projects can I make with faux fur?
Faux fur opens doors to cozy projects like plush blankets, whimsical pillows, and trendy jackets.
You can also craft adorable stuffed animals or luxurious rugs, adding warmth to your space without breaking the bank—or the environment, with faux fur being a key to these creations, and making them luxurious.
What types of faux fur fabrics are available?
You’ll find various faux fur fabrics like shaggy, curly, plush, and short-pile types.
There’s faux mink for luxury, sherpa for warmth, or animal-inspired patterns for style.
Each offers unique textures and uses—plenty of options!
What type of sewing machine should I use for faux fur?
You’ll want a sturdy sewing machine with adjustable stitch length and a walking foot attachment.
It prevents fabric slipping and helps handle the bulk of faux fur.
Test stitches first—fur can be fussy!
What types of seams should I use when sewing faux fur?
Did you know inconsistent seams can ruin a faux fur project?
Use hinge or zigzag seams.
Hinge seams butt edges together for bulk-free stitching.
Zigzag seams securely hide stitches.
Test both to see what suits your project!
How do I clean my sewing machine after using faux fur?
Clean your machine by removing the needle plate and bobbin case, then use a small vacuum or brush to clear out fur fibers.
A quick blast of compressed air works wonders, but expect a fluffy mess!
How can I reduce shedding during cutting?
Use a craft razor or X-acto knife to cut the fabric’s backing, not the fur.
Gently tug fibers apart after cutting.
Shake the fabric outside to loosen stray hairs—less mess, more fun cutting!
Conclusion
Sewing faux fur might seem like wrestling a fluffy gremlin, but with the right steps, it’s surprisingly simple.
Remember, the nap direction is your guide—ignore it, and chaos may ensue.
Cut only the backing, keep those seams neat, and let your walking foot do the heavy lifting.
Comb the edges for a polished look and hide those seams for a flawless finish.
With these tricks, you can conquer faux fur like a pro and create something fabulous!
- https://docs.google.com/forms/d/e/1FAIpQLSdDD-iG0whrkwLDOIgugH3lk_3vS6v_XrcWUlAiCFZkYBzFiA/viewform?usp=sf_link
- https://youtu.be/kQwtuuQqy18
- https://mellysews.com/tips-to-sew-faux-fur-and-fuzzy-fabric/
- https://www.fabricsgalore.co.uk/blogs/fabric-news/a-guide-to-sewing-with-faux-fur-fabric?srsltid=AfmBOoqI7cbS1HBIMZrWFdYMXOlMw3Q7OuZrWLwK-MUYTmqbpom0DTfK
- https://blog.shannonfabrics.com/blog/how-to-sew-and-blend-faux-fur-seams

