This site is supported by our readers. We may earn a commission, at no cost to you, if you purchase through links.

Grab pins, matching thread, a needle, scissors, and maybe a measuring tape.
Wear the item inside out, pinching and pinning excess fabric where you want a snugger fit—careful not to poke yourself!
Mark the new seams with chalk or fabric pen, keeping them even.
Carefully sew along the pins, using small, sturdy stitches.
Trim extra fabric, leaving a bit for the seam.
Flatten seams with a hammer for a polished look.
Want professional results?
Matching thread is your secret weapon.
Table Of Contents
Key Takeaways
- Wash and dry your clothing first to ensure any shrinkage happens before sewing and altering the fit.
- Pin and mark excess fabric with precision while wearing the garment inside out to shape it for a snug fit.
- Sew along marked lines, backstitch for strength, and trim away extra fabric, leaving a small seam allowance.
- Flatten seams with a hammer for a polished finish and match thread color to maintain a professional look.
Prep Your Jeans
Start by washing and drying your jeans to verify they’re clean and shrink any loose fibers.
Washing and drying your jeans ensures they’re clean, prepped, and perfectly tightened for flawless tailoring results.
Gather your sewing supplies, like pins, thread, and scissors, so everything’s ready to go.
Wash and Dry Jeans
Before you start sewing, toss your jeans in the washing machine on a hot water cycle to help initiate shrinkage.
Follow this with the highest heat setting in your dryer. The heat helps tighten the denim, especially around the waistband and hips.
This step guarantees your jeans fit better before tailoring. Remember, the shrinkage factors depend on the fabric type and washing frequency—cotton denim shrinks more than synthetic blends.
Understanding how fabric content affects shrinkage is vital for predicting the outcome. Always check your jeans’ care tag for the best water temperature and dryer settings before you start.
Have Sewing Supplies Ready
Once your jeans are fresh from washing and drying, it’s time to gather the right sewing supplies.
Gather your tools and stitch your way to perfectly tailored denim—preparation is the secret to sewing success!
Having everything ready makes the process smooth and frustration-free.
Here’s what you’ll need:
- A sewing machine, various needle types, and matching thread selection.
- Measuring tools, like a tape measure, fabric marking chalk, and seam rippers.
- Scissors, pins, and optional items like interfacing or elastic for added fit tweaks.
Think of these tools as your sewing toolkit—ready to help you stitch confidence into your denim!
Many sewers find it useful to explore machine options before starting.
Mark New Seams
Grab some pins and start shaping your jeans for a snugger fit by pinching excess fabric along the seams.
Mark the new lines clearly so you’ll know exactly where to sew for even and consistent results, which will help you achieve a snugger fit.
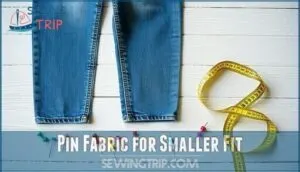
Pin Fabric for Smaller Fit
When sewing to tighten, pin placement is key. Evenly distribute fabric along the waist, hips, and thighs, smoothing any puckers. Use pins to taper seams for a custom fit.
A symmetry check confirms both legs match perfectly. Assess fit by gently tugging to test fabric alignment. Precise marking techniques keep alterations consistent.
Before pinning, consider that different sewing pins are designed for various fabric types. Here’s a quick pinning guide:
| Area | Pin Distance | Adjustment Needed |
|---|---|---|
| Waist | 2 inches | Taper inward |
| Hips | 3 inches | Smooth fabric |
| Thighs | 4 inches | Confirm symmetry |
This approach ensures a proper fit and helps in making necessary adjustments to achieve the desired outcome.
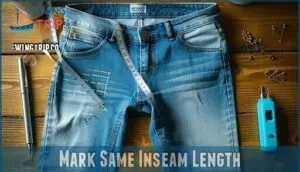
Mark Same Inseam Length
Measuring inseams carefully guarantees length consistency and prevents uneven legs.
Here’s how to master inseam precision:
- Use a tape measure to check the inseam length from crotch to hem on both legs.
- Mark the length using chalk or other marking tools.
- Rip open the inseams and evenly trim the seam allowance.
- Pin the seams together, shaping them for a snug fit.
- Sew and backstitch the ends for durability and professional sewing adjustments.
Accurate measurements require a specialized measuring tool for precise results.
Sew New Seams
Now it’s time to stitch your jeans into shape by sewing along the pins you’ve placed.
This step secures the fit while letting you remove any excess fabric for a clean, polished look.
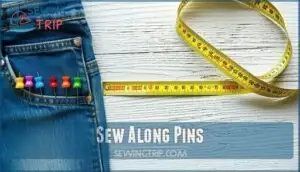
Sew Along Pins
Align your fabric with the presser foot and sew straight along your pins for clean, precise seams.
Maintain even fabric tension to prevent puckering. Backstitch at each end for durability.
Use a medium stitch length, sturdy needle type, and matching thread for a professional look.
Taper smoothly for slim-fit adjustments and make certain of proper seam allowance for comfort.
For strong seams, consider using a full backstitch method.
These sewing techniques keep your jeans snug and stylish, making sewing for fit easier with every adjustment.
Cut Away Excess Fabric
Trimming excess fabric is key to resizing garments effectively. Once you’ve sewn your new seams, grab sharp fabric scissors and carefully cut outside the seam, leaving a small seam allowance—about half an inch.
This step guarantees a clean finish and avoids unnecessary fabric waste. To get the best results, you’ll want extremely sharp scissors.
For best results:
- Use smooth, steady cutting techniques to prevent jagged edges.
- Double-check your seam alignment before trimming to avoid mistakes.
- Remember, a well-executed alteration not only tightens your jeans but also showcases sewing skills that transform how clothing fits, and also enhances your overall sewing abilities!
Finish Seams
Once you’ve sewn your new seams, it’s time to finish them for a polished look.
Flatten the seams with a hammer and distress the stitching to keep your jeans sturdy and stylish.
Hammer Seams Flat
When you’ve sewn new seams, grab a hammer—it’s an unsung hero in seam finishing.
Flatten bulky areas like the inner thighs with consistent pressure. Place a pressing cloth on the fabric to protect it, then gently tap.
- Why it works: Creates professional, smooth seams.
- Results: Puckering disappears.
- Pro tip: Use noise reduction tools.
- Must-haves: Reliable Seam Flattening Tools.
Distress Stitching
Distress your seams to give them a natural, broken-in look that matches your favorite jeans.
Grab distressing tools like a seam ripper or razor blade and gently pull threads along the seam placement. Focus on high-wear areas like inner thighs for authenticity.
Use tweezers to pick out vertical threads, creating an artfully unfinished appearance. Don’t skip a dot of fray check on loose threads to keep the fabric choice intact.
Tailor your thread color and stitch density to match the original jeans for flawless blending of old and new stitches.
Avoid Mistakes
You don’t want to end up with jeans that look worse than before, so watch out for common sewing mistakes.
Testing the fit and matching thread color can save you from frustration later.
Test Fit With Basting
Use a long basting stitch length to pin seams and test the fit before cutting. This reversible alteration helps avoid costly mistakes.
Try on the jeans after every adjustment—it’s iterative fitting at its best. If something feels off, tweak and repin until perfect.
Pick a visible basting thread choice for easy removal when finalizing the sewing alterations.
Match Thread Color
To keep your alterations spotless, match the thread to your jeans with Thread Color Theory in mind.
Consider Denim Shade Matching—light blue, dark indigo, or black.
Adjust Sewing Machine Tension for smooth stitches.
Remember, Needle Size Matters! A sturdy needle suits denim best.
Blending thread with the fabric type guarantees your seam looks professional, not home-stitched.
For accurate color choices, utilize digital conversion charts.
Frequently Asked Questions (FAQs)
How to make a dress tighter without sewing?
To make a dress tighter without sewing, try tying a stylish belt around the waist.
Use safety pins to gather extra fabric, or add elastic bands or hair ties at the back for a temporary fit.
How do you make a dress tighter?
Pinch, pull, and pin—start by marking the loose areas with safety pins.
Test the fit, then adjust the side seams using darts or elastic.
Try a belt for quick fixes or get professional help!
How to make jeans tighter?
Start by turning your jeans inside out and pinning the excess fabric along the seams.
Sew a new line along the pinned areas, trim the extra fabric, and test the fit for adjustments to ensure a proper fit.
How to tighten jeans without sewing?
Shrink your jeans by soaking them in hot water, then toss them in a high-heat dryer.
For quick fixes, try safety pins, elastic bands, or a belt.
Layering tights underneath also adds snugness.
How to make clothes tighter?
When clothes feel like they’ve grown overnight, try darts to shape fabric, elastic for snug waists, or heat-shrinking with hot water.
Safety pins or belts offer quick fixes, while sewing guarantees a permanent custom look.
How do you make a sleeveless dress tighter?
To tighten a sleeveless dress, try taking in the side seams.
Turn it inside out, pin excess fabric evenly, and sew along the new edges.
Test the fit, then trim any extra fabric, to ensure a proper adjustment, focusing on complete concepts for the best results.
How to sew a top to make it tighter?
Picture your top snugly fitting like a glove.
Turn it inside out, pin excess fabric along the seams, and sew along those lines.
Cut the extra material, backstitch for strength, and test the fit!
How do you tighten a loose sew in?
To tighten a loose sew-in, thread a needle with matching thread, then sew along the loosened wefts close to the braid.
Secure with tight, even stitches.
Check for gaps and adjust as needed.
How to tighten waistband sewing?
Flip your pants inside out, pinch the waistband at the back, and mark excess fabric.
Stitch a new seam using a sewing machine, backstitch for strength, and trim extra fabric.
It’s easier than you think!
How do you sew tightly by hand?
Start with a threaded needle and firm grip.
Sew small, tight backstitches along the seam, pulling the thread snugly after each stitch.
Work steadily, ensuring even spacing, it’s simple, effective, and beginner-friendly!
Conclusion
Think of sewing to tighten your jeans like giving them a customized hug.
With the right tools and steps, you can transform loose fits into a snug, polished look.
Wash, pin, mark, sew, and flatten seams for a pro-quality finish.
Take your time with details like matching thread to keep the look seamless.
Practice patience, test your fit, and trust the process.
Knowing how to sew to tighten jeans guarantees every piece fits just right!


