This site is supported by our readers. We may earn a commission, at no cost to you, if you purchase through links.
 Creating a cross stitch pattern is like turning pixels into a cozy piece of art.
Start by choosing a design with clear lines and colors; it’s like picking the right crayons for coloring!
Use a photo or drawing, then try a tool like Stitch Fiddle to magically convert it into a grid pattern.
Don’t forget to select your threads carefully, sticking to a few colors to keep things simple.
Transfer your design onto grid paper with precision, much like tracing a treasure map.
Add special stitches for extra flair—think of them as secret ingredients.
Curious about refining those details? Keep reading!
Table Of Contents
- Key Takeaways
- Creating a Cross Stitch Pattern
- How to Make a Cross Stitch Pattern
- Tracing and Transferring The Design
- Selecting a Color Scheme and Thread
- Incorporating Special Stitches and Symbols
- Designing The Cross Stitch Graph
- Creating a Cross Stitch Pattern From a Photo
- Finalizing and Downloading The Pattern
- Frequently Asked Questions (FAQs)
- Conclusion
Key Takeaways
- Choose a clear image with well-defined lines and contrasting colors to simplify the cross-stitch pattern creation.
- Use tools like Stitch Fiddle to convert photos or drawings into detailed cross-stitch patterns, making the process easier and more precise.
- Transfer your design onto grid paper precisely, centering it for a balanced layout and adding symbols for special stitches to enhance details.
- Select a suitable color scheme and thread type, using a color key and symbols to represent different threads for organized and accurate stitching.
Creating a Cross Stitch Pattern
Now you’re ready to create your own cross stitch pattern! You’ll choose a design, transfer it onto graph paper, and select your thread colors.
Choosing a Design for Inspiration
Start your cross stitch journey by seeking inspiration from diverse sources.
Look around your home, snap photos of pets, or revisit cherished memories captured in photos.
You can also explore online resources like beginner cross stitch supplies and kits for ideas and guidance.
Mix design complexity with personal style, letting subject matter guide you.
Need cross stitch pattern ideas?
Try a minimalist approach for beginners with free cross stitch patterns available online to spark creativity.
Selecting Images With Well-defined Lines and Contrasting Colors
Finding an image with clear lines and contrasting colors is key for your cross stitch pattern. Think of it like picking a bold flavor for a dish—it helps everything pop. Choose something simple to make the pattern easy to follow. When selecting an image, consider using a cross-stitch generator or grid paper to create a pattern from a photo or drawing, as explained in the guide on how to make a cross stitch pattern.
- Look for high-contrast images.
- Select those with well-defined shapes.
- Opt for simple color palettes.
- Avoid overly detailed photos.
Considering Skill Level and Pattern Complexity
When choosing a cross stitch project, the complexity of the pattern matters.
Beginner-friendly patterns with fewer colors and simpler shapes help you ease into the craft.
As you gain confidence, tackle more complex designs with intricate details and advanced techniques.
Remember, a pattern’s difficulty affects your enjoyment and progress, so balance ambition with skill level to stay motivated.
How to Make a Cross Stitch Pattern
Start by selecting a photograph or drawing with clear lines and contrasting colors as your inspiration.
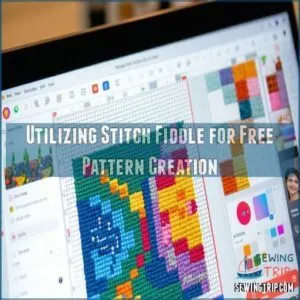
Use Stitch Fiddle to transform your chosen image into a free pattern.
Choose the project type and thread that best suits your design.
Using Photographs or Drawings as a Starting Point
Turn your cherished photographs or intriguing drawings into a cross stitch pattern masterpiece.
Pick images with crisp lines and vibrant, contrasting colors to simplify stitch conversion.
To enhance your design, use photo digitizing techniques digitizing photos for embroidery, which can help you create a more intricate and detailed pattern.
Balance design complexity with your skill level; a straightforward image offers a smoother start.
Play around with the color palette and stitch count to finalize the pattern, creating a personal touch that shines.
Utilizing Stitch Fiddle for Free Pattern Creation
Stitch Fiddle offers a fantastic playground for creating your own cross stitch pattern.
It’s like painting by numbers but with stitches.
You can find additional Stitch Fiddle pattern maker resources here online.
Start with a free account to save your projects.
The paid version gives you access to perks like pattern editing.
Enjoy choosing colors from the DMC selection, making your design stand out.
This cross stitch software is your creative companion!
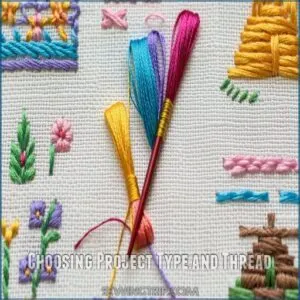
Choosing Project Type and Thread
After designing your pattern in Stitch Fiddle, choose your project type—a pillow, sampler, or something else.
Select your thread. DMC is popular, but Anchor works too.
Consider your project size and the thread count you’ll need for your fabric type. A simple design means less work.
Aim for a limited color palette to avoid a headache! This keeps your cross stitch pattern manageable.
Tracing and Transferring The Design
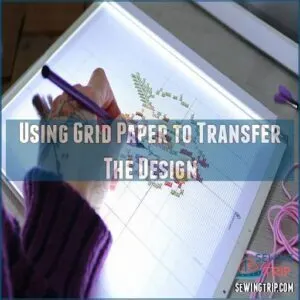
Using grid paper to transfer your design makes it easy to see where each stitch will go.
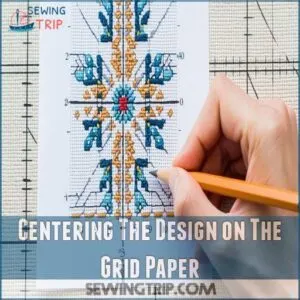
Center your design on the paper.
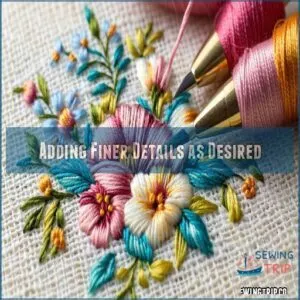
Add finer details if needed.
Using Grid Paper to Transfer The Design
When you’re ready to transfer your design to grid paper, precision is key. Here’s how:
- Choose the Right Grid Paper Size: Match your cross stitch pattern graph to your design complexity.
- Gather Tracing Tools: Lightbox or window for clear tracing.
- Ensure Grid Paper Accuracy: Align carefully for consistency.
- Begin Tracing: Outline major elements for easy pattern placement.
Centering The Design on The Grid Paper
You’ve got your grid paper ready, so it’s time to center your design like a pro.
Use rulers to measure and make sure precise placement, similar to how marking and measuring tools are used in embroidery to create temporary guidelines for accurate placement.
A balanced design leads to a polished cross stitch!
Align the image centrally, checking it’s equally spaced with border gaps equal on all sides.
Here’s a quick guide:
| Grid Size | Image Placement | Alignment Tips |
|---|---|---|
| Small | Centered evenly | Use a ruler |
| Medium | Middle of grid | Check symmetry |
| Large | Proportional | Measure borders |
Adding Finer Details as Desired
With your design centered on the grid paper, it’s time to add finer details.
Think of adding detail as enhancing a story.
Use these techniques:
- Quarter Stitch: Perfect for curves.
- Backstitch: Outlines and defines shapes.
- French Knot: Creates tiny dots.
- Half Stitch: Adds subtle shading.
These stitches elevate your cross stitch pattern to new heights.
Selecting a Color Scheme and Thread
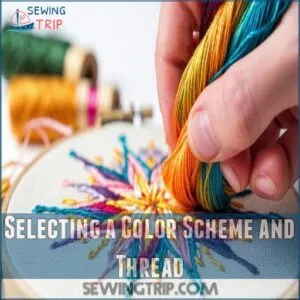
Choosing a color scheme and thread for your cross stitch project sets the stage for your entire design.
Gather colored pencils or markers to match your threads.
Create symbols to represent each color if needed.
Gathering Colored Pencils or Markers for The Pattern
How do you make your pattern stand out?
Gathering colored pencils or markers is key for sketching your cross stitch chart.
Choose good quality ones for precise color matching.
Consider pencil quality and marker brands to avoid fading.
Keep them organized—nobody likes hunting for colors.
A tidy storage box saves time and sanity, ensuring smooth designing.
Using Different Colors to Represent Different Thread Colors
Next, grab your colored pencils or markers.
Match them to your DMC floss.
This color-coding is key for your cross stitch chart.
It’s like creating a mini-rainbow for your project!
Each color represents a specific thread color.
This helps keep your thread organization simple.
A well-made color chart will save you headaches later.
Trust me on this one.
Creating Symbols to Represent Colors if Necessary
Setting up your color key isn’t just about colors; it’s about clarity.
Imagine this: you’re out of colored pencils.
This is where a symbol system saves the day.
Each symbol represents a color, becoming your pattern legend.
Think of it as a secret code.
Tools like a chart editor complement DMC floss in your cross stitch pattern chart beautifully.
You can even use a machine embroidery thread color chart to help you pick out the perfect colors for your project.
Incorporating Special Stitches and Symbols
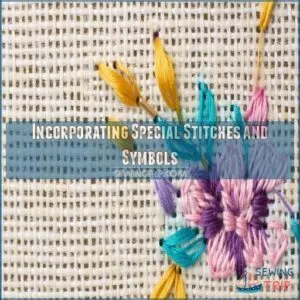
Adding special stitches to your cross stitch design can enhance its complexity and uniqueness. Use symbols on the pattern to easily indicate half stitches, ¾ stitches, and backstitches for precise guidance.
Considering Incorporating Special Stitches Into The Design
While refining your color scheme, think about adding dimension with special stitches, which you can easily find the necessary supplies for at cross stitch stores online like cross stitch supplies.
These quirks can make your cross stitch pattern pop.
Here’s a stitch menu:
- Half stitches – perfect for subtle shading.
- Back stitching – crisp outlines.
- French knots – delightful dots.
- ¾ stitches – add curves.
Up your stitching game while creating texture!
Using Symbols to Indicate Special Stitches on The Pattern
Creating your cross stitch pattern’s symbol legend is like crafting a secret code.
Symbols provide clarity, ensuring each special stitch stands out.
| Symbol Type | Stitch Meaning |
|---|---|
| Slash | Half Stitch |
| Triangle | ¾ Stitch |
| Dot | French Knot |
| Line | Backstitch |
| Star | Special Stitches |
Using clear symbols makes your pattern easier to follow.
Representing Half Stitches, ¾ Stitches, and Backstitches
When crafting patterns, think of your stitching like a symphony, with each type of stitch playing its part.
A slash marks a half stitch, adding subtle texture.
A triangle shows a ¾ stitch, perfect for nuanced details, while a line across the grid signals a backstitch, defining outlines.
Use these cross stitch symbols for precise and accurate patterns.
Designing The Cross Stitch Graph
To design your cross stitch graph, first determine the project size based on Aida count. Then, select DMC colors from the sidebar and consider overestimating size for intricate designs.
Determining Project Size Based on Aida Count
Knowing your Aida count is key to sizing your cross stitch project. It’s like baking – you wouldn’t ignore the recipe!
Here’s what you need to know:
- Higher Aida count means smaller stitches and a denser design.
- A lower count results in larger stitches and a less detailed look.
Use a cross stitch pattern maker to estimate your fabric size based on your stitch count. This helps you avoid surprises, such as running out of fabric!
Selecting DMC Colors From The Sidebar
Once you’ve sized your project, it’s time to select DMC colors.
Flip through the sidebar like browsing paint swatches, matching shades to your design.
The wide array of hues in embroidery floss may tempt you to mix and match.
Pinpoint your preferred color palette by using thread color variations or substitutes to make your cross stitch pattern stand out.
Overestimating Size for Intricate Designs
Tackling intricate cross stitch patterns? Consider overestimating size to accommodate complex details and higher stitch counts.
Using a bigger fabric or hoop frees up space, preventing cramped designs. It’s like giving your creativity some breathing room!
When using cross stitch pattern software or a generator, go large. This makes those delicate edges and vivid colors pop beautifully.
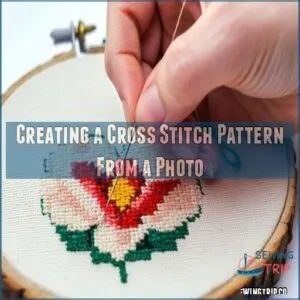
Creating a Cross Stitch Pattern From a Photo
You can turn a photo into a cross stitch pattern by uploading it to a converter and cleaning up unwanted details.
Simple photos with minimal colors work best for a clear pattern.
Uploading a Photo to The Converter
Ready to transform your favorite photo into a cross stitch masterpiece? Hop on a cross stitch pattern generator. Upload your chosen image—a high-quality photo with a limited color palette works best.
Remember:
- Image size affects pattern detail
- Photo quality is key for precision
- Simple designs ease your pattern-making journey
Let the magic begin!
Cleaning Up The Pattern to Remove Unwanted Details
You’ve uploaded a photo to the converter, and now comes the fun part—cleaning up your cross stitch pattern.
Remove unwanted lines and details by editing your image.
Simplify the design by reducing colors to essentials.
Think of it like tidying a room; less clutter makes the pattern clearer and easier to stitch on graph paper.
Using Simple Photos With a Minimal Color Palette
Selecting photos with a minimal color palette simplifies your cross stitch pattern-making process.
Opt for images with limited hues to ease the design conversion from photo to cross stitch.
Think about using subjects like geometric shapes or serene landscapes.
These simple photos translate well, ensuring your cross stitch pattern remains vivid and less cluttered, making your creative endeavors smoother and more enjoyable.
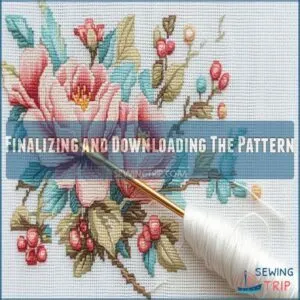
Finalizing and Downloading The Pattern
Now you’ll carefully review your pattern, making any necessary tweaks. Then, download your design in your preferred file format, ideally a PDF, for easy printing and use.
Reviewing and Refining The Pattern as Needed
 View On Amazon
 - Evaluate detail level to make sure clarity in stitches.
- Adjust colors for a balanced look.
- Confirm stitch count aligns with your design.
- Fine-tune size adjustments to fit your project.
Downloading The Pattern in Desired Format
Once you’re happy with your cross stitch pattern, it’s time to think about file types and image quality.
Check your download options—whether you want the pattern in graph paper, excel, or another format.
The pattern size might affect the quality, so choose wisely for storage.
Keep your pattern download handy for easy access whenever inspiration calls.
Saving The Pattern as a PDF File
In the final stretch of your cross stitch masterpiece, save your pattern as a PDF.
This guarantees easy sharing and printing, with file compatibility for different devices.
Organize your pattern neatly—consider file size for smooth access.
Think of it as packing your supplies compactly before a stitching trip, ready to share your creativity with fellow enthusiasts.
Frequently Asked Questions (FAQs)
How do you make a cross stitch pattern?
Start by choosing a clear image and tracing it onto grid paper.
Add details with symbols for stitches.
Use colored pencils matching your thread for each X.
Online tools like Stitch Fiddle can simplify this process.
What is a cross stitch pattern?
It’s a chart showing where to place stitches.
Think of it as a recipe for a picture, using X’s to guide your needle.
Each X represents a cross-stitch, creating your design.
You’ll follow the pattern’s colors and symbols to make your cross-stitch masterpiece.
What is counted cross stitch?
Counted cross stitch, like painting by numbers, lets you create intricate designs by stitching X-shaped patterns on Aida cloth.
You follow a grid pattern, ensuring each stitch matches the corresponding chart square, forming a beautiful image.
Is cross stitch a simple craft?
Cross stitch can be simple, especially for beginners.
You follow a pattern on Aida fabric, making X marks with a needle and thread.
Start with a basic design and a few colors to ease into it.
What is evenweave?
Evenweave fabric offers a balanced weave, perfect for cross stitch.
Evenweave fabric guarantees your stitches are evenly spaced, making it superb for designs demanding precision and detail.
Imagine a chessboard where each square is uniform; it’s perfect for cross stitch.
How do I do a French knot?
To create a French knot, wrap the thread around your needle twice, hold it tight, re-insert the needle near the original hole, and pull through while keeping tension.
This adds texture and tiny details.
How do I create my own cross stitch pattern?
Did you know over half of crafters prefer personal designs?
Start with a photo, draw on grid paper, and trace outlines.
Use colored pencils for threads.
Stitch Fiddle helps convert images into detailed cross stitch patterns.
What is the app that makes cross stitch patterns?
Stitch Fiddle is your go-to app for creating cross stitch patterns.
It lets you upload photos, select thread types, and adjust stitch counts.
Making it easy and fun to turn your ideas into detailed designs.
How to cross stitch with a pattern step by step?
Cross-stitching’s like building with tiny X’s. First, find your pattern. Then, thread your needle. Next, follow the chart, making X’s in the right colors. Finally, admire your handiwork!
How do I create a custom cross stitch piece?
To create a custom cross stitch piece, choose an image or draw your design.
Trace it onto grid paper.
Select colors.
You can use online tools like Stitch Fiddle for more precision and design options.
Conclusion
Crafting a cross stitch pattern is like solving a puzzle, each stitch fitting perfectly into place.
You’ve explored how to make a cross stitch pattern, from selecting designs to adding fine details.
Remember, even a simple photo can morph into a cozy masterpiece with the right tools.
As you transfer your design onto grid paper, think of it as plotting a treasure map.
Tackle special stitches with creativity, making each project a unique piece of art.
Happy stitching!


