This site is supported by our readers. We may earn a commission, at no cost to you, if you purchase through links.

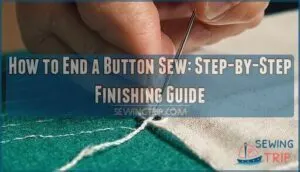
Pull this wrapping tight to form a sturdy shank that prevents the button from sitting flat against the fabric.
Next, push your needle through to the wrong side and tie a secure knot close to the fabric.
Trim excess thread, leaving about a quarter-inch tail.
This technique guarantees your button won’t pop off during wear and creates the perfect amount of space for smooth buttoning.
There’s actually a clever trick that makes this process even more foolproof.
Table Of Contents
Key Takeaways
- Create a sturdy shank by wrapping your remaining thread around the stitching between the button and fabric – this prevents the button from sitting flat and ensures smooth buttoning
- Secure with a tight knot on the fabric’s wrong side – pull the needle through to the back, tie your knot close to the fabric, then trim excess thread, leaving a quarter-inch tail
- Use quality thread and proper tension throughout – match the thread to your fabric type and maintain consistent tightness without over-pulling to prevent puckering or breakage
- Test your button’s security before finishing – give it gentle tugs to check the knot integrity and ensure it sits firmly without excessive movement
Prepare Sewing Tools
Before you start sewing your button, you’ll need to gather the right tools for a professional finish.
Having the proper needle, matching thread, and sharp scissors within reach makes the entire process smoother and prevents frustrating interruptions.
Having the right tools ready prevents mid-project scrambles and keeps your focus sharp.
Gathering Materials
Gathering materials sets the foundation for successful button sewing techniques. You’ll need quality thread that matches your fabric choice, ensuring strong button knot tutorial results.
Select appropriate needle types based on your button variety and material quality. Consider fabric thickness when choosing tools.
Having sharp scissors, thimble, and measuring tape nearby streamlines the sewing button end process. Button sewing supplies are essential for achieving the best results.
Quality materials prevent future repairs and create secure button knot finishes. This is crucial for successful sewing outcomes, and having the right materials is key to a good start.
Choosing Right Needle
Once you’ve got your materials ready, selecting the right needle is like picking the perfect key for a lock.
Your needle size should match your fabric type – use size 70-80 for lightweight fabrics and 90-100 for heavier materials.
Choose a universal point type for most button sewing techniques. Many sewers prefer universal sewing needles for their versatility.
Check that the eye size accommodates your thread thickness comfortably. Quality needle material guarantees smooth stitching when finishing button stitch work.
Selecting Thread Color
Thread selection goes beyond needle compatibility. Your color choice affects both the button’s appearance and the strength of your secure button knot.
Your thread choice shapes both beauty and durability—pick wisely for buttons that last.
Match your thread to your fabric or choose a contrast thread for decorative appeal.
- Matching Fabric: Use thread that blends seamlessly with your garment’s color for invisible repairs and professional-looking finishes
- Contrast Thread: Select bold colors for decorative buttons or when color psychology suggests making the button a focal point
- Thread Material: Choose cotton for natural fabrics or polyester for synthetic materials to guarantee your finishing button stitch won’t break and prevent button unraveling over time
End Button Sewing Process
Once you’ve gathered your tools and prepared for sewing, it’s time to focus on the actual button sewing finish. This phase requires careful attention to detail and proper securing techniques to guarantee your button stays put.
Start by pulling your needle through from the back of the fabric, creating your first thread anchor. Make three to four passes through each buttonhole, maintaining consistent tension. Don’t rush—steady, deliberate stitches create better knot strength and button durability.
As you complete your final pass, keep about six inches of thread on the needle side. This gives you enough working material for secure button knot creation. Pull the thread snug but avoid over-tightening, which can cause fabric puckering or thread breakage.
The key to effective button thread ending lies in creating multiple small securing points rather than one large knot. This distribution prevents button unraveling and extends the life of your repair. Wind the thread around the button stem two to three times for added reinforcement methods. For a cleaner look, consider burying the thread.
Now you’re ready to create the final securing knot that will keep everything in place.
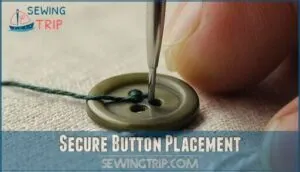
Secure Button Placement
Once you’ve sewn through the button holes and fabric several times, you’ll need to secure that button so it won’t come loose during wear.
This essential step involves creating a strong anchor point beneath the fabric and ensuring your thread is properly tightened before you finish the job, which helps to create a strong anchor point.
Creating Anchor Point
Before starting your initial stitch, you’ll create a solid foundation that prevents the button thread ending from unraveling.
Begin with proper knot placement by making a small, tight knot at your thread’s end. This securing technique forms the reinforcement methods needed for durability.
When knotting button thread, guarantee adequate thread tension without over-tightening. Your button sewing finish depends on this vital anchor point that keeps everything secure throughout wear, ensuring the longevity of your work with proper thread tension.
Positioning Button Correctly
Place your button on the marked fabric spot before threading the needle. Double-check button placement against pattern requirements, verifying proper spacing uniformity with existing buttons.
Use alignment techniques like rulers or measuring tape to avoid misalignment. Position the button flat against fabric, maintaining consistent spacing between buttonholes.
This careful positioning prevents crooked results and guarantees your button sew looks professional and functions correctly, ensuring a uniform appearance.
Tightening Thread
After positioning your button correctly, you’ll need to pull the thread tight to guarantee the button thread secure. Gentle but firm pressure prevents gaps between the button and fabric while maintaining proper thread tension.
This critical step creates the foundation for best button knots and prevents future slippage prevention issues. A key factor in achieving this balance is understanding balanced thread tension.
- Pull thread snugly – Apply steady pressure to eliminate slack without breaking the thread
- Check thread tension – Ensure consistent tightness across all stitches for knot security
- Test button movement – Verify the button sits flat while allowing normal function
- Prepare for weaving ends – Position thread for final stitch reinforcement and securing
Finishing Sewing Task
You’re almost done with your button sewing project, and now it’s time to secure everything properly.
The final steps will guarantee your button stays firmly attached and your work looks professional.
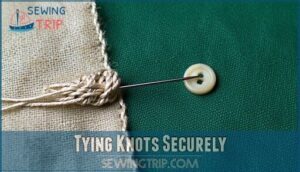
Tying Knots Securely
After positioning your button correctly, focus on creating secure knots that won’t fail.
Use surgeon’s knots for maximum knot strength – they resist unraveling better than simple overhand knots.
Maintain proper thread tension while wrapping thread around your needle three times before securing ends.
This technique prevents slippage and creates durable button sewing that withstands regular wear, ensuring your best button knots last through countless uses.
For ending a stitch by hand, consider using a single threaded needle for knotting.
Cutting Excess Thread
After securing your knots, you’ll need to trim away the extra thread for a clean finish. Sharp fabric scissors work best for this task, preventing fraying and ensuring a clean finish isn’t the goal, rather guarantee and maximize performance, consider investing in sharp fabric scissors.
Follow these snipping techniques for professional results:
- Position scissors close to the fabric surface, leaving about 1/8 inch of thread length for security
- Cut at an angle rather than straight across to reduce bulk and create a cleaner edge
- Make one decisive snip instead of multiple small cuts to prevent thread damage
Quality tool sharpness makes all the difference in achieving clean cuts without pulling or distorting your hand sewing buttons work.
Inspecting Button Security
After trimming thread, test your button’s security with gentle tugs to check thread wear and knot integrity.
Look for loose threads or button damage that could compromise durability. A properly secured button won’t shift when pressed.
Check shank stability by wiggling the button – it should feel firm without excessive movement.
These sewing tips guarantee your hand sewing buttons will withstand regular use, ensuring they are secure.
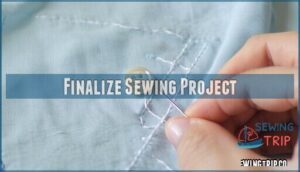
Finalize Sewing Project
You’re almost finished with your button sewing project, but the final step makes all the difference.
Take a moment to check your button’s alignment and make any needed adjustments before calling it complete.
Checking Button Alignment
After securing your threads, examine your completed button for proper alignment.
Visual checks reveal whether your button sits straight and centered on the fabric.
- Alignment Tools: Use a ruler or measuring tape to verify consistent spacing from fabric edges
- Angle Precision: Check that your button isn’t tilted by comparing it to nearby seams or buttonholes
- Common Errors: Watch for uneven thread tension that pulls the button sideways or creates puckering
Marking techniques help identify misalignment issues before they become permanent.
These sewing tips buttons guarantee your reinforced button stitch creates professional results through careful visual inspection.
Making Adjustments
When your button isn’t quite right, don’t panic—tiny adjustments make all the difference.
Check thread tension first; loose threads create wobbly buttons while overly tight ones pucker fabric. Adjust stitch length if needed, guaranteeing your reinforced button stitch holds firm.
Consider needle size compatibility with your fabric type, and verify proper seam allowance.
To secure the thread, try the loop through method.
These sewing tips for buttons guarantee your button fastening methods create a secure thread button connection that’ll last.
Frequently Asked Questions (FAQs)
What is the last thing you should do after sewing a button on to a garment?
After you’ve sewn your button securely, tie off the thread with a knot on the fabric’s underside.
Then trim the excess thread close to the knot, leaving just enough tail to prevent unraveling.
What happens when button thread breaks while wearing?
When your button thread snaps mid-wear, you’ll notice the button becomes loose or completely detaches from the fabric.
You’ll need to re-sew it promptly to prevent losing the button entirely and maintain your garment’s functionality.
How to fix loose button without complete removal?
Like a wobbly table leg needing a quick tightening, you’ll thread your needle through the existing shank, wrap tightly around the base several times, then secure with small knots underneath.
Can you reuse old thread for button repair?
You can reuse old thread if it’s strong and matches the button color, but fresh thread provides better durability and security for long-lasting repairs.
What causes buttons to fall off repeatedly?
Worn thread, loose attachment points, and frequent stress cause repeated failures.
You’re likely using thread that’s too thin, not securing it properly with multiple wraps, or sewing through weak fabric areas that tear under pressure.
How to prevent button thread from fraying quickly?
Thread frays when it’s your sewing nemesis, but you can outsmart it.
Use quality polyester thread, wax it lightly, keep stitches snug but not tight.
Secure with a buried knot to prevent unraveling.
Conclusion
Mastering this technique, practicing the method regularly, and maintaining consistent tension will transform your sewing results.
You’ll discover that learning how to end a button sew properly saves time during future repairs and prevents embarrassing wardrobe malfunctions.
Your buttons will stay secure through countless washes and daily wear. Remember to keep your stitches tight, your knots close to the fabric, and your thread trimmed neatly.
With these finishing skills mastered, you’re ready to tackle any button replacement project confidently and with secure results.


