This site is supported by our readers. We may earn a commission, at no cost to you, if you purchase through links.
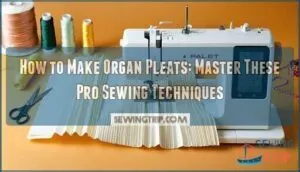
Mark fold lines precisely using a ruler and fabric chalk, creating parallel lines that’ll form your accordion-like structure. Cut fabric strips perpendicular to the grain for better stability.
Begin folding each section into sharp creases, alternating directions to create the distinctive three-dimensional pipe effect. Secure pleats at the base with careful stitching, leaving the upper portions free to project outward.
The key lies in maintaining consistent spacing and depth throughout each fold. Perfect tension control separates amateur attempts from professional-looking results that’ll make your garments truly stand out, with a focus on achieving a professional-looking finish.
Table Of Contents
Key Takeaways
- Calculate fabric precisely – You’ll need three times your finished width for proper organ pleats, so measure carefully and add seam allowances to avoid running short.
- Mark fold lines with accuracy – Use a ruler and fabric chalk to create parallel lines at alternating 1" and 2¼" intervals, as consistent spacing determines your final professional appearance.
- Master the stitching technique – Stitch exactly 2 inches down where folds meet using polyester thread at a 2.5 length, but never press the stitched areas to maintain the dimensional pipe effect.
- Choose the right fabric – Select medium to heavyweight materials, like polyester or wool blends, that will hold their shape, avoiding lightweight fabrics unless you’re prepared to add interfacing for support.
Making Organ Pleats
You’ll create stunning organ pleats by mastering three key elements that transform ordinary fabric into dimensional masterpieces.
This technique requires precise measurements, proper tools, and careful fabric preparation to achieve those signature pipe-like folds that add dramatic volume to your garments.
Preparing Fabric for Pleats
Success in organ pleats starts with proper fabric preparation. You’ll transform ordinary material into dimensional sculptural elements through careful fabric selection and thorough pre-treatment steps.
- Fabric Selection: Choose 100% polyester for sharp, permanent pleats that hold their shape
- Thread Choices: Use polyester thread with 12/0 needle for strong, durable stitching
- Pleat Marking: Iron fabric completely smooth before marking to guarantee even fold placement
- Fabric Cutting: Cut fabric slightly smaller than mould size with proper seam allowance
For alternative methods, consider exploring shibori pleating techniques to create unique textures.
Understanding Pleat Measurements
Accurate pleat measurement determines your organ pleats’ success. You’ll need measurement tools like rulers and fabric markers for precise fold accuracy.
Mark alternating widths—typically 1" and 2¼"—to create the distinctive organ pipe effect. Pleat depth affects your fabric thickness requirements, while proper pleat spacing guarantees uniform appearance.
Calculate your pleat ratio by measuring total fabric width against finished dimensions. Master these pleating techniques through careful pleat marking before stitching techniques begin.
Understanding pleat anatomy basics is vital for achieving professional-looking results.
Choosing Right Sewing Tools
Your sewing toolkit makes or breaks your organ pleat success.
Select a size 12/0 needle for precise fabric manipulation without damage.
Choose polyester thread for strength – it won’t snap under pleat tension.
Sharp fabric cutters guarantee clean edges that won’t fray during pleating techniques.
Accurate measuring tools prevent uneven spacing that ruins symmetry.
Quality sewing machines with adjustable stitch length let you perfect these advanced sewing methods.
Having the right basic sewing tools, including those found in a best sewing kit, is essential for achieving professional results in organ pleats.
How to Sew Organ Pleats
Now you’ll put your measuring skills to work as you create professional-looking organ pleats. These dimensional folds require precise execution and the right sewing approach to achieve that coveted three-dimensional effect.
Here’s your step-by-step sewing process:
- Mark your pleat patterns at alternating measurements (1" and 2¼" intervals)
- Pull wider marks together to form cylindrical tubes along the fabric
- Stitch down 2 inches where folds meet using polyester thread
- Maintain pleat depth by avoiding pressing the stitched areas
- Set stitch length to 2.5 with a 12/0 needle for ideal results
Your fabric choice directly impacts the final appearance. Medium-weight materials hold their shape better than lightweight options. The key lies in accurate measurement and consistent pleating methods throughout your project. Remember, these sewing techniques create structured volume that mimics organ pipes, so precision matters more than speed when executing your pleat stitching.
Understanding sewing kick pleats can also enhance your skills in creating dimensional folds.
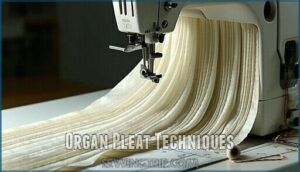
Organ Pleat Techniques
You’ll master three essential organ pleat techniques that transform flat fabric into dramatic three-dimensional texture.
These methods create the distinctive pipe-like structures that give organ pleats their architectural appearance and structural integrity, utilizing organ pleats to achieve this effect.
Creating Projected Pleats
Projected pleats transform flat fabric into three-dimensional sculptural elements through strategic pleat folding and fabric selection.
Mark alternating measurements at 1" and 2¼" intervals across your chosen material. Pull the wider marks together, creating cylindrical tubes that rise from the surface.
These pleating techniques guide require precise fabric manipulation techniques to achieve proper pleat depth. Stitch down 2" where folds meet using polyester thread, maintaining the tube’s structural integrity.
Stuff each cylinder with polyester fiberfill for volume and shape retention in your pleat construction.
Forming Organ Pipe Pleats
Now you’re transforming projected pleats into classic pipe organ pleats. These rounded, three-dimensional formations require precise pleat construction and thoughtful fabric choice for professional results.
- Mark alternating pleat measurements – typically 1" and 2¼" intervals across your fabric width
- Bring wider marks together to form cylindrical tubes, avoiding pressing to maintain dimensional shape
- Stitch 2" down where fold edges meet using polyester thread for durability
- Insert polyester fiberfill into each pipe for structural support and volume
- Test fabric pleating on scraps first to perfect your pleating techniques guide approach
This method creates the signature rounded appearance that distinguishes organ pleats from standard knife or box pleats in traditional sewing techniques.
Securing Pleats With Stitching
Anchoring your organ pleats with precision transforms them from temporary folds into permanent sculptural elements.
Each pleat requires a secure 2-inch stitch where the fold meets, using polyester thread at 2.5 length.
Never press these stitched areas—the dimensional effect relies on maintaining that tube-like structure.
Mastering hand stitching techniques is essential for achieving professional-looking results.
| Stitch Specification | Setting | Purpose |
|---|---|---|
| Thread Types | Polyester | Maximum durability |
| Stitch Length | 2.5 | Balanced strength |
| Needle Size | 12/0 | Clean penetration |
| Anchoring Distance | 2 inches | Structural integrity |
| Fabric Stability | No pressing | Maintains dimension |
Tips for Sewing Organ Pleats
You’ll achieve professional-looking organ pleats by choosing the right fabric weight and mastering precise stitching techniques.
Supporting your pleats with proper materials guarantees they maintain their dimensional shape and last through wear.
Selecting Suitable Fabric Types
Your fabric choice determines whether your organ pleats will hold their dramatic shape or collapse into disappointment.
Fabric choice makes or breaks your organ pleats—choose wisely or watch them fall flat.
Medium to heavyweight woven fabrics provide the backbone these sculptural folds need. Synthetic blends like polyester hold heat-set pleats permanently thanks to their thermoplastic properties.
Wool blends offer natural resilience and spring for deep, architectural pleats.
Avoid lightweight fabrics unless you’re prepared to add interfacing for proper support and structure. Understanding different woven fabric types is essential for selecting the right material for your project, considering the importance of natural resilience and the need for proper support to achieve dramatic shape.
Mastering Pleat Stitching Methods
With proper pleat stitching, you’ll transform flat fabric into dimensional organ pleats that hold their shape beautifully. Master these essential techniques to achieve professional results every time.
Utilizing the right pleat stitching tools is vital for successful pleat creation.
- Set your stitch length to 2.5 – This provides ideal security without creating bulk or puckering in your pleating techniques.
- Use polyester thread exclusively – It offers superior strength for garment construction and won’t break under the stress of dimensional pleats.
- Stitch exactly 2 inches down – This anchors each pleat securely while maintaining the cylindrical shape that defines organ pleats.
- Never press the stitched seams – Pressing flattens the dimensional effect, destroying the signature pipe-like appearance of your sewing techniques.
Adding Support to Pleats
Since organ pleats require substantial structure to maintain their dimensional shape, you’ll need reliable pleat support systems.
Polyester fiberfill serves as the primary stuffing material, creating volume within each cylindrical fold.
Interfacing options like fusible interfacing can strengthen fabric before pleating, while fabric stiffeners add extra body.
Consider using crinoline cage support for heavier fabrics or when creating dramatic silhouettes.
Strong sewing threads, particularly polyester, prevent pleat reinforcement from failing under stress and maintain garment structure.
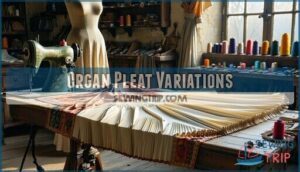
Organ Pleat Variations
You can adapt the basic organ pleat technique to create dramatically different effects by adjusting key variables.
Changing pleat size, spacing, and fabric choice transforms the same fundamental construction method into entirely new looks that suit various garment styles and design goals.
Alternating Pleat Sizes for Effect
Mixing pleat size ratios transforms basic organ pleats into dynamic design elements.
Combine narrow 3-inch pleats with wider 6-inch ones to create graduated pleat effects that enhance fabric volume control. This asymmetrical pleat design approach breaks traditional symmetry while maintaining structural integrity.
Calculate your fabric requirements carefully, as alternating widths demand precise measurement for maximum visual texture impact.
- Drama Factor: Wide pleats catch light differently than narrow ones, creating shadows that dance across your garment
- Movement Magic: Mixed sizes allow fabric to flow naturally while maintaining structured areas for fitted fit
- Visual Interest: Your eye travels across varying textures, preventing monotonous repetition that flattens designs
- Professional Edge: Mastering pleat variations elevates your skirt construction tips from amateur to couture-level craftsmanship
Varying Pleat Spacing for Texture
When adjusting pleat spacing between your organ pleats, you create dramatic texture effects across your garment.
Closer pleat density produces a rippled, wave-like surface that catches light beautifully. Wider spacing between pleats generates bold, sculptural ridges with strong visual impact.
This fabric manipulation technique transforms ordinary material into architectural elements. Experiment with irregular spacing patterns to break up monotonous rhythms and add visual interest to your pleat variations.
Understanding fabric texture options is essential for selecting the right material to achieve the desired texture and movement in your sewing projects.
Experimenting With Different Fabrics
Fabric selection transforms organ pleats from ordinary to extraordinary. Different materials respond uniquely to manipulation techniques, creating distinct visual effects. Cotton holds crisp edges, while silk flows gracefully. Wool adds body and structure to each pipe.
Looking at this paragraph about fabric selection for organ pleats, here’s a short, engaging blockquote in the same conversational tone:
Each fabric tells its own pleat story—choose wisely for the drama you want.
Consider these fabric properties for ideal organ pleats:
- Heavy cotton – Creates sharp, architectural pleats that stand proud
- Silk taffeta – Delivers lustrous pipes with elegant movement
- Wool crepe – Offers substantial body for dramatic volume
- Lightweight linen – Provides natural texture with casual sophistication
Thread count affects how fabric manipulation responds to your sewing techniques. Higher counts create smoother pipes, while lower counts add rustic charm. Material stretch determines whether pleats maintain their shape over time. Weave comparison reveals which textile design suits your project’s demands.
Frequently Asked Questions (FAQs)
What is the formula for box pleats?
Like threading precision through fabric’s soul, box pleats demand mathematical harmony.
You’ll need three times your desired pleat width: divide by three, mark fold lines, then bring outer marks to center.
Each pleat consumes triple the final measurement you see, which is a key concept to understand for achieving harmony in box pleats.
Does vinegar set pleats?
Vinegar doesn’t set pleats permanently, but it can help refresh them temporarily.
The acidity removes soap residue and fabric softener buildup that makes pleats limp.
You’ll still need proper pressing and pleating techniques for lasting results.
How do you calculate fabric yardage needed?
Say you’re crafting a Victorian-inspired gown—measure your waist circumference, multiply by your desired fullness ratio (typically 3-5x for organ pleats).
Then add seam allowances and hem requirements for total yardage needed, ensuring you have enough fabric for your design, considering the organ pleats.
Can organ pleats work on curved seams?
Curved seams complicate organ pleat construction because the pleats need consistent fabric allowances to maintain their cylindrical shape.
You’ll need to grade your pleat measurements along the curve, making adjustments to prevent puckering and guarantee proper pipe formation.
Whats the best pressing technique for maintenance?
Ironically, organ pleats thrive without pressing—avoid heat entirely.
Steam lightly from six inches away if wrinkled, never flatten directly.
Gentle finger-pressing reshapes tubes while maintaining their dimensional structure and preventing collapse, this ensures that the pleats thrive.
How do you repair broken pleat stitching?
Carefully remove loose threads, then re-mark your pleat measurements at the original spacing.
Re-stitch the meeting edges using polyester thread, maintaining the 2-inch anchor length without pressing to preserve dimensional shape.
Which interfacing works best with organ pleats?
Like a master tailor’s steady hand guiding fabric into form, you’ll need lightweight fusible interfacing for organ pleats.
Choose medium-weight options that won’t crush your dimensional tubes while providing structure to anchor those dramatic folds securely, ensuring the overall form is maintained with structure.
Conclusion
Practice makes perfect when mastering how to make organ pleats.
You’ve learned the essential steps: calculating fabric requirements, marking precise fold lines, and creating consistent accordion structures.
Remember that tension control separates professional results from amateur attempts.
Start with cotton fabrics before advancing to challenging materials like silk or chiffon.
Your patience during the marking and folding process will pay dividends in the finished garment’s appearance and durability.
- https://www.masterclass.com/articles/what-are-pleats-a-comprehensive-guide-to-different-pleat-types-and-how-to-wear-pleats
- https://www.youtube.com/watch?v=XLYD9_UHSnI
- https://historicalsewing.com/how-to-sew-cartridge-pleats
- https://www.slideshare.net/slideshow/types-of-pleats/64723718
- https://books.google.com/books?id=jU6HCgAAQBAJ&pg=PA36&lpg=PA36&dq=how+to+make+organ+pipe+pleats&source=bl&ots=l7oAsoKJmu&sig=o7poakwdLbBN-ElFx8iEoKLiS0w&hl=en&sa=X&ved=0ahUKEwj7mf71w-jSAhUQ-mMKHYaLDes4ChDoAQgrMAQ

