This site is supported by our readers. We may earn a commission, at no cost to you, if you purchase through links.

With a few yards of cotton, some low-loft batting, and basic sewing skills, you can create a custom bumper that secures properly, washes easily, and meets your exact specifications for cushioning and durability.
Table Of Contents
Key Takeaways
- Sewing your own bed bumper gives you complete control over fabric selection, padding thickness, and fastener placement—ensuring breathability, washability, and a precise fit that store-bought options rarely deliver.
- Safety requires deliberate choices: use low-loft batting under one inch thick, choose breathable cotton fabric, reinforce all seams and fasteners with backstitching, and avoid excess padding that blocks airflow or creates suffocation risks.
- Accurate measuring and cutting before you start—recording mattress dimensions, adding seam allowances, and respecting fabric grain—prevents fit issues and wasted material down the line.
- Modern safety guidelines strongly discourage traditional crib bumper pads due to suffocation and entrapment hazards, so consider breathable mesh alternatives or limit use to toddler beds where risks are lower.
Materials Needed to Sew a Bed Bumper
Before you start cutting and stitching, you’ll need to gather the right materials to make a safe, durable bed bumper.
The fabric, batting, and fasteners you choose will directly impact how your finished bumper looks, feels, and holds up over time.
Let’s walk through the essentials you’ll want on hand before threading your machine.
Choosing The Right Fabric and Batting
The fabric and batting you choose will form the foundation of your bumper’s safety, comfort, and longevity—so it’s worth taking a moment to get this decision right.
Cotton fabric is your go-to choice for the outer layer, offering breathability and easy washing that matters when you’re sewing for a crib bumper.
For batting types, consider H630 fusible fleece or low-loft polyester batting—these provide cushioning without excess bulk that could pose risks.
Fabric weights around medium density work best, balancing structure with texture options that feel soft against skin.
Selecting Safe Thread and Fasteners
Once you’ve settled on fabric and batting, the thread and fasteners you pick will hold everything together—and they need to be strong enough to withstand washing without creating loose ends or choking hazards.
Use 100% cotton or polyester thread for sewing, avoiding weak novelty yarn that can break.
For fastener safety, choose sturdy fabric ties or binding strips instead of safety pins that could open. Secure weaving of all sewing notions keeps your crib bumper intact through every wash, giving you confidence in what you’ve created.
Essential Sewing Tools and Accessories
With your materials chosen and safety locked in, you’ll need the right tools on hand—sharp scissors, a reliable sewing machine, and measuring tape—to turn those fabric panels into a finished bumper.
Start with fabric cutters or shears that slice through cotton cleanly, then grab pins to hold seams steady before stitching.
Choose the right needle selection for your sewing machines—ballpoint needles work best for jersey, universal needles manage woven fabric. Keep extra thread types on hand and basic sewing notions like marking chalk for accuracy you can trust.
Measuring and Cutting for a Custom Fit
Getting the measurements right from the start saves you time and fabric later. You’ll need to measure your bed or crib carefully, factor in seam allowances, and cut everything to match.
Here’s how to prepare your materials for a bumper that fits perfectly.
Measuring The Bed or Crib Dimensions
Start by grabbing your tape measure—accuracy here means the difference between a snug, secure fit and a bumper that gaps or bunches dangerously.
Record these dimensions for your crib or bed:
- Mattress width and length – measure the top surface where the crib sheet sits
- Mattress depth – measure from the top to the bottom edge
- Crib or bed frame types – note any unique rail shapes or attachment points
- Interior perimeter – measure each side separately, as crib size variations can surprise you
Calculating Seam Allowances and Bumper Height
Add 2 cm (about ¾ inch) to your width and length measurements for seam allowances. Determine your bumper height by measuring from the mattress top to where you want the fabric to end—usually 15–20 cm for cribs, factoring in both your desired visual coverage and the extra padding thickness. Always account for fabric shrinkage when following sewing patterns—pre-wash cotton to prevent measurement errors that compromise fit.
Double-check your sewing instructions before cutting—bias tape and crib bumper assembly require precision.
| Calculation Step | Standard Allowance |
|---|---|
| Seam margin (all sides) | 2 cm per edge |
| Bumper sizing height | 15–20 cm from mattress |
| Corner reinforcement | Add 1 cm extra |
| Elastic edge casing | 3 cm additional depth |
Cutting Fabric, Batting, and Ties to Size
Lay your pre-washed fabric flat on a cutting mat, pattern side up, and mark each panel with chalk or a fabric pen before making your first cut. Follow your sewing instructions carefully, respecting the fabric grain to prevent warping:
- Cotton fabric panels: cut to calculated dimensions plus seam allowance
- Batting sizes: match fabric panels minus 1 cm on all sides
- Tie lengths: 30 cm strips, cut on bias tape for strength
- Crib bumper sections: divide total length into manageable panels
- Elastic edge casings: add 3 cm to depth measurement before cutting
Step-by-Step Guide to Sewing a Bed Bumper
Once you’ve measured and cut your fabric, it’s time to bring your bed bumper to life. The sewing process involves assembling the panels, adding cushioned batting, and securing everything with safe fasteners.
Follow these steps to create a sturdy, professional-looking bumper that’ll protect and personalize your space.
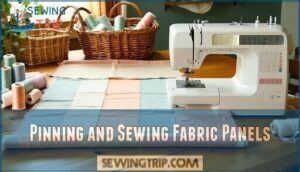
Pinning and Sewing Fabric Panels
Once your fabric panels are cut and ready, pinning them right sides together is where your bumper truly starts taking shape—this is the moment that transforms loose pieces into a cohesive, protective cushion.
Start by aligning the cotton fabric edges precisely, matching corners and sides so nothing shifts during sewing. Pin every 3-4 inches along your seam line, checking fabric tension stays smooth without puckering.
Sew with a straight stitch, maintaining consistent seam allowances for strong, professional seam finishing.
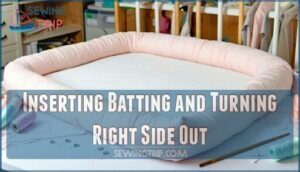
Inserting Batting and Turning Right Side Out
After you’ve stitched your panels and left that essential opening, the real transformation begins when you slide the batting inside and coax those seams from the inside out—this step breathes life into what’s been flat fabric, giving your bumper its protective cushion and finished structure.
Gently push batting through the opening, smoothing it toward corners for even batting placement and proper corner alignment. Turn the crib bumper right side out carefully, respecting your seam allowance while using a chopstick or knitting needle for crisp edge finishing on this rewarding sewing project.
Attaching Ties, Velcro, or Fasteners
Your bumper’s nearly complete, but without secure fastenings, it won’t stay put—now it’s time to add the ties, Velcro, or fasteners that keep everything safely in place.
Consider these attachment methods for your crib bumper sewing projects:
- Ribbon ties sewn at corners offer traditional charm
- Velcro strips provide quick removal for washing
- Secure fastening with reinforced stitching prevents loosening
- Proper tie placement ensures stability without excess length
Pin your chosen fastener types carefully, then stitch through all layers with matching thread for a professional finish.
Tips for a Safe and Durable Bed Bumper
Sewing a bed bumper is one thing, but making sure it stays safe and holds up over time is another. A few smart choices during construction and after can keep your bumper secure, breathable, and ready for daily use.
Here’s what you need to focus on to get it right.
Reinforcing Seams and Fasteners
A seam that fails at the wrong moment isn’t just frustrating—it’s a safety risk when you’re working with something meant to protect a little one. Backstitch at the start and finish of every seam on your crib bumper pads, and consider using a straight stitch with higher stitch density on your sewing machine for fabric stability. Thread selection matters—polyester thread holds up better to washing than cotton.
| Reinforcement Method | Best For |
|---|---|
| Backstitching | Seam beginnings and ends |
| Double stitching | High-stress areas and corners |
| Bar tacks | Fastener attachment points |
| Reinforced box stitch | Tie or ribbon anchors |
| Topstitching | Edge stability and weaving layers |
Avoiding Excess Padding for Safety
Padding that’s too thick blocks airflow and creates suffocation hazards, especially in cribs where baby safety tips emphasize breathability above comfort. Current crib safety regulations and baby crib safety standards discourage crib bumper pads altogether, but if you’re making one, limit batting to a single thin layer—fusible fleece works well.
Choose open-weave fabric choices that pass breathability tests, and skip quilted or puffy padding risks that could trap carbon dioxide against a baby’s face. According to safety guidelines, crib bumpers pose a significant suffocation risk to infants.
Regular Inspection and Maintenance Advice
Regular inspection keeps your baby crib safety at its best. Check bumper safety every 2-3 weeks, looking for fraying seams, loose ties, or thinning fabric that could compromise crib safety. Catching wear early protects your sewing projects from becoming hazards.
- Inspect fasteners and ties before each wash to guarantee secure attachment
- Follow cleaning schedules: spot-clean spills immediately, deep-clean every 1-2 months
- Replace bumpers showing persistent damage—maintenance tips won’t fix structural failure
These inspection frequency habits extend fabric durability while keeping crib bumper pads functional and safe. Regular maintenance also involves checking for proper cleaning methods to guarantee the longevity of the crib bumper.
Personalizing and Caring for Your Bed Bumper
Once your bumper is sewn and secured, you can make it your own with simple personal touches.
Proper care will keep it looking fresh and safe for years to come. When it’s time to move on, you’ll also want to know how to store or repurpose it responsibly.
Adding Appliqué, Embroidery, or Fabric Paint
Once your bumper is stitched and sturdy, it’s the perfect blank canvas for a splash of color or a sweet motif that turns a practical piece into something truly one-of-a-kind.
Try iron-on appliqué techniques for quick shapes, hand embroidery with floss for delicate decorative stitches, or fabric paint effects to personalize with names or patterns.
Just work on your fabric before you assemble the bumper—it’s easier and keeps your sewing lines crisp.
Cleaning and Washing Instructions
Keep it clean, and your bumper will stay soft and safe season after season.
Machine wash your cotton fabric bumper on gentle with mild detergent, spot cleaning stains before tossing it in. Remove batting if it’s loose-fill, or wash the whole piece if you’ve used fusible fleece.
Air dry flat or tumble on low—high heat can shrink seams and warp your careful sewing work.
Storing or Repurposing The Bumper Safely
When your little one outgrows the crib or you’re ready to reclaim that bedroom space, don’t toss that bumper just yet—there’s life beyond the slats. Fold it clean and store it in a vacuum-sealed bag for the next baby, or repurpose the fabric into cushion covers, DIY projects, or even nursery decor accents.
Just check Safety Guidelines before passing it along—crib bumper pads have evolved, and outdated designs shouldn’t circle back into another baby crib without meeting current baby safety standards.
Frequently Asked Questions (FAQs)
What size bed bumper should I make?
Mattress measurements drive everything—studies show 80% of ill-fitting crib bumper pads fail safety standards because of incorrect sizing.
Measure your mattress width, length, and depth, then add seam allowances (usually 1-2 cm per side) to determine your fabric requirements and bumper height for a secure, proper fit.
Can I make a bed bumper without sewing or tools?
Yes, you can create no-sew options using fabric glue techniques or pre-made crib bumper pads. Tool-free methods include braided DIY alternatives and bed bumper kits that require only tying or velcro attachment.
Is there a no-sew bed bumper I could buy instead?
Absolutely—ready-made bumpers and pre-made bumpers are widely available as no-sew solutions. You’ll find store-bought options like crib bumper pads, braided crib bumpers, and other baby bedding accessories at retailers specializing in crib accessories and DIY home décor.
What colors and patterns would match my child’s bedroom?
Pick colors and patterns that echo your nursery themes and bedroom decor. Soft pastels suit calm spaces, while bold fabric textures add energy.
Mix patterns carefully—stripes with florals or geometric prints—for crib decoration that feels cohesive and safe.
Can I make a bed bumper for a crib?
You can absolutely create a crib bumper, but modern crib safety guidelines strongly discourage bumper pads because they pose suffocation and entrapment risks.
If you’re set on DIY nursery decor, consider breathable mesh alternatives or focus your sewing projects for beginners on safer baby crib accessories like fitted sheets or a braided crib bumper for outside the crib.
What are alternatives to traditional bed bumper fasteners?
Instead of traditional ties, you’ve got modern options: snap fasteners for quick changes, magnetic clips for tool-free attachment, adhesive strips (though temporary), elastic ties for stretch, hook systems for adjustable tension, or classic ribbon sewn securely with your sewing machine—perfect beginner-friendly fabric projects.
How do you fix a torn bed bumper?
Tear repair starts with damage assessment—check the seam fixing needs first.
For fabric patching, pin a reinforcement piece over the tear, then stitch using your sewing machine. Bumper reinforcement ensures durability, turning your crib bumper pad tutorial into a practical sewing project.
Can you use recycled materials for bed bumpers?
Repurposed fabric from old sheets, curtains, or clothing works beautifully for this sewing project. Choose breathable cotton or jersey, inspect for tears, and pre-wash thoroughly.
These eco-friendly options and sustainable materials make your DIY home projects greener while keeping your baby crib cozy.
Whats the ideal bumper thickness for different ages?
Picture a pillow pressed gently against delicate skin—thickness matters when safety is the goal. For infants, keep bumpers under 1 inch to meet Crib Bumper Regulations; toddler bed rails can use 1 to 2 inches. Age Specific Guidelines prioritize breathability over plushness.
Conclusion
The bumper you’re stitching today will outlast dozens of washes, adapt to your child’s needs, and reflect the care you put into every seam. Learning how to sew a bed bumper hands you full control over safety, fit, and aesthetics—no more settling for generic sizes or questionable fill materials.
Once you’ve reinforced those ties and tested every fastener, you’ll have a piece that works exactly how you intended. That peace of mind, paired with fabric you chose yourself, makes every stitch worthwhile.


