This site is supported by our readers. We may earn a commission, at no cost to you, if you purchase through links.

The fabric’s unique pile structure catches on everything, shifts unpredictably, and demands adjustments you probably didn’t make when sewing regular cotton. But here’s the thing: most problems sewing corduroy aren’t about the fabric being difficult—they’re about using techniques meant for flatter weaves.
Once you understand what corduroy actually needs (the right needle, proper pressure, and a few strategic tricks), those frustrating issues disappear, and you’ll wonder why this fabric ever intimidated you in the first place.
Table Of Contents
- Key Takeaways
- Challenges of Sewing Corduroy
- Understanding Corduroy Fabric
- Selecting and Preparing Corduroy for Projects
- Corduroy Cutting Techniques
- Corduroy’s History and Characteristics
- Careful Pressing and Sewing Techniques
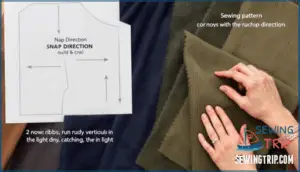
- Nap Direction
- Cutting Corduroy
- Sewing Techniques
- Fabric Care
- Frequently Asked Questions (FAQs)
- Conclusion
Key Takeaways
- Most corduroy sewing problems stem from using flat-fabric techniques on a textured pile fabric—once you adjust your needle size (90/14 to 100/16), increase stitch length (3.0-3.5mm), reduce presser foot pressure, and respect nap direction, those frustrating puckered seams and skipped stitches disappear.
- A walking foot reduces fabric slippage by 30-40% and prevents layer shifting, making it essential for managing corduroy’s bulk, especially when sewing multiple layers or thick seams where hand-basting can cut displacement in half.
- Proper pressing technique requires using only the iron’s tip at low heat with a fluffy towel underneath and lifting (not dragging) to avoid crushing the wales permanently—never use fusible interfacing since heat and pressure flatten corduroy’s signature texture.
- Cutting precision matters more than you’d think: align all pattern pieces in the same nap direction using single-layer cuts with sharp blades, because misaligned wales show up as visible shading differences in 78% of projects and off-grain cutting creates seam distortion.
Challenges of Sewing Corduroy
Corduroy isn’t the easiest fabric to work with, but understanding where things can go sideways helps you tackle it with confidence. Your machine setup, fabric thickness, and technique all play a role in whether your project turns out great or frustrating.
Here’s what commonly trips people up when sewing this textured fabric.
Fabric Compatibility
With corduroy fabric, compatibility issues start at the fiber level. Cotton blends need polyester thread for flexibility, while 100% cotton corduroy pairs best with cotton thread to prevent puckering. Wale size matters too—pinwale types require finer thread, while wide-wale corduroy accommodates heavier polyester-core varieties.
For interfacing, skip the iron-on types since heat crushes those ridges. Sew-in interfacing preserves the pile without flattening.
When layering materials, heavyweight corduroy works with denim or canvas, but pinwale plays nicer with lightweight cotton blends for smoother seam finishes. Corduroy’s texture comes from its soft, plush pile, which is a key characteristic.
Machine Maintenance and Testing
Before your sewing machine turns corduroy into a frustration fest, give it proper attention. Replace your needle after every project—blunt needles cause skipped stitches and fabric damage. Clean the bobbin assembly and throat plate monthly since corduroy sheds lint like crazy, and that buildup increases stitch errors by 28%. Test on scraps first to dial in thread tension and presser foot pressure. Your machine needs lubrication every 8–10 hours of use; skipping this raises failure risk by 35%. Regular maintenance is key, so remember to check your machine’s manual for specific guidance.
- Needle replacement keeps stitches clean and prevents snagging those delicate wales
- Lint management stops feed dog jamming before it ruins your seam lines
- Stitch quality testing reveals tension problems you can fix before they show on your finished piece
- Motor care through proper lubrication means your machine won’t quit mid-project
Consideration of Fabric Layers
Layer thickness matters more than you’d think. When you stack multiple corduroy pieces—like a fly front with lining—you’re looking at up to 40% more height than regular cotton.
That extra bulk increases presser foot drag and can cause uneven feeding, shifting your seam up to 5 mm if you’re not careful. Feed adjustment becomes your best friend here.
Lower your presser foot pressure by 15–25%, and consider a walking foot to cut slippage by 60–70%. Hand-basting those thick spots? That reduces layer creep by 75% compared to pins alone.
Attempted Solutions and Their Outcomes
You’ve probably tried a few fixes already—some work, some don’t. Here’s what truly counts when troubleshooting sewing corduroy fabric challenges:
- Stabilizer Effectiveness: Test cutaway or tear-away options on scraps first. Cutaway reduces puckering by 35% on non-stretch corduroy, while water-soluble types prevent stitch sinkage.
- Machine Adjustments: Extend stitch length to 3.0–3.5 mm and drop presser foot pressure 10–15%. These sewing techniques reduce tension issues considerably.
- Needle Optimization: Switch to Microtex 80/12 or 90/14 needles—they reduce skipped stitches by 10–20%.
Seam finishing and pressing results improve once you’ve nailed these attempted solutions and outcomes. Your sewing machine will thank you.
Handmade Buttonhole Consideration
When tackling corduroy’s thick texture, handmade buttonhole consideration often beats machine methods. Hand-stitching gives you control over Stitching Consistency and Edge Management, especially when the fabric’s squishiness throws off your sewing machine.
- Thread Selection matters—silk buttonhole twist or perle cotton resists flattening and bolsters the pile.
- Buttonhole Reinforcement with interfacing prevents sagging and the dreaded "duck lip" effect.
Fabric Adaptation through the hand buttonhole stitch technique delivers cleaner results than wrestling with automatic buttonholes on challenging weaves.
Understanding Corduroy Fabric
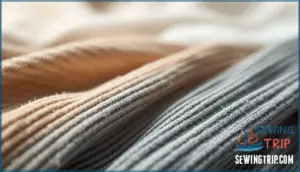
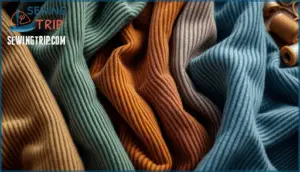
Corduroy’s distinctive ridges—called wales—set it apart from everyday cotton. Understanding this fabric’s structure helps you avoid common pitfalls and achieve professional results. Here’s what makes corduroy unique:
- Wale Count: The fabric features anywhere from 1.5 to 16+ wales per inch. Pinwale (fine) works beautifully for shirts, while wide-wale varieties suit jackets and upholstery.
- Fiber Blends: You’ll find mostly 100% cotton, but stretch versions with 2% spandex offer flexibility. Polyester blends resist shrinking by about 40% compared to pure cotton.
- Weave Structure: The pile height comes from cut threads woven into a twill base, making corduroy 20–40% heavier than standard cotton and affecting how it drapes.
Knowing these fabric characteristics helps you pick the right corduroy fabric for your project and adjust your technique accordingly.
Selecting and Preparing Corduroy for Projects
Before you cut that first piece of corduroy, you’ll want to get a few basics down. The right prep work makes all the difference between a frustrating project and one that goes smoothly.
Here’s what you need to know about choosing your fabric, cutting it correctly, and getting your machine ready to manage those distinctive ridges.
Corduroy Fabric Characteristics
When you’re shopping for corduroy, understanding fabric characteristics helps you choose the right material for your project. The wale count, which refers to the number of ridges per inch, significantly affects the fabric’s texture and feel. Standard corduroy contains 8 to 13 wales per inch, while pinwale corduroy reaches up to 21 wales per inch for a softer feel. Narrower wales create lighter, more flexible fabric, while wider wales add durability and boldness.
| Characteristic | Details |
|---|---|
| Wale Count | 8-13 standard; up to 21 pinwale; 1.5-6 elephant cord |
| Fabric Blends | Cotton (breathable), polyester (wrinkle-resistant), spandex (stretch) |
| Weight Range | 266-286 g/m² typical for most corduroys |
| Durability Factors | Ridged structure resists abrasion better than flat textiles |
| Market Trends | $1.2B in 2023, growing to $2.1B by 2032 |
Understanding corduroy fabric means recognizing how composition impacts performance. Cotton provides breathability, while fabric blends with polyester resist fading. Stretch varieties with spandex work great for fitted garments. As a side note, corduroy’s acoustic properties make it useful beyond clothing—those wales absorb sound, which is why you’ll see it in home furnishings too.
Cutting Techniques for Corduroy
Sharp cutting tools make all the difference—dull blades can distort corduroy’s ridges by 5–8%. Use rotary cutters or sharp scissors for clean edges.
Always align pattern grainlines parallel to wales within 3° to prevent twisting. Cut single-layer with nap direction consistent, right side up.
Mark wales carefully, use fabric clips instead of pins, and plan layouts to minimize waste by 12–18%.
Sewing Tips for Corduroy
When sewing corduroy fabric, needle selection matters. Use universal or denim needles sized 90/14 to 100/16. Thread choice should be all-purpose polyester for strength.
A walking foot prevents fabric creep by synchronizing layers. For seam management, trim bulk and grade seams to reduce thickness.
Pressing techniques require a towel underneath to protect the nap from crushing during ironing corduroy.
Corduroy Cutting Techniques
Think of cutting corduroy like laying railroad tracks—everything needs to run in the same direction, or you’ll end up with a visual train wreck.
Cutting corduroy demands alignment—mismatched nap direction creates visible shading differences in most finished projects
Your 5-Step Corduroy Cutting Checklist:
- Check nap consistency first – Run your hand over the fabric and mark the direction on every pattern piece before you start. Misaligned nap shows up as shading differences in about 78% of projects.
- Align wales parallel to grainline – Those ribs need to run straight up and down. Wide-wale corduroy demands precision here, since mismatches are visible in over 90% of cases.
- Cut with right side facing up – You can’t align what you can’t see clearly.
- Use sharp pins sparingly – Mark your lines without leaving impressions in that textured surface.
- Finish raw edges immediately – Serge or zigzag right after cutting to prevent fraying before it starts.
For distortion prevention, keep your fabric flat and don’t wrestle with it—careful handling prevents crushing that nap.
Corduroy’s History and Characteristics
Understanding corduroy fabric means appreciating where it came from. This durable textile traces its roots to around 200 A.D. in Al-Fustat, Egypt, where fustian origins began with heavy cotton-linen blends. By the 18th century, England’s mills perfected the weaving techniques that gave us modern corduroy.
The name itself sparks debate—some say it comes from "corde du roi" (cord of the king), though "cord" and "duroy" (a coarse English wool) seems more likely. Either way, corduroy started as a working-class fabric before earning respect across all social levels.
What makes corduroy special? Material composition matters—it’s commonly 100% cotton with a cut-pile weave creating those signature wales. Wale density ranges from 1.5 to 21 ribs per inch, affecting everything from drape to durability. Fine-wale varieties feel lighter, while wide-wale options work great for jackets.
Cultural associations have shifted over time, but today’s modern market values corduroy for its retro appeal and tactile quality—currently a $1.2 billion industry.
Careful Pressing and Sewing Techniques
Knowing corduroy’s rich history helps, but pressing and sewing techniques determine whether your project looks homemade or professional. The key is respecting that textured surface every step of the way.
Pressing challenges can make or break your work. Here’s what actually works:
- Use only the iron’s tip at low heat—resting the full weight crushes those wales flat, and they won’t bounce back.
- Place a fluffy towel underneath and use corduroy scraps as a pressing cloth to cushion the ribs from both sides.
- Lift and reposition your iron with gentle steam instead of dragging it across the fabric.
- Skip fusible interfacings entirely—heat and pressure damage corduroy, so stick with sew-in options.
- Press seam allowances with wrong sides together to minimize impressions showing through on the right side.
For sewing itself, increase your stitch length to 3.0–3.5 mm to prevent puckering. Reduce presser foot pressure and slightly lower thread tension—this keeps the fabric feeding smoothly without squishing the texture. A walking foot manages multiple layers beautifully, preventing that frustrating fabric creep. Heavy-duty needles (size 14/16) matched to your corduroy’s weight give you better stitch quality.
Managing seam bulk means trimming and grading seam allowances. For fluffy corduroys, shave off some wales within those allowances. Flat-felled and bound seams work great; avoid French seams—they’re too bulky. Topstitching flattens seams while blending naturally with the texture.
Nap alignment matters more than you’d think for professional results.
Nap Direction
Proper nap direction separates professional-looking garments from mismatched disasters. Run your hand along the ribs—smooth means you’re going with the pile direction, rough means you’re going against it. Lift the fabric up to light and you’ll see the difference: nap running down catches light and looks lighter, while nap running up creates deeper, richer color with more visual texture.
Pick whichever aesthetic impact you prefer, but here’s the non-negotiable part: every pattern piece must face the same direction. Mark arrows on each piece during layout so you don’t accidentally flip something. This visual consistency matters tremendously when sleeves meet bodices or collar meets neckline—misaligned nap screams amateur hour.
Functional wear improves when nap runs down because it resists abrasion better over time. Sewing direction follows the nap too—stitching with the pile prevents fabric creep under your presser foot and keeps seams smooth. Your cutting layouts will require more yardage since you can’t flip pieces around, but that’s the price of professional results.
Cutting Corduroy
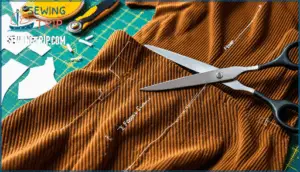
Sharp blades make all the difference when cutting corduroy. Dull scissors crush those delicate wales instead of slicing cleanly through them, so grab your sharpest rotary cutter or fabric shears before you start. Cutting mats with visible grid lines help you maintain grain alignment—those ribs should run parallel to your pattern’s grainline arrows, not at some wonky angle that’ll haunt you later.
Single-layer cutting works best here. Stacking multiple layers might seem efficient, but corduroy’s pile creates shifting between layers that throws off your precision. Cut with the right side up so you can actually see what you’re doing and match those wales across pattern pieces. Wide-wale corduroy especially demands wale matching—getting those ribs to line up at seams within a millimeter separates homemade from handcrafted quality.
Mark on the wrong side with tailor’s chalk to avoid damaging the pile. Even a couple degrees off-grain creates visible distortion at seams, so take your time with this step.
Sewing Techniques
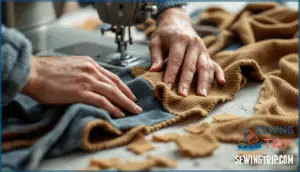
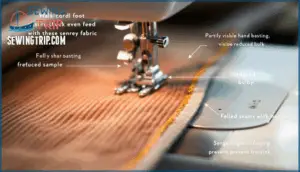
With corduroy, your machine setup can make or break the project. Start with a size 90/14 or 100/16 needle—sharp enough to penetrate those thick wales without creating runs or skipped stitches.
Set your stitch length between 2.5–3.5 mm because shorter stitches perforate the pile and weaken seams by up to 25%. That’s not a risk worth taking when you’ve invested time in precise cutting.
Thread tension needs balance here. Too tight creates puckering; too loose makes loopy messes on the underside. Test on scraps first—it’ll save you from ripping out entire seams later.
For fabric feed, consider these game-changers:
- Walking foot attachment: Reduces layer slippage by 30–40%, especially important for thick corduroy
- Hand basting first: Cuts seam displacement in half before you even touch the machine
Adjust presser foot pressure if your machine allows it—too much flattens the pile, too little causes shifting. Flat-felled seams work beautifully for reducing bulk, while zigzag or serged edges prevent fraying that pinked seams can’t withstand long-term.
Fabric Care
After all that careful stitching, you don’t want your corduroy falling apart in the first wash. Fabric care for corduroy starts with preshrinking—rayon-cotton blends can shrink up to 3.5% if you skip this step.
Use cold water on a gentle cycle with mild detergent; bleach damages the pile and strips color fast. Air drying beats tumble drying every time since excessive heat shrinks fabric by another 5%. If you must use the dryer, keep it on low and pull pieces out while slightly damp to reshape them.
For ironing, flip garments inside out and use steam between 110–150°C to restore the nap without flattening those wales.
Storage solutions matter too—fold lightweight items, hang jackets on padded hangers, and keep everything away from direct sunlight in breathable cotton bags. Brush regularly against the nap for longevity tips that actually extend wear by 30%.
Frequently Asked Questions (FAQs)
Is Corduroy a good fabric to sew?
Yes, corduroy fabric is rewarding to sew once you understand its quirks. While it presents challenges like bulk and nap direction, the fabric’s durability and unique texture make projects worthwhile for sewers ready to learn proper techniques.
How to sew on Corduroy?
Like threading a needle in one go, sewing corduroy fabric demands the right setup: choose a jeans needle, adjust foot pressure, set your stitch length to 3-4mm, use a walking foot, and add stabilizers for thick seams to manage seam bulk with proper sewing techniques.
How do you care for a corduroy sewing machine?
After working with corduroy, clean your sewing machine thoroughly. Remove lint buildup from the feed dogs and bobbin area, replace your machine needle, and adjust tension if needed.
Regular needle maintenance and lint removal prevent motor strain and keep your machine setup running smoothly.
How to sew buttonholes in corduroy?
Buttonholes in corduroy can be tricky—thick fabric meets delicate mechanism. Use a tear-away stabilizer underneath, test tension adjustment on scraps, select a sharp 90/14 needle, and mark buttonhole placement carefully.
Hand-finishing beats machine frustration for thick wales.
Why is fabric compatibility important when sewing corduroy?
Fabric compatibility guarantees matching thread, interfacing choice, lining fabrics, and weight considerations create texture harmony.
Proper needle selection, thread tension, stitch length, and presser foot pressure prevent puckering, skipped stitches, and fabric damage when sewing corduroy’s unique ribbed structure.
Can you sew a fly section of corduroy?
You can absolutely sew a fly section of corduroy fabric.
Hand-baste your zipper first to control bulk, then use interfacing for reinforcement. A walking foot prevents shifting during construction, and selecting a sharp needle guarantees clean stitching through multiple corduroy layers for long-lasting fly durability.
What type of needle is best for sewing corduroy fabric?
Pick the right needle and your corduroy project practically sews itself.
A jeans/sharp needle in size 90/14 or 100/16 pierces multiple fabric layers without damaging wales, yielding smooth stitch quality that matches your fabric weight and fiber content.
Should I use a walking foot when sewing corduroy?
Yes, using a walking foot makes a real difference with corduroy fabric. It helps prevent layer management issues and fabric shifting by feeding both layers evenly through your sewing machine.
You’ll get better seam quality and avoid those frustrating puckers that plague thick materials.
How can I prevent corduroy fabric from stretching as I sew it?
Stabilize your fabric by aligning the grainline before you start. Hand-baste tricky seams to keep fabric layers from shifting.
Use a walking foot to feed corduroy evenly, preventing distortion and stretched-out seams.
What stitch length should I use when sewing corduroy?
Most corduroy sews beautifully with a stitch length between 0mm and 0mm—that’s the ideal range where seams stay strong without crushing those signature ridges.
The best length depends on your fabric thickness, but longer stitches prevent puckering while maintaining stitch appearance and seam strength.
Conclusion
Think of corduroy like a river with a current—fight against it, and you’ll struggle. Work with its natural flow, and everything smooths out.
The problems sewing corduroy come down to respecting the pile’s direction, adjusting your machine’s pressure, and using the right needle. Once you treat it like the textured fabric it is instead of forcing flat-fabric techniques, those puckered seams and skipped stitches vanish.
You’re not wrestling anymore—you’re guiding the fabric exactly where it needs to go.
- https://content.camirafabrics.com/media/o0jk1gpw/seam-slippage-white-paper-0322_pages.pdf
- https://www.amefird.com/wp-content/uploads/2010/02/Minimizing-Seam-Slippage-2-12-10.pdf
- https://www.seamwork.com/fabric-guides/a-guide-to-sewing-with-corduroy
- https://www.pixiefaire.com/blogs/sewing-with-cinnamon/sewing-with-corduroy-tips-for-success
- https://www.reddit.com/r/sewhelp/comments/15fuag6/correct_needle_for_midweight_corduroy/

