This site is supported by our readers. We may earn a commission, at no cost to you, if you purchase through links.
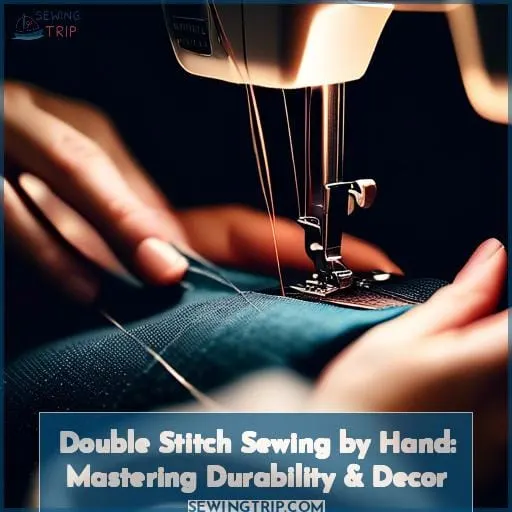
This age-old method not only adds durability to your creations but also brings an element of decor. Let’s embark on a journey to strengthen your sewing repertoire, ensuring each stitch you make is as enduring as it is aesthetically pleasing.
Get ready to weave strength and beauty into your projects.
Table Of Contents
- Key Takeaways
- How to Double Stitch Sewing by Hand
- Gathering Necessary Materials
- Threading the Needle
- Understanding Double Stitch
- First Row of Stitches
- Second Row of Stitches
- Securing the Stitches
- Strength of Double Stitch
- Applications of Double Stitch
- Troubleshooting Common Issues
- Advanced Double Stitching Techniques
- Frequently Asked Questions (FAQs)
- Conclusion
Key Takeaways
- Double stitching by hand involves using a backstitch for the first row to lay a strong foundation, ensuring durability and resilience in the seam.
- The second row of stitches should be placed close to the first, with tighter spacing to reinforce the seam, adding extra strength and flexibility for heavy fabrics or items that will undergo frequent use.
- Utilizing a double thread can significantly enhance the strength of the stitches, making the seam more durable and suitable for heavy-duty projects like quilting or making clothes.
- Creative applications of double stitching not only add decorative flair but also serve as a testament to the sewer’s mastery, allowing for the incorporation of intricate designs and the use of double-stitched seams in quilt bindings and other craft items.
How to Double Stitch Sewing by Hand
To double stitch by hand, thread your needle with a double thread and knot the ends, then sew two parallel lines of stitches for extra durability.
Gathering Necessary Materials
You’ll need the right thread and needle for your project, so choose them carefully based on the fabric you’re working with.
Before you start stitching, make sure your fabric is prepped and ready to go.
Thread and Needle Selection
Choosing the right thread and needle is like picking the perfect dance partners for your hand-sewn quilt.
Ensure your thread quality sings harmony with durability, and its thickness matches the fabric’s tempo.
Needle size and sharpness should glide through material like a hot knife through butter.
And thread color? It’s the spotlight, making every stitch pop.
Fabric Preparation
Before diving into the art of double stitch sewing by hand, let’s prep your canvas.
- Choose your fabric wisely; it’s the soul of your project.
- Pick a needle size that feels like an extension of your hand.
- Opt for a thread count that promises durability.
- Master cutting techniques for clean edges.
- Calculate seam allowances for a flawless double stitched seam.
Each stitch you sew weaves a story of patience and precision.
Threading the Needle
When threading your needle for hand sewing, you’ll need to decide between using a single or double thread.
A double thread will create a stronger stitch, but remember to knot both ends to prevent unraveling.
Single Vs Double Thread
When you’re threading your needle, you’re at a crossroads: single or double thread?
A double layer means durability—think double-stitched seam strength that outlasts others. Opt for a concealed double stitch for a clean look, or let thread colors pop in a decorative pattern.
For quilting, a double-stitched seam by hand adds that personal touch of craftsmanship.
Knotting Techniques
After choosing your thread, it’s time to tie the knot—literally!
A slip knot or a square knot is perfect for beginners, while a surgeon’s knot offers extra security.
For those tricky fabrics, consider a double knot to avoid the dreaded granny knot mishap.
Whether you’re anchoring a backstitch or basting with a herringbone stitch, knotting the thread sets the stage for success.
Understanding Double Stitch
Diving into the world of hand sewing, let’s unravel the mystery of the double stitch. This technique, steeped in history, is your go-to for creating durable seams and exquisite quilt designs.
Imagine the double stitch as the unsung hero of your quilt top, binding everything together with strength and grace. Originating from the need for sturdy stitches in heavy fabrics, its variations now grace everything from quilt bindings to intricate quilt designs.
Mastering the double stitch means your seams won’t just hold; they’ll stand the test of time. As you double stitch your way through fabric, think of it as weaving a story of resilience and beauty.
Each double-stitched seam adds a chapter of durability and decorative flair to your sewing saga.
First Row of Stitches
Now, let’s dive into the nitty-gritty of your double stitch adventure. You’ve got your needle threaded—remember, double up for strength—and you’re ready to lay down the foundation of your durable creation.
Whether you’re piecing together a scrap quilt or reinforcing the seams on stretch fabrics, the first row of stitches is your starting line.
Place your fabric snugly under your needle and envision the path of your running stitch. This isn’t just any seam; it’s the backbone of your project. With a steady hand, guide your needle through the fabric, creating even, deliberate stitches.
Think of it as laying down tracks for a train—the smoother the rails, the better the ride. Your double stitched seam on fine fabrics or quilt patterns will thank you for this sturdy base.
Second Row of Stitches
After laying down your first row with the precision of a seasoned tailor, it’s time to dive into the second row of stitches.
Think of this as your chance to reinforce your masterpiece. Adjust your stitch spacing slightly tighter than the first row to ensure durability. Remember, the thickness of your thread and the size of your needle can make or break the uniformity of your stitches.
Keep an eye on stitch tension; too tight, and you’ll have puckering, too loose, and the fabric may sag. Now, introduce a stretch stitch or double stitch sewing by hand for areas needing flexibility.
For quilt makers, consider your batting choice here; it should complement your double stitched seam machine work. Let these double stitched seam creative ideas flow, turning each stitch into a testament to your growing mastery.
Securing the Stitches
Alright, let’s lock those stitches down and make sure your creation holds together like family at a reunion.
- After your last stitch, don’t just cut the thread and hope for the best. Instead, sneak the needle through a loop near the last stitch to form a small knot.
- Gently tug the thread to bring the knot down to the fabric’s surface. This isn’t a tug-of-war, so keep the thread tension friendly.
- For extra stitch strength, repeat the knotting method once more. Think of it as a backup plan, like having an umbrella even when the sun’s out.
Strength of Double Stitch
The strength of a double stitch in hand sewing lies in its durability, offering a balance between robustness and flexibility. This technique involves sewing two rows of stitches, enhancing the seam’s resilience.
When considering the strength of a double stitch, it’s essential to weigh its durability against its flexibility, as this balance ensures a sturdy yet adaptable seam. Moreover, the time consumption of creating a double stitch is relatively moderate compared to the added strength it provides.
Additionally, double stitching can serve both functional and decorative purposes, making it a versatile technique suitable for various sewing projects. It’s crucial to match the fabric thickness with the appropriate double stitch to ensure compatibility and optimal results.
Applications of Double Stitch
You’ll find that double stitching is key for reinforcing seams, ensuring they hold up under stress.
It’s also perfect for hemming, providing a durable finish that lasts.
Reinforcing Seams
Reinforcing seams with a double stitch isn’t just about making your fabric fortress unbreachable; it’s about weaving history and style into every thread.
- Double Stitch History: Embrace techniques passed down through generations, adding a layer of tradition to your creations.
- Double Stitch Styles: Mix and match stitch patterns for a unique flair.
- Double Stitch Thickness & Thread: Choose the right thickness and thread for your project, ensuring durability.
Durable Hemming
Durable hemming transforms your projects from good to great. Think of your thread as the hero, needle size as its sidekick, and fabric thickness as the adventure landscape.
| Thread Strength | Needle Size | Fabric Thickness |
|---|---|---|
| Strong | Small | Light |
| Medium | Medium | Medium |
| Heavy | Large | Thick |
| Adjust as needed | Experiment | Test first |
| Balance is key | Match well | Consider wisely |
Troubleshooting Common Issues
If you’re noticing uneven stitches in your hand-sewn projects, it’s likely an issue with thread tension. Adjusting the tension can help achieve more consistent and professional-looking stitches.
Uneven Stitches
After mastering the double stitch, you might notice your stitches looking a bit like a mountain range rather than a straight line.
- Uneven Stitch Causes: Identify if it’s a tension issue or a needle mismatch.
- Uneven Stitch Prevention: Use the right equipment for your fabric.
- Uneven Stitch Correction: Adjust your tension and practice even pressure.
- Uneven Stitch Practice: Regularly switch between fabrics to adapt your technique.
Thread Tension
After tackling uneven stitches, let’s dive into thread tension. It’s the tightrope walker of your sewing act, balancing knot strength and stitch beauty.
| Factor | Too Tight | Just Right | Too Loose |
|---|---|---|---|
| Thread Tension | Puckered fabric | Smooth stitches | Loopy mess |
| Knot Strength | Snaps easily | Holds firm | Slips apart |
| Needle Sharpness | Skips stitches | Glides through | Drags and bunches |
| Fabric Thickness | Distorts fabric | Complements fabric | Dimples fabric |
| Stitch Length | Stitches too small | Evenly spaced | Irregular, uneven |
Advanced Double Stitching Techniques
Now, let’s explore how to elevate your double stitch with decorative techniques.
You’ll also learn how to seamlessly integrate it with other stitches for both beauty and strength.
Decorative Double Stitch
After tackling common issues, let’s jazz up your project with some decorative double stitching.
- Experiment with contrasting threads for a pop of color.
- Introduce embroidered accents to elevate your design.
- Weave in French knots for textured highlights.
- Incorporate various stitching patterns to create intricate decorative details.
Combining With Other Stitches
After exploring the beauty of decorative double stitch, let’s dive into how you can mix it up with other stitches for that extra flair.
| Stitch Combination | Application |
|---|---|
| Double + Running | Seam reinforcement |
| Double + Slipstitch | Hemming durability |
| Double + Backstitch | Embellishment |
| Double + Catchstitch | Flexibility |
| Double + Herringbone | Decorative pairings |
Experiment and see your creations come to life!
Frequently Asked Questions (FAQs)
Can double stitching prevent fabric puckering?
Double stitching can indeed help prevent fabric puckering, as it reinforces seams, ensuring they’re strong and less likely to gather.
Like a buddy system for your stitches, keeping everything smooth and in line.
Is double stitch suitable for stretch fabrics?
Ahoy, fabric wranglers!
Double stitching by hand isn’t the best mate for stretch fabrics. Instead, opt for a stretch or herringbone stitch to keep those seams stretchy and avoid the dreaded pop and snap.
How does double stitching affect seam allowance?
Double stitching adds durability without extra seam allowance; you’ll sew a second line inside the existing allowance.
It’s like a backup singer—there for support, not stealing the spotlight from the main seam.
What needle size is best for double stitching?
For double stitching by hand, a needle size that’s comfortable yet sturdy, like a size 4 or 5, will ensure your stitches are the cat’s pajamas—strong and neat, without turning your project into a pincushion.
Can double stitching replace serging edges?
Double stitching can indeed step in for serging, especially if you’re aiming for a fray-free finish without a serger at hand.
It’s like having a trusty sidekick when the superhero’s off-duty.
Conclusion
Just as a ship embarks on a voyage with the compass set for uncharted waters, you’re now equipped to navigate the art of double stitch sewing by hand.
With your needle and thread at the ready, you’ve learned to intertwine durability with decor, ensuring your creations withstand the test of time.
Embrace this journey, letting your projects shine with strength and beauty.

