This site is supported by our readers. We may earn a commission, at no cost to you, if you purchase through links.
 Adjusting patterns for different body shapes transforms standard sizing into custom-fit garments that celebrate your unique proportions.
Start by identifying your body type—pear, apple, hourglass, rectangle, or inverted triangle—then take accurate measurements to compare against pattern specifications.
Master key techniques like slash-and-spread for width adjustments, dart manipulation for curves, and length modifications for proper proportions.
Focus on strategic alterations: bust adjustments for fuller figures, waist tapering for definition, hip modifications for pear shapes, and shoulder adjustments for broader frames.
Remember, you’re not changing your body to fit the pattern—you’re customizing the pattern to flatter your silhouette.
The secret lies in understanding which measurements matter most for your shape and knowing exactly where to make those vital adjustments to achieve a custom-fit garment that flatters your silhouette.
Table Of Contents
Key Takeaways
- Identify your body shape first – You’ll need to determine if you’re a pear, apple, hourglass, rectangle, or inverted triangle before making any pattern adjustments, as each shape requires specific modification techniques.
- Take accurate measurements and compare them to pattern specs – You can’t rely on ready-to-wear sizing when working with sewing patterns, so measure your bust, waist, hips, and length dimensions precisely against the pattern’s size chart.
- Master key alteration techniques like slash-and-spread and dart manipulation – You’ll use slash-and-spread to add width where needed and adjust darts to accommodate your curves for a custom fit that flatters your proportions.
- Focus on strategic adjustments for your specific shape – You should prioritize bust adjustments for fuller figures, waist tapering for definition, hip modifications for pear shapes, and shoulder adjustments for broader frames rather than trying to change every aspect of the pattern.
Body Shape Identification
Identifying your body shape is the foundation for successful pattern alterations that create flattering, well-fitted garments.
Understanding whether you’re pear-shaped with wider hips, apple-shaped with a fuller bust, hourglass with balanced curves, rectangle with minimal waist definition, or inverted triangle with broader shoulders helps you target specific areas for adjustment.
Recognizing Pear Shape Features
Pear Shape Identification starts with recognizing your body’s natural blueprint.
Your hips measuring wider than your bust, creating that signature silhouette where your lower body takes center stage.
Your pear-shaped silhouette puts curves exactly where they command attention most.
Your shoulders slope gently, while your waist remains well-defined.
This pearshaped figure concentrates fullness through your thighs and hip area, making Body Proportion analysis essential for achieving perfect Curve Accentuation in your garments.
Identifying Apple Shape Features
Recognizing an apple shaped figure means spotting broad shoulders and a fuller bust that dominate your silhouette.
Your upper body carries most of your curves, while your hips remain narrower in comparison.
Apple measurements typically show larger bust and waist dimensions than hip circumference.
This body shape analysis reveals less waist definition than hourglass figure or pear shaped body types, creating straighter body proportions through your midsection.
Understanding Hourglass Figure
While apple shapes carry fullness through the midsection, you’ll find the hourglass figure represents balanced proportions with natural waist accentuation.
Your hourglass silhouette creates the perfect foundation for figure flattery through strategic pattern adjustments.
Key characteristics include:
- Curvy fit requirements with balanced bust and hip measurements
- Well-defined waistline that naturally showcases body proportions
- Curve accommodation needs for both upper and lower body areas
Understanding your hourglass shape guides full bust adjustment techniques and body shape analysis for ideal pattern modifications.
Rectangle Body Type Characteristics
You’ll find rectangle body types display nearly equal measurements across bust, waist, and hips with minimal waist definition.
Your rectangular body shape creates a straight silhouette that benefits from strategic body shape adjustments.
Pattern alteration techniques focus on creating curves through dart placement and seam contouring.
Rectangle fit requires careful fabric selection to add visual interest.
Understanding your body proportions guides pattern resizing decisions for an improved garment silhouette.
Accurate body measurements are essential for achieving the perfect fit in rectangle body types.
Inverted Triangle Body Shape
Your inverted triangle body shape features broad shoulders and a fuller upper body that beautifully contrasts with narrow hips.
This athletic silhouette creates natural strength in your frame, but pattern adjustments help achieve proportional balance.
When sewing for unique body shapes like yours, focus on adding volume to your lower half while maintaining your powerful shoulder line through strategic body shape adjustments to achieve proportional balance.
Measuring Body Proportions
Taking accurate body measurements forms the foundation of successful pattern alterations.
You’ll need precise bust, waist, hip, and length measurements to determine which adjustments your pattern requires for a proper fit.
Accurate Bust Measurements
Breaking through the myths surrounding bust measurement, you’ll discover that precision here determines your entire garment’s success. Proper bust fitting requires specific measurement tools and techniques to capture both upper bust and full bust dimensions accurately.
Here’s your essential measurement checklist:
- Use flexible measuring tape – cloth or pliable plastic only
- Measure over thin, non-padded bra or bare skin for accuracy
- Keep tape horizontal across front, back, and sides consistently
- Apply snug pressure without compressing breast tissue
- Record to nearest quarter-inch for pattern adjustment precision
When you’ve got a bust discrepancy between upper and full measurements exceeding two inches, you’ll need full bust adjustment techniques. This difference affects bra sizing and determines whether your pattern requires modification before cutting. Understanding proper bra sizing is vital for a perfect fit.
Waist and Hip Circumference
Once you’ve captured accurate bust measurements, shift your focus to your waist measurement and hip circumference.
Measure your natural waist—the narrowest point of your torso—and your hips at their widest point.
These circumference adjustments form the foundation for proper body proportions.
Record both measurements carefully, as hip ratio calculations determine necessary waist modifications and hip contouring techniques for perfect fit techniques and waist definition.
Understanding the waist to hip ratio is essential for achieving a perfect fit.
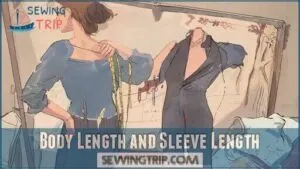
Body Length and Sleeve Length
Capturing accurate torso measurement and sleeve fitting guarantees your garment moves naturally with your body.
Measure from the base of your neck to your natural waistline for torso length, and from shoulder point to wrist for proper arm length.
- Torso Measurement: Measure neck base to waist for body proportions
- Sleeve Length: Shoulder point to wrist determines arm length
- Armhole Depth: Underarm to shoulder affects sleeve fitting comfort
- Length Adjustments: Mark adjustment lines for pattern modifications
Comparing Measurements to Size Charts
Once you’ve taken accurate body measurements, you’ll need to compare them against pattern size charts for proper fit analysis.
Pattern sizing differs substantially from ready-to-wear clothing, so ignore your usual dress size. When your measurements fall between sizes, choose the largest measurement and adjust accordingly.
This chart interpretation approach guarantees better proportion guidance and prevents common fitting mistakes that lead to poor waist definition and hip placement issues.
Understanding your body measurement is vital for a perfect fit.
Essential Measurements for Pattern Alterations
After comparing your body measurements against standard size charts, you’ll need specific measurements for successful pattern alterations.
These key body measurements form the foundation for fit analysis and alteration techniques:
- Full bust and high bust measurements – determines bust adjustment needs
- Crotch depth and shoulder width – guarantees proper torso proportions
- Side seam length and back length – maintains balanced silhouette
- Waist definition and hip placement – guides dart positioning and shaping
Accurate measurement tools and sewing accuracy make all the difference in your final fit.
Pattern Alteration Techniques
You’ll master five essential techniques that transform any pattern into your perfect fit.
These methods—slash and spread, dart adjustments, length modifications, seam allowance refinement, and pattern grading—work together to create garments that flatter your unique body shape.
Slash and Spread Method
Once you’ve gathered accurate measurements, the slashandspread method becomes your go-to technique for pattern modification.
This approach adds width and controls volume by cutting your pattern pieces and spreading them apart. You’ll slash along specific lines, then spread the pieces to create the desired length manipulation or design changes.
This pattern alteration technique works perfectly for accommodating different body shapes, whether you need extra fabric usage around the bust or hips for a comfortable fit. The technique is especially useful for making adjustments to achieve the desired design changes.
Dart Adjustments for Curves
Darts control where fabric gathers to accommodate your curves, making them your secret weapon for clothing for curves.
Position dart tips 1-2 inches from your bust apex—closer for smaller busts, farther for fuller figures.
This apex control guarantees smooth volume distribution across your curves.
Split wide darts into smaller ones for better curve refinement, and always blend darts seamlessly into surrounding seams for professional results.
Length Adjustments for Fit
Once your curves are perfectly shaped with darts, you’ll need to address length adjustments for proper fit.
Torso length modifications guarantee garments hit at the right spots on your body.
Use lengthen/shorten lines for sewing pattern adjustments, maintaining grainlines when altering sleeve length or inseam adjustments.
Rise alterations and hem variations depend on your body measurements for accurate sewing pattern fitting, considering proper fit and body measurements.
Seam Allowances for Smooth Seams
Proper seam allowances guarantee smooth pattern alteration success for all body shapes.
When you make pattern adjustments, maintaining consistent width prevents puckering and distortion that can ruin your carefully measured modifications.
- Keep armhole seams at standard 5/8-inch width for professional results
- Use curved seams rulers to maintain smooth lines during alterations
- Apply proper seam finishes to prevent fraying after trimming seam excess
- Check measurements twice before cutting to avoid costly fabric mistakes
- Blend seam allowances gradually when connecting altered pattern pieces to ensure a smooth fit and prevent errors in pattern alteration.
Pattern Grading for Resizing
Pattern grading lets you resize patterns while maintaining their original proportions and fit.
You’ll work with grading increments to systematically increase or decrease measurements across all pattern pieces.
Calculate ease requirements for each size, then blend seams smoothly to avoid awkward shifts.
Resizing challenges arise when body variations don’t match standard grading rules, requiring custom proportionate grading adjustments.
Understanding pattern resizing techniques is vital for achieving a perfect fit across different body shapes, and this requires careful consideration of pattern grading and ease requirements to ensure a well-fitted garment.
Common Pattern Adjustments
You’ve identified your body shape and taken accurate measurements—now it’s time to make those vital pattern adjustments that transform a generic pattern into your perfect fit.
These five essential adjustments tackle the most common fitting challenges, ensuring your handmade garments flatter your unique proportions.
Bust Adjustment for Fit
Full bust adjustment transforms your fit-freedom journey into precise measurements. When your bust exceeds the pattern’s intended cup size, these modifications create the space you need without sacrificing style.
Perfect patterns become perfect fits when you master the art of bust adjustments.
- Measure your full bust and compare it to the pattern’s finished measurements
- Calculate the difference between your measurement and the pattern size
- Locate the bust apex on your pattern piece for accurate dart placement
- Use slash-and-spread technique to add necessary width at the bust point
- Redistribute dart excess to maintain the garment’s original silhouette
These bust fitting techniques give you control over cup adjustments and fit customization. Your sewing pattern alteration skills develop through practice with these fundamental pattern modification methods.
Waist Tapering for Definition
Through strategic waist reduction and curve enhancement, you’ll transform loose-fitting patterns into body-contouring masterpieces.
Pinch excess fabric along side seams, then taper gradually from bust to waist for an hourglass figure.
Dart placement becomes your secret weapon—relocate or deepen existing darts for waist definition. These fit techniques create silhouette refining magic, giving you complete control over your garment’s shape through precise waist adjustments and tapering methods.
Hip Adjustment for Pear Shapes
When your hips measure substantially wider than your bust, you’ll need to grade your pattern from a smaller size at the waist to accommodate your fuller lower body proportions.
- Measure your high hip (7-9 inches below waist) and full hip to determine the exact adjustment needed
- Grade patterns by blending from smaller bust/waist sizes to larger hip sizes using smooth curved lines
- Add width evenly at side seams on both front and back pieces to maintain balanced fit
For pear-shaped figures, this hip adjustment process guarantees your sewing pattern alterations create flattering garments that follow your natural body shape fitting requirements without pulling or bunching.
Lengthening and Shortening Patterns
When you need different lengths, use the lengthen/shorten lines marked on your pattern.
To lengthen, slash at these lines and spread pieces apart by your desired amount.
For shortening techniques, fold the pattern at these lines, removing excess length.
Always maintain grainline management by keeping grain arrows straight and parallel.
These length adjustments preserve proportion balance while giving you perfect fit through strategic pattern resizing and sewing pattern modification.
Understanding proper pattern alteration techniques is essential for achieving a perfect fit in your garments.
Hemline Adjustments for Proportion
After adjusting pattern length, hemline balance becomes your next priority.
Proportion adjustments guarantee your rectangular body type maintains visual harmony. Curve adjustments at the hemline prevent awkward bunching or pulling.
Length modifications should follow your body proportion guide, keeping silhouette shaping consistent.
Silhouette refining happens when you check hemline adjustments against your natural proportions, creating that polished finish you want.
Applying Alterations Successfully
Successfully applying pattern alterations requires the right tools and a systematic approach to achieve professional results.
You’ll transform basic patterns into perfectly fitted garments by combining precise measurement techniques with careful attention to construction details.
Tools for Successful Pattern Alterations
Perfect patterns start with the right tools in your hands.
Grab your flexible ruler for straight lines and accurate measurements. Your measuring tape wraps around curves like a second skin. French curves shape those tricky armholes and necklines smoothly. Tracing paper preserves your original patterns while you experiment. Muslin fabric becomes your testing ground before cutting precious fabric.
- Flexible ruler – Your straight-line lifeline for precise pattern grading
- Measuring tape – Curves don’t stand a chance against this trusty companion
- French curves – Transform awkward angles into graceful, professional lines
- Tracing paper – Keep originals safe while you play pattern scientist
- Muslin fabric – Your mistake-proof testing canvas for fearless fitting
These pattern alteration supplies transform guesswork into precision. Your sewing pattern tools become extensions of your creativity, while measuring tools deliver the accuracy you crave.
Fit adjustment tools put you in complete control of your garment’s destiny. Accurate measurements rely on using a flexible ruler guide to guarantee precise cuts and adjustments.
Tips for Mastering Pattern Adjustments
Smart sewers tackle pattern adjustments one change at a time, working from shoulders downward to avoid compounded fitting issues.
Test every alteration on muslin before cutting final fabric—this sewing hack saves precious materials and prevents costly mistakes.
Address major body shape identification needs first, then fine-tune smaller details, remembering that overfitting restricts movement, so maintain adequate ease for comfortable garment construction and natural drape, ensuring a good fit without compromising on comfortable movement.
Documenting Measurements and Alterations
Smart sewing starts with keeping detailed records. Your measurement accuracy improves when you track changes and document successful adjustments for future projects.
Accurate sewing also relies on using proper sewing measurement tools to guarantee the best fit.
- Measurement Records: Log your body measurements with dates to track any changes over time
- Alteration Logs: Note specific pattern alterations that worked well for your body shape
- Fit Diaries: Record muslin fitting results and adjustment notes for each garment type
These records become your personal fitting bible, saving time on future projects.
Preserving Grainlines and Proportions
Your fastidious record-keeping sets the foundation for maintaining pattern integrity throughout alterations.
Grainline Management requires keeping fabric threads straight during Pattern Resizing to prevent twisted seams. Mark grainlines clearly on adjusted pieces, ensuring Seam Alignment stays true to the original design.
Proportion Techniques involve scaling adjustments proportionally—if you widen hips by two inches, distribute changes evenly across front and back pieces. This maintains balanced Fabric Draping and prevents awkward pulling or bunching in your finished garment, which is crucial for overall garment quality.
Checking Fit and Silhouette for Balance
After preserving grainlines and proportions, you’ll need to evaluate your Silhouette Balance through careful Fit Evaluation. Your body shape calculator helped identify proportions, but now it’s time for hands-on Proportion Analysis.
Creating Garment Harmony requires checking Body Symmetry across all pattern adjustments.
Here’s your fit checkpoint system:
- Try on your muslin – Check for pulling, bunching, or gaping that signals fitting issues
- Assess your silhouette – Step back and evaluate the overall shape from front, side, and back views
- Test movement – Sit, bend, and raise arms to guarantee comfort without restriction
- Mark problem areas – Pin adjustments directly on the muslin before transferring to your pattern
Frequently Asked Questions (FAQs)
How do patterns fit plus-size bodies?
Ninety percent of plus-size sewers struggle with commercial patterns designed for B-cup bodies.
You’ll need bust adjustments, wider shoulders, and longer torsos.
Standard patterns assume proportional scaling, but your curves don’t follow those rules—requiring strategic dart placement and ease distribution.
What about asymmetrical body differences?
You’ll adjust each pattern piece separately when one side differs from the other. Make a custom fitting muslin, mark differences, then transfer those specific alterations to your final pattern pieces.
Can pregnant women adjust standard patterns?
Like a seedling requiring room to grow, you’ll absolutely need to expand standard patterns.
Use a slash-and-spread technique at bust and waist areas to create necessary space for your changing body throughout pregnancy.
How do fabric types affect alterations?
Fabric weight and drape dramatically change how you’ll approach alterations.
Stretch fabrics need less ease than wovens, while heavy materials require wider seam allowances and different dart placements for proper fit.
Should shoulder adjustments come before others?
Why postpone the foundation when building your perfect fit?
You should tackle shoulder adjustments first since they’re your garment’s structural backbone.
Everything else—bust, waist, and hip modifications—depends on proper shoulder placement and width for balanced proportions.
Conclusion
Coincidentally, many sewers discover that adjusting patterns for different body shapes becomes second nature once they understand their unique proportions.
You’ve learned to identify your body type, take precise measurements, and apply targeted alterations using techniques like slash-and-spread and dart manipulation.
These skills transform standard patterns into custom-fit garments that celebrate your silhouette.
Remember, successful pattern adjustment requires patience and practice, but the results speak for themselves—clothes that fit perfectly and flatter your figure every time.
- https://theconceptwardrobe.com/build-a-wardrobe/determine-your-body-shapes
- https://www.fashiondesignacademy.co.uk/blog/fashioning-diversity--designing-for-different-body-types-and-ages
- https://gabriellearruda.com/hourglass-body-shape-guide-wardrobe/
- https://www.reddit.com/r/sewhelp/comments/1f94lzr/how_to_modify_a_pattern_for_a_pear_shape/
- https://www.youtube.com/watch?v=m3_QP6UFljs


