This site is supported by our readers. We may earn a commission, at no cost to you, if you purchase through links.
Grab any size chart and you’ll notice two numbers doing all the work: waist and hip.
Mix them up by even an inch, and a dress that should hug your curves ends up pulling at the seams or sagging like a sack.
Your waist sits at your torso’s narrowest point, where ribs give way to abdomen.
Your hips claim the territory below, anchored by the pelvic bone and curving out at their fullest near the greater trochanter.
One measures muscle and breath; the other measures bone and volume.
Knowing exactly where each begins changes how you cut, fit, and flatter every garment you make.
Table Of Contents
- Key Takeaways
- Waist is Torso; Hip is Pelvis
- Natural Waistline Versus Full Hip
- How to Measure Your Waist
- How to Measure Your Hips
- Waist and Hip Measurement Differences
- Waist-to-Hip Ratio Explained
- Why Measurements Matter in Sewing
- Choosing Size: Waist or Hip
- Pattern Adjustments for Waist and Hip
- Flattering Waist and Hip Proportions
- Frequently Asked Questions (FAQs)
- Conclusion
Key Takeaways
- Your waist sits at your torso’s narrowest point (usually 1 to 4 inches above the navel), while your hips are anchored by the pelvic bone and reach their fullest near the greater trochanter, typically 7 to 9 inches below the waist.
- Measure your waist after a normal breath with the tape snug, not tight, and measure your hips at their widest point, recording the larger of two passes if they differ by more than a quarter-inch.
- Dividing your waist by your hip measurement gives your waist-to-hip ratio, which reveals your body shape (around 0.7 for hourglass, near 0.9 for rectangle, above that for apple) and guides how much ease or shaping a pattern needs.
- Waist measurements control darts and fit in bodices and waistbands, hip measurements drive ease in skirts and pants, and dresses depend on getting both right, so grade between sizes whenever the two numbers don’t match a single chart.
Waist is Torso; Hip is Pelvis

Knowing where your waist ends and your hips begin makes every fitting decision clearer and more confident. These two landmarks sit on completely different parts of your body, each with its own anatomy and role in how clothes are cut and sized. Here’s what sets them apart.
For step-by-step guidance on measuring correctly and matching those numbers to a size chart, check out this guide to choosing the right pattern size.
Waist Location
Tucked between your rib cage and hips, the waist sits at the narrowest point of your torso — usually 1 to 4 inches above the navel. It marks where your thorax transitions into your abdomen.
Your posture shifts this location slightly. During exhalation, the natural waist rises; during relaxed inhalation, it drops. Always measure after a normal breath for consistency.
Hip Location
The hip sits lower than the waist — anchored by the pelvic bone structure rather than soft tissue. Your fullest hip point commonly falls 7 to 9 inches below your natural waist, right where the gluteal muscles and iliac crest create the widest outer curve.
That’s your hip circumference reference point.
Anatomy Differences
These two landmarks come from completely different tissue. Your waist relies on abdominal muscle structure — the rectus abdominis and obliques — while your hip depends on the pelvic bone ring itself, the ilium, ischium, and sacrum.
Soft tissue distribution shifts the contrast further: waist skin sits over muscle, hip skin sits over gluteal volume and bone. Spinal mobility also bends your waist; the hip joint doesn’t move that way at all.
Sewing Fit Relevance
That tissue difference matters the moment you pick up a pattern. Your waist measurement controls bodice darts and fitted seams, while your hip measurement determines ease in skirts and trousers.
When the two differ markedly — say, a 10-inch drop — you’ll grade between sizes to avoid pulling at the hip or gaping at the waist.
Natural Waistline Versus Full Hip
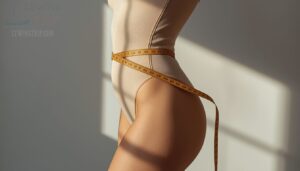
Before you measure anything, you need to know exactly where to measure. Your body has several distinct reference points between your waist and hips, and each one matters for different garments. Here’s what you’ll be working with:
Natural Waist Crease
The natural waist crease is the horizontal fold that appears just above your belly button when you relax your torso. It marks the narrowest point of your midsection — not your beltline, which often sits lower.
In sewing, this crease guides dart alignment and waist seam placement, ensuring your garment sits where your body actually narrows.
Fullest Hip Point
Unlike the waist crease, the fullest hip point isn’t fixed — it shifts based on your body’s unique bone structure and fat distribution.
Wrap your tape around the widest point of the hips, keeping it horizontal, to capture true hip circumference. This reading controls fabric drape and silhouette balance.
Use it to:
- Set hip ease in pants and skirts
- Position darts for smooth hip curves
- Guide side seam shaping
- Determine how fabric flows over hip protrusion
- Balance the hip bone’s visual prominence in fitted garments
High Hip Area
Picture the spot where your torso narrows before flaring into your hips — that’s your high hip area, sitting at the iliac crest. This pelvic interface zone guides high hip tailoring, dart placement, and silhouette balance points.
| Reference | Position | Garment Use |
|---|---|---|
| Natural waist | Rib-to-crest midpoint | Bodices |
| High hip | Iliac crest | High hip ease, darts |
| Fullest hip | Widest point of hips | Hip circumference |
Low Hip Area
Below your waist sits the low hip area, right where the ilium edge curves outward toward your thigh. This zone covers the upper gluteal region and reflects posterior hip fullness, the part that determines sitting comfort ease.
It’s a key reference point for hip circumference and your waist-to-hip ratio, since this curve shapes how skirts, pants, and dresses fit your body shape.
How to Measure Your Waist
Getting an accurate waist measurement comes down to technique, not guesswork. A few small adjustments in how you stand and handle the tape make all the difference. Here’s exactly what to keep in mind before you wrap that tape around your middle.
Use Flexible Measuring Tape
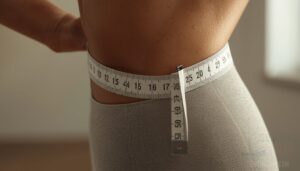
Grab a flexible measuring tape instead of a rigid ruler; rigid tools can’t curve around your waist circumference accurately. Look for one with clear metric and imperial markings for easy conversion, plus durable, sweat-resistant coating.
Quality measuring tape features, like a metal end tab, support maintaining tape accuracy over time.
Store it rolled, away from heat, for proper tape storage and lasting durability.
Stand Straight and Relaxed

Posture changes your number more than you’d think. Stand tall with balanced weight distribution on both feet, feet together, and shoulders relaxed away from your ears.
Keep neutral pelvic alignment and your natural spinal curve maintenance intact, don’t arch or slump. Practice diaphragmatic breathing techniques, exhale fully, and focus on relaxing your stomach muscles. Relaxed muscle tension throughout your torso keeps your waist measurement honest, not artificially pulled in.
Find The Narrowest Point
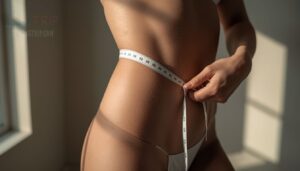
Once your posture’s set, bend sideways slightly. The crease that forms reveals your natural waistline instantly.
Check three things:
- Bony landmarks — feel for your lowest rib and iliac crest
- Side silhouette — note where your torso indents before flaring
- Cinch test — confirm the spot feels snug, not compressed
This narrowest part of your torso is where your flexible measuring tape belongs for accurate waist-to-hip ratio calculations.
Keep Tape Level
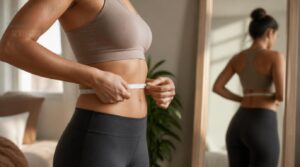
Once you’ve found your narrowest point, the tape itself needs attention before any number means anything. Keep it parallel to the floor all the way around, checking a mirror to confirm it doesn’t dip at your back or ride up at the sides. Avoiding parallax error means reading the tape head-on, not at an angle.
Avoid Pulling Too Tight
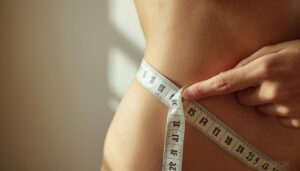
Tension matters as much as placement. Pulling the tape too hard compresses skin and shaves inches off your true waist measurement, leading to a garment that binds instead of fitting.
Snug, not tight is the rule—you should be able to slide a finger underneath comfortably. This same care prevents fabric distortion and seam puckering later, since patterns built from squeezed numbers throw off drape before you’ve cut a single seam.
How to Measure Your Hips
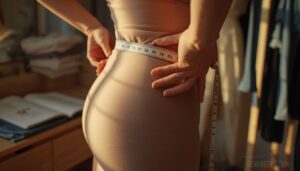
Hip measurements work a bit differently than waist ones, with their own set of rules to follow. Get the tape placement wrong here, and your pants or skirts won’t fit right no matter how good the pattern is. Here’s exactly what to check before you settle on a number.
Measure Fullest Hip Area
Your hips tell a different story than your waist, and finding their true width takes a careful eye. Wrap your flexible measuring tape around the widest part of your hips, where the gluteal protrusion peaks.
This plane usually aligns with the greater trochanter on each leg. Body type variations shift this point higher or lower, so circle slowly to catch the true circumference around the hips.
Include Buttocks
Capturing the buttocks fully means letting the tape ride over their roundest point, not pressing flat against muscle.
Gluteus maximus size, fat distribution, and skin elasticity all shape this curve differently, so your gluteal fold sits lower or higher depending on muscle tone.
Don’t flatten contours to get a smaller number; that distorts your waist-to-hip ratio and throws off the whole circumference around your hips.
Keep Feet Together
Standing with your feet together stabilizes your pelvic position, preventing the side-to-side shift that throws off hip measurement accuracy.
This stance maintains postural alignment and keeps the tape from sagging at your sides, so it stays level around your fullest curve.
That consistency matters: small stance changes can skew your waist-to-hip ratio, undermining the body measurements you’re working hard to nail down.
Check Tape Alignment
Run your fingers around your flexible measuring tape before reading it, checking that every inch lies flat against your skin without twisting.
- Tape stays parallel to the floor, front to back
- No slack or sagging at your sides or center back
- Same anatomical point guides both waist measurement and hip measurement
This consistency protects your waist-to-hip ratio from skewed numbers caused by careless wrapping.
Record The Largest Measurement
Your final hip reading should be the largest accurate number you recorded across your two passes — not an average. Repeat the measurement if the two readings differ by more than a quarter‑inch.
For custom pattern needs or extreme circumferences, document the date, measurer’s name, and measurement location alongside your number for reliable future reference.
Waist and Hip Measurement Differences
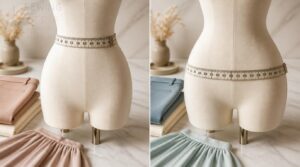
Waist and hip measurements don’t do the same job — each one tells a different story about how a garment will fit your body. Knowing which measurement matters where can save you a lot of guesswork at the cutting table. Here’s how they each work and what they actually control:
Waist Measures Torso Circumference
The waist measurement captures torso circumference at its narrowest point — the abdominal region sitting between your ribcage and iliac crest. This single number tells you exactly how your bodice, fitted dress, or waistband will wrap your midsection.
Your natural waistline positioning determines where darts are placed and how side seams are shaped throughout a pattern.
Hips Measure Lower Body
The hip measurement tells the fuller story of your lower body — circling the widest point across your pelvic bone structure, buttocks, and surrounding soft tissue.
- Gluteal muscle development directly increases hip circumference
- Soft tissue distribution shifts this number with weight changes
- Bone width sets the floor; fat and muscle determine the ceiling
Your hip captures lower body volume that waist measurement simply can’t.
Waist Affects Fitted Bodices
Your waist circumference directly controls dart placement precision in a fitted bodice. Darts taper from the bust point toward the natural waist, so an incorrect measurement creates vertical pull lines or a collapsed midsection.
Seam alignment along the natural waist keeps side seams parallel and the silhouette smooth. Too little ease restricts breathing; too much causes rippling across the front panel.
Hips Affect Skirts and Pants
Your hip measurement drives fit in skirts and pants more than any other number.
- A-line skirts need hip ease to skim the fullest point without pulling
- Pencil skirts require precise hip measurement to prevent seam drag
- Slim-fit pants demand accurate hip measurement to avoid seat tightness
- Generous pant hip ease reduces thigh compression during movement
- Letting out hip seam allowances corrects tightness across the seat
Both Guide Garment Sizing
Skirts and pants pull focus to your hip measurement — but dresses answer to both. Sizing accuracy means matching your waist and hip to the pattern, since retail sizing rarely accommodates every body’s proportions equally.
| Measurement | Garments It Governs |
|---|---|
| Waist | Bodices, waistbands |
| Hip | Skirts, pants, dresses |
Custom measurements eliminate guesswork entirely.
Waist-to-Hip Ratio Explained
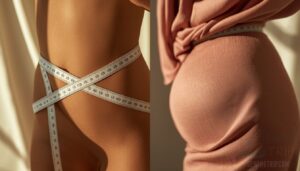
Once you have your waist and hip measurements, putting them together unlocks a surprisingly useful number. Your waist-to-hip ratio does more than reflect health — it shapes how you choose patterns, identify your body proportions, and dress with intention. Here’s what that single calculation reveals:
Simple Ratio Formula
The waist-to-hip ratio is a single number you get when you divide your waist measurement by your hip measurement — nothing more. For example, a 28-inch waist divided by a 38-inch hip gives you 0.74, a dimensionless value showing how your waist relates to your hips proportionally.
Your waist-to-hip ratio is just one division away: waist divided by hip reveals your body’s proportional story
- Quickly reveals your body’s natural shape
- Needs only two measurements to work
- Works in inches or centimeters equally
- No special waist-hip ratio calculator required
Sewing Proportion Guide
Once you have your ratio, it becomes a practical tool for pattern drafting decisions. Designers use a golden reference of 0.7 for women’s hourglass silhouettes and 0.9 for men’s — meaning your waist-to-hip ratio tells you how much ease or shaping a pattern needs.
A ratio closer to 1.0 signals minimal curve difference, so side seam adjustments and reduced dart intake keep the garment balanced without distorting the drape.
Body Shape Clues
Your waist-to-hip ratio quietly maps your body onto one of four recognizable silhouettes.
A ratio around 0.7 signals an hourglass shape — waist noticeably narrower than hips. Climb toward 0.9, and you’re reading a rectangle. Push above that, and the apple silhouette emerges.
Drop below 0.75 with wider hips, and the pear classification fits.
Style Balance Reference
Once you know your waist-to-hip ratio, it becomes a practical styling compass. Use it as a reference for three key decisions:
- Belt placement to anchor and define the waist
- Silhouette choice — A-line or flared for higher ratios
- Fabric weight to control how proportions read visually
Heavier fabrics minimize, lighter ones reveal.
Why Measurements Matter in Sewing
Knowing your waist and hip measurements does more than help you pick the right size — it shapes every decision you make from the cutting table to the final press. Skipping this step is how you end up with a finished garment that fits on the hanger but not on your body. Here’s what accurate measurements actually do for your sewing:
Better Pattern Selection
Accurate waist and hip measurements make pattern selection far more precise. When your numbers align with a pattern’s drafted dimensions, you avoid awkward size jumps that distort the silhouette.
| Measurement | Pattern Zone | Fit Benefit |
|---|---|---|
| Waist measurement | Bodice, waistbands | Controls darts and shaping |
| Hip measurement | Skirts, pants | Ensures proper ease and drape |
| Waist-to-hip ratio | Full garment | Guides proportional grading |
Fewer Fitting Issues
Most fitting headaches start with a measurement taken in the wrong spot. When your waist and hip numbers come from reliable fitting landmarks, the pattern’s built-in pattern ease works as intended instead of fighting your body.
That accuracy keeps darts, side seams, and waistbands aligned, so you’re not re-cutting fabric or chasing a stubborn pucker. Consistent seam allowances and a sound waist-to-hip ratio simplify alterations from the start.
Improved Garment Comfort
Comfort isn’t accidental — it’s built in when your waist and hip measurements are precise. A garment cut to your actual dimensions lets smooth construction and elastic waist designs move with you instead of binding against you.
Breathable fabric layers and stretch thread work best when seam placement follows your true contours, keeping waistbands smooth and skimming hip curves without pulling.
Accurate Alterations
When precision slips, garments expose it fast. Your waist and hip measurements directly guide seam allowance precision — small adjustments of even a millimeter per seam shift the entire fit.
- Baste first, cut never
- Test mobility before pressing
- Match lining adjustments to main fabric
- Record altered dimensions on your pattern
- Press seams to set every change permanently
Cleaner Finished Silhouette
Once your waist measurement and hip measurement align with your waist-to-hip ratio, finishing technique decides the rest. Serged edge benefits, invisible hem techniques, and minimalist seam finishing reduce seam bulk, supporting precise garment fitting and true silhouette enhancement.
Professional edge stitching locks every line flat, proving clean construction finishes what accurate measuring started.
Choosing Size: Waist or Hip
Picking a size isn’t always about matching one number to a chart. Different garments lean on different measurements, and knowing which one to trust saves you from a frustrating fit. Here’s how to decide which measurement takes the lead for each type of project.
Dresses Need Both
A dress lives or dies on bodice-to-skirt balance, which means you can’t shortcut by picking just one body measurement. Here’s why both numbers matter:
- Waist measurement shapes the bodice fit
- Hip measurement determines skirt ease
- Waisttohip ratio guides dart placement
- Seam placement controls smooth fit through the torso
- Accurate body measurements guarantee proper garment drape
Pants Prioritize Hips
Pants prioritize hip measurement over waist measurement, since fit problems start at the hip, not the waistline. Curved side seams, a slightly raised back rise, and stretch fabric fit your fullest hip point without restricting movement.
Hip yoke shaping and hip ease keep the silhouette smooth and comfortable, no matter your waist-to-hip ratio or body shape, for reliable clothing fit.
| Pants Feature | What It Does | Hip Area Affected |
|---|---|---|
| Curved side seams | Mirrors hip contour | Hip bone |
| Raised back rise | Prevents sagging | Lower hip/back |
| Stretch fabric | Adds hip ease | Hip joint |
Skirts Prioritize Hips
Since skirts hang freely from the body, your hip measurement determines fit far more than your waist ever could. Seam placement strategy places hip seams at your fullest point, while dart shaping methods release fullness without bulk.
- Hip ease management allows movement without strain
- An A-line skirt balances wider waist-to-hip ratios
- Fabric drape impact shapes how curves read visually
Garment design always starts at the hip here.
Waistbands Need Waist
Every waistband construction decision traces back to your waist measurement, not your hips.
Waistband tension depends on accurate waist circumference, balancing elasticity vs comfort, so the band grips without digging in.
Interfacing for shape keeps the structure from sagging, while width and proportions should match your frame.
Seam durability techniques, like reinforced stitching, only work when your measurement technique nails the waist-to-hip ratio first.
Adjust Between Sizes
When your waist and hip don’t match a single size chart, pattern grading rules become your best friend. Most patterns move the waistline and hip line outward by 0.5 to 1 cm per size increment, so blend gradually between two sizes rather than jumping straight up.
Watch fabric elasticity limits, too. A 15% stretch knit forgives more than a rigid woven, letting waistband ease management and dart repositioning fine-tune the fit without redrafting the whole pattern.
Pattern Adjustments for Waist and Hip

Your waist and hip measurements rarely match a pattern’s grading exactly, and that’s where real fitting skills come into play. Small adjustments at the cutting and sewing stage can close that gap without starting a project over. Here’s where to focus your changes for a cleaner, better-fitting result.
Add or Remove Darts
Darts are your main tool for closing the gap between waist circumference and hip measurement on a fitted pattern. Use dart manipulation to add intake when the difference is large, or remove darts entirely when it’s minimal.
Adjusting dart depth controls how much fabric gets pulled in, while shaping with princess seams offers a smoother alternative to traditional dart placement techniques during garment construction.
Grade Between Sizes
Grading between sizes means scaling a pattern up or down while keeping every measurement in proportion, not just stretching it like taffy.
Proportional grading rules commonly add 1 to 2 inches per size at the hip and waist, using incremental size steps for vertical grading and ease distribution.
This keeps your waist-to-hip ratio intact across a full clothing size guide:
- Waist circumference scales evenly
- Hip measurement grows proportionally
- Pattern block scaling stays balanced
Adjust Side Seams
Side seams act like the hinges connecting your waist to your hip, and even a quarter inch off-balance throws the whole silhouette out of sync.
| Garment Type | Side Seam Adjustment |
|---|---|
| Dresses | Deeper hip shaping |
| Jeans/Trousers | Pronounced curve allowance |
| Blouses | Minimal underarm easing |
Even ease distribution prevents bulging, while matching grain line preserves true shaping after alteration.
Shape Waistbands Correctly
Once side seams align, the waistband needs its own attention to hold that shape.
Match interfacing weight to your fabric so the band resists buckling at the natural waistline without stiffening it.
Set elastic casing depth between 12 and 22mm, stabilize zipper edges with a 6mm seam allowance, and topstitch the top edge for clean definition that suits the body shape underneath.
Balance Hip Ease
A waistband holds shape; the hip area needs room to move. Build in 1 to 2 inches of ease for fitted skirts, more for relaxed cuts, so seated comfort testing shows no pulling at the seat.
Knits handle hip ease through fabric stretch, while wovens need it drafted in. Even ease distribution prevents bulk, keeping the silhouette smooth from waist to hip regardless of body shape or waist-to-hip ratio.
Flattering Waist and Hip Proportions

Once you know your measurements, the real fun starts: using them to your advantage. Every body type has design tricks that highlight its best lines, no alterations required. Here are five styling techniques that work with your proportions, not against them.
Belts Define Waist
Among the simplest tools in your styling kit, a belt instantly reshapes how the eye reads your torso.
Waistline placement at the natural waistline creates the strongest definition, while belt width impact matters too: narrow belts subtly mark the waist, wide ones exaggerate it.
Buckle detail effects and fabric belt interaction (structured versus flowing) further shape the silhouette, regardless of body shape or waist-to-hip ratio.
A-line Skirts Balance Hips
A belt sharpens your waist, but an A-line skirt does the opposite job for your hips, smoothing rather than emphasizing.
Skirt flare mechanics widen gradually from your fullest hip measurement, so the fabric skims instead of clings.
Fabric drape impact matters here too: soft drape smooths hip lines, while stiffer cloth fights the flare and exposes your waist-to-hip ratio.
Peplums Add Curves
Where an A-line skirt smooths, a peplum builds, adding shape exactly where you want it. Waistline placement starts right at your natural waist, flaring above the hip for curvy shape enhancement.
For silhouette balancing techniques, match peplum fabric selection to your goal:
- Sateen for crisp structure
- Chiffon for soft drape
- Tapered cut for hourglass bodies
- Longer flare for pear shapes
High Waists Lengthen Legs
Once your waistline placement shifts above the natural waist, your legs read longer instantly. High-waisted pants anchor at this higher point, so the eye travels from waist to hem without interruption.
Pair vertical seam effects with a monochrome outfit for maximum stretch. Choose fabric drape impact that falls smoothly, then finish with footwear leg elongation, like pointed-toe shoes that continue the line.
Fabric Choice Affects Shape
Before you even choose a pattern, fabric does half the proportion work for you. Fabric stretch impact changes everything: stretch fabrics cling at hips, while structured wovens hold shape firmly.
Consider these options:
- Chiffon drapes softly over hips
- Gabardine balances waist-hip flow
- Wool adds structured shaping
- Lining stabilizes cling-prone fabrics
- Interfacing sharpens waist definition
Fiber content and drape versus structure ultimately decide your finished silhouette’s success.
Frequently Asked Questions (FAQs)
What is the difference between waist and hip measurements?
Your waist sits at the torso’s narrowest point, shaped by abdominal muscle and skin, while your hip circumference wraps around the pelvis and buttocks, influenced by skeletal width. Measuring both accurately with a flexible tape gives you the waist-to-hip ratio for proper garment fit.
Can a dress fit at the waist?
A snug bodice with loose hips tells you everything: yes, a dress can fit at the waist yet pull tight at the hips. Check darts, seam placement, and ease allowance, then correct hip tightness through alterations rather than abandoning the size altogether.
Are waist and hip measurements important?
Yes, absolutely.
Beyond fit, your waist-to-hip ratio functions as a key health risk indicator, linking abdominal circumference to cardiovascular disease and metabolic health markers, making these measurements essential body composition tools for accurate obesity assessment and chronic disease prevention.
What is waist measurement & hip circumference?
Think of your torso and pelvis as two stories of a building, each with its own footprint. Waist measurement captures your narrowest torso point; hip circumference wraps the fullest pelvic curve—together defining your body’s proportions for accurate, well-fitted garments.
What is arthritis in the hip?
Hip arthritis develops as cartilage wear patterns expose bone, causing friction, hip joint pain, and stiffness.
X-rays confirm diagnosis; diagnostic imaging methods like MRI catch early changes.
Watch for mobility reduction signs, limited hip joint range of motion, and weight impact risks straining your pelvis’s musculoskeletal health.
Severe cases show complete loss of cartilage, evident as joint space narrowing on X‑rays.
What is the function of waist compared to hips?
Your waist bolsters core stability, spinal support, and breathing mechanics, while your hips handle locomotion mechanics and weight transfer. Together, they shape your waist-to-hip ratio, body proportions, and overall body shape, guiding fit and movement alike.
Are hips & waists related?
Absolutely, your natural waistline and hip measurement work together to reveal body shape and calculate waist-to-hip ratio, a key metric for evaluating cardiovascular disease risk, abdominal obesity, and overall metabolic health beyond what a single measurement shows.
Should my waist be smaller than my hips?
Not necessarily — it’s just one common body shape variation. Calculate your waist-to-hip ratio to check proportions; a smaller waist often signals a curvier silhouette, but rectangle or apple shapes fit garments just as well with proper sizing.
What does a high hip & waist measurement mean?
Picture both numbers climbing like a slow-rising tide—that’s elevated waist-to-hip ratio territory.
It signals abdominal obesity, shifting fat distribution toward your midsection, and raises real cardiovascular disease risk alongside metabolic health concerns worth monitoring closely.
Which part is hip and waist?
Your torso marks the waist, sitting between rib cage and pelvis, often visible as a crease when you bend sideways. Your pelvis defines the hip, the skeletal boundary at your body’s widest lower point, used for circumference and waist-to-hip ratio measurements.
Conclusion
It’s no coincidence that two tape marks, one circling your ribs’ edge and one circling the bone, decide whether a garment flatters or fights you.
Once you understand the difference between waist and hip, every pattern choice becomes deliberate instead of guesswork. Your waist bends with breath; your hips hold their shape.
Measure both honestly, mark them on your pattern, and let fabric fall exactly where your body curves, not where a size chart assumes it should.