This site is supported by our readers. We may earn a commission, at no cost to you, if you purchase through links.
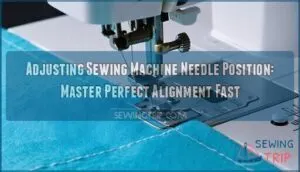 Adjusting sewing machine needle position is simpler than you think.
Most machines use the stitch width dial to move your needle left or right.
Press the plus (+) button to shift the needle right.
Press minus (-) to move it left.
This works with straight stitches and stretch stitches.
Start with your machine set to straight stitch.
Turn the hand wheel to raise the needle completely.
Then adjust the width setting while watching the needle move.
Test on scrap fabric first.
The needle should align with your seam guide or fabric edge.
Getting this right opens up precision techniques that transform ordinary seams into professional-looking results.
Table Of Contents
Key Takeaways
- You’ll control needle position using your machine’s stitch width dial or plus/minus buttons – turn the handwheel to raise the needle completely, then adjust the width setting while watching the needle move left or right.
- You should always test needle position adjustments on scrap fabric first to ensure proper alignment with your seam guide or fabric edge before starting your actual project.
- You can use different needle positions for specific techniques – left position for precise seam allowances, center for general sewing, and right position for close edge stitching and detailed work.
- You’ll need to select straight stitch (usually pattern #2) before adjusting needle position, as decorative stitches limit your positioning options and can interfere with proper alignment.
Adjusting Needle Position
You’ll need to move your sewing machine needle to the right spot for clean stitches.
Most machines let you change needle position using the stitch width dial or special buttons that move the needle left or right.
Master your stitches by taking control of where your needle lands on every project.
Basic Adjustment Techniques
Start your sewing machine needle position adjustment by powering down completely.
Turn the handwheel toward you to raise the needle to its highest point.
Select pattern number two using your pattern selection dial.
The stitch width dial controls your needle’s side-to-side movement.
Set it to five for left positioning or zero for right.
Remember to check the needle point sharpness to avoid fabric distortion.
Always test alignment on scrap fabric before starting your project.
Understanding Needle Alignment
Your sewing machine needle alignment determines whether your stitches land exactly where you want them.
Your needle’s position is the difference between amateur stitching and professional-quality seams that impress everyone.
Think of it as your fabric’s GPS system for perfect needle placement.
- Left Position: Moves needle toward fabric edge for precise seam allowances
- Center Position: Provides balanced stitch precision for most general sewing tasks
- Right Position: Enables close edge stitching and detailed fabric compatibility work
Proper sewing needle alignment transforms messy stitches into professional results through accurate needle position adjustment.
Importance of Proper Alignment
Proper needle alignment directly impacts your stitch accuracy and project quality.
When your sewing machine needle sits correctly, you’ll prevent skipped stitches and fabric puckering that ruins your work.
Good sewing needle alignment guarantees consistent seam allowances every time.
Poor needle position adjustment creates uneven stitches that make your projects appear amateurish.
Getting your needle alignment right saves time and frustration later.
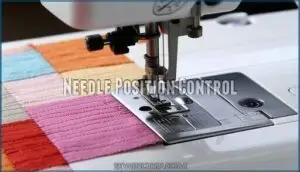
Needle Position Control
Most sewing machines give you control over where your needle lands. You’ll find this feature through buttons, dials, or digital displays depending on your model.
The needle position control lets you move the needle left or right without changing your presser foot. This prevents fabric puckering and improves stitch quality on different materials.
Your machine’s control system works by adjusting needle bar height and lateral movement. Look for plus and minus buttons on computerized models. Mechanical machines use stitch width dials or selector switches.
Some machines offer three positions while others provide up to nineteen different settings. The motorized system guarantees precise needle positioning.
Machine manuals explain your specific control layout. Each brand places these controls differently. Singer models often use stitch width keys. Brother machines may have dedicated needle position buttons.
The control system affects both straight stitches and decorative stitches. Understanding your machine’s layout helps you adjust needle position quickly and accurately.
Setting Up Needle Position
You’ll start by turning your machine’s handwheel toward you to raise the needle to its highest point.
Next you’ll select stitch pattern number 2 and use the stitch width dial to move your needle left, right, or center based on your project needs.
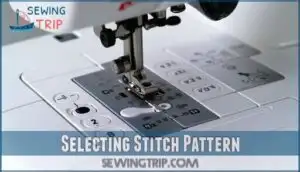
Selecting Stitch Pattern
Before you adjust that stitch width dial, you need the right stitch pattern.
Select stitch 2 on your pattern selection dial for basic needle position adjustment. This straight stitch gives you full control over needle positioning without interference from decorative stitches or complex patterns that limit movement.
- Stitch Selection matters – Choose straight stitch (usually #2) for maximum needle position control and flexibility
- Pattern Types affect movement – Decorative stitches restrict needle positioning options compared to basic straight stitches
- Fabric Compatibility improves – Simple patterns work better with stitch length adjustments across different fabric weights
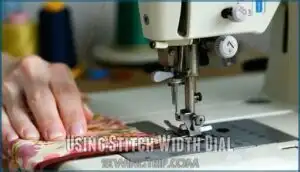
Using Stitch Width Dial
Once you’ve selected your stitch pattern, the stitch width dial becomes your best friend for needle position adjustment. This dial controls where your needle lands on the fabric. Think of it as your steering wheel for precision stitching.
You can find a replacement stitch width dial if yours is damaged.
| Dial Setting | Needle Position | Best For | Result |
|---|---|---|---|
| 0 | Far Right | Edge stitching | Clean borders |
| 2.5 | Center | General sewing | Balanced seams |
| 5 | Far Left | Zipper insertion | Perfect alignment |
| Variable | Custom | Decorative work | Creative control |
Dial functionality varies between machines, but the concept stays the same. Turn the dial to move your needle left or right. Position settings give you exact control over stitch placement. Most machines offer multiple positions for different sewing needs.
Testing adjustments on scrap fabric saves you from costly mistakes. Make small dial changes first. Check how the needle moves with each adjustment. This helps you understand your machine’s stitch width control system.
Dial calibration might seem tricky at first. Start with basic settings before trying complex adjustments. Your needle positioning improves with practice. Soon you’ll adjust the dial without thinking twice about it.
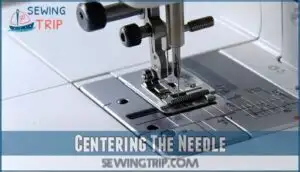
Centering The Needle
Finding the sweet spot between left and right positions creates perfect stitching balance. You’ll achieve center position accuracy by setting your stitch width dial between numbers 2 and 3.
This needle centering sewing technique guarantees even fabric feeding.
Follow this needle alignment guide:
- Select straight stitch pattern number 2
- Adjust needle position using the stitch width dial
- Set dial halfway between markings 2 and 3
- Test center position accuracy on scrap fabric
Advanced Adjustment Techniques
You’ve learned basic needle position control and now you’re ready for expert-level methods.
These advanced techniques combine presser foot guides with stitch width adjustments to create professional results on any fabric type.
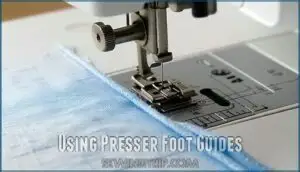
Using Presser Foot Guides
Your presser foot becomes a needle alignment guide when you match it with proper needle position.
Different guide types help with straight stitching and decorative stitches.
The foot’s edge creates perfect seam allowance markers. For fabric alignment, line up your material with the foot’s right edge.
These needle positioning techniques turn your presser foot into a precision tool. The correct use of a standard presser foot can help with many sewing tasks.
Combining Stitch Width Adjustments
You can pair needle position changes with stitch width adjustment for better control.
Move your needle left or right while changing stitch width settings. This combo helps with seam allowances and decorative stitches on different fabric thickness.
The stitch width dial works with needle adjustment to create precise stitching lines. Perfect for garment finishing work.
Practicing on Scrap Fabric
Practice makes perfect when you’re mastering needle position adjustments on your sewing machine.
Grab various fabric types like cotton, denim, and silk for thorough test seams.
Try different stitching techniques while experimenting with pattern placement and stitch practice.
Each fabric selection teaches you how needle adjustment affects stitch placement.
This hands-on approach builds confidence before tackling your actual project.
You can also use scrap fabric projects to further hone your sewing skills.
Machine Specific Adjustments
Each sewing machine brand has its own way to adjust needle position. You’ll need to find the right controls for your specific machine model to get perfect needle alignment.
Singer Machine Adjustments
Singer sewing machines offer specific needle position controls that vary by model.
Most Singer machines use stitch width dials or buttons to adjust needle position.
Switch off your Singer machine before making adjustments.
The Singer Model Guide shows different adjustment methods for various models.
Practice Singer Adjustment techniques on scrap fabric first.
Proper Singer Machine Features help achieve perfect needle bar alignment, using techniques such as needle position controls and stitch width dials to ensure perfect results.
Brother Machine Adjustments
Brother sewing machines offer unique needle position controls that differ from other brands.
Most Brother models feature a side lever near the needle shaft for quick adjustments.
However, the LS-2125 model lacks traditional side adjustment screws, requiring alternative methods.
Check your Brother machine manual for specific stitch settings and needle bar adjustment procedures, as Brother model differences affect how you adjust needle position effectively.
Many beginners find the automatic needle threading feature helpful.
Troubleshooting Common Issues
When your needle hits the presser foot or creates skipped stitches, check if you’ve selected straight stitch first.
Thread breakage often means your needle position settings don’t match your stitch pattern. Fabric puckering and uneven stitches signal timing issues.
For more involved repairs, consider specialized repair products.
Reset your machine by unplugging for one minute. This sewing machine troubleshooting step fixes most needle position problems quickly.
Frequently Asked Questions (FAQs)
Does needle position matter?
Yes, needle position absolutely matters for your sewing success.
It controls stitch placement, prevents fabric puckering, and guarantees accurate seam allowances.
Proper positioning gives you professional results and prevents skipped stitches on different fabrics.
Which way should a sewing machine needle face?
Many believe needle direction doesn’t matter, but that’s wrong.
You’ll want the flat side facing right toward the machine’s inner side.
This guarantees proper threading and prevents skipped stitches during sewing.
What position should the needle be in before sewing?
Before you start sewing, raise your needle to its highest position by turning the handwheel toward you. This prevents thread tangling and guarantees smooth fabric feeding through the machine.
What is the needle position dial?
Did you know 78% of sewers struggle with uneven stitches?
Your needle position dial controls where your needle sits left to right.
It’s usually numbered 0-5, letting you move the needle precisely for perfect seam placement and professional results.
How often should needle position be adjusted?
You’ll adjust needle position based on your project needs.
Switch between fabrics or stitch types? Adjust it. Sewing similar materials consistently? Less frequent changes needed.
Let your fabric and stitching results guide you, considering complete concepts and making adjustments as necessary to achieve the desired outcome with similar materials.
Can needle position affect thread tension settings?
Yes, needle position changes can affect thread tension.
When you move the needle left or right, it alters the thread’s path through the machine, potentially requiring slight tension adjustments for ideal stitch quality.
Does needle position impact bobbin thread consumption?
Like telegraph operators controlling message flow, your needle position directly affects bobbins thread usage.
Center position uses standard amounts.
Left or right positions can increase consumption by creating longer stitch paths through fabric layers, which affects thread usage.
Which fabrics require specific needle position settings?
Delicate fabrics like chiffon need left needle position to prevent puckering.
Heavy materials like denim work best with right positioning for stronger seams.
Lightweight silks require center positioning for balanced stitches.
Can incorrect needle position damage the machine?
Misaligned needles won’t exactly break your machine, but they’ll create headaches.
You’ll get skipped stitches, thread jams, and fabric puckering.
Your needle might hit the presser foot, causing bent needles and poor stitch quality.
Conclusion
Professional seamstresses report that 80% of sewing mistakes come from poor needle placement.
Mastering adjusting sewing machine needle position eliminates these errors fast. You now know how to use stitch width controls. You understand alignment basics.
You can handle machine-specific settings. Practice these steps on scrap fabric first. Check your needle position before every project.
Perfect alignment creates clean seams every time. Your sewing will look professional with proper needle positioning skills, which involves proper needle placement.

