This site is supported by our readers. We may earn a commission, at no cost to you, if you purchase through links.
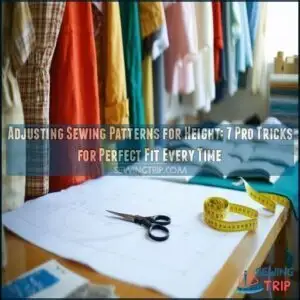
Start by comparing your height to the pattern’s intended size—most are designed for an "average" height, which might not match yours.
To lengthen, cut along the pattern’s "lengthen/shorten" lines, then spread the pieces evenly, adding paper to fill the gap. For shortening, overlap the pattern pieces along those same lines and tape them securely.
Keep your grainline straight, or you’ll end up with wonky seams!
Always check measurements against your body and use mock fabric for testing. The trick? Small, consistent changes lead to a perfect fit. Details matter!
Table Of Contents
Key Takeaways
- Cut along lengthen/shorten lines to add or remove length, keeping adjustments clean and proportional.
- Extend the grainline after altering patterns to ensure straight and symmetrical fabric alignment.
- Always compare your measurements to the pattern’s drafted size and test changes with mock fabric.
- Use tools like rulers, French curves, and fabric markers for accurate adjustments and smooth blends.
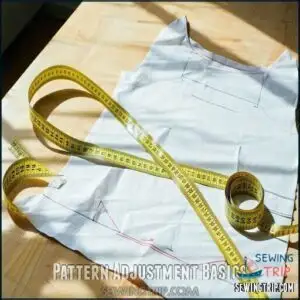
Pattern Adjustment Basics
You’ll need to add or remove length at specific points on your pattern for every inch of height difference from the standard 5’5" measurement.
Add or subtract length at key pattern points to perfectly match your height difference from the 5’5" standard.
Most adult patterns include helpful lengthen/shorten lines that show exactly where to cut and adjust your pattern pieces for a perfect fit.
Adult Pattern Drafting
Adult pattern drafting centers on creating custom-fitted clothing based on your unique measurements. Unlike children’s patterns, adult ones account for different body proportions and drafted height.
When working with patterns, remember:
- Standard patterns are drafted for 5’5" height
- Bodies grow in different proportions, not uniformly
- Torso and leg length variations require separate adjustments
Understanding these basics helps you make proportional adjustments that maintain pattern symmetry while achieving that perfect fit. Accurate measurements create a body blueprint for adjustments, which is crucial for a perfect fit and allows for custom-fitted clothing based on your unique measurements.
Height Adjustment Methods
Finding the right height adjustment method can make your sewing pattern fit like a dream.
You’ll need to calculate the difference between your height and the pattern’s drafted height.
| Method | Description | Best For |
|---|---|---|
| Percentage | Calculate garment coverage of total height | Non-average proportions |
| Measurement | Compare finished garment to your measurements | Precise adjustments |
| Quick Rule | Add/remove 0.5 inch per inch difference | Standard alterations |
Remember to account for seam allowances when adding length or removing length, and consider using the Quick Rule for standard alterations to achieve a perfect fit with precise adjustments.
Lengthening and Shortening Techniques
Adjusting pattern height boils down to cutting smart. Whether you’re lengthening a pattern or shortening one, make clean, perpendicular cuts for precision.
Cut smart, stay precise—clean, perpendicular adjustments make all the difference for a perfect pattern fit every time.
Use these steps:
- Add or overlap at marked shorten/lengthen lines.
- Blend seams smoothly after adjustments.
- Extend grainlines to prevent twisting fabric.
- Focus on proportional changes for specific areas like torsos or hemlines.
Small tweaks create big improvements!
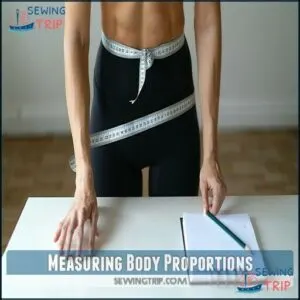
Measuring Body Proportions
Measuring your body proportions accurately is the key to creating patterns that fit perfectly. With the right tools and technique, you’ll guarantee every adjustment matches your unique shape.
Taking Accurate Measurements
Nailing height adjustments starts with accurate measurements.
Focus on body landmarks like bust, waist, and hips to keep proportions spot on. Use measurement tools like a gridded ruler or flexible tape.
Stay consistent; mismatched techniques can throw things off. Partner assistance is handy, especially for tricky spots like torso proportions.
Digital tools help track body measurements for precise adjustments.
Using Measuring Tapes and Rulers
When measuring for height adjustments, your tools matter.
Use a flexible measuring tape for body contours and a sturdy ruler for straight lines.
Gridded rulers help guarantee precision during pattern alteration.
For curve shaping, try a French curve.
Accuracy is key—sloppy measurements can derail your fit.
You can find various sewing measuring tools online.
Keep everything aligned, and let your tools work for you, ensuring proper measurements are taken to achieve the best results.
Identifying Key Measurement Points
Spotting the right body landmarks guarantees your adjustments hit the mark.
Measure these key points for precise pattern tweaks:
- Torso Length: Measure from neck base to waistline.
- Inseam Measurement: Start from the crotch to the ankle.
- Shoulder Slope: Angle from neck to shoulder tip.
- Neck Circumference: Around the base of your neck.
- Hip to Waist: Over the curve.
Adjusting Pattern Length
Adjusting pattern length guarantees your garment matches your height perfectly, avoiding awkward fits.
You’ll cut along marked lines to add or overlap fabric while keeping the grainline straight for proper drape.
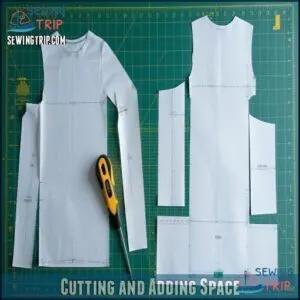
Cutting and Adding Space
Adding length to adjust pattern height? Cut the pattern perpendicular to the grainline at marked points.
Gently spread pieces to your desired pattern lengthening size, then slide paper underneath for stability. Secure them with tape, blending seams smoothly.
For specialized assistance, consider using dedicated pattern tools.
Don’t forget grainline extension—it’s like a guide for fabric alignment. These precise pattern alterations guarantee perfect fit and flawless garment flow.
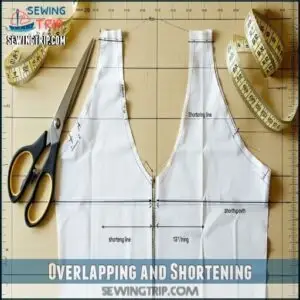
Overlapping and Shortening
Shortening a sewing pattern? Precision is key. Use Shortening Lines marked on the pattern or draw your own.
Overlap evenly to remove length, ensuring Accurate Overlapping without distortion. Tape securely and smooth edges by Blending Seams for a flawless finish.
- Double-check the overlap matches your height needs.
- Remove excess evenly across pieces.
- Shorten both front and back patterns identically.
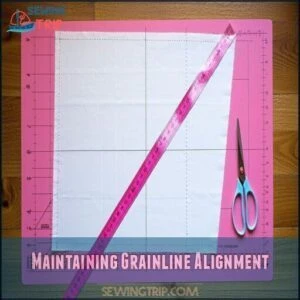
Maintaining Grainline Alignment
Think of the grainline as your pattern’s backbone—it keeps everything straight and symmetrical.
Always make perpendicular cuts during pattern alterations to maintain the grainline’s integrity. After adding or cutting length, extend the grainline consistently.
Symmetry maintenance guarantees fabric hangs correctly, avoiding twisting. Understanding fabric grainlines is vital for achieving a professional finish.
Grainline importance can’t be overstated—get this right, and your height adjustments will look flawless every time.
Pattern Alteration Techniques
You’ve got a few key techniques to master when altering sewing patterns for height, like the slash and spread and shift methods.
These approaches guarantee precise adjustments while keeping the grainline straight and the fit just right.
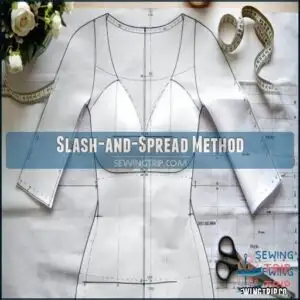
Slash and Spread Method
When altering a pattern for height, the slash and spread method works well.
Cut the pattern along the marked lines, then separate or overlap pieces based on needed size increments. Always extend the grainline to maintain alignment and avoid pattern distortion.
You can find products related to the slash spread pattern online.
Shift Method for Adjustments
The shift method is a quick way to manage height-related pattern adjustments.
It involves simple corner adjustments and maintaining straight lines.
- Cut along the shorten/lengthen line.
- Adjust by overlapping or spreading the pattern, ensuring alignment.
- Double-check measurement charts to match size ranges.
Keep the grainline straight, and true edges carefully for smooth modifications when altering patterns. The process requires careful handling to ensure straight lines and smooth modifications.
Blending Curves and Lines
Blending curves and lines guarantees pattern adjustments look seamless. Whether you’re smoothing a blended angle on a skirt lengthening project or maintaining line continuity for pant lengthening, always align seams and check visual flow.
For width changes, you might need to let out seams for a better fit.
Use these tools:
| Tool | Purpose | Example Use | Why Important | Avoid |
|---|---|---|---|---|
| French Curve | Smooth armholes, necklines | Adding Curve Angles | Keeps Curve Smoothness | Sharp Transitions |
| Clear Ruler | Straight edges | Seam Alignments | Maintains Line Continuity | Uneven Lines |
| Tracing Paper | Copying designs | Blending Adjustments | Easy pattern alteration | Overlapping Mistakes |
| Tape | Holding adjustments | Securing Extensions | Keeps Pattern Stable | Misalignment |
| Fabric Markers | Marking changes | Spotting Adjustments | Maintains Visual Flow | Faded Marks |
The tools listed are essential for making adjustments to your sewing patterns, ensuring that your sewing projects turn out professional and well-fitted. By using these tools correctly, you can achieve seamless transitions and maintain the integrity of your design. Remember to always check your work as you go to avoid mistakes and ensure the best possible outcome for your sewing endeavors.
Common Fit Issues and Solutions
When sewing patterns don’t fit quite right, it’s usually due to issues with length, bust, or sleeves.
Identifying these common problems and making proper adjustments guarantees your finished garment looks and feels made for you.
Identifying Fit Problems
When your garment doesn’t fit right, watch for drag lines, gaping necklines, tight sleeves, or misaligned shoulders.
These clues often reveal where pattern adjustments are needed, and excess fabric pooling hints at overestimation, while stress lines mean areas lack space.
Compare body measurements to the pattern’s design, identifying these fit issues guarantees better garment fit and height accuracy.
Resolving Length Discrepancies
Fixing length discrepancies starts by comparing body measurements to the pattern’s drafted height.
Use the garment coverage percentage to calculate height adjustments.
Cut along the shorten/lengthen lines, then:
- Add space or overlap the pattern.
- Blend seams to smooth the alteration.
- Extend the grainline for alignment.
- Use muslin verification to test the changes.
- Adjust ease for proper garment fit.
To finalize the alterations, ensure all changes are properly integrated into the pattern, and the pattern’s drafted height is accurately adjusted to match the body measurements.
Adjusting for Bust and Sleeve Fit
Poor sleeve length or a tight bodice can be frustrating. For a Full Bust Adjustment (FBA), slash the pattern and spread for extra room. A Small Bust Adjustment (SBA) involves removing fullness.
Accurate dart placement is key to achieving a good fit, so mark the bust apex before making adjustments.
| Fit Issue | Adjustment Needed | Tools Used | Tip |
|---|---|---|---|
| Tight sleeves | Bicep Adjustment | Ruler, chalk | Slash, spread, and blend edges. |
| Short sleeves | Sleeve Length Increase | Tape, scissors | Extend evenly on the pattern lines. |
| Bust too tight | Full Bust Adjustment | French curve, paper | Add ease without distorting curves. |
| Gaping neckline | Small Bust Adjustment | Gridded ruler | Overlap pattern for better fit. |
To ensure a good fit, it’s essential to address specific issues, such as tight sleeves or a gaping neckline, by applying the right adjustments with the appropriate tools, like a ruler and chalk.
Advanced Adjustment Methods
When basic adjustments aren’t enough, advanced methods help refine the fit for unique body proportions.
With precision cutting and specialized techniques, you can modify patterns to suit petite, plus sizes, or anything in between, which involves advanced methods.
Precision Cutting and Sewing
Precision matters when adjusting patterns for height! Nailing the details guarantees clothes fit like a dream.
- Use sharp cutting tools for clean pattern alterations.
- Align fabric grain painstakingly to avoid twists.
- Mark accurate seam allowances for professional results.
- Set a precise stitch length for durability.
- Finish seams consistently to prevent unraveling.
These steps simplify precise adjustments and elevate your sewing game.
Specialized Adjustments for Petite and Plus Sizes
Mastering sewing pattern adjustments for petite and plus sizes is all about precision. Petite proportions often require pattern shortening at armholes or waists, while plus grading addresses fuller curves.
Use muslin fitting to test changes before committing. Redrafting patterns or creating custom slopers guarantees a perfect height match.
Thoughtful pattern alterations like adjusting seams or dart placements can elevate any project, ensuring a perfect height match.
Frequently Asked Questions (FAQs)
How to adjust patterns for asymmetrical body shapes?
Adjust patterns for asymmetrical shapes by measuring both sides separately.
Adjust each side individually, altering seams, darts, or lengths accordingly.
Use muslin for testing, ensuring symmetry balance while accommodating unique proportions for a smoother fit.
What tools help with neckline adjustments?
Did you know precise tools can save hours?
For neckline adjustments, use a French curve, fabric markers, tracing paper, and a clear gridded ruler.
These keep your neckline shapely, aligned, and distortion-free, which is a key concept to achieve a shapely neckline.
How to modify patterns for posture differences?
To adjust patterns for posture differences, identify areas needing tweaks, like shoulders or back curvature.
Redraw seamlines, such as shoulder slopes or darts, to match your shape.
Always test adjustments with a muslin first.
Are there tips for non-standard arm lengths?
To adjust for non-standard arm lengths, measure from shoulder to wrist, compare to the pattern, and alter sleeve length at the shorten/lengthen line.
Always blend seam edges smoothly for a natural, even fit, which helps to achieve a natural look.
How to adjust for body shape variations?
Think of your adjustments like tailoring a suit—precision matters.
Identify areas needing tweaks, such as waist or hips.
Use darts, blending lines, and muslin tests to guarantee a natural, comfortable fit for your unique shape.
Conclusion
It’s funny how such tiny adjustments in a pattern can make or break your fit, right?
When adjusting sewing patterns for height, focus on precision at every step. Use the "lengthen/shorten" lines carefully, maintain the grainline, and always double-check your measurements.
Test with mock fabric to avoid surprises. Whether you’re adding or removing length, small, consistent changes guarantee accuracy.
Take your time, and soon, your custom-fit creations will look like they were made just for you, with a perfect custom-fit.

