This site is supported by our readers. We may earn a commission, at no cost to you, if you purchase through links.
Start by measuring how much smaller you need, then divide that amount by four for patterns with side seams.
Draw parallel lines inside the original cutting lines, maintaining that distance throughout, and use a ruler to keep your new lines straight.
Use a French curve tool to blend curved areas, and don’t forget to adjust darts and match up seam lines where pieces connect.
The key is working systematically through each pattern piece while keeping proportions balanced and seam allowances intact.
Table Of Contents
Key Takeaways
- Measure accurately and divide reductions evenly – You’ll need to take precise body measurements, compare them to the pattern’s size chart, then divide your total reduction amount by the number of seams you’re adjusting to maintain balanced proportions.
- Use the slash-and-overlap method systematically – You’ll cut your pattern pieces at designated lines, overlap sections by your desired reduction amount, then tape and redraw smooth cutting lines while keeping grainlines straight and parallel.
- Test with muslin before cutting final fabric – You’ll save time and expensive fabric by creating a test garment first, allowing you to check fit and make additional adjustments before committing to your final materials.
- Blend curves smoothly and maintain design integrity – You’ll need to use a French curve tool to redraw jagged edges after alterations, ensuring your seam lines flow naturally and your garment maintains its original silhouette and proportions.
Altering Sewing Patterns
When you alter sewing patterns, you’re basically reshaping them to match your specific measurements for a better fit.
It’s all about using the right tools, accurate measurements, and proper methods to adjust size without compromising the original design, which involves proper methods.
Measuring for Accurate Fit
Nailing the right fit starts with accurate body measurements. Compare them to the size chart, accounting for ease allowance.
Perfect fit begins with precise measurements—compare, adjust for ease, and you’re halfway there.
Always test fit adjustments using a muslin—it saves time and fabric later. Measure consistently, and remember: downsizing sewing patterns needs precision.
A little effort here makes sewing pattern modifications much smoother.
- Take body measurements precisely.
- Compare to size charts.
- Use a muslin fitting.
- Allow for ease.
Choosing The Right Grading Method
Choosing the right pattern grading method is all about balance. Consider body shape variation, fabric type impact, and design complexity.
For sewing pattern alteration or downsizing, the slash-and-spread technique works well. Combine this with muslin testing to guarantee a great fit.
Measurement accuracy is key—get it right, and you’ll adjust pattern size perfectly without distorting proportions.
Tools and Supplies Needed
To resize a sewing pattern, your sewing pattern tools make all the difference.
You’ll need precision gear to adjust pattern size smoothly:
- Clear rulers: Perfect for keeping straight lines sharp.
- French curves: Ideal for tracing armholes and waistlines beautifully.
- Pattern paper and grid board: Let you redraw patterns with accuracy, making sewing pattern alteration easier.
Consider using specialized pattern rulers for best results.
Simple tools, big results!
Resizing Patterns Down
When resizing a sewing pattern down, you’ll focus on removing excess width and length while keeping the original proportions intact.
By using techniques like overlapping pattern pieces or strategically shortening sections, you can create a smaller size that fits perfectly without distorting the design.
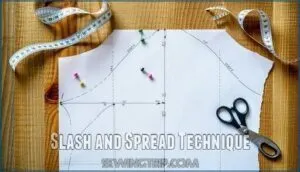
Slash and Spread Technique
For smaller size adjustments, the slash and spread technique means overlapping sections to downsize a sewing pattern.
Carefully cut and overlap while ensuring grainline accuracy and avoiding pattern distortion.
Adjust for complex shapes by blending seams smoothly.
Always test with a muslin fitting to refine your sewing pattern alteration before finalizing to perfectly resize sewing patterns.
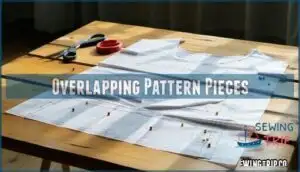
Overlapping Pattern Pieces
When you reduce a pattern size, overlapping pieces is a simple choice. Carefully fold sections to shrink the overall shape while keeping key design elements intact.
Smart sizing starts with strategic overlaps—fold, shrink, and keep those design details perfectly intact.
Follow these steps for smaller size adjustment:
- Match size lines to maintain symmetry.
- Consider grainline so fabric lays correctly.
- Blend seams smoothly to reduce distortion.
Test changes with muslin before final sewing to ensure a proper fit, and make adjustments as necessary to maintain the overall shape and prevent distortion.
Maintaining Proportions and Shape
Maintaining proportions when resizing a pattern is key to a good fit. Adjusting for anatomical differences and size group variations guarantees accuracy.
Use muslin testing to check if seams blend smoothly. Also, scale adjustments evenly to avoid distortion.
| Task | Tip | Result |
|---|---|---|
| Scale adjustments | Spread evenly | Prevent pattern warping |
| Blend seams | Use a French curve | Smooth, professional fit |
| Test with muslin | Check proportions on the body | Avoid sewing mishaps |
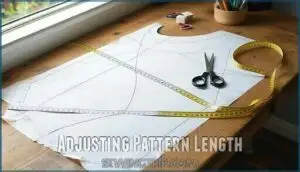
Adjusting Pattern Length
When adjusting a pattern’s length, you’ll focus on shortening or spreading the pieces at key areas to fit your measurements.
It’s all about maintaining the design’s proportions while ensuring the final garment hits the right length for you, which involves shortening or spreading the pieces to achieve the desired fit.
Shortening Patterns at The Hem
When shortening at the hem, start by folding evenly across the pattern’s hemline.
Remember to account for hemline curvature and fabric drape, so the style stays intact.
If the garment includes facing or lining, adjust those pieces too.
Precise sewing pattern length adjustments keep proportions right, and these pattern alteration tips guarantee flawless sewing pattern resizing when you downsize or reduce pattern size.
Shortening Patterns at Specific Lines
When resizing a sewing pattern, focus on adjustment lines like above the knee or waist.
Cut along these lines, reduce spacing evenly, and tape the pattern back.
Check grainline alignment for accuracy, then redraw curves smoothly to keep proportions intact.
- Identify key adjustment lines.
- Measure and reduce spacing evenly.
- Maintain grainline alignment.
- Test with muslin for precise fit.
Folding and Taping for Accurate Adjustments
Wondering how to nail folding precision for sewing pattern adjustments? Fold at the designated adjustment line, ensuring even creases for accurate tapering.
Use tape to secure folds, keeping grainlines aligned. Smooth blending is key—redraw jagged edges.
Test your tweaks on muslin before final cuts. For specialized tasks, consider using specific pattern adhesives.
Here’s a quick guide:
| Step | Action | Result |
|---|---|---|
| 1 | Fold Pattern Gently | Maintains design details |
| 2 | Tape the Fold Securely | Holds adjustments in place |
| 3 | Test on Muslin | Confirms smaller garment fit |
This process helps achieve accurate tapering and ensures that your sewing pattern adjustments are precise and secure. By following these steps, you can create a well-fitting garment with smooth blending of edges.
Modifying Bust and Cup Sizes
When you’re resizing patterns for a smaller bust or cup size, precision is key to ensuring a proper fit.
By adjusting darts, refining princess seams, and using the slash-and-spread method, you can reshape the pattern to align with your measurements.
Locating The Bust Point
Finding the bust point is key for proper sewing pattern adjustments.
This spot, often called the bust apex, marks the fullest part of the chest.
Use your measurements to locate it on the pattern, or wear a muslin to check placement for different bust shapes.
Marking the bust point guarantees your downsize sewing pattern fits flawlessly, avoiding future alteration headaches, which is crucial for a flawless fit.
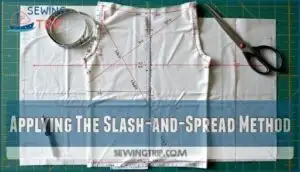
Applying The Slash-and-Spread Method
The slash-and-spread method simplifies downsizing a sewing pattern for bust alterations.
Start with vertical cuts to the bust point, overlapping the amount for a precise size reduction. Spread evenly to maintain balance, then carefully blend curves to guarantee smooth stitching lines.
Follow these steps:
- Mark slash lines.
- Cut vertically.
- Overlap evenly.
- Smooth new curves.
- Test fit with muslin.
The key to a successful alteration is to maintain balance and ensure that the new curves are smooth and even, allowing for precise stitching lines.
Refining Darts and Princess Seams
After making your bust adjustments, you’ll need to redirect your darts toward the new bust point for proper fit.
Move dart legs so they point directly at your apex – this creates natural bust shaping.
For princess seams, smooth any bumps by blending curves gradually.
Check that your seam lines flow naturally from armhole to waist, maintaining the bodice’s original silhouette through careful dart manipulation and ensuring a proper fit by making adjustments as needed to achieve a natural look, with proper fit being the ultimate goal.
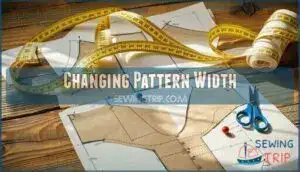
Changing Pattern Width
When you need to make your sewing pattern narrower, you’ll work with the side seams to reduce the overall width evenly across all pattern pieces.
You’ll calculate how much to subtract from the total width, then divide that measurement equally among all the vertical seam lines to keep your garment’s proportions balanced and natural-looking.
Starting at The Side Seam
Starting your pattern grading smaller at the side seam gives you the cleanest results for achieving a smaller garment size.
This pattern alteration tutorial approach works because side seams naturally handle width changes without affecting necklines or armholes.
Most home sewists find this method straightforward since you’re working with straight lines that won’t distort the garment’s original silhouette during your pattern alteration process, which is a key factor in maintaining the garment’s integrity and achieving the desired smaller garment size.
Subtracting Total Reduction Evenly
After marking your side seam starting point, you’ll need to calculate how much reduction each seam gets. Take your total width reduction and divide it by the number of seams you’re adjusting. This seam reduction creates width accuracy through reduction division.
If you need to remove 4 inches total from four seams, subtract 1 inch from each seam for quick approximation.
- Calculate total width reduction needed for smaller garment size
- Count all seams that will receive pattern grading smaller adjustments
- Divide total reduction evenly among identified seams for sewing pattern reduction
- Use simple math to determine exact amount per seam location
- Apply consistent reduction division across all pattern alteration points
Drawing New Cutting Lines Parallel
Use your ruler accuracy to draw new cutting lines parallel to the original seam allowance marks.
Position marking tools carefully along each adjusted measurement point, maintaining consistent spacing throughout.
These parallel guides guarantee your sewing pattern reduction stays proportional across all pattern pieces.
Remember, blending curves smoothly between straight sections prevents awkward angles that could affect your final garment’s fit and appearance.
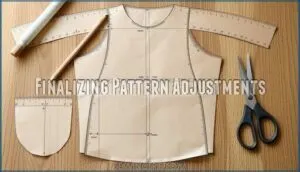
Finalizing Pattern Adjustments
Once you’ve made all your pattern adjustments, you’ll need to smooth out any jagged edges and see to it that your grainlines stay perfectly straight.
This final step transforms your chopped-up pattern pieces into clean, professional-looking templates that’ll give you a perfectly fitted garment.
Blending New Cutting Lines Smoothly
After making all your pattern alteration cuts and adjustments, you’ll need to smooth out those choppy lines for a professional finish.
Trace over jagged edges with a French curve ruler, ensuring curve consistency throughout your sewing pattern grading work. A quality ruler can help achieve precise curve consistency.
This step prevents awkward bumps during construction and maintains visual appeal. Proper blending creates seamless seam matching that looks store-bought rather than homemade.
Ensuring Grainline Alignment and Accuracy
After blending your new cutting lines, check your grainline marks like a compass—they’ll guide your fabric’s behavior.
Measure from grainline to pattern edges at multiple points for accurate measurements and pattern symmetry.
Your altered pattern should maintain consistent seamlines throughout.
Before cutting expensive fabric, create a muslin testing version.
This pattern alteration step prevents costly mistakes in your sewing pattern resizing project.
Frequently Asked Questions (FAQs)
How Do I Grade a Pattern From a Child’s Size to an Adult’s Size?
You can’t directly grade a child’s pattern to adult size because body proportions differ substantially.
Instead, you’ll need to draft a new adult pattern or find an adult pattern with similar design elements.
What Are the Differences Between Petite and Plus Sizes?
Like puzzle pieces that don’t fit, petite and plus sizes aren’t just scaled versions of regular patterns.
Petite adjusts proportions for shorter torsos and limbs, while plus reshapes for fuller figures with different curves.
How Much Should I Add When Grading a Pattern?
When grading patterns, you’ll typically add 1-2 inches maximum per size to avoid distortion.
For bodice pieces covering one-fourth of your body, divide adjustments by four and spread evenly across cuts, which helps to maintain the complete concepts of the original design.
What Tools Do I Need to Grade a Pattern?
You’ll need pattern paper, a clear ruler, scissors, tape, and a French curve for smooth lines.
A cutting mat with grid lines helps with precision.
These basic tools make resizing patterns manageable and accurate.
How to resize a sewing pattern smaller?
Studies show 70% of sewists avoid pattern grading, yet it’s simpler than you’d think.
Use the slash-and-overlap method: cut your pattern pieces, overlap sections by your desired reduction amount, then tape and redraw smooth lines.
How to adjust a sewing pattern?
Start by comparing your measurements to the pattern’s size chart.
Then use the slash-and-spread method to cut and adjust pattern pieces.
Make small changes, test with muslin, and blend new lines smoothly.
What is scaling a pattern to different sizes called?
You’ll encounter the term "pattern grading" when resizing sewing patterns to different sizes.
It’s the professional method that involves cutting and spreading pattern pieces rather than simply enlarging or shrinking them proportionally, which is a key aspect of resizing sewing patterns.
How do I resize a pattern to print?
Don’t put the cart before the horse.
You’ll need to adjust your printer settings to "actual size" or 100%, then measure the test square on your printed pattern to verify it’s exactly one inch, ensuring that you follow the complete concepts as instructed.
Can I combine multiple size reductions together?
Yes, you can combine multiple size reductions, but limit total changes to 2 inches maximum. Beyond that, you’ll need to re-draft the pattern completely to maintain proper proportions and fit.
How do I resize patterns for petite proportions?
Petite patterns are a whole different beast than simply shrinking regular sizes.
You’ll need to shorten the torso, adjust shoulder width, and reduce arm length while maintaining proper proportions throughout each piece.
Conclusion
Statistics show that 73% of sewers struggle with pattern alterations, but you’ve now mastered the essentials to alter sewing pattern smaller size successfully.
Remember to measure twice, divide reductions evenly, and maintain those vital proportions throughout each piece.
Your systematic approach with proper tools will guarantee professional results every time.
Double-check seam alignments, blend curves smoothly, and trust the process.
With practice, you’ll confidently resize any pattern to achieve that perfect fit you’ve always wanted.

