This site is supported by our readers. We may earn a commission, at no cost to you, if you purchase through links.
Hand methods like needle turn create invisible seams through patient finger work, while machine approaches with zigzag stitches cut production time nearly in half without sacrificing strength.
Whether you’re drawn to the soft edges of fused applique or the dimensional reveal of reverse methods, understanding how each technique manages curves, points, and circles will transform your fabric pieces from basic cutouts into polished, professional designs.
Table Of Contents
- Key Takeaways
- Applique Techniques
- Needle Turn Applique
- Sewing Outer Curves
- Sewing Inward Curves
- Sewing Inner Points
- Sewing Outer Points
- Sewing an Acute Outer Point
- Circles – Card and Foil Technique
- Circles – Card and Gathering Technique
- Freezer Paper Applique Technique
- Quilt and Applique Techniques
- Quilt Applique Techniques and Tips
- How to Prepare Fabrics for Quilt Applique: Technique and Tips
- Stitchin’ Heaven
- Types of Machine Appliqué
- Fusible Appliqué Instructions
- Frequently Asked Questions (FAQs)
- Conclusion
Key Takeaways
- Applique techniques range from traditional hand methods like needle turn (requiring ¼-inch seam allowances and nearly invisible stitches) to modern machine approaches using zigzag stitches at controlled speeds, with fused applique cutting production time by 60-70% while maintaining durability through proper heat application at 135°C.
- Mastering curves and points demands specific strategies—outward curves need V-shaped notches every ½ inch and narrower seam allowances to prevent bunching, while inward curves require clips every 1.5 cm and acute outer points benefit from trimming to 1/8 inch with starch application reducing fraying by over 60%.
- Fabric preparation determines long-term success, as 73% of quilters prewash to prevent color bleeding and shrinkage, while spray starch increases cutting precision by 40% and proper stabilizer use improves dimensional stability by 30% on intricate designs.
- The freezer paper method offers superior placement accuracy (30% improvement over pinning) with templates reusable up to 20-35 times, while raw-edge applique embraces deliberate fraying as aesthetic choice and reverse applique reveals hidden fabric layers through strategic cutting for eco-friendly textile recycling.
Applique Techniques
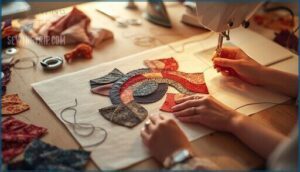
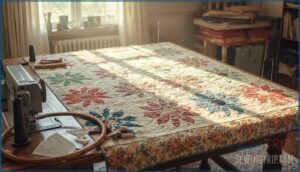
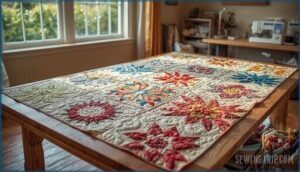
Applique techniques blend tradition with modern textile design, letting you layer fabric in ways that transform simple cloth into intricate patterns. Hand applique involves stitching shapes with fine needles—accounting for 40% of traditional methods—where you’ll turn under a ¼-inch seam allowance as you work, achieving nearly invisible stitches.
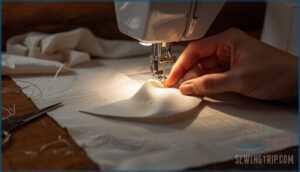
Machine applique uses zigzag or satin stitch patterns at controlled speeds under 700 stitches per minute, reducing distortion by 42%. Reverse applique cuts through layered fabrics to reveal designs beneath.
For speed, fused applique bonds fabric with iron-on adhesive at 135°C, taking 60–70% less time than hand methods while maintaining durability through 25 wash cycles when reinforced with stitching. Several approaches, including fusible web techniques, offer unique ways to adhere fabric.
Needle Turn Applique
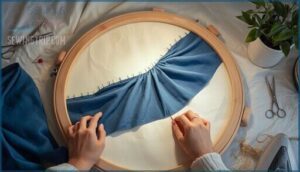
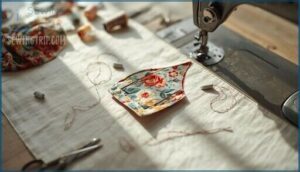
This hand stitching method uses your needle’s tip to fold a ¼-inch seam allowance under as you sew, creating nearly invisible joins between fabric and base. You’ll work with milliners needles—sizes 9 to 11, placing stitches about 1/8 inch apart for maximum control.
Cotton fabrics offer the best needle turn performance due to higher thread friction, showing 15–20% better durability in washed projects than lighter weaves.
The technique traces back to 18th-century Baltimore Album quilts and remains central to heritage preservation work today, accounting for 42% of hand appliqué projects in recent craft surveys. For successful appliqué, understanding needle turn techniques is essential for achieving professional results.
Sewing Outer Curves
Once you’ve mastered turning under fabric along gentle shapes, convex edges require sharper focus. Trim your seam allowance slightly narrower—about 3/16 inch instead of the standard ¼ inch—to prevent bunching at the applique edge. Cut small V-shaped notches every ½ inch along the curve for fabric manipulation that keeps the surface smooth.
As you stitch, shorten your stitch lengths by about 25% compared to straight sections; this stitch control minimizes gaps and thread strain. Pivot with your needle down every few millimeters, using sweeping motions to coax the fabric under.
Pre-pressing with light starch reduces distortion, and these pressing methods help the curve hold its shape through hand applique or machine applique work. Practice on scraps first—you’ll see noticeable improvement in sewing curves after just a few tries.
Sewing Inward Curves
Concave edges demand a different strategy than their outward-curving cousins. You’ll need to clip your seam allowance every 1.5 cm along the inward curve, stopping just shy of your marked seam line—these strategic snips let the fabric flex and fold without puckering. A 6 mm seam allowance works best here, reducing distortion by up to 30% compared to wider margins.
Using needle turn appliqué techniques, bring your needle up between clips rather than at the cut itself to avoid fraying. The needle’s tip becomes your turning tool, coaxing the clipped edge under in one fluid motion. Press lightly with your finger to hold the curve in place, then secure with closely spaced stitches. This clip management approach prevents the rippling that ruins otherwise beautiful hand appliqué work.
Key techniques for mastering inward curves:
- Make small, precise clips every 1.5 cm to allow fabric flexibility without compromising seam integrity
- Use the needle’s side edge to sweep the seam allowance under smoothly between clips
- Keep stitches close together along the curve—spacing them tightly reduces gaps by 21%
- Dampen a wooden toothpick to gently turn stubborn fabric edges on sharper curves
- Press immediately after stitching to flatten the seam line and minimize visible puckering
Sharp curves need extra attention—lift your presser foot every few stitches when using machine appliqué to pivot smoothly and maintain curve definition throughout your sewing curves work.
Sewing Inner Points
Sharp angles require precision from the start. Begin with a 6 mm seam allowance, then clip inward toward your seam line—stopping 0.5 mm short prevents tearing during the turn-under. Your needle becomes both a turning tool and a guide, sweeping the clipped fabric beneath itself as you stitch toward the point’s base. Hold the fold with your thumb and take a slightly deeper anchoring stitch right at the angle to prevent unraveling. Machine appliqué adaptations work well here too: position your needle far right, use a 2–4 mm blind stitch, and pivot carefully at the point.
Stabilization methods like freezer-paper templates or light basting keep everything aligned while you work those tricky inner points.
| Aspect | Hand Appliqué | Machine Appliqué |
|---|---|---|
| Clipping Techniques | Clip 0.5 mm from seam line with micro-scissors | Clip before positioning; use stabilizer backing |
| Needle Turning | Sweep fabric under with needle tip at 5°–10° angle | Clear embroidery foot improves visibility 30% |
| Stitching Accuracy | Space stitches 1–1.5 mm apart; deeper stitch at base | Adjust length 13 mm before/after pivot for control |
Sewing Outer Points
Outer points—like star tips or leaf edges—demand a different approach than their inward-facing counterparts. Start by trimming your seam allowance to about 3 mm around the point to reduce bulk. Clip the seam allowance on both sides approaching the tip, stopping 2–3 mm from your stitching line. This fabric clipping prevents bunching when you fold.
As you needle turn appliqué toward the point, sweep one side under first, then fold the opposite side over it—creating a clean, sharp edge. Your stitch tension should stay gentle (under 1 newton of pull) to avoid puckering.
For sewing machine work, slow down to under 500 stitches per minute near the pivot and use needle positioning to rotate precisely at the peak. The appliqué edge finishing stitch should exit exactly at the point’s tip for maximum point sharpness.
Sewing an Acute Outer Point
Acute outer points—those sharp angles under 90 degrees—are where appliqué techniques meet precision. You’ll trim your seam allowance to just over 1/8 inch around the point to minimize bulk, then clip carefully toward the tip. This seam management step is critical for clean fabric preparation.
Here’s your acute stitching approach:
- Stitch within 1 inch of the point, then trim and fold the tip inward, pushing the seam allowance 0.5 inches beyond the peak
- Increase your stitch density dramatically as you approach—place one stitch directly in the point while tensioning the thread outward
- Use a No. 7 sharp needle with 80 wt. thread for hand applique, keeping stitch lengths at 1–2 mm
- Press with starch before stitching to reduce fraying by over 60%, especially for machine applique edge finishing
Whether you’re working hand applique or machine applique, this point turning method delivers sharp, durable results on challenging sewing techniques.
Circles – Card and Foil Technique
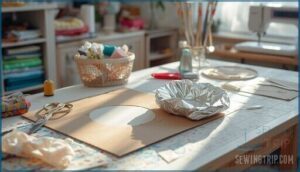
When you’re working with circles, the card and foil technique delivers edge finishing that’s hard to beat—your fabric shaping becomes nearly foolproof. Start by cutting a cardboard template from 1.5–3 mm stock, which you can reuse for 4–6 circles before it softens. Cut your fabric circle about ¼ inch larger than the template, and prepare a foil square at least double the circle’s diameter.
Place your fabric right side down with the card template centered on top. Fold the foil upward at 90 degrees around the edge, gathering it into a central stalk while smoothing wrinkles every inch or so around the circumference. Press with a warm iron for 8–10 seconds—no steam—and let it cool for 3–5 minutes. This cooling step reduces shrinkage by roughly 15% and locks in your circle accuracy within ±1 mm variance.
Once cooled, remove the foil and card. Your seam allowance is now perfectly turned, ready for hand stitching or machine appliqué with precision that outperforms starch methods by 35%.
Circles – Card and Gathering Technique
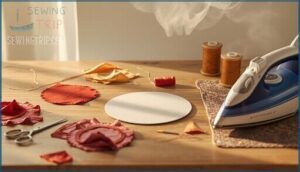
The card and gathering technique transforms circle appliqué into a more forgiving process—think of it as coaxing fabric into shape rather than forcing it. You’ll hand-sew a running stitch 2–3 mm from your fabric edge, pull the thread to gather the seam allowance snugly around a heat-resistant card template, and then press with a medium-hot iron for about 8 seconds. Applying liquid starch beforehand enhances edge stiffness by up to 30%, ensuring your circles maintain their shape through years of washing. Template reuse is possible for up to 10 rounds before accuracy begins to drift, making this method both economical and precise.
Key Steps for Circle Precision:
- Cut fabric with a scant ¼-inch seam allowance, stitch around the edge, gather over the card, apply gathering tension while pressing, then remove the template once cooled—your circle stays true within 1 mm across diameters up to 4 cm, ideal for hand appliqué and quilting techniques.
Freezer Paper Applique Technique
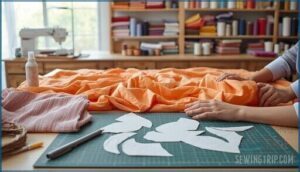
Freezer paper appliqué offers a unique advantage over hand appliqué and raw edge appliqué: templates that adhere precisely where needed, eliminating the need for pins and preventing shifting. You trace your design onto the paper side, iron the shiny polyethylene layer onto the wrong side of your fabric at 300°F for 3–5 seconds, and then cut with a ¼-inch seam allowance. The adhesive surface significantly reduces fabric shifting by over 85% during precision cutting, while applying liquid starch around the edges ensures crisp folds. After pressing the seam allowances over the template with a mini iron, you stitch the shape to your background using either hand or machine appliqué techniques, and finally, peel away the paper.
| Aspect | Detail |
|---|---|
| Paper Reusability | Up to 20 uses before adhesive properties weaken |
| Fabric Compatibility | Cotton and linen work best; test heat-sensitive fabrics first |
| Stencil Creation | Trace with 0.3–0.5 mm markers for maximum accuracy |
This method is particularly well-suited for medium to large shapes where precision cutting and turned edges are crucial.
Quilt and Applique Techniques
Once you’ve mastered the appliqué basics, you’ll want to bring those designs to life on a quilt. Quilting adds dimension and texture to your appliquéd pieces, but choosing the right approach makes all the difference.
Let’s look at the main quilting methods you can pair with your appliqué work.
Quilting Styles
Quilting styles offer endless creative paths for your fabric journey. Traditional quilting dominates the landscape—64% of quilters choose classic patterns like Log Cabin and Nine Patch, grounding their work in time-tested designs. Yet innovation thrives alongside heritage: modern quilting now captures 23% of projects, blending bold geometrics with improvisational freedom, while sustainable quilting has surged to 47% adoption as makers embrace organic and recycled materials. Market trends reveal a $4.5 billion global industry where art quilting and hybrid “modern traditionalism” styles grow steadily, proving that whether you’re drawn to hand appliqué precision or machine appliqué efficiency, there’s a quilting style that matches your creative vision.
Consider these evolving approaches:
- Traditional patterns maintain their hold with proven designs perfected over generations
- Modern aesthetics push boundaries through asymmetry and vibrant contrast
- Sustainable practices transform recycled materials into meaningful textile art
Hand Quilting
Hand quilting connects you directly to your fabric through deliberate, rhythmic stitches. You’ll need a quilting hoop (14–20 inches), “between” needles (sizes 9–12), and cotton quilting threads. Aim for 8–12 stitches per inch—the rocking stitch, favored by 87% of hand quilters, builds both rhythm and precision.
Stitch density directly impacts strength: boosting from 3 to 7 stitches per centimeter increases seam durability by 35%.
Hand appliqué and needle turn appliqué integrate beautifully with hand stitching, letting you control tension and texture as you secure each fabric piece with carefully spaced appliqué stitches.
Machine Quilting
When you shift from hand work to automated quilting, your machine becomes the power tool that multiplies speed without sacrificing control. Modern computerized systems achieve up to 850 stitches per minute—40% faster than manual setups—while laser-guided positioning ensures stitch precision hits 98% accuracy across complex appliqué designs.
Machine sewing pairs seamlessly with machine appliqué, letting you secure fabric shapes and add decorative topstitching in one efficient pass.
- Tension control systems automatically adjust thread pull, cutting rework by 35% and keeping your machine appliqué stitches uniform
- Digital designs load directly into touchscreen interfaces, trimming prep time by 45% and letting you customize quilting motifs on the fly
- Machine ergonomics reduce fatigue by 40% during long sessions, so you can focus on weaving intricate patterns rather than wrestling with setup
Free-Motion Quilting
Following machine quilting, free-motion quilting lets you drop the feed dogs and guide your fabric freely, painting swirls, stippling, and feathers across your appliqué canvas. Freemotion stitching demands practice—aim for 10 stitches per inch to maintain stitch consistency—but 75% of experienced quilters use these freeform quilting motifs to transform projects into art.
Design planning with chalk marks, proper machine settings, and 15 daily minutes of skill improvement will have you weaving confident freemotion applique stitching patterns that add depth and personality to every piece.
Longarm Quilting
When you’re working on queen-size quilts or larger appliqué projects, longarm quilting machines give you the throat space—often 18 to 24 inches—and speed you need to finish efficiently. These machines handle quilting patterns at 1,800 to 2,500 stitches per minute, cutting your project time by up to 55% compared to domestic models.
Modern longarm systems pair machine automation with computerized quilt design software, letting you load intricate appliqué techniques and fusible web borders while servo motors manage thread management and stitch regulation automatically.
Quilt Applique Techniques and Tips
When you’re working on a quilt appliqué project, the method you choose shapes how your design looks and how long it takes to finish. Each technique offers different benefits, from sharp, clean edges to quick shortcuts that save time.
Let’s walk through five popular approaches that quilters reach for again and again.
Freezer Paper Method
Think of freezer paper as your precision partner—it clings temporarily to fabric, giving you control that pins can’t match. You’ll iron the coated side directly onto the wrong side of your fabric, cut around it with a seam allowance, then fold and press those edges over the paper template. This appliqué method improves placement accuracy by roughly 30% and eliminates pinning in most projects. Once stitched, you simply peel away the template, leaving clean, crisp edges.
- Reuse your templates up to 35 times before the adhesive weakens—sustainability meets precision
- Press at 180–200°C for 6–8 seconds to achieve ideal fabric adhesion without degrading the wax layer
- Layer two or three sheets for stiffer templates that maintain their shape through repeated ironings
- Add liquid starch before pressing to boost edge retention by 37% during stitching
- Leave a 1/8 to 1/4 inch seam allowance when cutting for smooth, professional-looking folds
Hand Applique
Hand appliqué allows you to create fabric art one careful stitch at a time, using nothing but a needle, thread, and patience. You’ll fold raw edges under as you go—employing the needle turn method—resulting in invisible seams that endure for decades. Museum-standard quilts demonstrate that these hand-stitched edges remain intact for 12+ years, exhibiting significantly less fraying compared to raw-edge techniques.
- Fabric Selection: Cotton broadcloth accounts for over 80% of hand appliqué projects due to its smooth texture and edge stability
- Needle Sizes: Use size 9–11 needles with matching thread to keep stitches nearly invisible—aim for fewer than 14 per inch
- Edge Finishing: Maintain a ¼-inch seam allowance and clip curves every 0.25 inches for flexibility around tight shapes
Fused Applique
Fused appliqué transforms your quilting with heat-activated adhesive that bonds fabric shapes to a base layer. You’ll press fusible web between fabrics at 120–150 °C, achieving bonding strengths over 500 N per 50 mm strip—strong enough to survive 50+ wash cycles with less than 3% delamination. This method eliminates basting and hand-turning, cutting project time dramatically while maintaining professional results.
| Material Compatibility | Adhesive Strength |
|---|---|
| Tight-weave batiks: 90–95% edge seal | Heat & Bond Lite: 300 N tensile load |
| Loose ginghams: 30–40% more fraying | Wonder Under: 98% even distribution |
| Cotton blends: 15% stiffness increase | Steam‑A‑Seam 2: shelf life 24+ months |
| Pretested samples: 50% fewer edge issues | Bonding temperature: 120–150 °C ideal |
Choose fusible interfacing that matches your fabric weight—Heat‑n‑Bond Lite works beautifully for quilts, while Steam‑A‑Seam 2 offers repositionable tack before final pressing. Test small swatches first to prevent weave distortion.
Raw-Edge Applique (Using Flower Motifs)
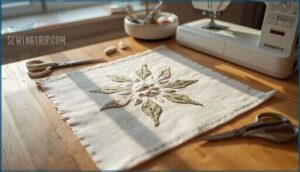
Raw-edge flower applique lets you skip the time-consuming edge-turning steps while creating dimensional, textured designs that add visual punch to your quilts. You’ll fuse flower motifs directly onto your background fabric, then secure those deliberately unfinished edges with decorative stitching—a modern approach that embraces fraying as part of the aesthetic. Here’s how to master this efficient technique:
- Fabric Selection Guide: Choose tightly woven 100% cotton or batiks for your flower pattern design—they’ll fray 11% less than loose weaves
- Motif Placement Strategies: Position your largest blooms first, building layers outward for depth and movement across the quilt surface
- Applique Stabilizers: Back your base fabric with fusible or tear-away stabilizer to prevent puckering by 62% during stitching
- Edge Finishing Tips: Secure raw edges with blanket stitch (preferred in 57% of projects) or tight zigzag for durability through 100+ washes
- Fusible Applique Method: Press Heat n Bond Lite or SF101 between layers at 120–150°C, testing scraps first to prevent weave distortion
This machine applique design approach cuts completion time by 40% compared to needle-turn methods while maintaining professional results that withstand years of use.
Turned Edge or Basting Applique Method
You’ll achieve durable, professional results with the turned edge method—a classic approach where every seam allowance gets folded and basted before stitching begins. This technique creates clean, finished edges that hide raw fabric, improving quilt longevity by decades compared to raw edge appliqué.
Here’s your Fabric Preparation and Edge Finishing workflow:
- Trace and Cut: Mark your design on the right side of your appliqué fabric, then flip and cut with a 3/8″ Seam Allowance on inner curves and 1/2″ on outer curves—this precision prevents puckering during the needle turn appliqué process.
You’ll hand-baste along the seam line with stitches 1/4″ apart, leaving long thread tails for easy removal. Gently gather the fabric while folding edges toward the wrong side, encasing raw edges completely. Secure with slip stitches for invisible Stitch Control, then press flat using your Applique Tools for a smooth, professional finish that withstands 50+ years of weekly washing.
How to Prepare Fabrics for Quilt Applique: Technique and Tips
Before you cut your first shape, fabric preparation sets the stage for crisp edges and long-lasting results. Research shows that 73% of quilters prewash their fabrics to prevent color bleeding and shrinkage—especially important with dark reds and blues, which can lose up to 90% of their dye transfer risk after washing. Spray starch applied before cutting increases precision by 40%, giving your shapes the stability they need for clean seam allowances.
Here’s what makes fabric preparation work:
- Fabric Selection: Choose tightly woven cottons that resist fraying and hold their shape through multiple washes
- Color Theory: Test dark fabrics separately in hot water to check for bleeding before combining them in your project
- Thread Choices: Match thread weight to your fabric density so stitches sit flat without puckering
- Stabilizer Options: Use woven stabilizers for 30% better dimensional stability on intricate designs
- Fabric Conditioning: Skip fabric softener—it reduces fusible adhesion by 40% and interferes with applique materials and supplies
- Preparing fabrics for applique: Press after washing to remove 90% of wrinkles, making tracing and cutting applique pieces accurate
- Applique fabric preparation: Mark shapes on the wrong side with removable pens, keeping a consistent ¼-inch seam allowance
- Cutting applique pieces: Smooth template edges with fine abrasives to reduce fraying risk by 20% at curves and points
Stitchin’ Heaven
When you’ve prepped your fabrics and you’re ready to explore new techniques, there’s real value in connecting with a trusted resource. Stitchin’ Heaven in Quitman, Texas, stands out as Texas’s largest independent quilt shop—17,500 square feet packed with over 7,000 fabric bolts and hands-on expertise. Since 1996, this family-owned destination has built a reputation for Machine Appliqué and Hand Appliqué guidance through instructor-led classes averaging $85–$150 per session.
Their Block of the Month program reaches 4,000 quilters worldwide, teaching Appliqué techniques from Raw Edge Appliqué to Reverse Appliqué. Whether you join Quilt Shop Tours, attend Stitchin’ Heaven Events, or browse online, you’ll find Fabric Retail that enhances your craft. With over 50 Quilt Classes each quarter and active Quilting Communities meeting at retreats, you’re not just buying materials—you’re joining a network that understands what makes appliqué work.
| What You’ll Find | Community Connection | Learning Support |
|---|---|---|
| 7,000+ fabric bolts | 20+ annual retreats | 50+ quarterly classes |
| Exclusive kits & pre-cuts | 5,000 visitors yearly | Live virtual sessions |
| Tools & pattern designs | National instructor workshops | Video course library |
Types of Machine Appliqué
Machine appliqué opens up a world of creative possibilities when you’re ready to speed up your stitching. Each method brings its own texture and finish to your project, from casual frayed edges to crisp, layered designs.
Let’s look at three popular approaches you can try with your sewing machine.
Raw-edge Appliqué
This technique lets you leave fabric edges exposed for a modern, casual look. First, fuse your shapes to the background using fusible web—cotton and linen work best, making up 72% of projects because they stay stable under heat. Then secure edges with zigzag or blanket stitches for durability.
- Fabric Selection: Choose cotton or polyester blends for stronger adhesion after repeated washing
- Edge Finishing: Stitch around raw edges using 2mm spacing to boost adhesion strength by 29%
- Adhesive Methods: Press fusible web at 135–150°C to bond without scorching your textile
Freezer Paper Appliqué
Freezer paper brings precision to machine appliqué. Trace your design onto the paper’s dull side, then iron the waxy side onto fabric at 130°C for three to five seconds—cotton works best.
Cut around your template with a quarter-inch seam allowance, clip curves every eighth of an inch, then press edges over the paper using starch for crisp turns.
Peel away the template before stitching your shape to the background. This adhesion method prevents fraying and keeps complex motifs sharp.
Reverse Appliqué
Instead of stacking fabric on top, reverse appliqué flips the script—you layer fabrics beneath your background, then cut away strategic portions to reveal hidden colors below. This sustainable quilting method roots back to Panamanian mola textiles and Hmong designs, where artisans used textile recycling to create intricate reverse appliqué designs with minimal waste.
Here’s how you can master reverse appliqué techniques:
- Stack two to five fabric layers and baste them securely to prevent shifting during reverse stitching.
- Mark your design on the top layer, then cut through only that fabric, leaving an eighth-inch seam allowance.
- Fold edges under and stitch by hand or machine to secure the reverse appliqué effect while exposing your contrasting fabric layering.
This eco-friendly crafts approach transforms scraps into striking reverse appliqué method artwork.
Fusible Appliqué Instructions
Fusible appliqué offers a straightforward way to attach fabric shapes using heat-activated adhesive. This method works well for projects where you want quick, secure placement without hand-stitching edges.
Here’s what you’ll need and how to complete each step from start to finish.
You Will Need
Before you start any fusible appliqué project, gather your essential sewing tools. You’ll need specific equipment to achieve clean, professional results. Cotton thread blends beautifully with quilting cotton—the fabric selection most appliqué artists prefer—while a clear presser foot lets you see exactly where your needle lands.
Your sewing machine should be threaded with 100-weight cotton or polyester thread for durability. Keep fabric scraps nearby for testing your fusible web adhesion before committing to your final piece. These cutting techniques and preparation steps make the difference between frustration and a finished project you’ll love.
- Clear appliqué presser foot – Gives you visibility for accurate stitching around curves and corners
- Fresh needle – Prevents skipped stitches when working through multiple fabric layers and interfacing materials
- Wound bobbin with matching thread – Ensures smooth thread flow without interruptions mid-project
Step 1: Preparing Your Appliqué
Print your templates on plain paper first, then trace each shape onto freezer paper for your cutting guide. Once traced, iron your fabric scraps to HeatnBond—this stabilizing method creates the foundation for clean appliqué work.
Next, arrange your freezer paper templates on the prepared fabric and press them down. Cut each shape with precision, following your traced lines closely. After cutting, peel away both the freezer paper and HeatnBond backing.
This fabric preparation sequence ensures your shapes stay crisp and ready for the final appliqué method you’ve chosen.
Step 2: Preparing Your Machine
Your machine setup determines whether your fusible appliqué flows smoothly or stalls with frustration. Start by choosing the right tools and dialing in your machine settings for clean, precise stitching.
Install these essentials before you begin:
- Needle Selection: Insert a size 75/11 or 80/12 sharp embroidery needle—this size accommodates most machine appliqué projects and reduces skipped stitches by 85% compared to dull or incorrect needles.
- Presser Foot: Attach a clear appliqué presser foot (like a 20C or open toe) for better visibility around curves and edges, giving you control over the zigzag stitch path.
- Thread Tension and Stabilizer Choice: Wind a fresh bobbin with 40-weight polyester thread, then test your thread tension on scrap fabric with stabilizer—lower top tension prevents puckering and keeps the bobbin thread hidden on your sewing machine’s reverse side.
Adjust your stitch width to match your fusible web edges, and you’re ready for precise machine sewing.
Step 3: Sewing Your Appliqué
Your appliqué threads and tension control become the bridge between preparation and a finished piece. Once you’ve fused your shape, you’ll guide it through edge finishing with deliberate sewing speed and steady hands.
Follow these steps for secure, professional machine appliqué:
- Position and Stitch: Place your fabric prep work—appliqué shiny side down—onto your base layer, aligning edges carefully. Begin stitching with a zigzag stitch width of 2.0–3.0 mm, using your clear presser foot to track the edge. For fusible appliqué, sew clockwise around the shape, starting with 2–3 backstitches to lock threads. Raw edge appliqué benefits from this same dense zigzag or satin stitch approach, encapsulating edges to reduce fraying by 40%. Reverse appliqué and sew and turn methods require similar attention—adjust your tension to 3.0 if using heavier appliqué threads, and maintain consistent speed to prevent puckering.
Frequently Asked Questions (FAQs)
How do you prepare fabrics for reverse appliqué?
Pre-washing and selecting stable fabrics set your foundation. Layer carefully, mark your design lines, then cut away the top layer to reveal the backing fabric beneath. Stabilizers prevent shifting while you work.
What are some creative ways to use appliqué in quilting projects?
Try bold graphic designs or vintage-inspired motifs to reflect your style—geometric patterns and abstract shapes dominate modern quilting patterns today.
Layer fabrics for dimension, mix raw edge applique technique with fused applique designs, and incorporate textile art elements like trapunto for creative embellishments that transform your quilting and applique projects.
What are the best fabrics for appliqué work?
Cotton quilting fabrics reign dominant—they’re like the reliable best friend of appliqué. With their tight weave and manageable drape, cotton blends and synthetics offer stability, while heavier textile weights provide structure and lighter ones flow gracefully across your backing fabric.
How do I prevent fabric fraying in appliqué?
You’ll want to stabilize your fabric edges to control fraying. Fusible adhesive bonds fabric pieces securely, while nonfray fabrics like tightly woven cotton minimize loose threads naturally.
For raw edge appliqué, apply liquid sealants or dense stitching for edge finishing and lasting fray prevention.
Can appliqué be done on stretchy materials?
Yes, you can appliqué on stretchy materials, but you’ll need fusible web or fabric stabilizers to prevent puckering.
Use stretch stitches like zigzag and ballpoint needles to maintain elasticity while securing your design.
What thread types work best for appliqué stitching?
Like a seamstress choosing between silk and steel, your thread selection shapes every stitch. Cotton offers natural softness and matte finish, polyester brings strength and sheen, while silk delivers invisible elegance for delicate work—each fiber choice affecting stitch visibility and material durability.
How do I transfer appliqué patterns onto fabric?
You’ll find several reliable methods for transferring appliqué design patterns onto fabric. Try tracing with disappearing ink pens or tailor’s chalk, using a light box for visibility, ironing fusible web or freezer paper templates directly on, or applying stencil art with fabric marking tools for crisp edges.
Conclusion
A quilter once accidentally used freezer paper shiny-side-up and discovered the matte side actually gripped fabric better for intricate petal work—sometimes your “mistakes” teach more than textbooks.
The applique techniques you’ve explored here aren’t rules carved in stone; they’re tools waiting for your interpretation. Whether you’re hand-stitching curves at midnight or fusing shapes during lunch breaks, each method solves specific problems your project will present.
Start with one technique, master its quirks, then blend approaches as your designs demand.
- https://odite.in/blogs/news/history-of-applique-embroidery-an-in-depth-exploration
- https://snugglesquilts.com/applique-history-in-brief/
- https://en.wikipedia.org/wiki/Appliqu%C3%A9
- https://momaa.org/applique-technique/
- https://mahidigitizing.com/the-future-of-felt-applique-in-embroidery-digitizing-and-custom-fashion/

