This site is supported by our readers. We may earn a commission, at no cost to you, if you purchase through links.
First, match your needle and thread to the fabric; using the wrong ones can lead to skipped stitches and fabric tears.
Don’t overlook fabric weight and drape—test them before you start.
Remember the old adage: measure twice, cut once.
Also, set your thread tension just right to avoid unsightly seams.
Pressing seams is like ironing out life’s little wrinkles for a professional finish.
Finally, control your sewing speed for consistent stitching.
Keep these tips handy, and soon enough, your sewing projects will look tailor-made.
Table Of Contents
- Key Takeaways
- Choosing The Right Fabric
- Mastering Your Sewing Machine
- Essential Sewing Techniques
- Avoiding Common Sewing Mistakes
- Seam Finishing and Pressing
- Selecting The Right Pattern
- Preparing Your Fabric
- Maintaining Your Sewing Machine
- Understanding Your Body Measurements
- Avoiding Overconfidence
- Frequently Asked Questions (FAQs)
- Conclusion
Key Takeaways
- Match your needles and thread to your fabric to prevent skipped stitches and fabric tears.
- Always pre-wash your fabric to avoid shrinkage and color bleeding surprises.
- Measure twice, cut once, and use your presser foot correctly for accurate and even stitching.
- Regularly maintain your sewing machine, including checking for bobbin type issues that can cause thread breaks and needle breaks, and use the correct tension and stitch length settings to ensure smooth operation and consistent results.
Choosing The Right Fabric
You’ve picked out the perfect pattern, but don’t start cutting just yet!
Choosing the right fabric is like finding your sewing soulmate – it can make or break your project.
So let’s make sure you’re not accidentally pairing silk with a swimsuit or denim with a ballgown.
Understanding Fabric Properties
Choosing fabric isn’t just about color; it’s an art, my friend. Consider these:
- Weight and Drape: Light fabrics flutter beautifully but heavy ones hang with authority.
- Stretch and Shrinkage: Pre-wash and stretch-test to avoid surprises.
- Grain Direction: Keep it straight to dodge puckering disasters.
Mastering these will make you the Picasso of fabric choice!
Fabric Selection for Different Garment Types
When pondering fabric properties, consider the garment’s type.
Fancy a flowy dress?
Aim for lightweight fabrics with excellent drape and a hint of stretch.
Planning a structured jacket?
Opt for heavier, textured options.
Matching fabric weight and occasion prevents common sewing mistakes like misaligned seam allowance and using inappropriate needle types. Understanding the importance of proper thread tension settings, such as those detailed in Brother sewing machine issues, can also make your sewing journey smoother and more enjoyable.
Testing Fabric Suitability
Before you start sewing, test your fabric!
A simple drape test reveals how it’ll hang.
Swatch it to check the color and texture.
A weight check makes sure it’s suitable for your sewing machine and project.
Don’t forget the shrinkage test—you don’t want your new dress to shrink after the first wash!
These checks guarantee fabric suitability and save you from frustrating sewing mishaps.
Common Fabric Selection Mistakes
So you’ve done your drape test, but picking the right fabric can still feel like nailing jelly to a wall. Watch out for these common pitfalls:
- Ignore fabric weight: It affects the garment’s behavior.
- Skip shrinkage tests: Beware of surprise shrinking!
- Miss color bleeding: Avoid colorful disasters.
- Overlook grain direction: It’s key for fit.
- Forget seam finishing: Elevates your project’s look.
Mastering Your Sewing Machine
Understanding your sewing machine can feel like trying to make sense of a mysterious contraption, but mastering its many parts is key to avoiding common mistakes.
From selecting the right needle for your fabric to recognizing when it’s time for a change, these tips will keep your projects smooth and frustration-free.
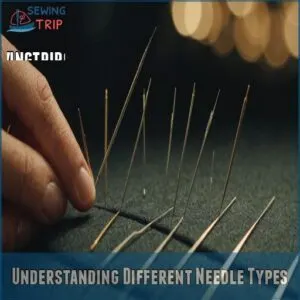
Understanding Different Needle Types
Grasping needle types is like choosing the right dance shoes—each step depends on the surface.
With needle size, points, and brands, you’re playing matchmaker for your fabric, ensuring there’s no needle drama.
From universal to ballpoint, explore the ocean of needle materials.
Avoid the temptation to shortcut with blunt needles; that way lies uneven thread tension!
Matching Needles to Fabric Types
Choosing the right needle for your fabric is like picking the perfect pair of shoes for an outfit.
Match needle size to fabric weight to avoid common mistakes.
Here’s how to master it:
- Fine fabrics need small needles (size 70/10).
- Medium-weight fabrics pair with size 80/12 needles.
- Heavy fabrics require larger needles, like 100/16.
Effects of Using Wrong Needles
When you choose the wrong needle for your sewing project, things can get messy fast.
You might notice skipped stitches or fabric tears, as the needle struggles to cooperate.
Needle breakage is frequent, too, causing a real hitch in your plans.
Even thread knotting is a potential nightmare.
Avoid these mishaps by matching your needle to the fabric.
Signs of Needle Damage or Wear
Wrong needles wreak havoc, but signs of needle damage demand equal attention. Notice these? It’s time for a change! Bent needle making your stitches dance chaotically, a broken tip causing thread snarls, or mysterious fabric tears. Each spells trouble.
Listening for thudding or popping sounds during sewing can also indicate a problem, a sign that it’s time to check needle lifespan and wear signs.
Here’s how to act:
- Skipped stitches: Frustrating gaps.
- Thread snags: Pesky knots.
- Fabric: Heartbreak central!
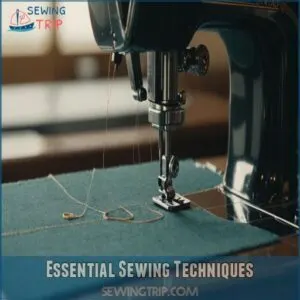
Essential Sewing Techniques
Ready to transform your sewing skills? We’ll cover essential techniques that’ll help you avoid those frustrating mistakes—like that time I accidentally sewed my finger to the project!
Measure Twice, Cut Once
Ever botched a project because measurements were off? "Measure twice, cut once" is your sewing mantra. With pattern accuracy and fabric alignment, you’ll avoid those head-smacking moments. A faulty cut won’t ruin your day if your basics—cutting tools and marking techniques—are on point. Oh, and don’t skip the pre-wash! It’s a lifesaver.
| Tip | Why It Matters | How to Execute |
|---|---|---|
| Pattern Accuracy | Guarantees proper fit | Double-check dimensions |
| Fabric Alignment | Avoids skewed garments | Align with grain lines |
| Cutting Tools | Clean, precise cuts | Use fabric scissors only |
Use Your Presser Foot
After double-checking those measurements, let’s chat about the presser foot.
It’s your sewing sidekick, holding fabric steady.
Experiment with different presser foot types; each has its magic.
The right foot pressure and placement can save the day, avoiding fabric bunch-ups.
Adjust foot tension too.
Your stitches will thank you, looking all neat and fabulous!
Get The Right Tension and Stitch Length
You know, mastering the presser foot helps, but don’t overlook adjusting the tension and stitch length for that picture-perfect stitch.
A little wrong turn here can wrinkle your project.
Troubleshoot those tension issues like a pro!
To ensure proper fabric movement and prevent issues like fabric bunching or uneven stitches, check your feed dog height and adjust it if necessary, referring to guidelines on sewing machine troubleshooting for common feed dog issues. Match your stitch length to your fabric type, and make sure your sewing machine calibration is spot on for a balanced stitch quality.
Don’t Forget Your Seams
Seams, the silent heroes of sewing, can’t be neglected.
Always remember to choose the right types of seams for your project, ensuring seam allowances are just right.
Pressing seams is like a spa day for your fabric—don’t skip it.
And if you want professional finishes, consider serging seams.
Keep seams strong, and your projects will shine.
Gaping Buttons
Perfecting seams is essential, but let’s not forget about those pesky gaping buttons.
Make sure button placement is snug by matching buttonhole size with your buttons.
To achieve this, consider mastering button attachment techniques, which involve identifying the correct button placement and using pins to temporarily secure the button in place.
If your fabric stretches, add a button shank for flexibility.
Check tension settings to avoid puckered fabrics.
Remember, well-placed buttons can make your projects shine like a well-tuned orchestra. Happy sewing!
Avoiding Common Sewing Mistakes
Sewing disasters happen to the best of us, but with a little attention to detail, you can avoid the most common pitfalls.
Whether it’s using the wrong needle or pushing the fabric instead of letting the machine do the work, recognizing these slip-ups will save you from unnecessary frustration and help you ace your sewing projects.
Choosing The Wrong Thread
Your project’s success hinges on the right thread!
Matching thread weight to your fabric is key; too heavy, and it’ll show; too light, and it’ll break.
Consider thread color carefully—a slightly off shade can ruin your masterpiece.
Proper thread tension prevents bobbin issues and keeps your stitches even.
Remember, the right thread type makes all the difference!
Choosing The Wrong Needles
If you’re tackling stubborn thread issues, remember that choosing the wrong needles can lead straight to frustration city. It’s like using a butter knife to cut steak—doomed from the start. Here’s what to keep in mind:
- Needle types matter
- Check fabric compatibility
- Avoid needle damage
- Skip skipped stitches
- Prevent thread knotting
Pushing or Pulling Fabric
Changing out needles isn’t the only way to improve stitches.
Properly threading the machine, including threading errors to avoid, can greatly affect fabric feed. Letting the sewing machine handle fabric feed means avoiding pushing or pulling.
This practice helps create even tension and smooth flow.
You’re free to focus on consistent speed and efficient presser foot use.
| Problem | Solution |
|---|---|
| Uneven stitches | Use fabric feed |
| Fabric jams | Avoid pulling |
| Crooked seams | Keep smooth flow |
Not Using Speed Control
Ever felt like your sewing machine has a mind of its own?
Using sewing speed control can save your sanity and improve stitch quality.
Keep a consistent pace, and you’ll notice the benefits:
- Machine control for precise stitching
- Even stitching for that professional look
- Adjust speed to match skill level
Give it a whirl, and don’t rush perfection!
Seam Finishing and Pressing
Regarding seam finishing and pressing, you’re not just putting the cherry on top of your sewing project—you’re adding the entire sundae!
Neglecting these steps is like wearing mismatched socks to a fancy dinner; you might get by, but it’s way more polished to finish your seams properly and press them for that neat and professional look.
Importance of Seam Finishing
Imagine sewing a beautiful garment, but halfway through, your seams turn into a fraying mess.
Seam finishing is like your sewing guardian angel, preventing fraying and ensuring garment durability.
Plus, it gives your work a professional finish that says, "Yes, I made this!"
Pay attention to seam allowance details for perfect results every time.
| Seam Finishing Importance | Benefit | Tip |
|---|---|---|
| Fraying Prevention | Longevity | Use zig-zag stitch |
| Garment Durability | Strength | Opt for serged edges |
| Professional Finish | Appearance | Press seams well |
Common Seam Finishing Techniques
Seam finishes are like the cherry on top of your sewing projects, preventing frayed edges with techniques such as using a serger vs. zig-zagging.
You might lean on a trusty overlock stitch or opt for the neatness of French seams for durability.
Flat felled seams are great for strength, while raw edge finishing can be a stylish choice in casual wear.
Choosing The Right Seam Finishing Technique
So, you’ve mastered a few seam finishing types, great! Now, picking the right one depends on what you’re making. Think about your fabric; will it fray easily? What’s the garment type? A simple zig-zag stitch works wonders on most fabrics, but for delicate materials, consider a rolled hem.
- Consider the fabric’s weight and tendency to fray.
- Match the seam finish to the garment type for a polished look.
- Prioritize aesthetic appeal; a pretty finish enhances your creation.
Tools for Seam Finishing
Choosing the right seam finishing techniques is half the battle; now, it’s time to equip yourself with the right tools.
A reliable serger helps make overlock stitches a breeze.
If fraying prevention is on your mind, consider a zig-zag stitch or binding techniques to keep those edges tidy.
These tools can transform your sewing game, offering both flair and durability.
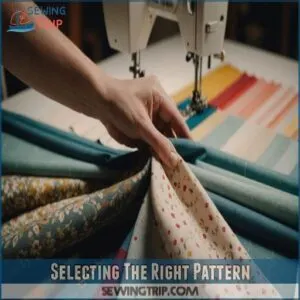
Selecting The Right Pattern
When you’re ready to select a pattern, picking the right one can feel a bit like finding the perfect recipe—you want something tasty, but not too complicated that you miss dinner.
Start with patterns that are beginner-friendly and focus on understanding the size charts and necessary adjustments, so you’re not stuck with a wearable tent or a second skin.
Choosing Patterns for Beginners
With a world of patterns out there, start simple!
Think of patterns as your sewing blueprint.
Look for ones that offer looser fits and fewer pieces, easing you into the groove.
Don’t forget to focus on pattern ease and fabric weight; they’re your best friends.
Trust the pattern instructions, and remember: seam allowance isn’t just a suggestion—it’s a must!
Understanding Pattern Size Charts
You’ve picked a pattern that screams potential, but now let’s talk size charts.
They’re like a GPS for your sewing journey, helping you navigate body measurements, ease allowance, and sizing discrepancies.
Since sewing patterns are often not true to size, understanding how to read size charts is essential, as seen in sewing pattern size guides.
Keeping fabric stretch in mind, compare these numbers to steer clear of misfits.
It’s your secret weapon for avoiding surprises when those fabric pieces come together.
Making Pattern Adjustments for Better Fit
Sizing charts give you a good start, but let’s get personal.
Pattern adjustments guarantee that perfect fit you crave.
When adjusting, think of it as your pattern’s gym session—working on its shape for a custom look.
- Adjust bust for personalized contours
- Shape the waist to your liking
- Extend sleeve length
- Modify skirt length
- Tweak pant legs
Common Sizing Mistakes
Selecting a sewing pattern is like the first date—it sets the tone for the whole project.
Avoid common sizing mistakes by paying attention to pattern ease and body proportions.
Remember, the garment fit can be tricky if you overlook fabric stretch.
Use accurate measuring techniques; otherwise, you might end up with a surprise wardrobe malfunction!
Preparing Your Fabric
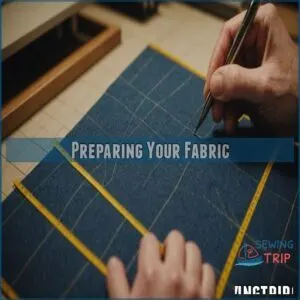
Before you even think about cutting, let’s get your fabric ready! Pre-washing prevents those post-sewing surprises like shrinkage and color bleeding, ensuring your masterpiece stays perfect.
Importance of Pre-washing Fabric
Ever wonder why your new clothes sometimes don’t fit quite right after washing?
That’s due to fabric shrinkage.
Pre-washing fabric isn’t just about cleanliness; it checks for color bleeding and enhances fabric drape.
Think of it as a first date with your fabric—it sets the stage for a lasting relationship in your sewing journey.
Pre-washing Techniques for Different Fabrics
When getting ready to sew, think of pre-washing like giving your fabric a spa day.
Different fabrics, from cottons to silks, need unique water temperatures to shine.
Cotton loves a warm wash, while silks prefer cold.
This helps manage shrinkage and color fastness.
Handle each fabric type with care, and you’re set for a flawless start!
Handling Fabric Shrinkage and Color Bleeding
A handful of simple tricks can save you from fabric mishaps.
Before sewing, run a pre-washing spree to tackle shrinkage control and test for colorfastness to dodge pesky dye bleeding.
Nobody wants a surprise when their garment shrinks two sizes!
Testing fabric with cold water checks its resilience, ensuring your vibrant creation looks perfect wash after wash.
Proper Fabric Pressing Before Cutting
Just tamed that fabric shrinkage monster? Great! Now, grab your pressing tools.
A good press pre-cuts helps the fabric lie flat, highlighting the grain direction like a pro.
Trust me, don’t rush this stage.
With the right heat settings, you’ll sidestep pressing mistakes, ensuring each piece is perfect.
It’s like ironing out life’s little wrinkles before they become big ones!
Maintaining Your Sewing Machine
Keeping your sewing machine in tip-top shape, which includes checking that the needle is properly seated and the needle clamp screw is tightened, is like giving your car a regular tune-up; it guarantees smooth operation and extends its lifespan.
Don’t forget, a little cleaning and oiling can prevent headaches later, saving you from fabric disasters just when your creative juices start to flow.
Basic Cleaning and Oiling Procedures
Your sewing machine’s like a trusty sidekick—keep it smooth and quiet with regular TLC.
Set a machine maintenance schedule; it’s as important as your morning coffee.
Use the right oil type and cleaning tools to pamper those intricate sewing machine parts.
Avoid common cleaning mistakes like over-oiling—no one likes a greasy mess!
Keep it simple; your projects will thank you.
Identifying Common Machine Issues
Regular cleaning and oiling using a sewing machine maintenance checklist can prevent damage and extend the life of your machine. Machine maintenance is key to sewing success! Listen for unusual machine noise; that often indicates thread tension issues, such as uneven stitches or puckered seams, which can be fixed by checking and adjusting the tension discs common sewing machine problems.
Here’s what to watch for:
- Thread jams – a common culprit.
- Stitch skipping – a sign of a dull needle.
- Needle breakage – replace it immediately!
- Bobbin problems – are you using the right bobbin?
Addressing these little gremlins keeps your sewing flowing smoothly.
Scheduling Professional Maintenance
When’s the last time your sewing machine saw a professional?
Regular check-ups keep it humming like a bee and extend its life.
Trust a seasoned technician for tweaks and learn about costs to dodge surprises.
Curious about how often? Aim for a yearly tune-up.
Avoid headaches with preventative care and boost your machine’s lifespan.
| Frequency of Maintenance | Typical Costs | Benefits |
|---|---|---|
| Every 6 months | $50 – $100 | Smooth Operation |
| Annually | $75 – $150 | Longer Machine Lifespan |
| As Needed | Varies | Fewer Major Repairs |
Proper Storage of Sewing Machines
Maintaining a sewing machine’s longevity is easier than you think.
After arranging professional upkeep, consider these storage tips.
- Dust Covers: Slip on a cover to fend off dust bunnies.
- Humidity Control: Keep it dry to avoid rust; your machine’s not a fan of humidity.
- Proper Space: Store vertically or horizontally, whichever fits your space best.
Understanding Your Body Measurements
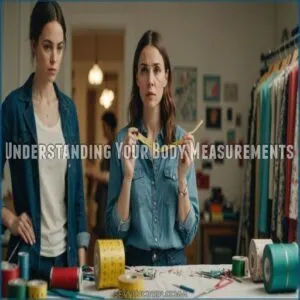
Knowing your body measurements is like having the secret key to making clothes that fit just right, saving you from the frustration of baggy waists or snug shoulders.
Grab your measuring tape, because learning these measurements can make all the difference in adjusting patterns and avoiding those all-too-common sizing mistakes.
Taking Accurate Body Measurements
Before jumping into sewing, get your body measurements right—it’s like your garment’s GPS.
Grab a flexible measuring tape and note key points: bust, waist, and hips.
Remember, measuring snugly but comfortably guarantees fittings aren’t awkward later.
And hey, don’t rush! Accurate measurements now save a world of fabric pain and guarantee you truly rock that outfit!
Using Body Measurements to Adjust Patterns
So, you’ve got your measurements down pat.
Let’s take those numbers and sprinkle a little magic with pattern adjustments!
Whether it’s bust, waist, hip, or length adjustments, making a pattern fit your unique shape means liberation from standard sizes.
It’s like crafting your tailoring toolkit, and once you get it right, you’ll feel like a sewing wizard!
Common Sizing Mistakes to Avoid
When sewing, you’re gonna want to dodge those sizing pitfalls.
- Accurate measurements: Always double-check your numbers—no eyeballing this time, and make sure to take the right body measurements for sewing, like the bust and waist measurements, to get a perfect fit.
- Pattern ease: What’s ease? That breathing room in your garment fit—keep it comfy.
- Fabric shrinkage: Pre-wash to avoid that “fitting like a glove” surprise.
Trust me, you’ll thank yourself later!
Avoiding Overconfidence
We’ve all been there – tackling a project way beyond our skill level, thinking we’re ready for a sewing marathon!
Let’s avoid those frustrating (and sometimes tear-inducing) experiences by choosing projects that match your current abilities, building confidence step-by-step.
Assessing Your Skill Level
Ever found yourself knee-deep in fabric, only to realize you’re not quite ready for a complex project?
Figuring out your skill level is important to avoid overconfidence.
Consult your sewing machine basics manual, familiarize yourself with essential sewing tools, and embrace beginner sewing projects.
Remember, even seasoned pros once began with simple projects, so give yourself room to grow.
Choosing Projects That Match Your Skill
Understanding your skill level is only half the battle; choosing beginner-friendly projects is where the magic happens.
Don’t let overconfidence steer you into complex jungles.
Start with projects that match your skills.
Assess project complexity and set realistic goals.
Who needs stress with a pincushion, right?
Embrace the learning curve while enjoying the creative process, ensuring success in every stitch.
Learning New Techniques and Skills
To master new sewing techniques, embrace practice and patience like old friends.
Don’t leap before you look; instead, ease into challenges.
Try these steps: 1. Introduce yourself to new patterns with a beginner’s mindset.
- Dedicate time to skill building by setting small goals.
- Laugh at mistakes—each oops is a stitch in your learning quilt!
Avoiding Overly Complex Projects Too Soon
Want to try that fancy new pattern?
Hold your horses! It’s tempting, but start with simple projects to build skills steadily.
Gradual learning keeps you sewing happily.
Imagine this:
| Step | Feeling |
|---|---|
| 1 | Excited |
| 2 | Overwhelmed? |
| 3 | Confident |
| 4 | Masterful |
| 5 | Joyful |
Beginner-friendly patterns are your best mates, boosting confidence without drama.
Frequently Asked Questions (FAQs)
How to avoid mistakes in sewing?
Want to conquer sewing? Use the right needles and thread, measure twice, cut once, and don’t rush! Practice makes perfect, so embrace those little mistakes – they’re learning opportunities!
What should you avoid when starting a sewing machine?
Starting a sewing machine can feel like taming a wild beast!
Avoid jumping straight into fabric before threading properly.
Don’t ignore tension settings—keep them right to prevent tangles and tears.
Remember, patience saves both fabric and sanity.
What are the worst beginner sewing mistakes?
Diving into sewing? Don’t let dull scissors ruin your project or mismatched needles leave you with a tangled mess.
Follow pattern instructions and cut precisely.
Practice patience; haste makes waste and crooked stitches!
Stay inspired, and sew on!
Are sewing mistakes sabotaging your projects?
Isn’t it frustrating when sewing mistakes feel like tiny gremlins ruining your masterpiece?
Fear not, friend!
Focus on seam allowances, fabric choice, and needle types.
Master these essentials, and you’ll transform those mishaps into perfection.
How do you hide sewing mistakes?
Ever sewn something and suddenly it looks like a hot mess?
Don’t worry!
Use fabric patches, decorative stitches, or even creative embroidery to conceal mishaps.
Just like magic, turn those whoopsies into unique design elements!
What sewing tool takes out sewing mistakes?
A seam ripper’s your best friend for undoing sewing blunders.
It deftly removes stitches, saving your project from disaster.
Keep it handy, and you’ll laugh off mistakes like a pro, ready to give it another shot!
What are the 7 common sewing machine troubles?
Wouldn’t you know it, sewing machines can be quirky!
You might face tangled threads, skipped stitches, broken needles, tension issues, fabric bunching, strange noises, or motor stalls.
Each problem has solutions, so don’t worry when things go awry.
What are 5 safety rules for sewing?
Always unplug your machine before cleaning or adjusting.
Keep your fingers clear of the needle.
Use sharp scissors; dull ones are dangerous.
Never sew while tired or distracted.
And finally, always follow the machine’s instructions!
How do I choose beginner-friendly sewing projects?
Did you know 60% of sewing newbies ditch complicated projects?
Start with patterns that have fewer pieces and looser fits—like simple tote bags or pillowcases.
They’re perfect for building confidence and skill without losing your stitch.
What tools should I have for garment sewing?
Start with a reliable sewing machine, sharp scissors, all-purpose thread, universal needles, and a trusty seam ripper.
Toss in a measuring tape, pins, and a pressing iron.
Oh, and a dash of creativity goes a long way!
How do I troubleshoot sewing machine issues?
Tackling sewing machine troubles can feel like untangling spaghetti!
Check needle type, adjust tension, rethread the machine, and clean lint.
If those don’t help, consult your manual or chat with a sewing buddy for tips.
How can I improve my sewing accuracy?
They say 80% of sewing accuracy comes from proper setup.
Keep your patterns pinned tightly, choose the right needle size, and don’t rush; steady hands craft wonders.
Remember, sewing’s like dancing—practice makes perfect, so embrace the rhythm!
What are the best practices for fabric storage?
You’ve got to store fabric right to keep it pristine.
Roll or neatly fold fabrics.
Store in a dry, cool area.
Use bins or shelves and label them by type or color to easily find what you need.
Conclusion
Imagine your sewing projects going off without a hitch—no unwanted holes, no mismatched parts, just smooth, polished pieces every time.
By avoiding common sewing mistakes like choosing the wrong fabric or needle, you’ll save yourself time and frustration.
Embrace these pro tips, and you’ll soon create projects that echo professionalism, making your friends wonder if you’ve turned into a tailor overnight.
Remember, practice and attention to detail make perfect, so keep that needle working!


