This site is supported by our readers. We may earn a commission, at no cost to you, if you purchase through links.
 Sewing machine stitch problems can turn a simple project into a test of patience, but most fixes are straightforward.
Uneven tension? Check your threading and adjust the upper thread tension knob. Skipped stitches usually mean a dull or incorrect needle, so swap it out for the right one.
Thread breakage? Verify that your spool and bobbin are properly loaded, and use high-quality thread. If your fabric puckers, adjust stitch length or tension and use a matching needle size.
Regular cleaning and maintenance prevent most issues. Stitch troubles don’t stand a chance when you know your tools—stay tuned for more solutions to help you master your sewing machine with simple project fixes.
Table Of Contents
- Key Takeaways
- Common Sewing Machine Stitch Problems
- Why is My Sewing Machine Not Stitching
- Thread Tension Issues Causing Stitch Problems
- Needle Troubleshooting for Stitch Problems
- Bobbin and Tension Issues Affecting Stitches
- Fabric Feeding and Handling for Smooth Stitches
- Stitch Quality and Adjustment for Perfect Stitches
- Machine Maintenance and Upkeep for Optimal Stitches
- Advanced Sewing Machine Issues and Solutions
- Preventing Sewing Machine Stitch Problems
- Frequently Asked Questions (FAQs)
- Conclusion
Key Takeaways
- Check your needle regularly—dull, bent, or mismatched needles cause skipped stitches and uneven seams. Replace them after every 2 projects or 8-10 hours of use.
- Rethread your machine correctly, ensuring the upper and bobbin threads follow proper paths. Misthreading creates tension imbalances and thread looping.
- Balance thread tension to avoid loose loops or puckered fabric. Adjust the upper thread dial between 2-5 and test on scraps for consistent results.
- Clean and maintain your machine frequently—clear out lint, oil moving parts, and inspect feed dogs to keep stitching smooth and problem-free.
Common Sewing Machine Stitch Problems
You’ll recognize common sewing machine stitch problems by their telltale signs: uneven tension, skipped stitches, thread breakage, and puckered fabric.
With the right troubleshooting approach, you can quickly identify and fix these issues before they turn your peaceful sewing session into a frustrating fabric wrestling match, which is why a peaceful sewing session is desirable.
Uneven Tension
Regularly struggling with uneven tension? Your stitches tell the story—loose loops below or tight pulls above indicate an imbalanced sewing machine.
Uneven tension leaves its mark—loose loops below or tight pulls above signal your sewing machine needs a quick tension adjustment!
- Reset both tensions by rethreading completely and checking for proper thread path through tension discs.
- Adjust upper thread tension gradually (between 2-5) until balanced stitches appear.
- Test on fabric scraps before continuing your project to confirm tension consistency.
Skipped Stitches
Skipped stitches occur when your sewing machine needle fails to catch the bobbin thread, creating gaps in your seam.
Your needle condition is likely the primary culprit—bent, dull, or incorrect needles cause 80% of skipping problems. Check thread compatibility with your fabric type and make certain proper machine timing.
Adjust presser foot pressure for thicker materials. To resolve issues, understanding thread tension problems is vital for smooth stitching.
Thread Breakage
Thread breakage can turn your sewing project into a frustrating experience.
Thread breakage can ruin the fun—choose quality threads, adjust tension, and match needles to fabrics for frustration-free sewing.
When threads keep snapping, check your thread quality—poor yarn quality often leads to fraying and weak fiber strength.
Adjust your tension settings to reduce friction issues, and verify your needle size matches your fabric.
Thread looping and uneven tension are common breakage causes that you can fix with proper machine setup, which often involves checking your tension settings and ensuring the right needle size.
Puckered Fabric
Puckered fabric ruins your otherwise perfect sewing project with its wrinkled, crumpled appearance.
When your seams look like miniature mountain ranges, try these three quick fixes:
- Adjust thread tension: Lower your upper thread tension slightly to reduce pulling on delicate fabrics.
- Match needle to fabric type: Thinner fabrics need smaller needles to prevent puncture damage.
- Reduce presser foot pressure: Less pressure means smoother feeding for better seam quality.
Why is My Sewing Machine Not Stitching
Five frustrating minutes have passed, and your sewing machine isn’t stitching a single thread despite the motor humming. Don’t panic!
First, check if your bobbins are preventing stitch formation. Is it inserted correctly and wound properly?
Next, examine threading errors—both the top and bobbin threads must follow the correct path through tension disks and guides.
Needle issues are common culprits too. Make sure it’s installed correctly (flat side facing back) and isn’t bent or dull. A fabric jam under the needle plate can halt stitching completely.
Tension imbalance might be why your machine doesn’t produce stitches. Verify the presser foot is down when sewing and the tension dial isn’t set to zero.
Don’t forget the basics—is your handwheel tightened? Did you pull enough thread to the back before starting? Sometimes the simplest fix saves the day. Ensuring proper thread tension settings is essential for smooth stitch formation.
Thread Tension Issues Causing Stitch Problems
You’ll find that thread tension problems are often the culprits behind those frustrating stitch issues that make your sewing projects look less than professional.
When your machine’s upper and lower thread tensions aren’t properly balanced, you’ll notice looping threads, puckered fabrics, or stitches that simply break apart as you sew.
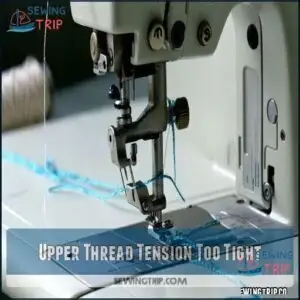
Upper Thread Tension Too Tight
When your sewing machine creates tight stitch issues, it’s often due to the upper thread tension being cranked too high.
This can lead to uneven tension, skipped stitches, and even fabric distortion. If your fabric looks puckered or your thread keeps snapping, it’s time to act.
Start by gently loosening the upper tension dial—aim for smooth, balanced stitches, not breaking threads. Always test your settings on scrap fabric to avoid surprises.
Check the thread path for snags or improper threading that might cause thread breakage.
Here’s what you can do:
- Loosen the tension dial slightly for smoother stitching.
- Rethread the machine to fix any threading issues.
- Clean tension dials if lint is stuck.
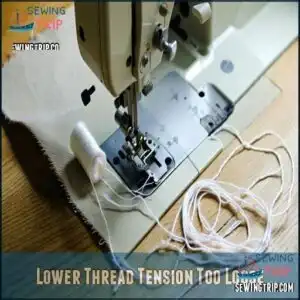
Lower Thread Tension Too Loose
Lower thread tension causing loose stitches can throw off your sewing mojo.
When thread slippage happens, it often leads to skipped stitches or tangled messes.
Check the bobbin case if you spot uneven tension.
The table provides solutions for common issues, including loose stitches, fabric drag, and thread birdnesting, which can be resolved by following the suggested steps, such as tightening the bobbin screw or adjusting the tension properly to prevent uneven tension.
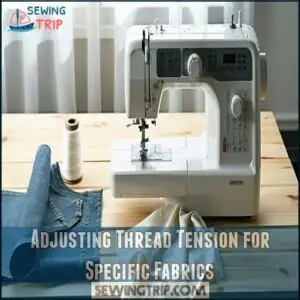
Adjusting Thread Tension for Specific Fabrics
Dialing in thread tension is your secret weapon for perfect stitches across different fabric types.
Uneven tension can quickly ruin your work, so start by balancing the upper and lower thread tension using tension guides in your machine’s manual.
Heavyweights like denim? Loosen that tension. For delicate silks? Tighten it slightly for smoother stitches.
Stitch regulation is all about finding harmony between thread balance and fabric compatibility. Always consider the fabric type and thread weight—thicker threads may need looser settings, while fine threads often require tighter adjustments.
Needle calibration matters too, so match your needle size to the fabric. Adjust as you go, and don’t be afraid to experiment—it’s all part of the process!
Understanding thread tension settings is essential for achieving balanced stitches.
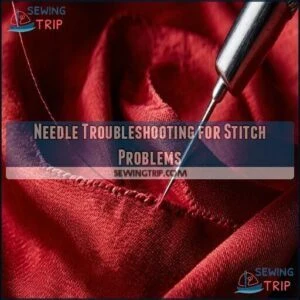
Needle Troubleshooting for Stitch Problems
If your sewing machine is skipping stitches or causing fabric puckering, the needle might be the culprit.
Checking for bent tips, proper size, and regular replacements can save you time and frustration.
Bent or Broken Needles
A bent needle is bad news—it warps stitch quality fast.
If your needle’s dull, bent, or broken, replace it immediately. Broken tips can snag fabric or damage the metal plate.
A stuck needle might signal hidden issues.
Avoid needle damage by storing them safely and using the right one for your machine. Needle replacement keeps everything running smoothly.
Needle Selection and Size
Choosing the right needle size and type is key to smooth stitching.
Match the needle to your fabric’s thickness and thread compatibility—smaller needles for lightweight materials, larger for thicker ones.
Needle types like ballpoint or sharp also matter.
Using high-quality needle materials reduces broken and bent needles, ensuring proper stitch formation.
Needle selection means fewer headaches and better results!
Understanding the needle selection guide is essential for superior stitching performance.
Needle Maintenance and Replacement
Needle maintenance isn’t glamorous, but it saves you plenty of frustration.
Regular needle inspection helps spot dull, bent, or broken needles before they ruin your stitches. A worn needle causes skipped stitches or puckered fabric, so replace it after one or two projects.
Need tips? Here’s your checklist:
- Inspect regularly for bent needles, dull points, or burrs.
- Practice needle storage—use a case to protect from damage.
- Consider needle sharpening tools for specialty projects.
- Double-check needle alignment during installation.
- Add a touch of needle lubrication for smoother stitching.
Treat your needles like gold, and they won’t let you down!
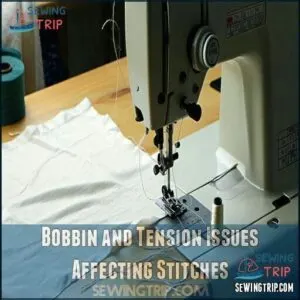
Bobbin and Tension Issues Affecting Stitches
Bobbin and tension issues can cause uneven stitches, thread bunching, or skipped seams. Checking compatibility, tension adjustments, and proper threading often solves these frustrating problems.
Bobbin Selection and Compatibility
Using the wrong bobbin type or size can throw everything off—kind of like wearing shoes two sizes too small.
Always check your machine’s manual for the correct bobbin material and bobbin case compatibility.
Insert the bobbin properly, ensuring smooth winding bobbins and balanced stitches.
Improper bobbin placement often causes thread looping or inconsistent bobbin thread tension, so double-check the fit every time.
Understanding sewing machine bobbins is essential for achieving the perfect stitch.
Bobbin Tension Adjustment
Adjusting bobbin tension is like tuning your sewing machine’s heartbeat—it keeps everything running smoothly.
Start by inspecting your bobbin case for uneven tension. If the bobbin thread tension feels off, use a small screwdriver to tweak the tiny screw on the case in small increments. A tension gauge can help you get the perfect balance.
- Verify smooth and consistent bobbin winding.
- Watch out for loose stitches or thread breakage.
- Check for thread nests (they’re sneaky!).
- Refer to your sewing machine manual for adjustments.
- Always test stitches on scrap fabric first.
Solutions to Bobbin and Tension Issues
Fix bobbin hiccups fast! Verify the bobbin case is clean and free of lint or snags. Fine-tune the tension dial to align thread tension perfectly—no uneven tension or skipped stitches here!
Use this quick guide to troubleshoot like a pro:
This guide provides solutions for common issues, including skipped stitches and thread path blockage, to help you fix your sewing problems efficiently.
Fabric Feeding and Handling for Smooth Stitches
Smooth fabric feeding is essential for even stitches and frustration-free sewing. Check your presser foot pressure, feed dogs, and fabric type to avoid hiccups.
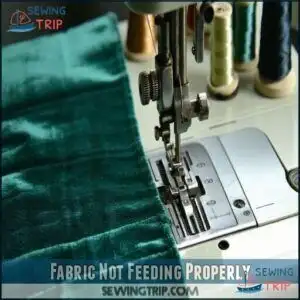
Fabric Not Feeding Properly
When your fabric feels like it’s skating instead of sewing, check these culprits:
- Feed dogs: Are they lowered, jammed, or dusty? Keep them clean and engaged.
- Presser foot pressure: Adjust it so the fabric feeds evenly.
- Tension adjustment: Uneven stitches or fabric slippage? Balance your tension settings to match the fabric type.
Smooth feeding means better stitches every time!
Proper feed dog maintenance is essential for smooth fabric movement.
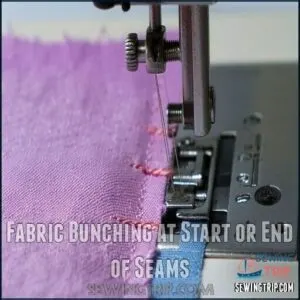
Fabric Bunching at Start or End of Seams
Fabric bunching at the start or end of seams can feel like a roadblock, but it’s a problem you can solve with a few tweaks.
Whether it’s uneven stitches or puckered fabric, the root cause often lies in fabric tension, seam alignment, or thread pull. A smooth start and finish make all the difference.
Here’s a quick breakdown of common causes and fixes:
Remember, avoid yanking the fabric—let the machine do the heavy lifting, as smooth start and finish are crucial, and ensuring correct tension is key to preventing puckering and achieving even stitches.
Solutions to Fabric Feeding Issues
Does your fabric feel like it’s doing its own thing? It might be fabric slippage!
Here’s how to fix it:
- Check your feed dogs—clean them and make certain they’re engaged.
- Adjust the presser foot pressure for better grip.
- Use a walking foot for smoother fabric feeding.
- Tweak the tension adjustment to prevent uneven stitches or thread breakage.
Smooth sailing ahead!
Stitch Quality and Adjustment for Perfect Stitches
Getting perfect stitches isn’t magic—it’s about finding the right balance of tension, needle, and stitch settings.
With a few adjustments, you’ll avoid puckered seams and distorted lines in no time.
Causes of Puckered Seams
Nothing’s more frustrating than a sewing machine puckering its stitches.
Puckered seams can result from stitch tension problems or uneven stitching while sewing.
Check the tension dial—too tight creates fabric bunching. Make certain your needle size matches the thread type, and adjust the presser foot pressure and stitch length as needed.
Feed dogs that are clogged or misaligned might also be culprits.
Smooth stitching starts with balanced tension and proper adjustments! To achieve superior results, understanding thread tension settings is vital for preventing puckering issues.
Causes of Distorted Seams
Distorted seams can feel like wrestling spaghetti.
Start by checking your needle size—it must fit the fabric type.
A mismatch leads to uneven stitches.
Adjust presser foot pressure to avoid puckered seams or fabric slipping.
Tension imbalance, whether too tight or loose, impacts sewing machine stitch quality.
Also, watch your stitch length settings; improper adjustments can cause inconsistent sewing machine stitches.
If issues persist, timing misalignment might be your culprit—consult a professional for repairs.
Adjusting Stitch Length and Width
To improve stitch quality and tackle uneven stitches, master stitch length and width basics.
Here’s how:
- Use longer stitches for thick fabrics to boost seam strength.
- Adjust width to enhance decorative stitches.
- Test settings on fabric scraps for stitch appearance.
- Pair length adjustment with balanced thread tension.
- If troubleshooting stitches, reset to defaults and tweak from there.
Machine Maintenance and Upkeep for Optimal Stitches
Keep your sewing machine clean, oiled, and properly maintained to avoid frustrating stitch problems. A little care now saves you endless troubleshooting later!
Cleaning The Sewing Machine
Keeping up with sewing machine cleaning saves you from stitch headaches like thread breakage or skipped stitches.
Use a soft brush for lint cleaning, especially in the bobbin zone, feed dogs, and around the needle.
Dust removal is a breeze when paired with compressed air, but avoid spraying directly inside.
Stick to regular maintenance schedules—monthly is ideal, or more often for heavy use.
A clean machine means smooth stitches and fewer hiccups, so don’t let lint buildup slow you down!
Lubricating The Sewing Machine
Before oiling, always clean your machine to remove lint and dust.
For smooth operation and fewer issues like thread breakage, use the correct oil viscosity and only apply sewing machine oil—not household alternatives.
- Oiling frequency: Every 8-10 hours of use or monthly.
- Key spots: Follow your manual.
- Lubricant types: Stick to sewing machine-specific oils.
Regular Maintenance Schedule
Think of your sewing machine maintenance like brushing your teeth—it’s all about consistency. A regular maintenance schedule tackles sewing machine problems before they escalate.
Commit to machine cleaning after every three to five uses. Pair that with monthly oil checks using high-quality sewing machine oil for smooth operation.
Don’t forget part replacement when tools feel dull or worn—schedule planning makes this easy. Tool sharpening is a game-changer for precision.
These steps turn common sewing machine problems into quick sewing machine solutions for a stitch-perfect experience.
Advanced Sewing Machine Issues and Solutions
When your machine throws advanced issues like wonky decorative stitches or wavy stretch seams, it’s a game of precision. Don’t worry—clear fixes can save time and frustration.
Decorative Stitch Settings Not Working
Why aren’t your decorative stitches working? Start with stitch settings—select the right mode and verify that there is no needle damage.
Check thread compatibility and verify the tension guides are properly adjusted. Misaligned bobbins could also derail things.
Sometimes, rebooting your sewing machine resets finicky stitch mode issues. Patience is key—approach sewing machine troubleshooting step by step for perfect results!
Seams in Stretch Fabrics Coming Out Wavy
Dealing with wavy seams in stretch fabrics can feel tricky, but it’s fixable with the right approach.
Adjusting stitch tension and fabric feed are key to smoothing out uneven stitches.
Try these tips:
- Use a walking foot for consistent fabric feed.
- Lower the presser foot pressure to prevent fabric stretching.
- Select a stretch stitch or slightly longer stitch length for elasticity.
- Place tissue paper under the fabric to stabilize it temporarily.
These small adjustments make sewing with stretchy fabrics a breeze—no more wavy seams!
Solutions to Advanced Sewing Machine Issues
Advanced sewing machine issues can be tricky, but they’re not impossible to fix.
If you’re struggling with skipped stitches or wavy seams, try these solutions:
- Adjust your sewing machine timing or check for feed dog timing issues.
- Inspect the tension assembly and correct any thread tension problems.
- Use a ballpoint needle for knits to avoid backlash issues.
- Consult your manual for hook problems or skipped stitches solutions.
With careful adjustments, you’ll be back to sewing smoothly!
Preventing Sewing Machine Stitch Problems
You can prevent stitch problems by replacing your needle regularly, threading the machine correctly, and using quality materials.
It might feel tedious, but these simple steps save you time and frustration later, and are a key part of using quality materials.
Regular Needle Replacement
Replacing your needle regularly is like revitalizing your toolbox—it keeps things running smoothly.
Over time, needles wear down, causing thread breakage, fabric damage, or bent needles that harm stitch quality.
Swap needles after every 8-10 hours of use or two projects to avoid issues like needle getting stuck.
Keep them organized with proper needle storage, whether universal, ballpoint, or denim, make certain the needle type matches your fabric for superior stitch performance.
Proper Threading and Tensioning
Perfect stitching starts with proper threading and tensioning—skip this, and you’ll face uneven tension or thread breakage.
Threading Tips? Follow your machine’s manual and check Thread Guides for snags. Got issues with Tension Control? Balance upper and bobbin tension carefully.
Needle Alignment matters—use the correct orientation and make certain it’s seated firmly.
Finally, Bobbin Setup plays a huge role—wind smoothly and insert it correctly.
- Thread Guides: Look for missed loops.
- Tension Control: Adjust to match fabric needs.
- Needle Alignment: Avoid skips by seating properly.
- Bobbin Setup: Prevent snags by threading smoothly.
Using Good Quality Threads and Needles
Great stitches start with thread selection and sharp needle care. High-quality threads prevent thread breakage, while the right needle type ensures seamless performance.
Match the needle size to your fabric and thread for fabric compatibility and stitch consistency. Regular needle replacement keeps tension smooth and stitching clean.
Invest in quality tools—your sewing machine will thank you with better quality control! Using the right sewing threads is vital for achieving professional results.
Frequently Asked Questions (FAQs)
What are the most common sewing machine problems?
Sewing machines often face issues like skipped stitches, thread bunching, uneven tension, or fabric feeding problems.
Fix these by rethreading, cleaning, checking the needle, adjusting thread tension, or inspecting feed dogs and bobbins alignment.
Why is my sewing machine not stitching?
Your sewing machine mightn’t stitch due to improper threading, bent needles, incorrect tension, or a jammed bobbin.
Check threading paths, reinsert needles correctly, clean lint, and make certain the presser foot’s lowered before stitching, to address issues like jammed bobbin.
How to prevent stitching problems in a sewing machine?
Ever notice how skipping maintenance feels like tempting fate?
Clean out lint, oil moving parts, use the right needle, double-check thread tension, and follow the manual.
A little care now saves big headaches later.
Can a sewing machine cause skipped stitches?
Yes, skipped stitches happen when your needle’s dull, bent, or installed incorrectly.
It can also be caused by improper threading, wrong tension settings, or mismatched needle and thread for the fabric.
Check and adjust!
How do you troubleshoot a sewing machine?
Start by rethreading both upper and upper and bobbin threads, then check the needle for bends or dullness.
Clean lint around the feed dogs and bobbin case, adjust tension settings carefully, and make certain of proper presser foot pressure.
Are your sewing machine stitches tangled up?
Did you know tangled stitches, or "bird’s nests," happen to 9 out of 10 users?
Check thread tension, clean lint, and rethread both bobbin and upper thread; this often resolves the chaos swiftly.
Why is my sewing machine not stitching correctly?
Check your threading and bobbin placement first—they’re common culprits.
Next, inspect the needle for bends or dullness. Adjust thread tension gradually, ensuring balance.
Why is my thread looping underneath?
Thread looping underneath happens when the top thread isn’t threaded correctly or tension is too loose.
Double-check your threading path, particularly through the tension disks, and tighten the upper tension slightly to resolve the issue, ensuring that you have properly addressed the cause of the thread looping.
What number should tension be on a sewing machine?
Ever feel like your sewing machine has a mind of its own?
Set the tension dial between 3 and 5 for most projects.
It’s a sweet spot for balanced stitches—tweaks might be necessary for specialty fabrics.
Why is my sewing machine doing the wrong stitch?
Your sewing machine may be stitching incorrectly due to improper threading, tension settings, or a mismatched needle and thread combination.
Verify correct threading, adjust tension, and match needles and threads to fix the issue, ensuring a correct combination of these elements.
Conclusion
Mastering sewing machine stitch problems is like tightening the last screw on a project—it makes everything work smoothly.
By understanding issues like uneven tension, thread breakage, or skipped stitches, you’ll handle mishaps with ease.
Regular needle checks, proper threading, and quality thread go a long way toward flawless stitches.
Stay proactive with cleaning and maintenance, and your machine will deliver every time.
With these fixes, no stitch problem will derail your creative flow. Happy sewing!
- https://wunderlabel.com/en-gb/blog/p/17-common-sewing-machine-problems-solve/
- https://www.daintydressdiaries.com/2021/04/common-sewing-machine-problems-how-to-fix-them.html
- https://www.reddit.com/r/sewhelp/comments/lb6wme/help_sewing_machine_not_making_stitches/
- https://pubs.nmsu.edu/_c/C202/index.html
- https://www.thesewingdirectory.co.uk/thread-tension/

