This site is supported by our readers. We may earn a commission, at no cost to you, if you purchase through links.
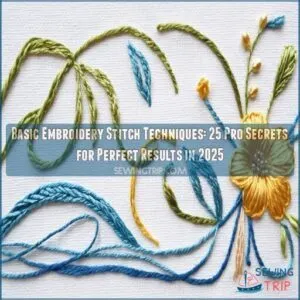
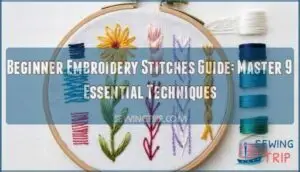
Start with the running stitch – it’s like drawing dashed lines with thread, perfect for simple outlines. The backstitch creates crisp, continuous lines that’ll make your designs pop.
Want to add some pizzazz? French knots are your tiny fabric bubbles, while the chain stitch flows like a delicate rope around curves.
For smooth, filled areas, the satin stitch is your go-to companion. Think of these stitches as your artistic building blocks – once you’ve got these down, you’re ready to explore the fascinating world of dimensional effects and textured patterns.
Table Of Contents
Key Takeaways
- You’ll master basic embroidery by learning 5 essential stitches: running stitch, backstitch, French knots, stem stitch, and satin stitch, which will help you create various designs and patterns.
- To get started with embroidery, you’ll need a few basic tools, including a hoop, needles, scissors, and embroidery floss, and it’s also important to choose the right fabric and stabilizer for your project.
- You’ll find that practice is key to improving your embroidery skills, and it’s essential to start with simple projects and gradually move on to more complex ones, experimenting with different stitches, threads, and fabrics.
- As you progress, you’ll discover various techniques to add texture and dimension to your embroidery, such as using different thread colors, varying stitch lengths, and combining stitches to create unique effects, and this will help you create unique effects with different stitches.
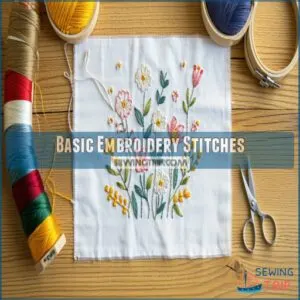
Basic Embroidery Stitches
You’ll master six essential embroidery stitches that form the building blocks of any beautiful design, from the simple running stitch to the classic French knot.
These basic techniques will help you create smooth outlines, add texture, and fill spaces with confidence, whether you’re stitching your first pattern or ready to tackle more complex projects, using the basic techniques.
Running Stitch Techniques
The running stitch is your gateway to the embroidery world. You’ll master this fundamental technique by pushing your needle up through the fabric and creating evenly spaced stitches in a straight line.
Experiment with stitch length and spacing variations to achieve different effects. Consider your thread choices and fabric considerations carefully – lighter fabrics work best with shorter stitches, while heavier materials can handle longer ones.
Understanding running stitch embroidery techniques is essential for creating beautiful designs with the running stitch.
Backstitch Methods
While running stitch offers simplicity, backstitch delivers precision and durability for your embroidery outlines.
This foundational technique creates crisp, continuous lines that elevate any project.
Three ways backstitch transforms your embroidery:
- Creates unbroken lines that pop against fabric
- Supports precise curves for intricate designs
- Provides structure that maintains shape after washing
Control tension by keeping thread taut but not tight. Practice different thread weights to discover how they affect your stitch definition. Backstitch is a technique that offers durability for your embroidery outlines.
Straight Stitch Applications
While backstitch creates solid outlines, the straight stitch offers incredible versatility.
This simplest of embroidery stitches creates star patterns with just a few strategic placements. Try scattered stitches for texture fills that catch light beautifully.
You’ll find straight lines are just the beginning—overlap them for fabric textures or vary their length for dynamic effects.
Learning basic embroidery stitching techniques expands your creative options.
Perfect for quick projects, this stitch delivers maximum impact with minimal effort.
French Knot Uses
While straight stitches create flat surfaces, French knots add impressive texture to your work.
You’ll love using these dimensional elements for creating textured fills in flower centers, starry skies, or animal fur.
Try varying your wraps (1-3 times) for different knot sizes.
Keep your embroidery floss taut as you pull through – this needlework technique transforms ordinary patterns into stunning embellishments with decorative details that truly pop.
Essential Stitch Types
When diving into Embroidery Basics, you’ll need these five essential stitch types in your arsenal.
The running stitch creates dashed lines perfect for simple outlines and sashiko patterns.
You’ll find the backstitch indispensable for creating crisp, continuous lines that define your design’s edges.
For adding texture and dimension, French knots act like tiny fabric bubbles that transform flat designs into tactile experiences.
The stem stitch creates smooth, rope-like lines that flow beautifully around curves.
Finally, the satin stitch fills areas with rich, smooth color for a polished look.
Your Thread Choices and Fabric Selection will dramatically affect how each stitch appears – lighter fabrics showcase delicate work while sturdier materials support complex Stitch Variations.
Practice these fundamentals, and you’ll quickly develop confident Needle Techniques for any project.
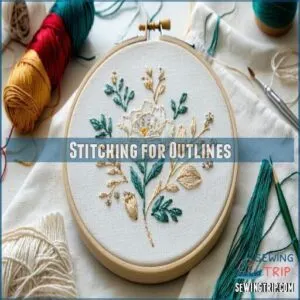
Stitching for Outlines
You’ll master crisp, professional outlines with the right stitch selection for your embroidery projects.
Backstitch creates defined lines while stem stitch offers smooth curves, giving your designs that polished edge that makes all the difference.
Stem Stitch Techniques
Now that you’ve explored various stitch types, let’s look at one of the most versatile outline stitches in your toolkit. Filling stitches create textured effects using techniques like the satin stitch, as described in this hand embroidery guide.
The stem stitch creates beautifully smooth outlines that work equally well for straight lines and curves. You’ll get consistent results when you master these techniques.
To achieve the best outcomes, consider the following tips:
- Keep your stitch length consistent for the smoothest lines
- Maintain even tension control throughout your work
- Choose medium-weight fabric for easiest learning
- Work left to right if you’re right-handed (reverse for lefties)
Split Stitch Applications
While stem stitch creates flowing lines, you’ll love how split stitch adds rich texture to your embroidery designs.
This versatile technique splits each previous stitch to create beautifully defined outlines.
| Application | Best Used For |
|---|---|
| Letters | Clean, crisp text |
| Curves | Smooth circular shapes |
| Fills | Dense color blocks |
| Details | Fine line work |
| Borders | Sharp edges |
Working split stitch feels like drawing with thread – each stitch builds upon the last, creating perfectly smooth lines that’ll make your designs pop with rich texture.
Satin Stitch Uses
You’ll find the satin stitch indispensable for creating smooth, filled areas in your embroidery projects.
This versatile basic embroidery stitch lets you achieve perfect color blending through parallel threads placed side by side.
For best stitch texture, choose a medium-weight fabric and select threads that complement your design.
Master this technique by practicing on simple shapes before tackling complex patterns.
Understanding embroidery satin stitch techniques requires knowledge of proper satin stitch tools to guarantee professional results with the use of proper tools.
Chain Stitch Methods
While satin stitch creates smooth surfaces, chain stitch offers a bold texture that’s perfect for eye-catching outlines.
You’ll love how this versatile stitch creates linked loops that flow smoothly across your fabric. Understanding basic embroidery techniques is essential for mastering various stitches.
- Master the basic chain stitch by keeping your loops even
- Try detached chain stitch for delicate flower petals
- Experiment with twisted chain stitch for added texture
- Use square chain stitch for geometric designs
- Create waves with zigzag chain stitch variations
Filling and Shaping Stitches
You’ll find that filling and shaping stitches add depth and dimension to your embroidery projects, transforming flat fabric into eye-catching artwork.
Whether you’re creating textured leaves with fishbone stitch or adding smooth satin-stitch petals to your flowers, these techniques will help you build beautiful designs that really pop off the fabric.
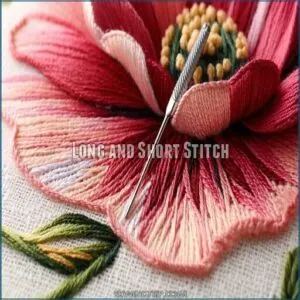
Long and Short Stitch
The long and short stitch creates stunning dimensional effects through varied stitch lengths, perfect for filling larger shapes with rich texture.
You’ll master this versatile embroidery technique by stacking stitches methodically from one side to the other. For the smoothest results, use a single thread and draw guidelines to maintain consistent angles.
It’s ideal for thread painting, allowing you to blend colors seamlessly in your designs. To achieve professional results, understanding silk shading techniques is essential for creating realistic and detailed embroidery pieces.
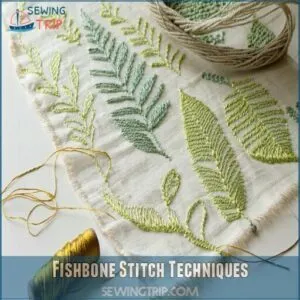
Fishbone Stitch Techniques
The fishbone stitch brings organic forms to life with its distinctive leaf-like patterns. You’ll create stunning nature-inspired designs by working diagonal stitches up and down from a central line. This versatile embroidery technique adds texture and dimension to your projects.
Understanding the fishbone stitch pattern is essential for mastering this technique.
- Master straight central lines first – they’re your foundation for perfect fishbone patterns
- Work stitches at consistent 45-degree angles for that classic leaf shape
- Keep thread tension even throughout to maintain smooth texture effects
- Start with simple leaf shapes before attempting complex variations
- Practice on medium-weight fabric for best stitch definition
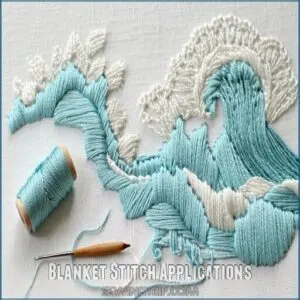
Blanket Stitch Applications
The blanket stitch isn’t just for securing edges – it’s your secret weapon for creating stunning decorative borders and finishing touches.
You’ll love how this versatile stitch transforms plain edges into eye-catching designs while preventing fraying. Learn the blanket stitch technique with a step-by-step guide.
| Application | Technique | Result |
|---|---|---|
| Appliqué | Tight spacing | Clean finish |
| Plushie edges | Double loop | 3D effect |
| Decorative borders | Varied heights | Wave pattern |
Master this stitch, and you’ll wonder how you ever lived without it, as it provides a clean finish and helps create a 3D effect.
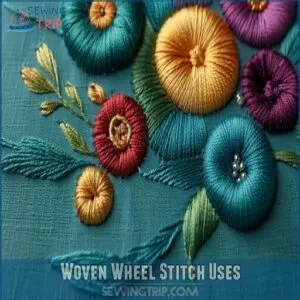
Woven Wheel Stitch Uses
While you’ve mastered the edge-securing power of blanket stitch, let’s explore the woven wheel stitch – your secret weapon for creating stunning floral embellishments and circular designs.
This versatile embroidery stitch transforms simple geometric patterns into dimensional masterpieces.
- Create textured fillings by varying thread colors within each wheel
- Layer multiple wheels for dramatic depth
- Space wheels evenly for balanced decorative motifs
- Combine different sizes for dynamic compositions
- Incorporate metallic threads for eye-catching accents
Advanced Stitch Techniques
You’ll find these advanced stitches easier than you think, as they build on the basic techniques you’ve already mastered.
Once you learn to create bullion knots and whipped back stitches, you’ll open up a whole new world of textured designs that’ll make your embroidery projects stand out.
Bullion Knot Methods
After mastering basic embroidery stitches, you’re ready to tackle the bullion knot.
This advanced stitch creates stunning dimensional effects by wrapping thread around your needle multiple times.
Start with small knots before attempting larger ones, and you’ll soon create gorgeous roses and unique textures.
Keep your thread tension consistent while wrapping – it’s the key to perfectly formed bullion knots.
Threaded Running Stitch
Transform your running stitch into an eye-catching design by weaving a second thread through the existing stitches.
You’ll need precise thread tension and consistent stitch length for best results. Choose contrasting thread colors to make your hand embroidery pop, and select a medium-weight fabric that won’t pucker.
This basic embroidery stitch technique creates stunning linear patterns perfect for borders and decorative elements. Mastering the running stitch basics is essential to achieve professional-looking results with this technique, and it’s crucial for creating a beautiful embroidery.
Whipped Back Stitch Techniques
Moving beyond threaded running stitch, you’ll love how the whipped back stitch adds elegant texture to your work.
Start with a row of backstitches, then wrap your contrasting thread around each stitch without piercing the fabric.
You’ll create stunning raised lines perfect for borders and decorative elements.
Vary your thread colors and wrapping tension to achieve different effects – it’s like adding a beautiful ribbon to your embroidery design.
Double Threaded Back Stitch Applications
When you’re ready to level up your embroidery techniques, the double threaded back stitch offers stunning depth and texture.
This variation combines two threads in a single backstitch to create bold, defined lines.
You’ll want to maintain consistent thread tension while working with contrasting colors.
It’s perfect for outlining designs, creating borders, or adding dramatic embellishments to your fabric choice.
Frequently Asked Questions (FAQs)
What is the easiest embroidery technique?
You’ll find the running stitch is your best starting point.
It’s as simple as weaving your needle up and down through fabric in a straight line – just like basic sewing you’ve done before.
What are the 7 types of stitches?
You’ll master these seven essential stitches: running stitch, backstitch, stem stitch, satin stitch, chain stitch, French knots, and split stitch.
Each one creates unique textures and patterns for your embroidery projects, which can be considered a complete concept in understanding the variety of stitches available.
What are the 5 type of embroidery?
You’ll discover five mesmerizing embroidery types: cross-stitch creates X patterns, crewel uses wool yarn, counted thread follows fabric weave, surface work adds dimension, and candlewicking combines colonial knots with white thread.
The embroidery types can be broadly categorized based on their techniques and materials, with cross-stitch being one of the most popular forms due to its versatility and aesthetic appeal.
What are the five basic stitches?
You’ll need five essential stitches to start your embroidery journey: backstitch for outlines, running stitch for dashed lines, straight stitch for fills, French knot for texture, and stem stitch for smooth curves.
These stitches are fundamental to creating various embroidery patterns and designs, and mastering them will help you improve your embroidery skills.
How do I prevent thread from tangling while stitching?
While chaos leads to tangles, you’ll keep control by measuring thread at arm’s length.
Conditioning it with beeswax, and gently untwisting as you work.
Don’t forget to run fingers down the length periodically.
What tools are essential for beginner embroidery projects?
You’ll require a hoop, needles, scissors, and embroidery floss to get started with beginner-friendly embroidery projects, making it easy to create and customize your designs.
How much fabric should I leave around designs?
You’ll want to leave about 2-3 inches of fabric around your design to make sure easy stitching and framing, giving you room to work comfortably.
Which stabilizers work best for different fabric types?
You’ll find interfacing, fusible web, and tear-away stabilizers work best for different fabric types, depending on the project’s requirements and your personal preference for ease of use and finish.
How do I transfer patterns onto dark fabrics?
You can transfer patterns onto dark fabrics using tracing paper, a stylus, or a light box to create a visible outline, then stitch over it with ease and precision always.
Conclusion
Fast forward to mastering embroidery, you’ll be a pro in no time.
Using these basic embroidery stitch techniques, you’ll create stunning designs.
Remember, practice makes perfect, so don’t be afraid to try new things.
With these 25 pro secrets, you’ll get perfect results, and basic embroidery stitch techniques will become second nature, helping you tap into your full creative potential with ease.

