This site is supported by our readers. We may earn a commission, at no cost to you, if you purchase through links.

Start with medium tension (usually 4-5), standard stitch length (2.5mm), and zero width for straight stitches. Most machines ship with these defaults, but you’ll adjust based on your fabric’s personality.
Lightweight fabrics need gentler tension and shorter stitches, while heavyweight materials demand stronger tension and longer stitches. Think of tension as a handshake—too tight crushes the fabric, too loose creates loose loops.
These fundamentals reveal professional results, but matching settings to specific fabrics requires knowing which adjustments create magic.
Table Of Contents
Key Takeaways
- Start with the three-legged stool foundation – Set tension at 4-5, stitch length at 2.5mm, and width at zero for straight stitches, then adjust based on your fabric’s weight and behavior.
- Match your settings to fabric personality – Lightweight fabrics need gentler tension (2-3) and shorter stitches, while heavy materials demand stronger tension (4.5-5.5) and longer stitches to prevent puckering or weak seams.
- Test every adjustment on scraps first – Small changes in tension, length, or width can make huge differences in your results, so you’ll save time and materials by testing before committing to your project.
- Choose the right needle for your fabric – Use size 9/70 for delicate materials, 11/80 for cotton, 14/90 for heavy cottons, and 16/100 for denim to prevent needle breaks and achieve clean stitches.
Sewing Machine Tension
Getting your sewing machine’s tension right is the difference between professional-looking seams and frustrating tangles.
You’ll need to balance the upper and lower thread tensions so they lock together perfectly in the middle of your fabric layers, which is crucial for achieving perfectly balanced seams.
Upper Thread Tension Control
Master thread tension through your upper dial – the control center of balanced stitches. When you dial in proper tension adjustment, your threads interlock perfectly within the fabric, not on either surface.
- Too tight: Bobbin thread appears on top, causing fabric puckering
- Too loose: Upper thread shows underneath with weak, looping stitches
- Just right: Clean thread balance with no visible crossover
Turn your tension dial incrementally, testing each dial settings change on scrap fabric before committing to your project. Proper thread tension settings are essential for achieving balanced stitches and preventing common sewing issues.
Test every adjustment on scrap fabric first—small changes prevent big sewing disasters.
Lower Thread Tension Adjustment
While upper thread tension gets most attention, bobbin tension is equally important for balanced stitches.
You’ll adjust it using the small screw on your bobbin case—turn counterclockwise to loosen, clockwise to tighten. Most bobbin adjustments are minimal since they’re factory-set. Test on scrap fabric before making changes.
Understanding proper thread tension settings is essential for achieving balanced stitches and preventing common issues like thread breakage.
| Adjustment | Turn Direction | Result |
|---|---|---|
| Loosen | Counterclockwise | Reduces bobbin pull |
| Tighten | Clockwise | Increases bobbin grip |
| Test | Either | Check thread balance |
Tension Settings for Different Fabrics
Your fabric selection drives your tension control decisions.
Set lightweight fabrics like silk and chiffon between 2-3 for proper thread balance.
Medium-weight cottons work best at 4.
Heavy materials like denim need 4.5-5.5 for secure stitch tension.
Always test your sewing machine settings on fabric scraps before starting your project to achieve perfect tension adjustment.
Understanding thread tension settings is essential for balanced stitches on various fabrics.
Stitch Length Settings
Stitch length determines how far your fabric moves with each needle puncture, directly affecting seam strength and appearance.
You’ll typically use 2.5-3.0 mm for general sewing, but different fabrics require specific adjustments to prevent puckering or weak seams.
Average Stitch Length for General Sewing
You’ll find most general sewing projects work best with stitch length between 2.5-3.0 mm, which equals 8-12 stitches per inch.
This standard setting provides excellent stitch balance and fabric feed control across medium-weight materials.
Your sewing machine settings should deliver consistent thread control and ideal sewing speed, ensuring high stitch quality for basic stitches without compromising thread tension stability.
Adjusting Stitch Length for Fabric Type
Stitch length isn’t one-size-fits-all—your fabric types demand specific sewing machine settings for perfect stitch balance.
Thread tension and fabric thickness work together, requiring you to match stitch settings to material weight. Different fabrics need customized approaches for proper stitch balance and sewing speed control.
Understanding the correct stitch length guide is essential for achieving professional results with various fabric types, considering the stitch length factors.
- Lightweight fabrics like silk need shorter stitches (1.5-2.5mm) to prevent puckering and maintain fabric stretch integrity.
- Medium-weight materials such as cotton work best with standard 2.5-3.0mm lengths for balanced thread tension.
- Heavy fabrics like canvas require longer stitches (3.0-4.0mm) to accommodate fabric thickness without bunching.
Shorter Stitch Lengths for Lightweight Fabrics
When working with delicate materials, you’ll want to reduce your stitch length to prevent damage.
Lightweight fabrics like silk and chiffon require shorter stitches for better fabric handling and thread management.
| Fabric Type | Stitch Length | Tension Setting |
|---|---|---|
| Silk | 2.0 mm | 2-3 |
| Chiffon | 1.8-2.0 mm | 0-2 |
| Organza | 2.0 mm | 2-3 |
Shorter stitches give you better stitch control and prevent puckering on these temperamental materials.
Longer Stitch Lengths for Heavy Fabrics
When tackling heavy fabrics, you’ll need longer stitch lengths ranging from 3.0 to 4.0 mm to accommodate the fabric thickness.
Heavy duty materials like denim and canvas require this adjustment for proper fabric feed and thread strength.
These extended stitches prevent bunching while maintaining stitch balance, ensuring your sewing machine settings deliver professional results on challenging materials.
Stitch Width Settings
Stitch width controls how far your needle moves from side to side, creating the foundation for zigzag stitches and decorative patterns.
You’ll adjust this setting to match your project needs, from narrow utility stitches to wide satin embroidery effects.
Controlling Stitch Width for Zigzag Stitches
Width control transforms your zigzag stitch from basic to brilliant.
You’ll adjust this setting using your machine’s stitch width control dial or digital display, typically ranging from 0 to 7mm depending on your model.
- Narrow zigzag (1-2mm) prevents fabric stretch while maintaining seam flexibility
- Medium zigzag (3-4mm) secures raw edges and handles moderate fabric stretch
- Wide zigzag (5-7mm) creates decorative effects and maximum stretch accommodation
Adjusting Stitch Width for Decorative Stitches
Decorative stitches reveal your machine’s creative potential beyond basic zigzag patterns.
Each decorative pattern requires specific stitch width adjustments to achieve superior results.
Feather stitches work best within 0.0-7.0mm width ranges, while blanket stitches need 2.5-7.0mm for proper appliqué effects.
Always test your decorative stitch settings on fabric scraps first, then fine-tune the width control to match your project’s requirements.
Understanding various decorative stitch techniques can help you create unique and intricate designs.
Using Stitch Width for Satin Embroidery Effects
Between achieving perfect satin embroidery effects and basic stitching, stitch width becomes your creative control center.
You’ll create stunning satin stitches by combining wide stitch width settings with short stitch length for dense coverage.
Here’s your satin stitch setup checklist:
- Set stitch width to maximum – Usually 5-7mm for bold embroidery effects
- Reduce stitch length to 0.3-0.5mm – Creates tight, overlapping stitches
- Choose contrasting thread colors – Makes your embroidery pop against fabric choices
- Test on scrap fabric first – Prevents costly mistakes on your final project
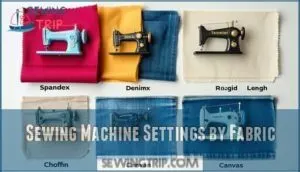
Sewing Machine Settings by Fabric
Different fabrics require specific machine settings to achieve professional results without damage or frustration.
You’ll need to adjust tension, stitch length, and stitch type based on whether you’re working with stretchy spandex, thick denim, delicate chiffon, or heavy canvas.
Settings for Stretchy Fabrics Like Spandex
Successfully balance your spandex sewing with these targeted adjustments.
Set your sewing machine tension between 2-3 for ideal thread control without breaking seams.
Use narrow zigzag stitches with 1-2mm width and 2-3mm length for elastic stitches that move with fabric stretch.
Choose ballpoint needles and reduce presser foot pressure for smooth feeding.
Settings for Thick Fabrics Like Denim
Thick fabrics like denim demand higher sewing machine tension and precise adjustments for professional results.
Unlike stretchy materials, denim requires firm control to penetrate multiple layers without compromising stitch quality.
- Upper thread tension: Set between 4-5 for heavyweight denim, 3-4 for medium-weight
- Stitch length: Use 2.8-3.0mm for seams, 3.5-4.0mm for topstitching
- Needle selection: Choose denim needle size 90/14 or 100/16
- Bobbin tension: Keep factory settings unless persistent issues occur
- Testing protocol: Always test on scrap fabric before sewing final pieces
To achieve superior results, understanding heavy duty machines is vital for working with thick fabrics like denim.
Settings for Lightweight Fabrics Like Chiffon
Lightweight fabrics like chiffon and silk need gentle handling through precise sewing machine settings for chiffon adjustments.
Set your stitch length to 2-2.5mm for clean seams without puckering. Lower your fabric tension to 0-2 on the bottom thread and 5-7 on top for proper thread control.
This stitch balance prevents the delicate fibers from bunching. Test your machine calibration on scraps first—these sewing techniques guarantee professional results with tricky materials, ensuring a finish that requires gentle handling.
Settings for Heavy Fabrics Like Canvas
Canvas and heavy fabrics demand higher tension settings and longer stitch lengths to penetrate thick layers effectively.
Heavy fabrics don’t negotiate—they demand stronger settings to achieve professional results.
Set your tension dial to 4-6 and stitch length to 2.5-4 mm for canvas tension control.
Heavy fabric requires stronger thread control to prevent skipped stitches.
Test sewing machine settings for upholstery on scraps first.
Fabric thickness determines your tension adjustment approach—don’t fight the material, work with it.
Basic Sewing Machine Components
Understanding your sewing machine’s components is essential before adjusting any settings.
You’ll need to locate the power switch, spool pin, thread guide, bobbin winder, stitch selection controls, tension dial, presser foot, and needle plate to operate your machine effectively, focusing on key parts like the stitch selection controls and tension dial.
Power Switch and Spool Pin Location
Your sewing machine’s power switch sits on the right side or back panel, while some models start automatically when plugged in.
The spool pin holds your thread spool securely on top of the machine.
- Power Controls: Locate the main power switch before starting any project
- Machine Placement: Position your machine on a stable surface for safety
- Spool Pin: Thread the spool pin with your chosen thread color
- Safety Features: Always unplug when threading or changing settings
Thread Guide and Bobbin Winder Function
Guiding your thread through the proper path guarantees smooth operation and prevents tangled messes.
The thread guide, a small metal fixture on your machine’s left side, directs thread from the spool pin to create the correct thread path.
This component works with the bobbin winder mechanism to maintain proper thread tension during winding.
When setting up bobbin thread, the guide adjustment keeps everything aligned.
Your sewing machine settings depend on this fundamental thread path setup for consistent results.
Proper bobbin threading techniques are essential for achieving perfect stitches and preventing common issues like thread bunching or nesting.
Stitch Selection Buttons and Tension Dial
Mastering your machine’s Thread Control starts with understanding two key components on your sewing machine’s control panel.
The stitch selection buttons let you choose between straight, zigzag, and decorative Stitch Options, while the tension dial manages thread pull for balanced seams.
Here’s your essential control breakdown:
- Stitch selection buttons – Located on front or side, control stitch type and direction
- Tension Adjustment dial – Usually numbered 0-9, positioned near take-up lever for precise Fabric Guidance
- Dial Settings – Combine stitch length, stitch width, and thread tension controls for perfect results
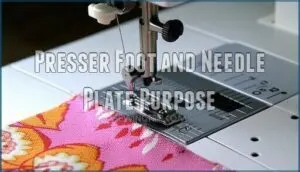
Presser Foot and Needle Plate Purpose
Your presser foot holds fabric steady during sewing, preventing unwanted movement that can throw off your stitch length and sewing accuracy.
The needle plate sits beneath, featuring measurement markings for precise fabric guidance and seam allowances.
Together, they provide fabric control essential for consistent results.
Different presser foot types handle various fabrics – use the right one for your sewing machine settings and needle position requirements.
Setting Up Your Sewing Machine
Before you start threading and sewing, you’ll want to set up your machine properly to avoid frustration and guarantee smooth operation.
Proper setup means positioning your machine correctly, choosing the right needle for your fabric, and taking basic safety precautions that’ll save you time and potential headaches.
Unplugging The Machine for Safety
First rule of sewing machine safety: always unplug your machine before threading or changing needles.
This simple electrical precaution prevents accidental starts that could cause injury. Power cords and switches don’t mix with threading hands.
Make unplugging part of your setup routine—it’s the easiest accident prevention step.
These user guidelines protect you from unexpected machine activation during maintenance, following the key principle of sewing machine safety and ensuring a safe environment by preventing accidental starts.
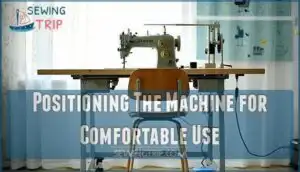
Positioning The Machine for Comfortable Use
Position your sewing machine with the needle on the left and the machine body on the right for ideal sewing machine operation.
This machine orientation creates a natural workspace setup that supports proper user posture during extended projects.
Place your machine on a stable surface at elbow height, ensuring comfortable seating that prevents back strain.
The foot pedal should sit naturally under your dominant foot for smooth control during sewing machine setup.
Choosing The Right Needle for Fabric Type
Your needle choice can make or break your sewing project. Machine needles aren’t one-size-fits-all tools.
Here’s your Needle Size Guide for different fabrics:
- Size 9/70 – Silk, chiffon, and delicate materials
- Size 11/80 – Cotton, linen, medium-weight fabrics
- Size 14/90 – Heavier cottons, canvas prep work
- Size 16/100 – Denim, thick canvas, multiple layers
- Size 18/110 – Heavy leather, upholstery materials
Needle Point Types matter too. Universal needles work for most projects, while ballpoint needles prevent runs in knits. Sharp needles pierce tightly woven fabrics cleanly.
Fabric Weave Impact determines whether you need cutting or separating action. Understanding specific needle dimensions is vital for achieving excellent sewing results.
Preventing Needle Breaks starts with matching needle size to fabric weight – forcing wrong combinations causes costly mistakes.
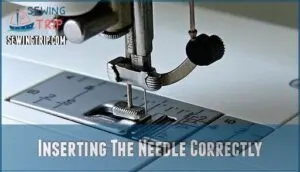
Inserting The Needle Correctly
Why struggle with bent needles when proper insertion takes seconds? Insert your sewing machine needles with the flat side facing backward, ensuring the groove aligns with your thread’s path.
Different needle types and sizes require secure installation in the needle clamp. Proper needle orientation prevents threading issues and fabric damage, giving you complete control over your sewing projects.
Regularly inspect your needles, and consider needle replacement schedules for peak performance.
Default Sewing Machine Settings
Most sewing machines come with standard default settings that work well for general sewing projects.
You’ll typically find the tension dial set around 3-4, stitch length at 2.5-3.0 mm, and stitch width at 0 for straight stitching.
The settings include a tension dial set around 3-4, and stitch length at 2.5-3.0 mm.
Standard Top Thread Tension Dial Settings
Most sewing machines feature a tension dial range from 0 to 9, with the default setting at 4 or 4.5 for general sewing.
This sweet spot handles medium-weight fabrics perfectly.
Fabric weight impact determines your adjustments—heavier materials need higher settings while delicate fabrics require lower numbers.
When troubleshooting tension issues, check your threading first before adjusting.
Modern automatic tension systems handle most fabrics, but manual control gives you precision.
Regular tension dial maintenance keeps your balanced stitches consistent, preventing bobbin thread visibility issues.
Average Stitch Length and Width Settings
Most sewing machines default to 2.5-3.0 mm stitch length for general sewing, providing balanced seam appearance without fabric damage.
You’ll adjust stitch width from 0 (straight) to 7mm for decorative applications, while functional seams typically use narrower settings.
Always test stitch adjustment on scrap fabric first—your sewing machine settings determine whether you’ll achieve professional results or create a puckered mess.
Default Tension Settings for General Sewing
Mastery over your machine begins with understanding the universal setting that works for most projects. Most sewing machines ship with a default tension around 3-4, which creates balanced stitches for medium-weight cotton fabrics.
Here’s your foundation for optimal tension:
- Standard setting: Start with tension dial at 3-4 for general sewing
- Thread interlock: Proper tension locks threads in fabric’s center layer
- Scrap fabric testing: Always test on fabric scraps before starting projects
- Balanced stitches: Look for even thread distribution on both fabric sides
- Tension troubleshooting: Adjust incrementally—small changes make big differences
Consulting The Owner’s Manual for Specific Settings
Every manufacturer builds machines differently, so your owner’s manual becomes your personal roadmap to perfect sewing machine settings.
Brand-specific instructions reveal ideal tension ranges, fabric recommendations, and stitch combinations your machine handles best.
The troubleshooting guide helps diagnose tension problems quickly, while maintenance schedules keep your machine running smoothly.
Don’t overlook warranty information either—it protects your investment.
Frequently Asked Questions (FAQs)
What are the settings for a sewing machine?
Ever wondered what makes your machine hum perfectly?
Adjust tension (2-4 for most fabrics), set stitch length (5-3mm for standard sewing), choose appropriate width, and match settings to your fabric type for professional results.
What are the different types of Stitch settings on a sewing machine?
You’ll find three main stitch categories on your machine: straight stitches for basic seams, zigzag stitches for stretch fabrics and finishing edges, and decorative stitches for embellishment and specialized techniques.
How do you set a stitch length on a sewing machine?
Locate your machine’s stitch length dial or digital control panel.
Turn the dial or press buttons to adjust between 0-0mm settings.
Test on scrap fabric first—shorter lengths create stronger seams, longer ones work for basting.
How do I adjust my sewing machine stitch?
Most sewers don’t know that 70% of stitching problems stem from improper adjustments.
You’ll adjust stitch length using your machine’s dial or digital controls, typically ranging 0-0mm, while setting tension via the numbered dial for balanced stitches.
How do I choose a stitch pattern on a sewing machine?
Look for stitch selection buttons or dials on your machine’s front or side panel.
These controls let you choose different stitch types, adjust their length and width.
Start with basic straight stitches, then experiment with decorative options once you’re comfortable.
How much tension should a sewing machine have?
Like a compass needle finding its magnetic north, your machine’s tension should settle at 3-4 for most fabrics.
You’ll adjust lower for delicate materials, higher for heavy ones.
Test on scraps first—balanced stitches mean you’ve hit the sweet spot.
What is the basic setting for a sewing machine?
Start with a straight stitch at 5mm length, tension dial at 3-4, and medium stitch width. You’ll adjust these baseline settings based on your fabric weight and project needs.
What is the normal length setting for a sewing machine?
Most sewing machines work best with a 5-0 mm stitch length for everyday projects.
You’ll get around 8-12 stitches per inch, creating strong seams that won’t pucker or gap on standard fabrics.
What is the default setting on a sewing machine?
Your sewing machine’s default setting is typically around 3-4 for thread tension and 5-0 mm for stitch length.
These middle-ground settings work well for most cotton fabrics and general sewing projects before you fine-tune for specific materials.
How do I wind the bobbin properly?
Place your thread spool on the pin, then pull thread through the bobbin winder’s tension disc.
Push the bobbin onto the winder spindle and engage it.
Hold the thread tail while pressing your foot pedal to wind smoothly and evenly until full.
Conclusion
If you’ve ever had a sewing project take an unexpected detour, basic sewing machine settings are your best guide back on track.
Balancing tension, stitch length, and width lets you handle everything from delicate chiffon to sturdy denim.
Check your machine’s defaults, adjust for fabric type, and always use the right needle.
With these basics, you’ll avoid most common sewing headaches, and by keeping your manual handy, you can trust your settings, and let your creativity do the rest.
- https://www.artisanstitch.co.uk/sewing-machine-tension/
- https://www.youtube.com/watch?v=b4JDAkByMlQ
- https://www.threadsmagazine.com/2008/11/02/understanding-thread-tension
- https://sewingcraft.brother.eu/en/blog/tutorials/2022/how-to-understand-sewing-stitches
- https://craftworld.com/cms/sewing-machine-stitch-settings/

