This site is supported by our readers. We may earn a commission, at no cost to you, if you purchase through links.
A needle moving at full speed completes roughly 1,000 stitches per minute. That’s not a statistic most sewists think about until something goes wrong—a finger slips, a cord sparks, or a rotary cutter finds skin instead of fabric.
Sewing feels domestic and low-risk, and that’s exactly what makes it deceptively hazardous. The tools are sharp, the machines are electrical, and fatigue creeps in during long projects when your guard drops.
Safe sewing practices aren’t about paranoia. They’re about building habits so automatic that protecting yourself becomes part of the craft itself.
Table Of Contents
Key Takeaways
- Always unplug your sewing machine and wait 30 seconds before any adjustment — it’s the single habit that prevents most electrical accidents.
- Distraction is as dangerous as a dull blade; a focused mind and a clear workspace protect you more than any tool guard alone.
- Sharp tools, stored right are safer than dull ones — replace rotary blades when they snag, keep pins in labeled holders, and never leave a rotary cutter exposed.
- Your body is part of the setup: proper seat height, task lighting above 500 lux, and a stretch every 30–45 minutes keep fatigue from turning into injury.
Essential Sewing Machine Safety Guidelines
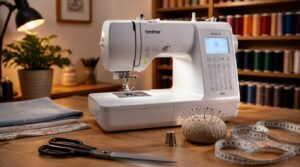
Your sewing machine is a powerful tool, and like any machine, it demands a little respect. A few key habits can make the difference between a safe session and an avoidable accident. Here’s what every sewist should know before sitting down to stitch.
Protecting your fingers starts with the needle, but true safety runs deeper — good sewing machine maintenance habits keep both you and your machine running smoothly session after session.
Unplug Before Adjustments
Before changing a needle, swapping a presser foot, or reaching into the bobbin area, always unplug your sewing machine. Not just powered off — fully disconnected. Then wait 30 seconds for internal capacitors to discharge before touching anything.
- Prevents accidental activation mid-adjustment
- Allows capacitor discharge safety before contact
- Aids safe bobbin area access
- Promotes proper maintenance tool separation
- Makes post-adjustment testing a deliberate, conscious step
Keep Fingers Clear
Your fingers and the needle should never share the same space. Think of the area around the needle plate as a no-fingers zone — treat it that way every single time.
Finger guards help enforce that boundary. They guide fabric toward the presser foot while steering your hands away, and clear plastic designs keep your sightlines open.
| Safety Practice | Why It Matters |
|---|---|
| Use finger guards | Reduces contact with the needle strike zone |
| Operate pedal with your foot’s base | Keeps fingers away from moving parts |
| Stop and raise needle before repositioning | Prevents hand contact during fabric adjustments |
| Use tweezers near the needle plate | Replaces finger reach with a safer tool |
Let the feed dogs do the work — they pull fabric through, so your fingertips don’t have to chase it. When stitching curves, use both hands to steady the fabric, but keep them at least an inch from the needle. And never reach across the needle plate while the machine is running.
Use Correct Needles
The right needle isn’t just a detail — it’s what stands between clean stitches and damaged fabric.
Following the proper 90° entry angle can reduce fabric trauma during stitching.
- Ballpoint needles glide through knits without creating snags or runs
- Sharp needles deliver clean, precise entry into woven fabrics
- Denim or leather needles handle tough, thick materials without deflecting
- Needle size must match both your fabric weight and thread thickness
- Replace needles every 8–12 hours of use to prevent skipped stitches
Sew Without Distractions
A clean, precise needle choice keeps you in control — but even the best setup can’t protect you if your mind is elsewhere. Distraction is a safety risk.
Whether you’re threading or switching settings, staying mentally present matters just as much as mastering singer sewing machine needle position safety.
Even the sharpest needle cannot protect you from your own distracted mind
Silence notifications, put pets in another room, and commit to one project per session.
A quick pre-session checklist takes two minutes and keeps your focus exactly where it belongs: on the work in front of you.
Avoid Loose Accessories
Loose items near your machine are more dangerous than they look.
Pins, bobbins, and thread snips left on the machine bed can become projectiles or get drawn into the rotary hook, causing jams.
Keep small components stored in labeled containers, magnetic holders, or designated trays — and clear your work surface before every session.
Electrical Safety for Sewing Machines
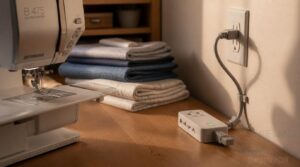
Your sewing machine runs on electricity, and that means a few basic precautions can prevent serious accidents. Electrical hazards aren’t always obvious — a frayed cord or an overloaded outlet can cause real damage before you notice anything wrong. Here’s what to keep in mind to keep your setup safe.
Inspect Cords Weekly
Your power cord is a silent hazard hiding in plain sight.
Once a week, run your hand along the full length of the cord, feeling and looking for cracks in the insulation, exposed copper, or heat discoloration near the plug. Check that the prongs aren’t bent or loose — arcing from a bad plug connection is a genuine fire risk.
Prevent Outlet Overloads
Your sewing machine isn’t a massive power drain on its own, but it shouldn’t share an outlet with your iron, space heater, or anything else that pulls hard. One machine per outlet is the rule.
Daisy-chaining power strips multiplies that risk quickly — one strip per outlet, always.
Check your breaker panel labels so you know exactly which devices are sharing a circuit.
Use Surge Protection
A power surge can fry a computerized sewing machine in milliseconds. That’s why a UL-certified surge protector with a minimum 2,000-joule rating isn’t optional — it’s critical.
Check the clamping voltage, too; lower values mean faster protection.
Watch the indicator light: a failed status light means your protector needs replacing now.
Keep Liquids Away
Water and electricity don’t negotiate. A tipped cup near your machine can end a project — or worse, cause a real shock hazard.
Designate a liquid-free zone at least one meter from your workstation.
- Use spill-proof bottles with secure lids
- Place drinks on a separate surface
- Keep a dry cloth within reach
- Wipe spills immediately — don’t draft and drink
Manage Voltage Safely
Most circuits don’t warn you before they fail — they just trip, or worse, overheat. Fit RCDs or GFCIs on every outlet your sewing equipment uses; they cut power within milliseconds after a fault.
Check cords for exposed conductors weekly.
Never re-energize a tripped circuit until a qualified person clears it.
Sharp Tool Handling and Storage
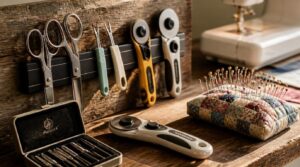
Sharp tools are a big part of sewing, and how you store them matters just as much as how you use them. A misplaced pin or an unguarded rotary blade can cause a serious cut in seconds. Here’s what you need to know to keep your tools organized, protected, and out of harm’s way.
Store Pins Securely
A loose pin on the table edge is an accident waiting to happen. Use a pincushion with dense fill to hold pins firmly — it prevents rolling, keeps sharp ends visible, and puts everything within reach.
- Store straight and safety pins separately
- Face pin heads upward for quick identification
- Label spare pins by size and type
- Replace bent or rusted pins promptly
- Keep storage away from children and pets
Use Magnetic Holders
A magnetic pin holder takes organization a step further than a pincushion. Mount one on a steel pegboard, and your needles stay visible, accessible, and — critically — off the floor.
Choose holders with corrosion-resistant coatings and never exceed their rated weight limit. Keep them away from computerized machines, since magnets can interfere with electronics.
Retract Rotary Cutters
Pins and needles have their holders — rotary cutters need the same respect, just with higher stakes. A exposed rotary blade doesn’t forgive a moment’s inattention.
Retract the blade immediately after every cut; modern self-retracting models return to a safe position within 0.5 seconds of releasing the squeeze trigger. That’s not slow — but your hand can still reach it first.
Keep Blades Sharp
A dull blade is actually more dangerous than a sharp one — it drags, slips, and forces you to push harder. Replace rotary blades when they snag threads or skip across fabric.
For scissors, a 15–20 degree sharpening angle per side keeps the edge clean. Test sharpness with a light slice through thread: smooth means ready, tearing means it’s time.
Wear Cut-Resistant Gloves
When rotary cutters and scissors are part of your daily toolkit, cut-resistant gloves are worth keeping within arm’s reach.
Look for ANSI A3 or higher ratings — A3 controls routine cutting, while A5 covers heavier tasks.
Kevlar and Dyneema gloves offer solid protection without bulk. Choose a snug fit; loose gloves kill dexterity fast.
Ergonomic Sewing Workspace Setup
Your workspace setup matters more than most sewists realize — a poor arrangement quietly drains your energy and strains your body over time. Getting the ergonomics right means you can sew longer, more comfortably, and with fewer aches the next morning. Here’s what to address first.
Set Machine Height

Getting machine height right is one of the most important adjustments in sewing ergonomics.
For seated work, 2.5–3 inches below elbow level keeps your wrists neutral and your shoulders relaxed. If you’re standing, align the surface with your elbow height directly.
Either way, your arm should flow smoothly from shoulder to forearm — no hiking, no reaching.
Choose Supportive Seating

Your chair is the foundation of your whole ergonomic workstation. Seat height should place your elbows at roughly 90 degrees, with feet flat on the floor. Aim for 16 to 21 inches from floor to seat.
A contoured backrest with lumbar support keeps your spine’s natural curve intact — critical during long sessions.
Armrests parallel to your sewing surface prevent shoulder elevation.
Separate Cutting Tables

A dedicated cutting table does one thing your sewing machine surface can’t — it gives fabric room to breathe. Cutting accuracy improves when the surface is stable, vibration-free, and sized between 36 and 72 inches long.
- Built-in storage keeps rulers and mats within reach
- Durable laminate surfaces resist scratches and adhesive residue
- Locking wheels hold the table steady during precise cuts
Route Cords Safely

A cord snaking across your floor is a trip waiting to happen. Route cords along walls, securing them with clips or ties at regular intervals to prevent sagging.
Where cords must cross walkways, use cord covers or ramps. Keep a 36-inch clear aisle around your workspace — enough room to move freely without a second thought.
Organize Tools Clearly

A cluttered workspace costs you time and safety. Label every drawer with its contents — studies suggest this cuts search time by up to 40 percent.
- Group tools by function: cutting, stitching, measuring, marking
- Sort pins and needles into separate holders by size
- Use clear bins for threads and small notions
- Keep frequently used tools within arm’s reach
- Rotate tools seasonally to maintain workflow
Fatigue, Lighting, and Health Protection

Good sewing habits go beyond sharp tools and proper posture — your eyes, body, and overall health need just as much attention.
Fatigue and poor lighting are two of the most overlooked hazards in a home sewing space, and they can quietly chip away at both your safety and your work quality.
Here’s what to focus on to keep yourself feeling sharp and protected throughout every session.
Improve Task Lighting
Good lighting isn’t decoration — it’s safety. Aim for at least 500 lux on your work surface, or 1,000 lux when you’re doing detailed stitching. An adjustable LED task lamp positioned to the side or slightly in front keeps shadows off your fabric without bouncing glare back at you.
Choose bulbs rated between 3500K and 4500K with a Color Rendering Index of 85 or higher. That combination renders thread colors and fabric tones accurately, so you’re not guessing. Frosted or diffused shades soften harsh hotspots without dimming what you need to see.
Reduce Eye Strain
Lighting sets the stage, but your eyes still carry the load.
Sit so the work surface is 40–75 cm from your eyes — roughly arm’s length — and angle the machine so you look slightly downward. That head position alone reduces how hard your focusing muscles work.
Try the 20-20-20 rule: every 20 minutes, look at something 20 feet away for 20 seconds.
Take Stretch Breaks
Your eyes just got a break — now your hands, neck, and back need one too.
Stop every 30–45 minutes. Stand up, shake out your hands, roll your shoulders slowly backward. It takes under two minutes and prevents the kind of stiffness that sneaks up mid-seam. Start before soreness begins, not after.
Practice Safe Ironing
The iron is just as dangerous as any blade in your sewing space. Always unplug it after each use — no exceptions.
Check the care label first, then test your heat setting on a scrap piece.
Use distilled water in the reservoir to prevent mineral buildup, and keep the board stable, at elbow height, with the cord clear of the hot soleplate.
Keep First Aid Nearby
A small kit close to your machine can mean the difference between a quick fix and a preventable problem. Keep it within arm’s reach, on a stable surface you can see without searching — consistency matters, especially under stress.
Stock it with antiseptic wipes, sterile gauze, and adhesive bandages in multiple sizes for pins, needles, and rotary-cutter nicks. Don’t forget disposable gloves.
Frequently Asked Questions (FAQs)
What are some safe steps to take when sewing?
Sewing safely means unplugging before adjustments, keeping fingers an inch from the needle, using the right needle for your fabric, staying focused, and securing loose accessories before you start.
What is the most secure stitching method?
The backstitch is your strongest option — two to three overlapping stitches at each seam end resist pull-out under real tension. Pair it with polyester thread for maximum knot strength.
Do you know sewing safety rules?
Yes — sewing safety rules cover everything from unplugging before adjustments to storing sharp tools and maintaining proper lighting. Ignore them, and a simple distraction can turn a routine stitch into a serious injury.
What are sewing machine safety tips?
Like a guard rail on a steep road, keeping one inch between your fingers and the needle is your first defense. Always unplug before threading, select the right needle, and sew distraction-free.
What is the most important sewing machine safety rule?
Never sew over pins — they can snap the needle, sending metal fragments flying at your face. Remove all pins before they reach the needle area. That single habit prevents most machine damage and injuries.
How to make a sewing machine safe and accident-free?
Threading a needle blindly in a busy room is a recipe for mishaps. Unplug before every adjustment, keep fingers clear of the needle, use the correct needle size, and eliminate distractions to stay accident-free.
What is sewing safety?
Sewing safety means protecting yourself from sharp tools, moving parts, and electrical hazards while you work. It covers proper posture, organized workspaces, and smart habits — so every project stays enjoyable and injury-free.
What are sewing safety precautions?
Safety is the thread that holds every sewing session together. Unplug before adjustments, keep fingers from the needle, use correct needles, eliminate distractions, and store all sharp tools securely.
How to be safe when using a sewing machine?
Your machine can become a hazard the moment you lose focus or skip a small precaution. Unplug before adjustments, keep fingers clear, and never let distractions pull your attention while the needle’s moving.
What are the safety tools for sewing?
The right safety tools keep your hands, eyes, and workspace protected. Think magnetic pin holders, cut-resistant gloves, protective blade sheaths, thimbles, and heat-resistant mats — each one quietly preventing the injuries you’d rather never experience.
Conclusion
Imagine this: a workspace where every tool is in its place, the light is clear, and your hands move with practiced confidence. That’s what safe sewing practices build over time—not just a safer room, but a sharper, more capable sewist.
Habits form slowly, then hold fast. Start with one change today. Protect your fingers, check your cords, rest your eyes.
The craft rewards those who respect it enough to treat their safety as seriously as their seams.
- https://www.goldstartool.com/blog/top-sewing-machine-safety-tips.htm
- https://wunderlabel.com/en-gb/blog/p/14-essential-sewing-safety-tips-beginners
- http://www.osha.gov/etools/sewing
- https://www.nursingworld.org/practice-policy/work-environment/health-safety/safe-needles/safe-needles-law
- https://www.pinterest.com/ageberry/