This site is supported by our readers. We may earn a commission, at no cost to you, if you purchase through links.
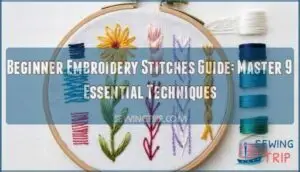
Start with the backstitch for clean outlines, then learn running stitch for simple details and straight stitch for basic lines.
French knots add perfect texture, while stem stitch creates smooth curves.
The satin stitch fills shapes beautifully, split stitch makes fine outlines, and chain stitch works great for decorative elements.
Lazy daisy creates instant flower petals.
These beginner embroidery stitches guide techniques work on any fabric with basic supplies like embroidery floss, needles, and hoops.
Each stitch builds your confidence and opens new creative possibilities for your projects.
Table Of Contents
Key Takeaways
- You’ll master nine fundamental stitches that form the foundation of all embroidery work, starting with backstitch for clean outlines, running stitch for details, and straight stitch for basic lines.
- You’ll need basic supplies including embroidery floss, sharp needles, cotton fabric, and a 6-inch hoop to keep your fabric taut while creating professional-looking results.
- You’ll develop proper technique through tension control, keeping 18-inch thread lengths to prevent tangling, and practicing regularly with focused 15-minute sessions to build muscle memory.
- You’ll expand your skills with decorative stitches like French knots for texture, satin stitch for filling shapes, and lazy daisy for instant flower petals that add dimension to your projects.
Basic Embroidery Stitches
You’ll start with these five basic stitches that form the foundation of all embroidery work. Each stitch serves a specific purpose and creates different effects in your designs.
Backstitch for Outlines
Backstitch serves as your go-to stitch for crisp, professional outlines that define your embroidery designs. This reliable technique builds continuous lines by working backward—you’ll stitch from right to left while creating forward progress.
Master backstitch with these key techniques:
Master backstitch for crisp, professional outlines that define your embroidery designs with precision and control.
- Control line weight through stitch length—shorter stitches create delicate outlines, longer ones make bold borders
- Practice curved backstitch by taking smaller stitches around bends for smooth, flowing lines
- Maintain consistent backstitch spacing by keeping equal distances between entry and exit points
- Experiment with decorative backstitch variations like whipped or threaded styles for added texture
Start by bringing your needle up one stitch length ahead of where you want to begin. Insert it back at your starting point, then bring it up another stitch length forward. This basic stitch forms the foundation of beginner embroidery, giving you clean outlines perfect for lettering backstitch projects and detailed embroidery stitches that look professionally finished.
Running Stitch for Details
Think about threading your needle and making your first gentle pass through fabric.
The running stitch creates those classic dashed lines you’ll use everywhere in embroidery for beginners.
This fundamental technique from basic stitches involves simple up-and-down movements.
Experiment with varying lengths and spacing effects to add visual interest.
Short stitches work perfectly for fine layered details, while longer ones suit bold accents.
The running stitch adapts beautifully to curved lines and pattern adaptations, making it essential for beginner embroidery projects.
Straight Stitch for Lines
The straight stitch is your building block for all embroidery. You’ll bring your needle up through fabric, then down to create a single line. Master this fundamental technique to discover countless design possibilities.
- Varying lengths create different effects – short stitches for delicate details, longer ones for bold statements
- Angled stitches add movement and direction to your work
- Grouped stitches form clusters that build texture and visual interest
Use parallel lines for geometric patterns or isolated accents for scattered texture.
These basic stitches work beautifully alone or combined with other embroidery stitches. Perfect beginner stitches for embroidery for beginners – practice consistent spacing and tension for professional results.
French Knot for Texture
French knots create beautiful texture effects that bring depth to your embroidery stitches.
These raised dots work perfectly for flower centers, animal fur, or decorative accents.
Master knot placement by bringing your needle up through fabric, wrapping thread weight around it twice, then inserting close to your starting point.
Knot size depends on wrap count—two wraps make standard knots.
Practice knot variations with different thread types to discover unique textures for your embroidery techniques.
Stem Stitch for Curves
With gentle precision, the stem stitch transforms any curved line into flowing artwork. This fundamental technique creates smooth, rope-like lines perfect for flower stems and decorative borders.
Here’s your step-by-step approach to mastering stem stitch:
- Master stem stitch direction by working left to right with thread consistently below your needle
- Control curve stitch length using shorter stitches on tight turns for better control
- Apply tight curve technique by reducing stitch size when traversing sharp angles
- Focus on avoiding puckering by maintaining steady tension without pulling too tightly
Keep your consistent stem width by overlapping each new stitch halfway through the previous one. To achieve professional results, beginners should familiarize themselves with essential stitch types. This creates that signature twisted appearance that makes stem stitch so versatile. Practice on gentle curves first, then progress to sharper turns as your confidence builds.
Essential Embroidery Supplies
With your embroidery stitches mastered, you’ll need quality embroidery supplies and embroidery tools.
Smart beginner embroidery materials make projects easier and more enjoyable. Start with sharp embroidery scissors, various needle sizes, and quality floss. Cotton fabric works well for learning. A 6-inch hoop keeps fabric taut while stitching.
Different projects may require specific needle sizes for ideal results.
| Essential Tools | Helpful Extras | Storage Items |
|---|---|---|
| Embroidery needles | Fabric Stabilizers | Thread Organizers |
| Sharp scissors | Pattern Transfer tools | Needle cases |
| Quality floss | Stitch Removers | Project bags |
| Cotton fabric | Lighting Options | Hoop organizers |
These embroidery materials transform frustrating experiences into smooth stitching sessions. Quality tools aren’t expensive but make every project more successful.
Getting Started With Embroidery
Before you start stitching, you’ll need to set up your workspace with the right tools and materials.
Proper preparation makes embroidery easier and helps you create neat, professional-looking results from your first project.
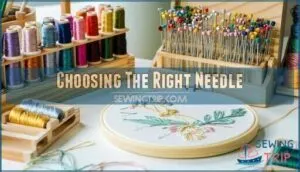
Choosing The Right Needle
Selecting the right needle for your embroidery project sets the foundation for successful stitching. Your Needle Size should complement your Thread Thickness—finer threads need smaller numbered needles, while thicker threads require larger ones. Point Type matters too, with sharp tips penetrating Fabric Type cleanly.
Consider these essential factors when choosing embroidery needles:
- Size 5 needles work perfectly for beginners using standard embroidery floss
- Embroidery supplies from quality brands prevent frustrating thread breaks and snags
- Needle Material affects durability—gold-plated options resist corrosion and last longer
- Match your embroidery tools to your fabric weight for smooth, even stitches
Quality embroidery needles make every stitch flow effortlessly through your fabric. For beginners, it’s often recommended to start with embroidery needle variety packs to explore different sizes.
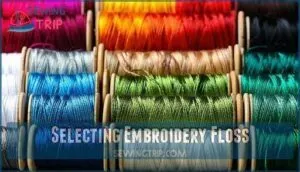
Selecting Embroidery Floss
Once you’ve selected your needle, choosing quality embroidery floss becomes your next priority. The right thread makes all the difference between frustrating tangles and smooth, beautiful stitches that beginners can actually enjoy creating.
Floss Material matters more than you might think. Six-strand cotton embroidery floss works best for most beginner embroidery stitches. Brand Comparison shows DMC leads in consistency and Color Choices, offering over 500 shades with reliable Dye Lots. Thread Weight affects your final results—separate strands for delicate work or use multiple strands for bold effects.
To prevent tangles and ease identification, consider using specialty floss organizers for storage. Here’s your embroidery floss selection guide:
- Start with DMC cotton floss for consistent quality and colorfastness
- Build a basic palette with black, white, primary colors, and earth tones
- Cut 18-24 inch lengths to prevent tangling during stitching
- Separate strands before threading to avoid knots and uneven tension
- Store properly on bobbins to keep thread organized and tangle-free
Quality thread transforms embroidery for beginners from struggle to satisfaction.
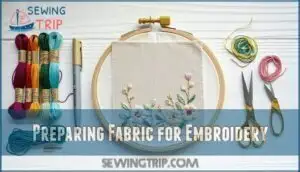
Preparing Fabric for Embroidery
Proper preparation transforms any fabric into an ideal embroidery foundation. Start by selecting 100% cotton for your first projects since it offers stability and forgiveness for beginners.
Pre-wash your fabric using cold water and gentle detergent to remove manufacturing residues and prevent future shrinkage. This step protects your finished work from distortion. Air dry partially, then iron while damp using appropriate heat settings for your fabric type.
| Fabric Type | Pre-wash Method | Stabilizer Needed |
|---|---|---|
| Cotton | Cold gentle cycle | Tear-away |
| Linen | Hand wash preferred | Cut-away |
| Synthetic blends | Cool water only | Wash-away |
Cut embroidery cloth with two-inch borders around your design area. Finish raw edges using pinking shears or zigzag stitching to prevent fraying during stitching.
Test thread compatibility on fabric scraps before starting your main project. This confirms colors won’t bleed and threads work smoothly through the weave. Stabilizing fabric properly prevents puckering and maintains crisp transferring patterns results.
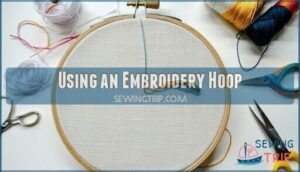
Using an Embroidery Hoop
Think of your embroidery hoop as your trusty sidekick that keeps fabric steady while you work. After preparing your fabric, it’s time to get that material properly secured.
Pick the right hoop size for your project. Smaller hoops give you better control when you’re starting out with embroidery for beginners.
Here’s how to set it up:
- Place your fabric over the inner ring with your design centered
- Press the outer ring down and adjust the screw for proper fabric tension
- Check that your hoop placement keeps the fabric taut but not stretched
Different hoop types work better with various fabric weights. Consider various hoop dimensions to suit different project needs.
Securing fabric properly prevents puckering and makes your embroidery stitches look cleaner. Once you finish your embroidery stitches for beginners, gently remove the hoop.
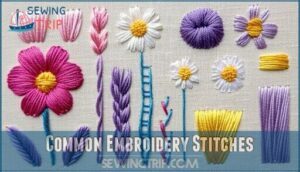
Common Embroidery Stitches
You’ll now build on your basic stitches with four essential techniques that add dimension and detail to your embroidery projects.
These common stitches – satin stitch, split stitch, chain stitch, and lazy daisy – will expand your skills and let you create more complex designs with filled areas, textured outlines, and decorative elements, utilizing the dimension added by these stitches to enhance your work.
Satin Stitch for Filling
Satin stitch transforms flat fabric into lustrous masterpieces. You’ll place parallel stitches close together, completely covering shapes with smooth, even threads. This filling technique creates stunning satin stitch variations when you master the basics.
One can also explore other fill and outline stitches to add unique textures.
Perfect your technique with these steps:
- Keep satin stitch direction consistent across the entire shape
- Control stitch length to prevent loose, floppy coverage
- Use padded satin stitch underneath for raised effects
- Practice satin stitch shading by changing thread colors
- Try long short stitch for blended color shifts
Start with simple circles before attempting complex designs. Your embroidery stitches will look professional when you maintain steady tension and avoid pulling too tight. This foundational embroidery stitches tutorial skill opens doors to advanced embroidery stitches for beginners techniques.
Split Stitch for Outlines
While challenging at first, the split stitch creates beautiful textured outlines with a braided appearance.
Insert your needle up through fabric, make a forward stitch, then bring the needle back up through the center of that same stitch.
This thread splitting technique produces rope-like lines perfect for curve detailing.
Stitch density and fabric choice affect the final texture, making this versatile outline technique essential for embroidery stitches mastery.
Chain Stitch for Details
While split stitch creates textured outlines, chain stitch opens up a world of decorative possibilities for your embroidery projects.
This fundamental technique creates linked loops that form continuous lines perfect for outlining shapes and adding intricate details.
Start by bringing your needle up through the fabric. Insert it back down at the same point, but don’t pull completely through. Instead, bring the needle up a short distance away, catching the thread loop underneath. Pull gently to form your first chain link, then repeat the process.
Chain stitch adapts beautifully to curves and corners, making it ideal for floral stems, lettering, and decorative borders. You can adjust the size and spacing to create different effects.
- Chain variations include twisted chain for rope-like texture and square chain for geometric designs
- Detached chain creates individual petals and leaves by securing each loop separately
- Chain filling builds solid areas by working rows of chains close together
Lazy Daisy for Flowers
Building on your chain stitch skills, you’ll love how the lazy daisy stitch creates realistic petal shapes for your hand embroidery flowers.
This fundamental technique in embroidery stitches transforms simple loops into botanical masterpieces.
Experiment with daisy variations by adjusting loop sizes and adding leaf accents around your blooms.
Try color blending techniques or creative fillings within petals.
This stitch guide approach helps embroidery tutorials for beginners feel manageable while producing stunning results.
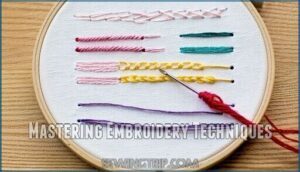
Mastering Embroidery Techniques
You’ll build consistent embroidery skills by focusing on proper tension control and keeping your threads organized.
Regular practice with these core techniques will help you troubleshoot mistakes and create professional-looking embroidery projects.
Tension Control for Even Stitches
Perfect tension transforms messy embroidery stitches into professional-looking work. You need to find the sweet spot between thread that’s too tight (causing fabric puckering) and too loose (creating uneven stitches). Mastering fabric stability and thread thickness control takes practice, but these embroidery basics will guide your progress.
Here are five essential techniques for stitch consistency:
- Keep your embroidery hoop taut throughout your project to maintain fabric stability
- Use 18-inch thread lengths to prevent tangling and guarantee smooth pulls
- Apply steady, consistent pressure with each needle pass for uniform appearance
- Check your work frequently and adjust tension before stitches set permanently
- Practice even spacing on scrap fabric before starting your main project
Proper knot prevention starts with controlled tension. These embroidery techniques for beginners form the foundation of quality work in any embroidery stitches guide.
Thread Management for Neat Work
Once you master proper tension, organizing your embroidery thread becomes equally important for clean results.
Keep your Thread Length around 18 inches to prevent tangling and make handling easier.
Securing Ends properly means starting without knots by anchoring your first stitch into the fabric back.
For Color Changes, complete one shade entirely before switching to maintain organized work.
Preventing Tangling works best when you store threads on labeled bobbins sorted by color.
To guarantee smooth operation, remember to address uneven tension causes.
Smart Waste Reduction means planning your embroidery stitches sequence beforehand, ensuring every strand counts in your embroidery for beginners journey.
Troubleshooting Common Mistakes
Why do embroidery projects sometimes go wrong? Common mistakes happen when you rush or skip basic steps.
Here are five key embroidery for beginners problems to avoid:
- Tension Issues create Fabric Puckering when you pull threads too tight.
- Knotting Thread occurs from using overly long strands or twisted floss.
- Stitch Gaps appear when spacing becomes inconsistent during stitching.
- Uneven Stitches result from improper hoop tension or hurried movements.
- Design misalignment happens when fabric shifts in loose hoops.
Master these embroidery techniques tutorial fixes for smoother basic embroidery stitches.
Practicing Regularly for Improvement
Three key principles drive successful embroidery practice: Consistent Practice, Focused Sessions, and Setting Goals. You’ll develop stronger embroidery skills when you commit to regular practice routines that target specific techniques without overwhelming yourself.
Here’s your structured approach to Skill Development:
- Schedule 15-minute daily sessions for embroidery practice to build muscle memory
- Rotate between different embroidery techniques tutorial content weekly for variety
- Focus on one stitch type per session to maintain concentration and quality
- Track your progress in a practice journal to monitor improvement patterns
- Create a comfortable workspace with proper lighting and organized supplies
Avoiding Burnout requires balance between challenge and enjoyment. Mix basic embroidery stitches with creative projects that spark your interest. Follow embroidery tutorials that match your current skill level while gradually introducing more complex techniques. This approach guarantees steady progress while maintaining your enthusiasm for learning new embroidery skills.
Frequently Asked Questions (FAQs)
How many basic embroidery stitches should beginners learn?
You’ll want to start with five essential stitches: running, backstitch, straight, satin, and stem.
These foundational techniques give you everything needed to create beautiful designs and build confidence before tackling advanced decorative stitches.
What is embroidery stitch guide?
A stitch guide provides you with step-by-step instructions and visual diagrams showing how to create different embroidery stitches.
It’s your roadmap for learning techniques, from basic running stitches to decorative knots.
What is the easiest embroidery stitch?
Ninety percent of new embroiderers start with running stitch because it’s incredibly simple.
You’ll bring your needle up and down through fabric, creating small, evenly spaced dashes that form basic outlines and patterns.
Is hand embroidery a good beginner craft?
Hand embroidery is perfect for beginners because you’ll only need basic supplies like needle, thread, and fabric.
You can master simple stitches like running stitch quickly, making it an accessible and rewarding craft to start.
Is it hard to learn embroidery stitches?
Surprisingly, embroidery stitches aren’t hard to master when you start with basics like running stitch and backstitch.
You’ll find these foundational techniques become second nature with practice, building confidence for more complex decorative stitches, which is a complete concept in itself.
What stitches make a great embroidery design?
You’ll create stunning embroidery designs by combining backstitch for clean outlines, satin stitch for solid fills, French knots for texture, and lazy daisy for flowers.
How do I know what stitch to use when embroidering?
Choose your stitch based on the design element you’re creating: backstitch for clean outlines, satin stitch for filled areas, French knots for texture, and running stitch for dashed lines or gathering.
What are the basic stitches for embroidery?
You’ll master five essential stitches: running stitch for simple lines, backstitch for solid outlines, stem stitch for curves, straight stitch for details, and satin stitch for filling areas smoothly.
What are the 10 basic stitches?
Like following a recipe for success, you’ll need these ten fundamental stitches: running, backstitch, straight, satin, stem, split, chain, lazy daisy, French knot, and blanket stitch for complete embroidery mastery.
How do I learn embroidery?
Start with basic supplies: embroidery hoop, fabric, needles, and thread. Practice fundamental stitches like running stitch, backstitch, and straight stitch on practice fabric before attempting projects.
Conclusion
Mastering these nine essential stitches transforms your fabric into a canvas of endless possibilities.
Like seeds planted in fertile ground, each stitch you’ve learned will bloom into beautiful embroidery projects.
Your beginner embroidery stitches guide journey has equipped you with backstitch precision, French knot texture, and satin stitch smoothness.
With regular practice, you’ll develop the muscle memory needed for consistent, professional-looking results.
These foundational techniques open doors to countless creative adventures ahead, and with them, you can achieve beautiful embroidery projects.
- https://cutesycrafts.com/how-to-embroider-for-beginners
- https://diaryofanorthernbelle.com/5-easy-embroidery-stitches-for-beginners-tutorial/
- https://www.needlenthread.com/2014/10/ten-embroidery-stitches-to-know.html
- https://www.dmc.com/US/en/sbs-embroidery-stitch-diagrams
- https://www.youtube.com/watch?v=PnNuzgSplaE

