This site is supported by our readers. We may earn a commission, at no cost to you, if you purchase through links.
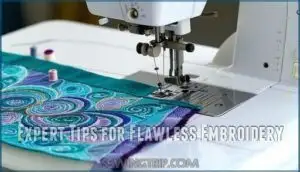
Choose tear-away stabilizers for knits and cut-away for stretchy fabrics. Keep thread tension balanced—too tight causes puckering, too loose creates loose stitches.
Use embroidery needles sized 75/11 for most projects, switching to 90/14 for heavy fabrics. Test stitch samples before starting final pieces.
Clean your machine regularly and replace needles after 8-10 hours of stitching. For metallic threads, slow your machine speed to prevent breaks.
These fundamentals transform amateur results into professional-quality embroidery that rivals store-bought designs, by applying techniques such as thread tension control and using the right needles for heavy fabrics to achieve the best results with embroidery needles.
Table Of Contents
Key Takeaways
- Master stabilizer selection – You’ll prevent puckering and distortion by choosing tear-away stabilizers for cotton and denim, cut-away for knits and stretchy fabrics, and water-soluble for delicate lace projects.
- Control thread tension properly – You’ll avoid loose stitches and thread breakage by keeping tension balanced, testing samples first, and slowing the machine speed when working with metallic threads.
- Use the right needle sizes – You’ll achieve professional results by using 75/11 needles for standard threads, 90/14 for heavy fabrics, and replacing needles every 8-10 hours of stitching.
- Maintain your equipment regularly – You’ll prevent costly repairs and ensure consistent quality by cleaning lint from the bobbin case, updating firmware monthly, and keeping your workspace organized with proper thread storage.
Choosing The Right Embroidery Machine
Your embroidery machine choice determines your project success from day one. Consider features like maximum design size, built-in designs, and user-friendly touchscreens when selecting your first machine.
The right machine sets your embroidery journey on the path to professional results from day one
Key Features to Consider
When selecting your embroidery machine, prioritize these core features that directly impact your results.
Machine Speed affects productivity—faster speeds save time but require steady hands.
Thread Capacity determines how many colors you can use without frequent changes.
Design Size capabilities limit your creative potential, so choose machines handling your preferred project dimensions.
Hoop Style compatibility expands versatility across different fabrics.
Stitch Quality separates amateur from professional results—test samples before purchasing to confirm consistent, precise stitching that meets your standards.
Comparing Popular Beginner Models
After reviewing key features, let’s examine top beginner-friendly models.
Machine comparison reveals clear winners:
- Brother SE700 – Combines sewing and embroidery for $500, perfect starter kits
- Brother PE800 – Dedicated embroidery machine at $900, excellent beginner tips included
- Singer Superb EM200 – 200 designs with versatile stitching capabilities
Each model offers different embroidery costs and learning curves.
Your embroidery machine selection depends on budget and project goals. When choosing a machine, consider the importance of built-in designs to enhance your embroidery experience.
Maximum Design Size and Capabilities
Your machine’s design limits and hoop sizes determine what you can create.
Most beginner models handle 4×4 or 5×7 inch designs.
Machine capacity affects stitch density and fabric compatibility too.
Check embroidery machine capabilities before buying – you’ll want room to grow your embroidery designs without upgrading immediately, considering your machine’s design limits.
Touchscreen and Computerized Options
When choosing computerized embroidery machines, touchscreen interfaces revolutionize your creative workflow.
Digital displays show real-time progress, while machine connectivity enables seamless software integration.
Modern computerized controls let you preview designs, adjust settings instantly, and download new patterns directly.
These embroidery machine techniques streamline the entire process from embroidery digitizing to final stitching, making computerized embroidery more accessible than ever.
Essential Tools and Accessories for Embroidery
Having the right tools transforms your embroidery from frustrating to fabulous. You’ll need proper hoops, stabilizers, threads, and organization systems to create professional results every time.
Hoops and Hooping Aids
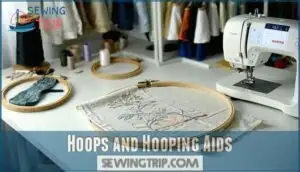
Now that you’ve picked your machine, the right embroidery hoops make all the difference. Different projects need different approaches, and having the right hooping tools saves time and frustration.
Here are three game-changing hoop options:
- Magnetic hoops – Perfect for delicate fabrics that traditional hoops might damage or mark
- Sock hoops – Specially designed for tubular items like sleeves, socks, and small garments
- Repositionable hoops – Allow you to adjust fabric placement without re-hooping your entire project
Smart hooping tips include using hoop shields to protect finished embroidery areas and investing in stabilizer holders to keep your workspace organized. Various hoop sizes give you flexibility for different design dimensions. Understanding magnetic hoop systems is essential for mastering embroidery techniques.
Stabilizers and Their Uses
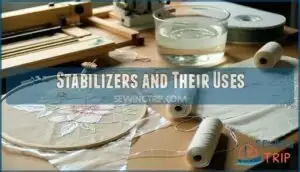
Your hoop’s secured, but fabric support determines success. The right stabilizer prevents puckering, distortion, and thread breakage while maintaining design integrity.
Understanding the role of embroidery stabilizer is vital for achieving professional results, as it involves using the right stabilizer materials.
| Stabilizer Types | Best Applications |
|---|---|
| Tear-away | Cotton, denim (70% of projects) |
| Cut-away | Knits, stretchy fabrics (90% durability) |
| Water-soluble | Lace, freestanding designs |
| Heat-away | Delicate fabrics requiring removal |
| Spray adhesive | Extra security for tricky materials |
Choose stabilizer thickness based on fabric weight and stitch density. Proper stabilizer selection and hoop management create the foundation for professional embroidery results.
Needles and Thread Selection
Why struggle with subpar results when proper needle and thread selection transforms your embroidery game?
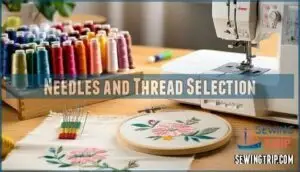
Your embroidery needles and thread selection directly impact stitch quality and project success.
- Match needle sizes to thread types – Use size 75/11 for standard embroidery thread, 90/14 for heavier threads
- Choose appropriate fiber selection – Cotton threads for everyday projects, polyester for durability, rayon for sheen
- Adjust thread tension settings – Test on scraps before starting your final piece
Scissors, Storage, and Organization Tips
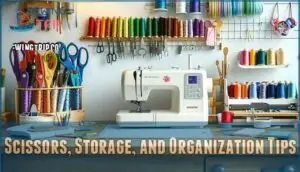
Three precision tools transform your embroidery workspace from chaos to control.
Sharp embroidery scissors cut clean lines while curved-tip scissors navigate tight spots around appliqué work.
Duckbill applique scissors prevent accidental snips through your base fabric.
| Tool Category | Recommended Items |
|---|---|
| Scissor Care | Curved-tip scissors, duckbill applique scissors |
| Thread Storage | Thread stands, organized spools by color |
| Fabric Organization | Stabilizer holders, upholstery pins for positioning |
Your Embroidery Workspace needs smart Tool Holders and systematic Fabric Organization.
Store embroidery supplies in labeled containers and use thread nets to prevent tangles.
Proper sewing tips include keeping cuticle scissors handy for detailed trimming work.
This embroidery storage system saves time and reduces frustration during complex projects.
Top Machine Embroidery Techniques
Mastering machine embroidery techniques transforms your projects from amateur attempts into professional-quality masterpieces.
You’ll discover how proper stabilization, thread management, and specialty methods create consistently beautiful results that impress every time, with beautiful results being the key to every project.
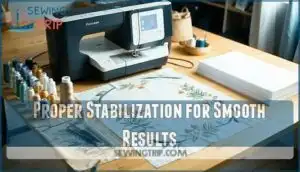
Proper Stabilization for Smooth Results
Behind every flawless embroidery project lies the foundation of proper stabilization.
The right stabilizer choice makes a huge difference in project outcomes, transforming potential disasters into professional-looking masterpieces.
- Tear-away stabilizers work perfectly for 70% of cotton and denim applications
- Cut-away stabilizers guarantee durability for over 90% of knit fabrics in high-use garments
- Water-soluble stabilizers allow residue-free finishing for lace and freestanding embroidery designs
- Spray adhesive adds extra security during fabric preparation
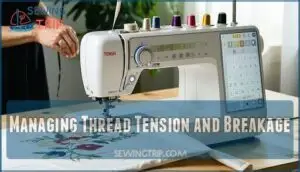
Managing Thread Tension and Breakage
Thread tension holds the key to flawless embroidery stitches.
Adjust your machine’s settings based on fabric choice and thread weight.
Proper tension prevents thread breakage and guarantees consistent stitch quality.
Run test samples before starting projects.
Slow your embroidery speed when working with delicate materials.
Regular embroidery machine maintenance keeps tension mechanisms functioning smoothly for reliable breakage prevention and ensures that thread tension is always optimal.
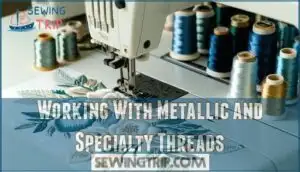
Working With Metallic and Specialty Threads
Mastering metallic thread requires finesse and the right setup. These shimmering fibers demand slower speeds, lighter tension, and specialized needles to prevent breakage.
Your thread tension settings become critical when working with these delicate materials. Understanding metallic thread properties is essential for achieving superior results.
- Use metallic-specific needles with larger eyes to reduce friction and thread shredding during stitching
- Set machine speed to 600-800 SPM to minimize breakage while maintaining consistent specialty stitches
- Apply thread nets to control high-memory specialty yarns and prevent excessive looping during embroidery
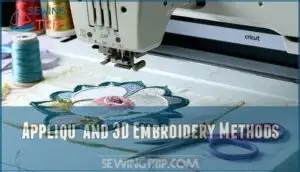
Appliqué and 3D Embroidery Methods
Applique transforms flat embroidery designs into layered masterpieces through strategic fabric layering.
Pre-trim your applique fabric using a Cricut Maker to prevent errors.
Duckbill applique scissors protect your base material during trimming.
For dimensional effects, 3D embroidery creates stunning texture through specialized stitch depth control.
Build layers gradually, adjusting thread control between passes.
Mastering applique techniques is essential for achieving professional-looking embroidery results.
These embroidery techniques add professional embroidery texture to any machine embroidery design, using dimensional effects.
Multi-Hooping for Large Designs
Large designs exceed your embroidery machine’s hoop capacity, but multihooping splits them into manageable sections. This technique requires precise fabric marking and stable hooping to achieve seamless joins between sections.
- Use specialized software like Hatch to automatically generate registration marks and split patterns
- Plan 1-2 inch overlap zones between sections to guarantee perfect alignment during repositioning
- Apply multi-layer stabilization to prevent fabric distortion across multiple hoopings
Smart design arrangement and stitch optimization reduce total hoopings by 20-30%, making large design tips more effective for complex projects. Understanding multi hooping tools is essential for mastering this technique.
Expert Tips for Flawless Embroidery
You’ve mastered the basics, but these expert techniques will take your embroidery from good to flawless.
Small adjustments in your approach can prevent common problems and deliver professional-quality results every time.
Preventing Stitching Through Garment Layers
Accidental stitching plagues even experienced embroiderers when garment layers shift unexpectedly.
Even seasoned embroiderers struggle when fabric layers surprise them mid-stitch
Use proper layer control through floating techniques—hoop only your top fabric while positioning stabilizer underneath.
Fabric choice matters: avoid slippery materials that slide during stitching.
Stabilizer selection creates barriers between layers, preventing needle penetration through pockets or linings.
Thread management and correct hoop tension keep everything secure without bunching.
Cutting and Trimming With Precision
Sharp thread-trimming techniques transform your embroidery from amateur to professional.
Curved-tip scissors excel at getting close to fabric without nicking delicate areas. Duckbill applique scissors prevent accidental cuts through your base material while trimming excess fabric.
For tight spots, cuticle scissors offer precision control.
Clean cuts reduce thread breakage and create polished finished projects, which is the result of using the right scissors, such as curved-tip scissors, for the task.
Using Thread Nets, Stands, and Holders
Thread nets wrap around embroidery thread spools like protective shields, preventing tangling and unraveling during stitching.
Thread stands elevate spools above your machine, creating smooth feeding paths that reduce tension issues.
Holder options include magnetic stands for metallic threads and adjustable arms for multiple spools.
These thread management tools transform chaotic workspace battles into smooth embroidery sessions, especially when working with delicate embroidery threads through your embroidery needle, and they can be considered thread management tools, which help in smooth embroidery sessions.
Organizing and Storing Materials Efficiently
Proper embroidery organization transforms chaotic workspaces into productivity powerhouses.
Invest in clear Supply Bins for fabric sorting by type and color.
Use dedicated Tool Holders for scissors and accessories within arm’s reach.
Create a Stabilizer Storage system using vertical files or magazine holders.
Thread Organization becomes effortless with thread racks or pegboards.
Label everything for quick identification.
Smart embroidery storage keeps projects flowing smoothly.
Effective sewing room organization tips, such as sewing space optimization, can greatly improve workflow efficiency and create a more organized sewing room with better thread organization.
Quick Fixes for Common Mistakes
Mistakes happen—even to seasoned embroiderers.
When thread breakage strikes, slow your machine’s speed and check needle condition.
Stitch errors often stem from tension issues, so adjust settings gradually.
For fabric tears, apply Bo-Nash powder to seal small holes.
Combat hoop slippage by ensuring fabric stays taut.
Keep Sharpies handy for quick color corrections on embroidery mistakes.
Maintenance and Troubleshooting for Best Results
Your embroidery machine needs regular care to produce professional-quality results every time. Proper maintenance prevents costly repairs and guarantees your projects turn out exactly as planned.
Cleaning and Calibrating Your Machine
Keep your embroidery machine running like clockwork by establishing a simple cleaning routine.
Regular maintenance reduces thread jams by 63% over twelve months.
Clean lint from the bobbin case using Q-tips and vacuum attachments for dust removal.
Run diagnostic checks monthly and install firmware updates to activate new features on 85% of computerized models.
Proper machine maintenance techniques are essential for preventing common issues and ensuring peak performance.
Regular Needle and Bobbin Care
Your machine’s heartbeat lies in its needle and bobbin—neglect these components, and your embroidery dreams turn into threading nightmares.
Replace needles every 8 hours of operation to maintain stitch quality and prevent costly thread breakage.
- Needle Replacement Schedule: Change embroidery needles after 8 hours of stitching to reduce skipped stitches by 41%
- Bobbin Care Routine: Wind bobbins evenly using proper technique to prevent uneven stitches and increase project completion rates by 23%
- Thread Tension Checks: Monitor tension settings regularly during needle maintenance to guarantee consistent stitch formation
- Needle Safety Inspection: Examine needle points for burrs or damage that could snag fabric during embroidery machine troubleshooting
Updating Firmware and Diagnostics
Beyond basic maintenance, firmware updates activate your machine’s full potential.
Download the correct file format from your manufacturer’s website and backup your designs first.
Modern embroidery machine software includes diagnostic tools that display specific error codes, helping you troubleshoot connection issues or calibration problems.
These system optimization features prevent costly downtime and keep your embroidery machine technology running smoothly for years, ensuring full potential and smoothly operation.
Removing Stitches and Stabilizer Safely
When things go sideways with your embroidery project, you’ll need reliable fabric rescue techniques.
Stitch removal starts with a quality thread eraser—these specialized tools safely extract unwanted stitches without damaging your base fabric.
For stabilizer removal, match your technique to the stabilizer type: tear-away varieties pull off cleanly, while water-soluble embroidery stabilizers dissolve completely.
Safe cutting prevents accidental fabric damage during embroidery cleanup.
Preventing Slippage and Ensuring Even Stitches
Precision in embroidery hinges on mastering the fundamentals that prevent fabric slippage and guarantee consistent stitch quality.
Your embroidery hoops need proper grip while maintaining perfect thread tension throughout each design.
- Tight Fabric Setup: Secure fabric in hoops with tambourine-like tension—flat and wrinkle-free without overstretching that causes distortion or thread breakage prevention issues.
- Smart Stabilizer Choice: Select cut-away embroidery stabilizers for stretchy fabrics and tear-away for stable materials, extending sheets ½-1 inch beyond hoop edges.
- Hoop Grip Enhancement: Add silicone strips or textured surfaces to hoop interiors, creating friction that eliminates fabric slippage during stitching operations.
Frequently Asked Questions (FAQs)
How do you embroider on curved surfaces successfully?
Curved surfaces challenge 90% of embroiderers, causing puckering and distortion.
You’ll need proper stabilization, tension adjustments, and strategic hooping.
Use cutaway stabilizer, reduce machine speed, and consider magnetic hoops for flexibility.
Float difficult curves when possible.
What causes puckering in finished embroidery projects?
Puckering happens when you’re dealing with improper stabilization, incorrect thread tension, or hooping that’s too tight.
Dense designs on lightweight fabrics also create this frustrating wrinkled effect that ruins your finished piece, often due to improper stabilization issues.
How do you create custom embroidery designs?
Back in the telegraph days of design, you’d sketch by hand.
Now you’ll use embroidery software to digitize artwork, select stitch types, set densities, and test your creation before stitching it onto fabric.
When should you use backing vs topping?
Use backing underneath fabric for stability and support during stitching. Apply topping over textured fabrics like towels or fleece to prevent stitches from sinking in. Remove topping after completion.
How do you fix uneven stitch density?
Check your thread tension first – loose tension creates gaps while tight tension bunches stitches together.
Adjust your machine’s speed slower for better control, ensuring each stitch has time to properly form and settle into the fabric evenly.
This allows for better control over the stitching process, making it easier to achieve consistent results.
Conclusion
Threading your needle is like planting a seed—mastering the best embroidery machine techniques requires patience and precision to bloom into professional results.
You’ve learned that proper stabilization, balanced tension, and quality needles form your foundation.
Regular maintenance keeps your machine running smoothly, while specialty threads demand adjusted speeds.
Practice these fundamentals consistently, test samples before final projects, and don’t rush the process, as proper stabilization and balanced tension are crucial for achieving professional results.
Your dedication to these proven techniques will transform ordinary fabric into extraordinary embroidered masterpieces that showcase your growing expertise.

