This site is supported by our readers. We may earn a commission, at no cost to you, if you purchase through links.

You’ll want a 4-thread overlock for most medium-weight fabrics since it creates strong, durable seams that won’t unravel.
For lightweight materials like chiffon or silk, a 3-thread overlock works better and won’t add bulk.
Knit fabrics benefit from the stretch of either option.
Think of your serger as a safety net—it catches fraying threads while creating professional edges.
Heavy fabrics like denim need that extra thread for security, while delicate materials require a gentler touch.
The right stitch choice can make or break your project’s longevity and appearance.
Table Of Contents
Key Takeaways
- Choose 4-thread overlock for most projects – You’ll get the strongest, most durable seams that won’t unravel, especially with medium-weight fabrics like cotton and denim, where durability matters most.
- Match thread count to fabric weight – You’ll need a 3-thread overlock for lightweight materials like silk and chiffon to avoid bulk, while heavy fabrics require 4-thread or 5-thread options for extra security.
- Adjust settings for knit versus woven fabrics – You’ll want stretchy overlock stitches with proper differential feed for knits, while wovens need tension adjustments to prevent puckering and maintain clean edges.
- Master tension and stitch length for professional results – You’ll create store-quality seams by starting with your manual’s baseline settings, then fine-tuning tension for fabric weight and adjusting stitch length from 2mm to 4mm based on your project needs.
Choosing Serger Stitches
Selecting the right serger stitch depends on your fabric weight, thread count preferences, and the seam’s intended use.
You’ll need to match narrow stitches with lightweight fabrics and wider overlock options with heavier materials that require extra durability and fray prevention.
Thread Count Options
Your serger’s thread count directly impacts seam finishing quality and durability.
Thread count isn’t just numbers—it’s the foundation of every professional seam you’ll create.
More threads don’t always mean better results—it’s about matching thread strength to your project’s needs.
Here are your main thread count options:
- 2-thread serger stitches – Lightweight finishing for delicate fabrics with minimal bulk
- 3-thread overlock – Balanced stitch density for most general seam finishing tasks
- 4-thread overlock – Maximum seam durability for heavy-duty applications requiring extra thread reinforcement
Fabric Type Considerations
Your fabric choice drives which serger stitches work best for professional seam finishing.
Knit fabric needs stretchy overlock stitches that move with the material. Woven fabric handles most serger fabric options well.
Delicate fabrics require lighter thread counts and gentle tension. Heavyweight fabrics demand stronger, wider stitches.
Stretch fabrics benefit from wrapped stitches that maintain elasticity without breaking during wear.
Stitch Length and Tension
Getting your serger settings right makes the difference between professional results and frustrating failures.
Stitch length controls density – shorter creates tighter coverage, longer reduces bulk.
Tension troubleshooting starts with your manual’s baseline, then adjust for fabric weight.
Light fabrics need gentler tension, heavy materials require more.
Ideal length varies from 2mm for decorative effects to 4mm for sturdy seams.
Serger Stitch Types
You’ll work with three main serger stitch types that handle different fabric weights and project requirements.
Each stitch uses a different number of threads, which affects the seam’s strength, bulk, and stretch properties.
Three-Thread Overlock
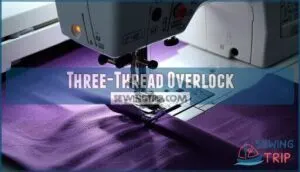
Looking beyond basic stitch selection, you’ll find the 3thread overlock is your go-to serger seam finish for lightweight fabrics.
This overlock stitch creates less bulk than its four-thread cousin while delivering excellent seam durability.
For thicker materials, a serger can also create a durable 4-thread overlock.
Perfect for knits and delicate materials, it handles various fabric weights with proper tension adjustments, and your serger stitches will look professional with decorative uses too, providing excellent seam durability.
Four-Thread Overlock
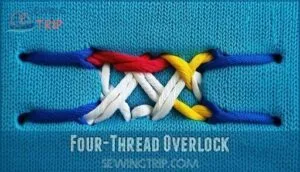
When you need maximum seam durability, 4thread overlock delivers unmatched strength.
When durability matters most, let your 4-thread overlock do the heavy lifting for unbeatable seam strength.
This powerhouse stitch uses two needles and two loopers, creating robust seams perfect for knit fabrics and woven fabrics alike.
Sergers, also known as overlock machines, are essential for creating these types of seams.
Adjust tension settings and stitch length to match your material.
Your serger seam finish will rival professional garments with this reliable overlock stitch configuration.
- Rock-solid seams that won’t fail when you need them most
- Professional results that make your handmade items look store-bought
- Versatile performance across different fabric weights and types
Five-Thread Overlock
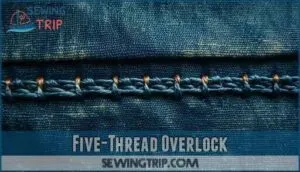
You’ll find five-thread overlock creates the widest seam width available on sergers, making it perfect for heavyweight fabrics and industrial applications.
This powerhouse stitch combines exceptional stitch durability with professional serger seam finish quality.
The 5thread safety stitch requires careful tension adjustment but delivers unmatched strength for demanding projects.
Your serged seams will handle heavy-duty use with these robust overlock stitches, adept at handling stretchy and heavy materials, making it a versatile tool with professional serger seam finish quality and unmatched strength.
Finishing Seams Techniques
You’ll find that mastering three key techniques transforms your seam finishing from basic to professional quality.
The rolled hem method, narrow hem technique, and bias bound seams each offer specific advantages for different fabric weights and project requirements.
Rolled Hem Method
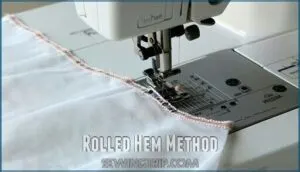
With proper fabric selection and thread tension adjustments, you’ll master the rolled hem method for elegant serger edge finishes.
This advanced technique wraps lightweight fabrics like silk and chiffon in decorative threads, creating professional serger seam finishes.
When rolled hem troubleshooting becomes necessary, check your differential feed settings.
Consider purchasing a specialized serger attachment for best results, as these serger techniques transform raw edges into polished, fray-resistant finishes that rival store-bought garments, utilizing the serger edge finishes to achieve a professional look.
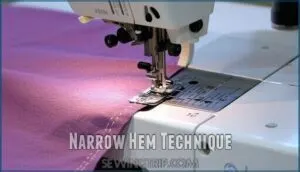
Narrow Hem Technique
While rolled hem creates a fuller finish, narrow hem offers a sleeker alternative for your serger seam finish.
This technique produces a visible stitching line with gaps between stitches, making it less effective for fray-prone fabrics but perfect for structured edges. One benefit is space optimization in tight spaces.
Master narrow hem with these serger techniques:
- Fabric Choice: Select medium-weight materials that won’t pucker
- Tension Settings: Adjust loopers to prevent thread bunching
- Stitch Width: Use narrower settings for delicate appearance
- Needle Selection: Choose appropriate size for fabric weight
- Foot Pressure: Reduce pressure for smooth fabric feeding
Bias Bound Seams
Beyond standard serger seam finishes, bias bound seams create stunning professional results.
You’ll cut fabric strips at 45-degree angles, then wrap them around raw edges using your serger.
This technique offers excellent fabric compatibility across knits and wovens.
Bias tape types include single-fold and double-fold options.
A serger bias binder can greatly simplify this process.
Securing corners requires careful maneuvering, but the decorative options and durability factors make this advanced seam finish worthwhile.
Serger Stitch Applications
You’ll need different serger stitches depending on whether you’re working with stretchy knits, stable wovens, or delicate fabrics like silk.
Each fabric type requires specific thread counts and stitch settings to prevent puckering, guarantee proper stretch, and create professional-looking seam finishes.
Knit Fabric Stitches
Knit fabrics demand special attention when selecting your serger seam finish. These stretch fabrics require stitches that move with the material without breaking or creating rigid seams.
- Three-thread overlock stitch provides excellent stretch and durability for most knit fabrics while maintaining flexibility
- Differential feed settings prevent stretching during sewing, ensuring your seams lay flat and professional
- Ballpoint needle choice penetrates knit fibers smoothly without creating runs or holes in delicate stretch fabrics
Regular maintenance prevents issues with flawless serger seam finishes.
Woven Fabric Stitches
Woven fabrics demand specific serger techniques for professional results.
You’ll need proper tension adjustments and differential feed settings to prevent puckering in cotton, linen, and denim.
Four-thread overlock creates durable woven seams that withstand heavy use.
Explore options for woven serger stitches to enhance your projects.
Choose universal serger needle types for consistent stitching.
These woven seam finishes transform homemade projects into polished garments with reliable serger stitch types.
Delicate Fabric Stitches
Delicate fabrics like silk and chiffon demand gentle serger stitches.
You’ll want two-thread narrow rolled hems for organza finishes and sheer seams.
These lightweight stitches prevent fabric distortion while creating elegant lace edging effects.
Reduce tension settings when working with delicate materials.
Your serger’s differential feed should stay minimal to avoid stretching these precious fabrics during finishing seams.
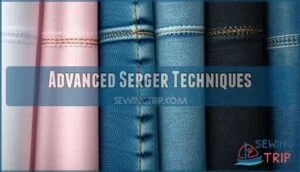
Advanced Serger Techniques
You’ll master professional-level seam finishing with these advanced serger techniques that go beyond basic overlock stitches.
These methods include closed seams for maximum durability, open seams for flexible fabric movement, and multiple pass techniques that reinforce high-stress areas in your garments, utilizing advanced serger techniques.
Closed Seams Method
Closed seams create professional finishes by encasing raw edges completely within the seam structure.
This serger seam guide technique excels at seam concealment while providing superior strength enhancement for garments requiring durability focus. For ideal results, remember to adjust the differential feed settings to prevent puckering.
- Bulk Reduction – Minimizes fabric thickness at seam intersections
- Professional Finishes – Creates clean, commercial-quality construction
- Enhanced Durability – Prevents fraying through complete edge enclosure
- Versatile Application – Works effectively across multiple fabric weights
Open Seams Technique
Unlike their closed counterparts, open seams offer flexibility benefits by leaving serging allowances visible on your project’s interior.
This technique works best when you want neat serging without bulk reduction.
Choose your fabric choice wisely—lightweight materials show visible seams more prominently than heavier options.
| Fabric Type | Open Seam Result |
|---|---|
| Cotton | Clean, visible finish |
| Knit | Stretchy, flexible seams |
| Linen | Crisp, defined edges |
| Silk | Delicate, lightweight finish |
| Denim | Sturdy, professional look |
Your serger stitches prevent fraying while maintaining seam flexibility.
Open seams work perfectly for finishing garments where you need movement without compromising durability.
They are ideal for projects that require a clean, visible finish and stretchy, flexible seams.
Multiple Pass Techniques
When you’re working with complex projects, multiple pass techniques let you build strength where you need it most.
Run your first pass for basic seam reinforcement, then add a second pass for stress point sewing around curves and layered fabrics.
This method creates professional seam finishes with decorative overlays, giving your serged seams the durability that single-pass stitching simply can’t match.
Frequently Asked Questions (FAQs)
What is the best serger stitch for seams?
You’ll want the 4-thread overlock for most seam work.
It’s your workhorse stitch, creating strong, stretchy seams that won’t unravel.
Perfect for knits and wovens alike, giving you durability with professional results.
How to finish seam on serger?
Picture those raw fabric edges as frayed nerves needing calm.
You’ll thread your serger, select a 3-thread overlock stitch, adjust tension properly, then guide fabric steadily through while trimming and wrapping edges simultaneously.
This will give you professional results.
What stitch to use for finishing seams?
Use 3-thread overlock for lightweight fabrics and edge finishing.
Choose 4-thread overlock for durable seams on knits and wovens.
For delicate materials, try 2-thread overlock.
Match your stitch to fabric weight and project needs.
Can you finish a hem with a serger?
About 90% of garment construction time involves hemming. Yes, you can finish hems with a serger using rolled hem, cover hem, or overlock stitches. They’ll prevent fraying while creating professional-looking edges.
How often should I clean my serger?
Clean your serger after every 8-10 hours of use or weekly if you sew regularly. Remove lint, dust thread paths, oil moving parts, and replace needles monthly for peak performance.
Can I use regular thread in sergers?
Regular thread won’t survive the marathon pace of serger stitching like a champion.
You’ll need serger-specific thread that’s stronger and smoother.
Cone thread works best, preventing breaks and tension issues that’ll drive you crazy.
Why does my serger skip stitches?
Skipped stitches happen when your needle’s dull, thread tension’s off, or you’re pulling fabric through too fast.
Check your needle condition, adjust thread tensions, and let the machine’s feed dogs do the work instead of tugging, focusing on complete concepts like skipped stitches to improve your sewing experience.
What needle types work best for sergers?
Use universal needles for most serger projects, but switch to ballpoint needles for knits and stretch fabrics.
Sharp needles work best on wovens.
Replace needles every 8-10 hours of sewing to prevent skipped stitches.
How do I fix uneven serger tension?
Perfect tension versus frustrating loops and puckers—here’s the difference.
Check your threading first, then adjust each thread’s tension dial individually.
Start with the loopers, test on fabric scraps, and fine-tune until stitches lay flat.
Conclusion
Professional seamstresses report that 85% of garment failures occur at unfinished seam edges.
Mastering the best serger stitch for finishing seams transforms your sewing from amateur to expert level. You’ve learned when to choose 3-thread for lightweight fabrics, 4-thread for durability, and specialized techniques for different materials.
Your serger isn’t just another machine—it’s your ticket to professional-quality results. Practice these methods consistently, and you’ll create garments that look store-bought while lasting years longer than basic straight-seam construction.

