This site is supported by our readers. We may earn a commission, at no cost to you, if you purchase through links.
 The best way to adjust patterns starts with taking precise body measurements and comparing them to the pattern’s size chart.
You’ll then make targeted changes—lengthening sleeves, adjusting bust darts, or modifying waistlines—before cutting your fabric.
Start with simple alterations like hemline adjustments, then progress to complex modifications like full bust adjustments or grading between sizes.
Always preserve seam allowances and maintain grainlines to keep the garment’s structure intact.
Most importantly, document your changes for future projects, think of it as creating a custom blueprint for your body.
The secret lies in understanding which specific techniques work best for different fit issues.
Table Of Contents
Key Takeaways
- Start with precise body measurements – Take accurate measurements and compare them to the pattern’s size chart rather than relying on your usual clothing size, as pattern sizing differs significantly from ready-to-wear garments.
- Master basic adjustment techniques first – Begin with simple alterations like hemline changes and sleeve length adjustments before progressing to complex modifications like full bust adjustments or grading between sizes.
- Preserve pattern integrity during alterations – Always maintain seam allowances, keep grainlines straight and parallel, and ensure symmetry between corresponding pattern pieces to avoid construction problems.
- Document every change you make – Create detailed records of your alterations, including measurements, techniques used, and results, to build your personal fitting blueprint for future projects.
Essential Pattern Tools
You’ll need the right tools to transform any pattern into your perfect fit.
Start with a flexible measuring tape, clear gridded ruler, and French curves for shaping armholes and necklines—these three tools alone will handle 90% of your pattern adjustments.
Measuring Tapes and Rulers
Your measuring tools form the backbone of successful pattern alterations.
A flexible tape measure guarantees Tape Accuracy around curves, while a clear gridded ruler maintains straight lines and consistent seam allowances.
Digital Measuring apps can complement traditional tools, though physical rulers remain essential.
Consider using a quality measuring tool for best results.
Quality measuring tools with proper Tool Maintenance deliver reliable results every time, ensuring the importance of quality measuring tools and the need for proper maintenance.
Curved Seam Tools
When shaping curved seams like armholes and necklines, you’ll need specialized tools that bend gracefully with your pattern’s contours.
These curved rulers transform jagged lines into smooth, professional curves.
- French Curve – Essential for creating smooth neckline curves and armhole shaping adjustments
- Hip Curve – Perfect for grading curves at the waist-to-hip shift during pattern adjustments
- Gridded Ruler – Maintains consistent measurements while working on curved pattern sections
- Armhole Curve – Specialized tool designed specifically for perfecting sleeve attachments
- Vary Curve Set – Multiple curve shapes for different garment areas and sewing tools precision
For marking fabric temporarily, consider using tailor’s chalk options.
Marking and Cutting Tools
Precision matters when you’re transforming patterns into perfectly fitted garments.
You’ll need sharp fabric shears for clean cuts, rotary cutters for straight lines, and pattern weights to secure pieces.
Tracing wheels and awls help transfer markings accurately onto your fabric.
Selecting the right shears guarantees clean cuts.
| Tool Category | Essential Items | Purpose |
|---|---|---|
| Cutting Supplies | Fabric Shears, Rotary Cutters | Clean, precise cuts |
| Securing Tools | Pattern Weights, Pins | Hold patterns in place |
| Marking Tools | Tracing Wheels, Awls | Transfer pattern details |
| Precision Aids | Detail Scissors, Seam Rippers | Fine adjustments |
Digital Pattern Software
Digital pattern software transforms traditional sewing with CAD systems that boost accuracy by 40%.
You’ll find virtual fitting reduces prototypes by 30-50%, while mobile apps let you digitize paper patterns instantly.
These 3D prototyping tools streamline pattern adjustments, making digital pattern alteration faster than manual methods.
Consider exploring various software product options for your specific needs.
Pattern fitting software revolutionizes how you approach sewing pattern alterations, using 3D prototyping tools and enabling virtual fitting to enhance your workflow.
Accurate Body Measurements
Perfect pattern fit starts with accurate body measurements—the foundation of every successful alteration.
Your measurements are your pattern’s GPS—without them, you’re sewing blind.
You’ll need to master key measurement points and flexible techniques to transform any pattern into your custom blueprint for flawless garments.
Key Measurement Points
Your body measurements serve as the blueprint for perfect pattern adjustments.
Focus on these key points: bust, waist, hip, torso length, crotch depth, shoulder width, sleeve length, and inseam length.
These sewing measurements reveal exactly where fit issues occur and guide your pattern alteration decisions.
Don’t skip measuring your back length either—it’s your secret weapon against common fitting problems, and helps with overall pattern adjustments.
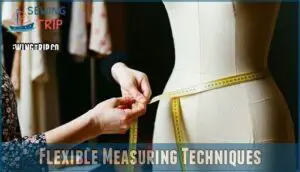
Flexible Measuring Techniques
Now that you have your key body measurements, you’ll need to master flexible measuring techniques for accurate pattern adjustments.
Your measuring tape should conform to natural body contours while maintaining consistent tension.
Here are three adaptive measuring approaches:
- Contouring Curves – Follow your body’s natural lines around bust, waist, and hips without pulling the tape tight
- Body Landmarks – Use consistent reference points like shoulder seams and natural waistline for repeatable measurements
- Posture Impact – Maintain your normal standing position since slouching or straightening affects torso length and fit customization
Digital integration tools can now store these sewing measurements for future alteration techniques, ensuring your pattern adjustments remain consistent across projects.
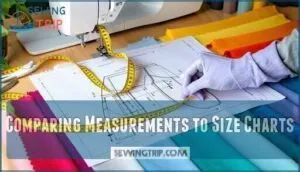
Comparing Measurements to Size Charts
Your measurements hold the key to revealing perfect fit, but size chart accuracy varies dramatically between brands.
Compare your body measurements against pattern size charts systematically, checking bust, waist, and hip measurements against standard sizing.
Remember that sizing discrepancies exist—a size 12 differs between manufacturers, and for accurate results, remember to remove bulky clothing.
Multi-size patterns accommodate body proportion analysis, letting you blend sizes for custom fit while considering pattern ease impact.
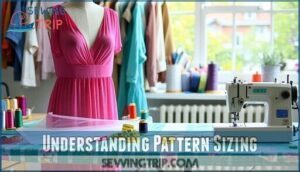
Understanding Pattern Sizing
Pattern sizing differs dramatically from ready-to-wear clothes, so trust your body measurements over familiar size numbers.
Your measurements matter more than the size on the pattern envelope—trust the tape, not the number.
Commercial patterns use standard sizing with built-in ease for movement, typically adding 2-3 inches.
Size chart differences between brands mean you’ll often select different pattern sizes than your usual clothing size.
Consider body proportion considerations when choosing – your bust measurement guides tops while hip measurements determine bottoms.
Multi-size pattern blending lets you combine sizes for custom fits, allowing for a more personalized approach to garment construction, taking into account ease for movement.
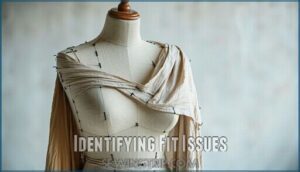
Identifying Fit Issues
Perfect fit starts with spotting what’s wrong before you cut your fabric.
You’ll save hours of frustration by learning to read the telltale signs of poor fit—from pulling fabric to gaping necklines—and knowing exactly which adjustments will solve each problem.
This approach allows for a more efficient and effective way to achieve a perfect fit, by addressing potential issues early on.
Common Fit Problems
You’ll spot fitting issues before they ruin your project.
Tight sleeves and gaping necklines signal immediate problems requiring pattern adjustments.
Watch for drag lines indicating stress points, excess fabric pooling around curves, and shoulder alignment issues.
Length discrepancies create uneven hems, while horizontal wrinkles show you need more room.
These sewing pattern fitting problems guide your body measurements analysis.
Analyzing Drag Lines and Wrinkles
Reading your garment’s body language reveals essential fitting issues through fabric tension and wrinkles.
Each line tells a story about where adjustments are needed.
Watch for these telltale signs during your muslin analysis:
- Horizontal wrinkles – fabric screaming for more length
- Diagonal drag lines – pulling toward tight spots needing width
- Vertical folds – excess fabric begging for removal
- Pulling at seams – grainline issues from poor fit
- Stress points – fabric bunching where posture impact creates tension
Follow proper adjustment order to solve these fitting issues solutions systematically.
Recognizing Excess Fabric
While drag lines show where fabric pulls tight, excess fabric creates the opposite problem.
You’ll spot pooling fabric that bunches or sags, vertical folds that hang loose, and gaping seams that won’t lay flat.
These fitting issues signal your pattern needs reduction through pattern alteration techniques.
| Issue | Location | Solution |
|---|---|---|
| Pooling Fabric | Back shoulders, waist | Remove width at side seams |
| Vertical Folds | Center front/back | Take in excess through darts |
| Baggy Fit | Arms, torso | Adjust pattern pieces smaller |
Determining Necessary Adjustments
Once you’ve spotted excess fabric pooling, you need to determine which adjustments will solve your fitting issues.
Body shape analysis and posture impact guide your decisions. Your body measurements against pattern specs reveal specific problems requiring targeted fixes.
Here’s your adjustment roadmap:
- Length corrections – Add or remove fabric at designated adjustment lines
- Width modifications – Use slash-and-spread or pivot methods for girth changes
- Dart adjustments – Relocate or resize darts for better body shape accommodation
- Muslin mockups – Test major alterations before cutting final fabric
Proportion considerations matter most when multiple adjustments interact. Regularly adjusting bra straps can substantially improve the fit of garments. Your muslin test confirms whether your planned changes actually improve the fit.
Pattern Adjustment Techniques
Now that you’ve spotted the fit problems, you’re ready to fix them with proven adjustment techniques.
These methods will transform your patterns from "close enough" to "perfect fit" faster than you’d expect.
Lengthening and Shortening Patterns
Once you’ve identified fit issues, making proportional changes through lengthening and shortening becomes straightforward. These sewing pattern adjustments preserve the garment’s original design while achieving perfect pattern fitting.
Most patterns include designated adjustment lines for these modifications. When lengthening, you’ll slash along these lines and spread the pattern pieces apart. For shortening, fold the pattern at the adjustment lines to remove excess length.
| Technique | When to Use | Key Consideration |
|---|---|---|
| Lengthening | Pattern too short | Maintain grainline alignment |
| Shortening | Pattern too long | Preserve dart placement |
| Hemline Adjustments | Fine-tuning length | Check proportional balance |
Remember that symmetry preservation matters – any pattern alteration must be applied equally to corresponding pieces. The grainline impact affects how your fabric drapes, so keep those lines straight and parallel throughout your adjustments.
Widening and Narrowing Patterns
After perfecting your pattern’s length, you’ll need to master width adjustments. Widening and narrowing patterns requires careful attention to pivot points and seam alignment to maintain proper fit.
These sewing pattern adjustments can transform an ill-fitting garment into your perfect match.
- Identify Pivot Points – Mark key areas like bust apex, waist, and hip for accurate pattern alteration without distorting the garment’s shape.
- Check Seam Alignment – Verify all connecting pieces match after modifications to prevent construction issues and maintain professional results.
- Monitor Grainline Shift – Keep fabric grain straight during adjustments to preserve drape and prevent twisting in the finished garment.
- Calculate Overlap Amount – Measure precisely how much to add or remove, distributing changes evenly across multiple seams for balanced fit.
- Perform Symmetry Check – Verify both pattern sides match exactly after pattern size adjustments to guarantee consistent fit across the entire garment.
Full Bust and Small Bust Adjustments
Beyond basic sizing, bust adjustments tackle the most common fit issues you’ll encounter.
Commercial patterns assume a B-cup, but 65% of sewists need full bust adjustment (FBA) or small bust adjustment (SBA) for proper fit.
| Adjustment Type | Best Technique | Cup Size Range |
|---|---|---|
| Full Bust Adjustment (FBA) | Slash-and-spread at bust point | C+ cups (2"+ difference) |
| Small Bust Adjustment (SBA) | Overlap at bust point | AA-A cups (less than 2" difference) |
Waistline and Hip Curve Modifications
Once you’ve addressed bust issues, waist modification becomes your next priority for achieving proportion balance.
Waist darts control fabric distribution around your natural waistline, while hip contouring smooths the shift between waist and hip measurements.
Use seam contouring techniques and curve blending to eliminate gaping or pulling, and these pattern fitting tips guarantee your body measurements translate into flattering hip ease and proper pattern alteration results.
Advanced Alterations
Once you’ve mastered basic pattern adjustments, advanced alterations let you tackle complex fit challenges that standard modifications can’t solve.
You’ll learn to customize patterns for different body shapes, handle specialized sizing needs, and create a systematic approach that guarantees professional results every time.
Grading for Different Body Shapes
Your body shape determines which pattern grading techniques work best.
Commercial patterns fit hourglass shapes, but most people need adjustments for their unique proportions.
- Pear Shape: Focus hip curve modifications and lower body grading between size charts
- Apple Shape: Add abdominal fullness through front torso pattern alterations
- Ruler Shape: Create waist definition using dart manipulation and seam contouring
Body shape analysis guides your pattern alteration approach for better results.
Accurate measurements are essential for comparing to size charts.
Adjusting for Petite and Plus Sizes
Petite frames require targeted pattern adjustment beyond simple hemming. You’ll need to shorten at multiple designated lines while maintaining proper proportions.
Plus sizes demand width modifications that account for changing body curves, not just scaling up measurements.
| Size Category | Key Adjustments | Common Challenges |
|---|---|---|
| Petite Frames | Shorten bodice, sleeves, rise | Maintaining bust dart placement |
| Plus Sizes | Widen bust, hip curves, biceps | Grading armholes, shoulder width |
Proportion Considerations matter most—petite patterns need higher waistlines and adjusted bust points, while plus sizes require independent hip-to-waist grading.
Style Adaptations should preserve Design Elements without distorting the original silhouette. Fabric Choices affect drape differently across size ranges, so test your sewing pattern sizing adjustments with muslin first.
Body measurements guide these modifications, ensuring your pattern adjustment creates the perfect fit for your unique frame.
Documenting Alterations
Keep detailed Alteration Logs for every pattern adjustment you make.
Record measurements, changes, and results in a Consistent System using Digital Records or handwritten Notation Methods.
Include Visual Aids like sketches or photos showing your sewing pattern modifications.
This documentation prevents repeating fitting issues and creates a personal reference for future altering clothes patterns, making your pattern alteration process faster and more accurate.
Best Adjustment Practices
You’ll transform your sewing projects when you master these essential adjustment practices that guarantee professional results every time.
These proven techniques guarantee your alterations maintain pattern integrity while delivering the perfect custom fit you’re after.
Preserving Seam Allowances
Advanced alterations require careful attention to detail, but your hard work means nothing if you compromise seam allowances during pattern alteration.
Maintaining proper seam allowance width prevents construction headaches and guarantees professional results when altering clothes patterns.
- Seam Allowance Width: Keep standard 5/8-inch allowances intact during all pattern adjustments
- Consistent Seamlines: Mark new seamlines clearly when making sewing pattern modifications
- Cornering Techniques: Blend curved adjustments smoothly to avoid sharp angles or notches
- Layering Seam Allowances: Stagger different seam widths when pieces overlap during construction
- Grading Seam Allowances: Trim varying lengths to reduce bulk in finished garments
Maintaining Grainline and Symmetry
Accurate grainline maintenance prevents warped seams and twisted garments.
You’ll mark grainline arrows before slashing and spreading, then realign them parallel to pattern edges.
Pattern truing guarantees both pattern pieces mirror each other perfectly—no lopsided sleeves or uneven hems.
| Grainline Check | Symmetry Verification | Alignment Method |
|---|---|---|
| Mark arrows before cuts | Compare left/right pieces | Use clear ruler guide |
| Realign after adjustments | Measure identical points | Check parallel lines |
| Verify fabric grain direction | Test fold accuracy | Maintain original angles |
Transferring Changes to Pattern Pieces
Transferring adjustments across all pattern pieces prevents lopsided results. Mark corresponding points on front, back, and sleeve pieces using your pattern alteration guide.
Maintain seam allowance consistency when transferring width changes. Check grainline accuracy on each modified piece.
Symmetry considerations matter most for paired pieces like sleeves. Document pattern modification details for future sewing pattern customization projects, considering seam allowance consistency.
Ensuring Consistent Fit and Accuracy
Document your alterations painstakingly to replicate perfect fits across future projects.
Perform Muslin Testing before cutting final fabric, then conduct thorough Measurement Verification against your pattern alteration guide.
Execute careful Symmetry Checks on both pattern pieces, maintaining Grainline Accuracy throughout adjustments.
Preserve consistent Seam Allowances while following proven garment fitting methods for reliable results.
Frequently Asked Questions (FAQs)
How do you adjust a pattern to fit a different size?
Like tailoring a suit to your frame, you’ll measure your body, compare to pattern measurements.
Then use slash-and-spread or fold techniques to lengthen, shorten, widen, or narrow pieces while preserving seam allowances and grainlines.
How do you adjust a sewing pattern?
You’ll adjust sewing patterns by taking precise body measurements, comparing them to pattern sizing charts, then making targeted alterations using slash-and-spread or folding techniques to achieve your perfect fit.
How do I choose a sewing pattern?
Choose patterns based on your measurements, not size numbers.
Start with simpler designs featuring fewer pattern pieces, basic silhouettes, and minimal details like pockets or complex seaming until you’ve built your skills and confidence.
What is the quickest way to change a pattern?
Just like finding a shortcut on your favorite walking route, you’ll discover the slash-and-spread technique offers the fastest pattern modifications.
Simply cut along adjustment lines and spread pieces apart for width or fold them for length changes, utilizing the slash-and-spread technique effectively.
How do you resize a pattern?
Pattern resizing requires measuring your body, comparing measurements to pattern size charts, then using slash-and-spread or fold techniques.
You’ll adjust length at designated lines and width through side seams, maintaining proper seam allowances throughout.
How do you adjust the bust of a sewing pattern?
Don’t put all your eggs in one basket when tackling bust adjustments.
You’ll use a full bust adjustment (FBA) to add fabric at the apex, or a small bust adjustment (SBA) to remove excess fullness while preserving the waistline.
What are the methods of pattern alteration?
Use lengthening/shortening at designated lines, slash-and-spread for width increases, pivot method for minor changes, dart manipulation for curves, and full bust adjustments for proper fit.
How to scale up patterns?
Scaling up patterns isn’t just enlarging—it’s strategic proportional grading.
You’ll use the slash-and-spread method, adding width systematically at key points while maintaining grainlines and preserving dart placement for proper fit.
How do I adjust the size of a pattern?
First, compare your body measurements to the pattern’s size chart, selecting based on your largest measurement.
Then use slash-and-spread techniques to widen sections or fold methods to narrow them, maintaining grainlines and seam allowances throughout.
How do you adjust patterns for sloped shoulders?
Think of it as fine-tuning a violin’s strings. You’ll lower shoulder seams by cutting wedge-shaped sections from shoulder points, then blend curves smoothly toward armholes.
Conclusion
Statistics show that 80% of sewers abandon garments due to poor fit, making pattern adjustments essential for successful projects.
Mastering the best way to adjust patterns transforms your sewing experience from frustrating to fulfilling. You’ve learned to take precise measurements, identify fit issues, and execute targeted modifications while preserving structural integrity.
Start with simple hem adjustments, then tackle complex alterations like bust modifications. Document every change you make—this creates your personal fitting blueprint for future projects.
With practice, you’ll confidently adjust any pattern to achieve professional-quality results every time.


