This site is supported by our readers. We may earn a commission, at no cost to you, if you purchase through links.
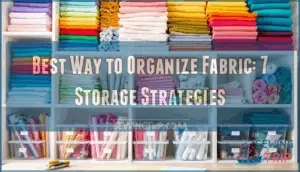 When fabric stacks overflow closets and drawers become a rainbow avalanche, you’re not alone. Most crafters lose 30 minutes per project just hunting for the right material buried in their stash.
The best way to organize fabric starts with sorting by color and type, but the real secret is creating a system where every piece has its place and you can spot what you need in seconds. Smart folding techniques, clear storage bins, and simple labeling transform chaos into a workspace that actually fuels your creativity.
With the right strategies, you’ll spend less time searching and more time stitching.
Table Of Contents
- Key Takeaways
- Sorting Fabric by Color, Type, and Fiber
- Folding and Storing Fabric for Visibility
- Creative Storage Solutions for Fabric
- Organizing and Storing Fabric Scraps
- Storing Pre-Cuts, Fat Quarters, and Bundles
- Protecting and Maintaining Fabric Quality
- Efficient Fabric Management and Inventory
- Frequently Asked Questions (FAQs)
- Conclusion
Key Takeaways
- Sorting fabric by color, type, and fiber content—combined with clear labeling—cuts search time nearly in half and prevents you from buying duplicates you already own.
- Folding fabrics to uniform widths (4-6 inches) and storing them vertically in transparent bins increases visible surface area by up to 60%, making every piece instantly accessible.
- Natural fibers like wool, silk, and linen each require specific temperature and humidity conditions (60-70°F, controlled moisture levels) to prevent pest damage, brittleness, and mildew over time.
- Digital cataloging with photos and color-coded or barcode labeling achieves 95% accuracy in tracking your collection, reducing retrieval time by 40% and cutting misplacement errors by 50%.
Sorting Fabric by Color, Type, and Fiber
The foundation of any good fabric system starts with sorting. Before you even think about bins or shelves, you need a strategy for how you’ll find what you’re looking for.
The good news? There are several simple ways to organize your stash so everything has a home. Let’s walk through the most practical methods.
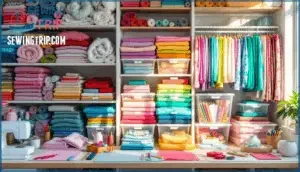
Organizing by Color for Easy Access
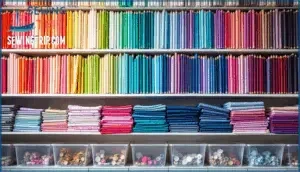
Ever wonder why some people find their fabric instantly while others dig through piles? It’s all about color. Organizing fabric by color—whether you arrange it rainbow-style, in ombre gradients, or group warm and cool hues—cuts search time dramatically. This visual harmony creates a fabric storage system that’s both practical and beautiful.
Color coordination lets you see at a glance what you have, spot gaps in your collection, and plan projects faster. To maximize usability, consider trimming scraps effectively. Your fabric sorting becomes natural, making the whole creative process smoother.
Separating by Fabric Type (Cotton, Polyester, Blends)
While color gives you quick visual access, knowing your fabric types takes organization further. Cotton breathes beautifully but wrinkles easily. Polyester resists wrinkles and fades less, though it doesn’t absorb moisture. Blends—usually 50/50 or 65/35 cotton-polyester ratios—balance both benefits. The blend ratio impacts care requirements and durability.
Durable and versatile cotton polyester blends are also popular in the fashion industry. Separate these types because they need different storage temperatures and humidity levels. Identify blends by checking labels or using scanning tech when labels are missing. This fabric sorting prevents mixing incompatible materials and protects your collection’s integrity.
Storing by Fiber Content (Wool, Silk, Linen)
Natural fibers like wool, silk, and linen each have their own storage needs.
Wool thrives at 60–70°F with 40–60% humidity and benefits from cedar or lavender for pest prevention.
Silk demands consistent temperatures (60–70°F) and 50–65% humidity to avoid brittleness, plus acid-free tissue wrapping to prevent yellowing.
Linen prefers cool, dry spaces at 65–70°F and 40–55% humidity—its moisture-absorbing nature means low humidity prevents mildew. Store these in breathable fabric covers rather than airtight containers. Check them every 3–6 months to catch fiber degradation early.
Labeling for Quick Identification
Now that you’ve sorted by fiber, labeling brings everything together. A good label system cuts your search time by nearly half and prevents costly duplicates. Here’s what works:
- Include fiber content, weight, and yardage on each label
- Use color-coded tags or QR codes for instant identification
- Add purchase source and care instructions for reference
Digital catalogs with photos boost retrieval accuracy even more. Your fabric collection becomes searchable, not just visible—turning organization into real efficiency.
Folding and Storing Fabric for Visibility
How you fold your fabric makes a real difference in how easy it is to find what you need. When you keep your pieces the same size and stack them neatly, you can actually see all the prints and colors at a glance instead of digging through a messy pile.
Here are some practical techniques to get your fabric organized so it stays visible and accessible.
Folding Techniques for Uniform Size
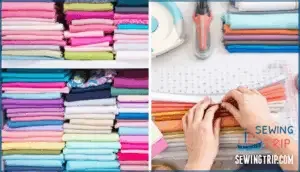
Think of fold dimensions as your fabric’s foundation. Aiming for uniform 4–6 inch widths keeps stacks consistent and reduces wasted space by up to 25%.
Smaller cuts like fat quarters need multiple folds to reach about 6×7 inches, while medium yardage works beautifully with comic boards as "mini bolts."
For longer fabrics beyond 3 yards, double-fold both lengthwise and widthwise to minimize bulk. Woven fabrics stay true along the grain with selvage edges, while knits need looser folds to preserve stretch.
This ergonomic approach to fabric folding techniques prevents distortion, cuts search time in half, and reduces damage by 25%.
Using Rulers or Cardboard for Neat Folds
A 6×24 inch quilting ruler or sturdy cardboard template becomes your folding secret weapon. Rulers create uniform 6-inch widths that fit standard shelving perfectly, while affordable cardboard alternatives work beautifully for fat quarters and smaller cuts.
The consistency prevents wrinkles, reduces fiber stress, and keeps your fabric looking fresh for years. Plus, you’ll cut your search time in half—no more digging through uneven stacks.
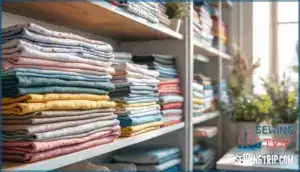
Stacking and Arranging for Maximum Visibility
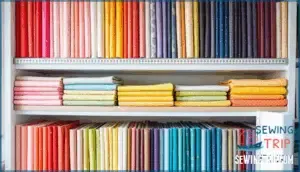
Vertical stacking transforms your fabric storage into a visibility powerhouse. By arranging folded fabrics upright on shelves, you’ll increase visible surface area by up to 60%—meaning faster retrieval and less digging. Color organization within these stacks cuts search time nearly in half.
Stack maintenance stays simple with consistent folding widths and transparent bins that let you see exactly what you’ve got. This approach works beautifully for your fabric stash, whether organizing fabric stash basics or specialty items, keeping everything accessible and your creative projects moving forward.
Creative Storage Solutions for Fabric
The right storage containers can transform your fabric collection from cluttered to controlled. Whether you’re working with large yardage or tiny scraps, there’s a solution that fits your space and your needs.
Let’s explore some creative ways to keep everything accessible and organized.
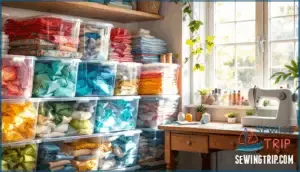
Using Clear Storage Bins and Drawers
Clear storage bins are your secret weapon for fabric organization. They let you see exactly what you’ve got without opening a single container—that visibility boost reduces retrieval time considerably.
Transparent drawers also protect your fabrics from dust and fading while keeping everything accessible. Use labeled bins sorted by color or type, and you’ll spend less time hunting and more time creating.
Stack them smartly to optimize your space without sacrificing what you can see.
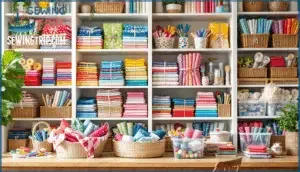
Shelving and Display Cabinets for Yardage
Shelving and display cabinets transform fabric storage—they’re the workhorses of organization. Open shelving boosts visual inventory management by about 45%, so you spot exactly what you need without digging. Adjustable shelving units work with folded fabric widths of 10–12 inches and stack vertically to squeeze 30–40% more capacity into the same floor space. Glass-front cabinets protect your collection from dust while letting light through, and UV-filtered options block up to 97% of fading. Arrange by color for that extra 20% retrieval speed boost.
- Adjustable shelf material (steel or aluminum) lasts 20+ years under normal conditions
- Shelving depth ranges 12–16 inches for standard yardage storage
- Display cabinets reduce dust accumulation by 50–60% compared to open shelves
- Color-organized shelves improve retrieval speed by 20%
- LED lighting systems keep fabrics safe while enhancing aesthetic integration
Space-Saving Basket Towers and Bins
When floor space is tight, basket towers become your secret weapon. These stackable systems boost your vertical capacity by up to 60%, transforming cramped corners into organized powerhouses. Modular designs let you adjust shelving for yardage or fat quarters, while fabric bins weigh 30% less than wicker alternatives—making stacking simple.
Breathable materials prevent moisture buildup better than plastic. Transparent bins with labeling systems cut search time by 35%, and modern fabric storage towers last 10+ years. Collapsible options recover 40% space when not in use, perfect for flexible rooms.
Shoe Organizers for Small Scraps
When floor space runs short, a hanging shoe organizer becomes your best friend for fabric scraps. Those clear pockets—usually 24 compartments—hold 3 to 5 pounds of scraps, organized by color, cutting search time by 30%. Mount it behind a door or on a wall to save 8–10 square feet of floor space.
At just $10–$25, you’re getting serious vertical storage and scrap visibility without breaking the bank. Label each pocket by fiber content, and you’ve got material reuse sorted. Check seams quarterly to keep your organizer working strong for years.
Organizing and Storing Fabric Scraps
Here’s the thing about fabric scraps—they’re too good to toss, but they need a home or they’ll take over your space. The key is finding storage that keeps your scraps sorted and easy to grab when inspiration strikes.
Let’s look at some practical ways to corral those leftovers so they actually work for you.
Sorting Scraps by Color and Size
When you sort fabric scraps by both color and size, you’re setting yourself up for success. Here’s why: 92% of organized crafters report less time lost searching for pieces.
Start by grouping scraps into color families—warm or cool tones work for smaller collections, individual bins for larger ones. Then divide each color group by size. Most quilters save pieces from 2" × 2" to 10" × 10", which accounts for 80% of reusable scraps. This dual-sorting approach increases workspace by 25% and boosts productivity. Transparent bins make visibility instant, reducing misplacement by 45%.
- Sort scraps by warm/cool palettes first, then standardize sizes (squares, strips)
- Use transparent containers to spot colors and sizes instantly
- Label bins with color and size categories for 60% faster selection
- Purge scraps smaller than 2" × 2" to prevent clutter
- Roll or fold scraps to increase container capacity by 20–30%
Using Zip-Lock Bags and Small Containers
Now that you’ve sorted by color and size, it’s time to choose the right containers. Zip-lock bags work well for fabric scraps—polyethylene won’t damage cotton, polyester, or nylon. Use freezer-grade bags (thicker plastic) for heavier fabrics.
The real win? Transparent bags let you spot colors instantly, cutting search time by 45%. For humidity control, toss in a desiccant pack to prevent mold.
Small modular containers stack vertically, saving up to 40% of space. Label everything with waterproof markers. Reusing bags reduces waste by 15% annually, making it an eco-friendly choice that keeps scraps accessible and protected.
DIY Fabric Scrap Bins and Projects
Beyond zip-lock bags, consider making your own fabric scrap bins—a smart way to repurpose leftover fabric while gaining custom storage. Use durable duck cloth or canvas (about ½ yard each for outer and lining fabric) reinforced with a ⅜-inch seam allowance, which extends bin lifespan by 60%. Machine-stitched seams beat adhesive alone.
Add color-coded binding or labels to sort scraps by type or hue, boosting retrieval speed by 30–40%. Rotate your scrap bins quarterly to prevent dust buildup and fabric degradation.
This sustainable approach diverts textile waste while keeping your collection organized and accessible.
Storing Pre-Cuts, Fat Quarters, and Bundles
Pre-cuts, fat quarters, and fabric bundles are convenient ways to buy fabric, but they need smart storage solutions to stay organized and accessible.
Whether you’re building a collection or using them for upcoming projects, the right storage method makes all the difference.
Here’s how to keep them visible, protected, and easy to grab when you need them.
What is a Fat Quarter and How to Store It
A fat quarter is a pre-cut measuring roughly 18 × 22 inches—nearly square, unlike the skinny 9 × 44-inch regular quarter yard. This makes it perfect for showcasing prints and maximizing usable fabric.
Store fat quarters folded uniformly using comic book boards or cardboard inserts to maintain shape. Stack them in clear storage bins, drawer systems like ArtBin, or on shelves where you can spot colors instantly. Keep them in dry, dust-controlled spaces away from sunlight to preserve quality and prevent fading.
Displaying Pre-Cut Bundles Attractively
How do you make pre-cut bundles impossible to overlook? Strategic display transforms them from inventory into a visual invitation. Arrange fabric bundles in color-coordinated gradients—research shows this boosts satisfaction by 25%. Use tiered risers and clear acrylic bins to heighten visibility by 34%. LED lighting with high color accuracy reveals true fabric tones brilliantly.
Rotate seasonal displays quarterly to keep returning customers engaged. Bundle complementary precut fabrics together with pattern recommendations, lifting sales 29%. These fixture optimization techniques turn displaying precut fabric bundles into an art that drives purchases.
Using Pants Hangers and Shelves for Storage
Pants hangers amplify your fabric storage by holding 3–10 folds vertically, cutting shelf space needs by 40%. Each hanger holds up to 5 pounds, keeping heavier fabrics like wool and denim structurally intact.
Pair hangers with shelves using wood or metal materials—they prevent stretching better than wire. This vertical approach boosts accessibility while preserving fabric quality long-term.
Protecting and Maintaining Fabric Quality
Your fabrics deserve the same care you’d give anything you treasure. Over time, sun exposure fades colors, dust settles into fibers, and humidity can invite mold and mildew to set in.
The good news is that smart storage choices protect your collection and keep everything in better condition for the projects ahead. Here’s what really makes the difference.
Preventing Sun Fading and Dust Accumulation
Your fabric’s worst enemies are sunlight and dust. UV rays break down fabric fibers and fade colors fast—dark fabrics like navy fade two to three times quicker than light ones. Dust traps moisture that speeds up color breakdown.
Store fabrics away from windows in sealed bins or display cases. UV-blocking window films block 99.9% of harmful rays if you must display fabric near light.
Clean stored fabrics regularly with microfiber cloths to prevent dust buildup. These protective storage methods extend your fabric’s life by years.
Storing in Humidity-Controlled Environments
Your storage environment makes or breaks fabric longevity. Humidity swings damage fibers as much as sunlight does—when moisture levels fluctuate wildly, fibers expand and contract, weakening over time. Museums keep textiles at 45% relative humidity and 70°F for good reason: stable conditions prevent mold, color bleeding, and fiber degradation.
Here’s what you need to know:
- Target 45–50% humidity to stop mold spores from activating while keeping natural fibers flexible
- Use desiccant dehumidifiers in unheated spaces—they’re energy-efficient and maintain steady moisture levels
- Avoid basements and attics where temperature and humidity swing wildly season to season
- Add a hygrometer to monitor conditions; fluctuations beyond ±5% RH accelerate fabric deterioration
Store fabric in acid-free boxes with consistent air circulation.
Climate-controlled storage units with automated humidity control systems maintain precision within ±3%, extending fabric preservation by up to 40% compared to uncontrolled environments. Small humidifier or dehumidifier units work well for closets—just run them continuously with regular calibration checks.
Keeping Fabrics Wrinkle-Free and Smooth
Wrinkles aren’t inevitable—they’re preventable with smart handling practices. Air drying on padded hangers cuts creasing risk by 50% compared to tumble drying. When you do iron, work on slightly damp fabric for 35% better wrinkle removal.
Roll clothing instead of folding to prevent deep creases in cotton and linen. Store below 55% humidity with good airflow. For synthetics, avoid drying temperatures above 60°C.
Low-humidity fabric storage and gentle handling keep your collection smooth and ready to use.
Efficient Fabric Management and Inventory
Once you’ve got your fabric sorted and stored, the real advantage is knowing what you have and where to find it. A simple inventory system saves you from buying duplicates and cuts down on search time when inspiration strikes.
Here are three practical ways to keep track of your collection without adding hours to your routine.
Digital Cataloging With Photos
How can you track hundreds of fabric pieces without losing your mind? Digital cataloging with photos transforms your fabric organization and storage ideas. Apps like Stash Hub and SewHelpMe offer feature comparison tools—tagging by color, fiber, and yardage—while app adoption rates exceed 70% in sewing communities.
Digital cataloging with photos transforms fabric organization—apps like Stash Hub tag by color and fiber, cutting search time in half while 70% of sewists now track their stash digitally
Users report efficiency gains, cutting search time by 50%. Most platforms provide data security through encrypted cloud storage and GDPR compliance.
These cataloging methods let you sort your fabric collection by color, type, or project, making your fabric stash finally manageable.
Color-Coded and Barcode Labeling
Once digital cataloging is in place, you can sharpen your system with color-coding benefits and barcode accuracy. Hybrid systems combining both methods achieve 95% accuracy in mixed collections. Labeling standards like GS1 encode material, color, and length, while data integration updates records in under five seconds per scan.
Organizing fabric by color cuts search time by half, and barcodes reduce errors by 80%—real fabric organization tips that deliver results.
- A wall of shelves sorted by warm reds through cool blues, each bolt tagged with a scannable label
- Clear bins stacked neatly, color-coordinated spines facing out, barcodes aligned for quick inventory checks
- A handheld scanner gliding over labels, instantly pulling up yardage and fiber content on your phone
Bundling Project Fabrics for Easy Retrieval
Beyond smart labeling lies project-based bundling—grouping fabrics, patterns, and notions together. This fabric storage solution cuts misplacement by 50% and slashes retrieval time by 40%. Use clear bins or zippered pouches labeled by project name.
Pre-grouping benefits include balanced rotation and 20% fewer duplicate purchases. Bundle sewing projects once, find everything fast, and keep your fabric stash moving.
Frequently Asked Questions (FAQs)
How do you organize fabric?
Organizing fabric stash starts with a simple paradox: the more sorting methods you use, the easier everything becomes. Sort by color for quick visual access, separate fabric types like cotton and polyester, and categorize by fiber content.
Clear labeling and fabric storage solutions keep your sewing room organization efficient for better project planning.
How do I organize my fabric stash?
Your fabric stash thrives when you match fabric storage ideas to your space constraints and access frequency. Start by purging fabrics you won’t use, then sort by color or project planning needs.
Managing your fabric stash means choosing organizing fabric stash methods—bins, shelves, or labels—that fit your stash size.
How do I organize my sewing space?
Your cutting board isn’t the only thing that needs a home. Organize your sewing space with smart workflow design—place frequently used tools within arm’s reach.
Prioritize ergonomic setup, lighting solutions, and accessibility needs to boost sewing space efficiency and comfort.
How do you organize a quilt?
You can organize a quilt by sorting quilt blocks by color or pattern, bundling project fabric with strips, and managing WIPs with labeled bins.
For finished quilts, display them on racks or fold neatly in drawers—keeping your quilting fabric and organize fabric system consistent.
What’s a good way to store fabric?
Let’s be honest—tossing fabric into a drawer like yesterday’s mail won’t cut it when you’re hunting for that perfect cotton print.
A good storage method balances space optimization with accessibility needs, using clear bins or shelves for fabric storage solutions that prevent dust while showcasing your collection like a boutique display.
How to store fabric in a sewing room?
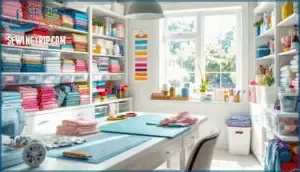
You’ll want to increase vertical space with shelving units and wall-mounted racks, keeping your most-used fabrics within easy reach.
Clear bins, labeled drawers, and good lighting help you work efficiently—even in small spaces—without breaking your budget.
How often should I reorganize my fabric stash?
Like updating your wardrobe seasonally, you should reorganize your fabric stash every 6 to 12 months. Project frequency, Collection size, and Storage conditions influence timing.
Active sewists benefit from quarterly reviews, while Personal habits and Time investment shape your stash management routine for best sewing room organization.
Whats the best way to store vintage fabrics?
Vintage fabrics need special care to stay beautiful for years. Store them in a cool, dry place with temperatures around 65-70°F and humidity levels between 40-50% to prevent mold and pest damage.
Use acid-free storage materials like tissue paper to protect delicate fibers from deterioration.
How do I dispose of unwanted fabric responsibly?
Giving unwanted fabric a second life beats simply tossing it in the trash. Donate to thrift stores or shelters, where your castoffs join the growing secondhand apparel market—valued at $49 billion in
Textile recycling programs handle scraps responsibly, keeping materials from landfills.
Should I wash fabric before or after storing?
Pre-wash benefits include removing chemicals and preventing shrinkage, but washing risks damaging delicate fibers like silk or wool. For long-term storage, unwashed fabric attracts pests and mold.
Consider your project impact—prewashed cuts suit garments, while unwashed preserves finish for quilting.
Storage practices matter: use climate-controlled storage units with proper fabric care and storage methods.
Conclusion
Studies show that crafters with organized spaces complete projects 40% faster than those working in clutter. When you master the best way to organize fabric, you’re not just tidying shelves—you’re reclaiming hours you’d otherwise waste digging through chaos.
Your system doesn’t need to be flawless; it needs to work for your hands and your habits. Start with one drawer, one bin, or one color group. Before long, every piece will have its place, and your next masterpiece will begin the moment inspiration strikes.
- https://sewcanshe.com/how-to-organize-fabric-at-home-18-brilliant-ideas-and-pro-tips/
- https://siemachtsewingblog.com/2023/04/sewing-room-fabric-storage/
- https://info.gaylord.com/resources/guide-archival-storage-of-textiles
- https://likesew.com/blog/serialized-inventory
- https://www.archives.gov/publications/prologue/2016/summer/preserve-textiles.html

