This site is supported by our readers. We may earn a commission, at no cost to you, if you purchase through links.

The soap bar method works like magic – just poke your pins into a bar of soap several times to restore their sharpness. You can also fold aluminum foil into a small pad and pierce it repeatedly with dull pins.
An emery strawberry or steel wool pincushion provides excellent results too. Even an old emery board from your nail kit can bring pins back to life.
These techniques cost practically nothing and save you from constantly buying new pins. There are even more clever tricks that’ll transform your entire sewing toolkit.
Table Of Contents
Key Takeaways
- You can restore dull sewing pins using simple household items like soap bars, aluminum foil, emery strawberries, steel wool pincushions, or emery boards—no need to buy expensive replacements.
- Sharp pins are essential for quality sewing because they glide through fabric without causing damage, bunching, or thread catching, while dull pins create resistance and compromise your project’s precision.
- The soap bar method works best for most sewers—just poke your pins one-third deep into a soap bar to sharpen them and create lubrication that helps them glide through fabric effortlessly.
- You should sharpen your sewing pins every 6-12 months or immediately when you notice increased resistance, fabric puckering, or pins catching and snagging delicate materials during insertion.
Importance of Sharp Sewing Pins
Sharp sewing pins are the backbone of quality craftsmanship. When your pins lose their edge, everything falls apart. Dull sewing pins create resistance against fabric, causing unnecessary stress and potential fabric damage during insertion.
Sharp pins are the unsung heroes of flawless sewing—when they’re dull, your entire project suffers.
You’ll notice threads catching, materials bunching, and your project precision suffering substantially. Maintaining proper sewing pin sharpness directly impacts your seam quality.
Sharp pins glide through layers effortlessly, creating clean entry points that won’t distort your fabric’s weave. This translates to better-looking finished seams and professional results you can be proud of.
Your sewing efficiency takes a major hit when working with worn-out pins. You’ll spend extra time repositioning pins that won’t penetrate properly, disrupting your creative flow. Sharp pins eliminate this frustration, allowing you to focus on your technique rather than fighting your tools.
Investing in pin sharpening methods extends your tool lifespan considerably. Rather than constantly replacing dull sewing pins, simple maintenance keeps your existing collection performing like new, saving money while maintaining sewing quality. Using steel wool as pincushion can help maintain sharpness, which is essential for achieving clean entry points and preventing fabric damage.
Techniques for Sharpening Sewing Pins
You can restore your dull sewing pins to their original sharpness using simple household items and proven techniques.
Transform dull pins into precision tools with everyday household items—no expensive replacements needed.
These five methods will help you maintain your pins effectively without spending money on replacements.
Soap Bar Method
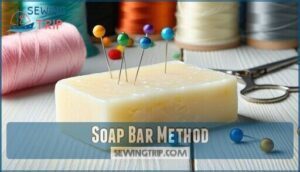
The most accessible pin sharpening method uses a simple soap bar as your secret weapon.
Insert pins one-third deep into the soap, creating soap lubrication that helps them glide through fabric effortlessly.
This soap pincushion approach tackles both sharpening and residue removal simultaneously.
Different soap types work equally well – keep one dedicated bar near your workspace.
Regular sharpening frequency prevents frustration during projects, making this the go-to choice for busy sewers.
For securing needles, consider using a steel wool pincushion, which is a useful tool for busy sewers to have a simple solution.
Emery Strawberry
Traditional emery strawberries contain aluminum oxide powder that creates perfect abrasive qualities for pin maintenance.
You’ll insert your sewing pins repeatedly into this compact tool to sharpen and achieve effective rust removal. The emery composition works like fine sandpaper, smoothing rough edges while eliminating burrs.
Consider DIY strawberry alternatives by filling small fabric pouches with emery powder. This method transforms dull sewing supplies into precision tools, making pin sharpening effortless for any sewing enthusiast seeking to sharpen sewing pins efficiently.
These tools are often paired with tomato pincushions for functionality, making them a useful addition to any sewing kit.
Steel-Wool Pincushion
Steel-wool pincushions offer a clever DIY steel-wool solution that sharpens sewing pins automatically with each use.
You’ll create an effective pin sharpening technique by stuffing fine-grade steel wool into denim fabric. This method prevents rust while maintaining your pins through regular insertion and removal.
For those interested, there are many places to purchase a steel-wool pincushion.
Here’s what makes steel-wool pincushions your sewing companion:
- Effortless maintenance – Your pins sharpen themselves during normal use
- Rust prevention – Fine steel filaments remove oxidation and debris
- Cost-effective solution – Dollar store materials create professional results
- Dual functionality – Acts as both storage and sharpening tool simultaneously
Emery Board
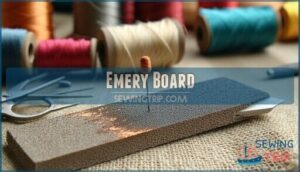
While steel wool works wonders, you’ll find emery boards offer precision that’s hard to beat. These nail-filing workhorses pack serious punch for pin sharpening solutions. The secret lies in their fine-grit composition—perfect for detailed work without overdoing it.
For those interested, there are various sewing products available online.
Here’s your step-by-step approach to mastering this technique:
- Choose Fine Grit: Select boards with 240-grit or higher for gentle yet effective sharpening tools that won’t damage delicate pin tips.
- Perfect Your Angle: Hold sewing pins at a 45-degree angle against the board surface for ideal needle angle positioning.
- Apply Light Oil: A drop of household oil on the board enhances the oil application process and reduces friction during sharpening.
- Target Rust Removal: Focus strokes on problem areas where oxidation appears, ensuring complete rust removal from pin surfaces.
- Consider Board Alternatives: Experiment with different emery board types to find what works best for your specific pin sharpening tricks collection.
Ordinary Oil Method
Common cooking oil offers another clever pin maintenance solution.
You’ll need ordinary oil, aluminum foil, and a clean cloth for this technique.
| Step | Action |
|---|---|
| Oil Application | Dip pin completely in cooking or coconut oil |
| Sharpening Process | Rub oiled pin against folded aluminum foil |
| Residue Removal | Wipe clean with cloth to remove excess oil |
| Safety Precautions | Handle carefully to avoid slipping on oily surfaces |
| Sharpening Frequency | Repeat monthly for ideal sewing pins performance |
This method removes rust while restoring sharpness to your favorite sharpening tools.
Enhancing Sewing Projects With Sharp Pins
Sharp sewing pins transform your crafting experience from frustrating fumbles to smooth sailing.
When you maintain properly sharpened pins, you’ll notice immediate improvements in your work quality and project enjoyment. These precision tools make all the difference between amateur-looking results and professional finishes.
Here’s how sharp pins enhance your sewing projects:
- Fabric Damage Prevention – Sharp points glide through delicate materials without snagging or creating unsightly holes
- Seam Precision – Clean penetration allows for accurate fabric alignment and consistent seam allowances
- Stitch Quality – Reduced fabric resistance leads to smoother machine operation and even stitching
- Sewing Efficiency – Less time wrestling with stubborn pins means more time creating beautiful pieces
Regular pin sharpening DIY maintenance and proper sewing pin care tips guarantee your sewing techniques remain exceptional throughout every project.
Additional Tips for Sewing Tools
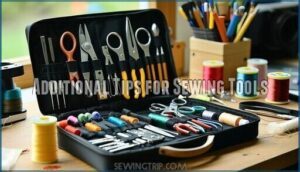
You can apply the same sharpening principles to maintain other sewing tools beyond pins. Your scissors, seam rippers, and rotary cutters all benefit from regular maintenance using similar household items.
Aluminum Foil for Scissor Sharpening
Beyond maintaining your sewing pins, your cutting tools deserve attention too.
Aluminum foil offers a surprisingly effective scissor-sharpening hack that costs pennies. Simply fold a 20cm piece of foil into multiple layers, then cut through it 10-15 times using your scissors’ full blade length. This removes debris and creates temporary sharpness improvement.
For ideal results, consider regular scissor sharpening every few months.
| Factor | Impact on Results |
|---|---|
| Foil Thickness | More layers increase effectiveness |
| Cutting Motion | Smooth, full strokes work best |
| Scissor Condition | Minor dullness responds better |
| Frequency | Weekly use maintains performance |
Sandpaper and Steel Wool as Scissor-Sharpening Alternatives
Beyond foil, sandpaper and steel wool offer powerful sharpening techniques for scissors and pins alike.
Choose 150-200 grit sandpaper for ideal results, applying gentle sharpening pressure to avoid damage. Steel wool grades from coarse to fine provide versatile alternative abrasives.
These pin sharpening methods for sewing extend beyond traditional tools, requiring proper safety precautions.
- Progressive approach: Start with coarser materials, finish with fine-grit sandpaper for professional results
- Dual purpose: These sharpening techniques work effectively on both scissors and sewing pins
- Cost-effective maintenance: Regular use of steel wool prevents rust while maintaining sharp edges
Frequently Asked Questions (FAQs)
How often should sewing pins be sharpened?
After noticing her pins dragging through silk fabric, Maria discovered she’d been using the same set for two years without maintenance.
You should sharpen your sewing pins every 6-12 months, or immediately when they resist fabric penetration during projects.
Can bent or damaged pins be salvaged?
Bent pins can’t be salvaged through sharpening – they’re basically unusable and should be discarded.
The metal stress compromises their integrity, making them unreliable for precise work.
Replace bent pins immediately for best results.
What are signs that pins need sharpening?
Like a car struggling uphill, your pins will fight against fabric instead of gliding through smoothly.
You’ll notice increased resistance, fabric puckering, bent pin tips, or pins that catch and snag delicate materials during insertion.
Do different pin types require different sharpening?
Different pin types don’t require separate sharpening methods.
Whether you’re using straight pins, safety pins, or specialty quilting pins, you’ll use the same techniques.
Soap bars, emery strawberries, steel wool, or fine sandpaper work universally, and are effective for sharpening various types of pins, making the process universally applicable.
Should machine needles and hand needles differ?
Sharp tools are like loyal friends – they’ll serve you better when treated right.
You should sharpen machine and hand needles differently since machine needles face higher speeds and need precise points for smooth fabric feeding, and this distinction is crucial for optimal performance with hand needles.
Conclusion
Transforming weary pins from fabric-fighting foes back into precision tools doesn’t require expensive replacements.
You’ve discovered that sewing pins can be sharpened using everyday household items like soap bars, emery strawberries, and steel wool pincushions. These simple methods restore your pins’ piercing power while saving money.
Sharp pins make clean holes without damaging delicate fabrics, ensuring professional-looking results in every project.
Keep your sewing toolkit performing at its peak with these practical sharpening techniques you can use anytime.


