This site is supported by our readers. We may earn a commission, at no cost to you, if you purchase through links.

You’re in luck because silk is a dye-friendly fabric. It plays well with a variety of dyes, giving you the freedom to create solid colors or playful prints. But, be warned: while silk is easy to dye, it’s also finicky. Too much heat and you’ll damage those delicate fibers.
So, if you’re ready to get started with silk dyeing, grab your gloves and let’s get started! From choosing the right dye to mastering the art of tie-dye, we’ll cover everything you need to know to transform your fabric like a pro.
Table Of Contents
- Key Takeaways
- Can You Dye Silk at Home?
- Choosing the Right Dye for Silk Fabric
- Preparing Silk Fabric for Dyeing
- Dyeing Silk With Acid Dyes on Stovetop
- Using Fiber-Reactive Dyes Without Heat for Silk
- Natural Dyeing Techniques for Silk Fabric
- Dyeing Silk Blends and Special Fabrics
- Tie-Dyeing and Patterning Techniques for Silk
- Aftercare for Dyed Silk Fabrics
- Troubleshooting Common Silk Dyeing Issues
- Frequently Asked Questions (FAQs)
- Conclusion
Key Takeaways
- Dyeing silk is a fun and creative way to transform your old silk items or create unique new pieces.
- There are several types of dyes suitable for silk, including acid dyes, fiber-reactive dyes, box dyes, and natural dyes, each offering different effects and requiring specific processes.
- Preparing your silk fabric properly is key to achieving the best results. Pre-washing, drying, calculating fabric weight, pre-soaking, and stain removal are essential steps to ensure an even and vibrant dye job.
- Silk is a delicate fabric, so special care is needed when washing and drying to maintain the color and texture of your newly dyed silk masterpiece.
Can You Dye Silk at Home?
You bet you can dye silk at home, and it’s easier than you might think! Whether you’re looking to breathe new life into an old garment or create a custom piece, dyeing silk is a fun and rewarding DIY project that’ll have you feeling like a fabric artist in no time.
Silk’s Dyeing Properties
Ever wondered if you can dye silk at home?
Well, you’re in for a treat! Silk’s natural properties make it a dream to dye.
Its protein fibers soak up color like a sponge, giving you vibrant results that’ll make your fabric pop.
Whether you’re a DIY newbie or a seasoned crafter, silk dyeing is your ticket to expressing your creativity.
Ready to jump into this colorful adventure?
Types of Dyes Suitable for Silk
Ready to transform your silk? You’ve got a rainbow of options! Let’s take a closer look at the dye types that’ll make your fabric sing:
- Acid dyes: The silk-whisperers, perfect for vibrant hues
- Fiber-reactive dyes: The chameleons that bond with your fabric
- Box dyes: The quick-and-easy solution for weekend warriors
- Natural dyes: The eco-friendly choice for Mother Nature’s fans
Each dye has its own personality, just like your silk. Choose wisely, and you’ll be dyeing to show off your masterpiece!
Preparing Your Workspace
Setting up your workspace for dyeing silk is all about creating a safe and functional space. Here’s what you need to know to get your workspace ready for some colorful fun:
- Clear the Clutter: Start by clearing any unnecessary items from your workspace. You’ll need a clean and spacious area to work on, so pack away any distractions and give yourself room to move.
- Cover and Protect: Dyeing can get messy, so it’s important to cover and protect your surfaces. Lay out plastic sheets or old newspapers to catch any spills or splashes. This will save you from staining your countertops and floors.
- Gather Your Tools: Before you begin, make sure you have all the tools and supplies you need within reach. This includes gloves, an apron, tongs, spoons, and of course, your chosen dye. Having everything at hand will make the process smoother and more enjoyable.
- Ventilation is Key: Dyeing silk can involve strong-smelling chemicals, so it’s important to work in a well-ventilated area. Open windows, turn on fans, or work outdoors if possible. This will keep the air fresh and help you avoid any unpleasant fumes.
- Prepare a Workspace That’s Just for Dyeing: If possible, designate a specific area for dyeing silk. This could be a corner of your garage, a backyard workspace, or even a well-ventilated room. Having a dedicated space will make it easier to set up and clean up after each project.
Safety Precautions
Dyeing silk? Safety should be your top priority. Here are some essential precautions to keep in mind:
- Gloves and Apron: Protect your skin and clothes from dye stains.
- Ventilation: Work in a well-ventilated area to prevent inhaling fumes.
- Eye Protection: Consider safety goggles if there’s a risk of dye splashing.
- **Clean-up
Choosing the Right Dye for Silk Fabric
Choosing the right dye is really important for achieving the desired color and preserving the delicate nature of silk. In this section, we’ll explore the different types of dyes suitable for silk fabric, so you can make an informed decision and transform your fabric with confidence.
Acid Dyes
Acid dyes are your best bet for achieving vibrant and long-lasting colors on silk fabric. These dyes work like a charm on protein fibers, and silk is no exception. With acid dyes, you can expect bright and bold hues that will make your silk projects pop.
When choosing an acid dye, go for a product specifically designed for silk. These dyes will have the right formula to bond with the silk fibers, ensuring your colors are colorfast and won’t fade over time.
Keep in mind that acid dyes require a slightly acidic environment to work their magic. Vinegar is your secret weapon here – it lowers the pH of the dye bath, creating the perfect conditions for the dye to adhere to the silk.
Fiber-Reactive Dyes
Choosing the Right Dye for Silk Fabric
Fiber-reactive dyes are an excellent choice for dyeing silk fabric and achieving vibrant, long-lasting colors. Here’s a simple breakdown:
- Cold dyeing: No heat is required, making it safe for silk. Soak your fabric and stir periodically.
- Silk blends: When blending with cellulose fibers, colors may shift. Test on a small swatch first.
- Soda ash: Essential for colorfastness, it helps the dye bond with silk fibers.
- Dyeing process: Similar to acid dyes but with adjustments. Follow instructions and stir frequently.
- Rinsing and washing: After dyeing, rinse with warm water and wash gently with soap.
Natural Dyes
natural dyes offer an eco-friendly way to add colour to silk, with a wide variety of colours and results. If you’re feeling adventurous, try dyeing with avocado skins, onions, turmeric, beetroot, black beans, hibiscus flowers, walnut hulls, or red cabbage. To get started, here’s what you need to know:
- Dye Extraction: Simmer your chosen plant in water for an hour to release its colour.
- Fabric Preparation: Soak your silk fabric in a vinegar and water mixture for an hour before dyeing.
- Dyeing Process: After straining the plant solids, immerse the fabric in the dye bath until you achieve your desired colour.
- Rinsing and Drying: Once you’re happy with the colour, remove the fabric from the dye bath and rinse it thoroughly. Allow the fabric to air dry, steering clear of direct sunlight.
Box Dyes
If you’re looking for an easy, one-off solution to dyeing silk, box dyes are a convenient option. These home dyeing kits, like Rit, Dylon, and iDye, offer a simple way to transform your silk fabric without the fuss of more complex methods.
However, keep in mind that box dyes tend to be less reliable and may not produce the same long-lasting results as other dyes. They’re more prone to fading over time, so if you’re seeking a permanent colour change, this mightn’t be the best choice.
Despite this, box dyes are a fun, low-commitment way to experiment with dyeing silk, especially if you’re a beginner.
Preparing Silk Fabric for Dyeing
Now that you’ve picked the perfect dye, it’s time to prep your silk for its colorful makeover. First up, let’s talk about getting your fabric ready for dyeing.
We’ll go over the four key steps: pre-washing and drying, calculating fabric weight, pre-soaking, and stain removal. These steps are really important for making sure your dye job turns out just right.
Pre-washing and Drying
Pre-washing your silk fabric is a key step in getting it ready for dyeing. It helps make sure any dirt, oils, or residues are gone, so the dye can soak in evenly and work well. Here’s a simple guide:
- Choose a mild, neutral detergent made for silk. Avoid fabric softeners or detergents with brighteners, as these can mess with how the dye soaks in.
- Hand-wash your silk item in lukewarm water, gently moving the fabric around to get rid of any dirt or stains.
- Rinse the fabric thoroughly with warm water to get rid of any detergent left behind.
- Gently squeeze out extra water from the fabric. Don’t wring or twist it, as this can damage the fibers.
- Air-dry the silk item by laying it flat on a towel or hanging it on a rack. Keep it out of direct sunlight, as this can cause it to fade.
Calculating Fabric Weight
Getting the right amount of dye is key when you’re working with silk. Here’s how to nail it:
- Grab your kitchen scale or a mini scale to weigh your fabric.
- Place the silk fabric on the scale and note the weight.
- Refer to the dye package instructions to determine the required dye amount based on the fabric weight.
- Calculate the needed dye weight accordingly.
Now you’re all set to move on to the next step, pre-soaking your silk!
Pre-soaking the Silk
Pre-soaking the silk is a key step in preparing your fabric for dyeing. This step helps the fibers soak up the dye evenly. Think of it like priming a canvas before painting—you want to create the perfect base for your masterpiece.
Simply soak your silk item in warm water before moving on to mixing your dye. This helps the dye penetrate the fibers more effectively, resulting in a vibrant and consistent color. So, don’t skip this step if you want to get the best results when dyeing silk at home.
Removing Existing Stains
Before dyeing silk, it’s super important to get rid of any stains to make sure the color comes out even and bright. Here are some tips to tackle those pesky stains and get your silk ready for a stunning transformation:
- Act fast—fresh stains are easier to remove.
- Blot, don’t rub. Gently blot the stain to avoid spreading it.
- Choose mild, silk-friendly stain removers to avoid damaging the fabric.
- Always perform a patch test on a hidden part of the fabric.
- Go natural with lemon juice, vinegar, or baking soda paste for a gentle and effective approach.
Dyeing Silk With Acid Dyes on Stovetop
Ready to try dyeing silk with acid dyes? This method uses your stovetop to create vibrant, long-lasting colors on your silk fabric. It’s an easy process that will soon have you transforming plain silk into something special.
Required Supplies
For this method, you’ll need a few more tools and supplies. Here’s the full list:
- Acid dye or fiber-reactive dye
- Dye activator (citric acid or vinegar)
- Non-reactive dye pot
- Rubber gloves
- Teaspoons
- Dust mask
- Plastic cup
- Stirring stick
- Tongs
- Stirring spoon
- Kitchen scale
- Mini scale
- Thermometer
Mixing the Dye Solution
- Get your dye package instructions handy.
- Measure out the required amount of dye according to the instructions and your desired shade.
- Dissolve the dye in hot water. This step is like making a magical potion!
- If needed, strain the mixture to make sure it’s smooth and lump-free.
Heating the Dye Bath
Now that you’ve mixed your dye solution, it’s time to heat things up!
| Temperature | Heat Source |
|---|---|
| 185°F | Stovetop |
The key to success here is maintaining a consistent temperature of 185°F. This is the sweet spot for dyeing silk with acid dyes.
Use a non-reactive dye pot and heat the dye bath until it reaches this temperature. This step is vital to make sure the dye takes to your silk fabric beautifully.
Now, let’s move on to the next step and add some magic with the dye activator!
Adding Dye Activator
Now for the fun part: adding the dye activator! This step is key for getting those vibrant colors you crave. Think of it like adding a secret ingredient to your favorite recipe, giving it that extra kick.
Go ahead and sprinkle in some citric acid or vinegar. Yep, that trusty vinegar in your kitchen cabinet can work wonders for dyeing silk. It’s like having a magic potion at your fingertips!
Stirring and Exhausting the Dye
Now for the fun part: stirring and exhausting the dye.
This is where the magic happens and your silk starts to transform.
You’ll want to stir the dye bath frequently with a spoon or tongs to make sure the dye is evenly distributed and absorbed by the fabric.
Keep stirring until the dye is completely exhausted, meaning all the dye has been absorbed and the water in the pot runs clear.
Think of it like stirring a delicious stew—you want to make sure all the flavors (or in this case, colors) are evenly distributed.
Using Fiber-Reactive Dyes Without Heat for Silk
Want to dye silk without breaking a sweat? Fiber-reactive dyes got your back! Unlike other methods, this one skips the heat, offering a chill approach to transform your fabric.
Cold Water Dyeing Process
You can achieve vibrant colors on silk using fiber-reactive dyes without heat. Here’s a step-by-step guide to mastering this technique:
- Pre-wash and dry: Start by washing and drying your silk item with detergent. This helps get rid of any impurities before dyeing.
- Calculate dye amount: Refer to the dye package instructions to determine the required dye quantity based on the weight of your silk fabric.
- Pre-soak: Soak your silk item in warm water. This step helps the fabric soak up the dye more effectively.
- Mix dye: Dissolve the fiber-reactive dye in hot water, and strain if needed.
Adding Salt and Soda Ash
Now for the fun part: adding the salt, soda ash, and dye to your cold dye bath. This is where the magic happens and your silk starts its transformation.
The Purpose of Salt and Soda Ash
Salt and soda ash are like the dynamic duo when it comes to fiber-reactive dyes. They help the dye react with the silk fibers and create a strong, vibrant color.
Creating the Dye Bath
Stir in the salt and soda ash, giving them a good mix to dissolve. Then, add your chosen dye to the party and stir it all together. Think of it like making a magical potion—but instead of casting spells, you’re casting colors!
Soaking Time for Vibrant Colors
To achieve vibrant colors when using fiber-reactive dyes without heat, you need to let your silk fabric soak in the dye bath for a good while. Here’s what you need to know:
- Dye Time: For deep, rich colors, aim for a long soak. The longer the fabric soaks, the more intense the color will be.
- Even Color: Make sure to stir the dye bath occasionally during the soaking process so the color spreads evenly on your silk fabric.
- Color Depth: A quick dip will give a subtle hue, but a longer soak of up to an hour will produce more dramatic results.
- Dye Strength: Remember, the dye strength will also impact the final color, so adjust the concentration of dye accordingly.
- Silk Dye Designs: Experiment with different soaking times and dye strengths to create unique silk dye patterns and designs.
Rinsing and Washing After Dyeing
Now for the fun part—seeing your handiwork!
Remove your silk item from the dye bath and give it a good rinse under warm, then cool water. You don’t want any dye residue left on your fabric.
Once you’re sure it’s all rinsed out, give it a gentle wash with some hand soap.
You’re almost ready to show off your new creation to the world!
Natural Dyeing Techniques for Silk Fabric
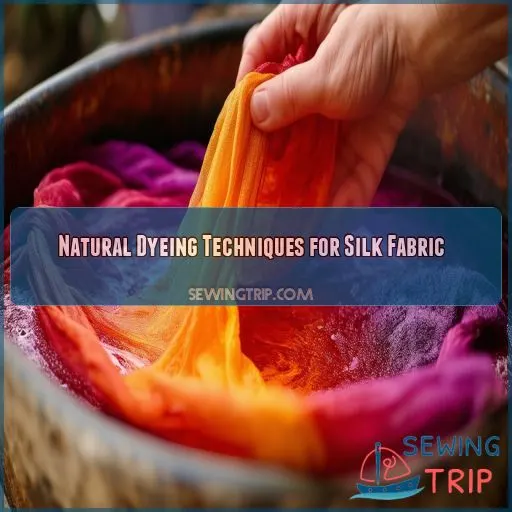
If you’re keen on going green, natural dyes are the way to go. Avocado skins, onions, and hibiscus flowers are just a few of nature’s colorful offerings that can transform your silk.
Plant-Based Dye Sources
If you’re keen on eco-friendly, natural dyes, you’ll be spoilt for choice. Think avocado skins, onions, turmeric, beetroot, black beans, hibiscus flowers, walnut hulls, and red cabbage. Nature’s palette is endless!
But, natural dyes need more time to work their magic. So, if you’re after a quick fix, commercial dyes might be your jam.
Mordanting Silk for Natural Dyes
When using natural dyes, you’ll need to mordant your silk to help the color stick.
Think of mordanting like priming a wall before painting—it helps the dye grab onto the fabric.
You can buy a premade mordant from a silk dye store, or make your own using alum or cream of tartar.
Simply soak your fabric in the mordant solution, then wring it out and let it dry before dyeing.
Extracting Natural Dye Colors
Now for the fun part: extracting those vibrant natural colours!
This process involves simmering your chosen plant material in water for an hour to release the dye.
You can use avocado skins, onions, turmeric, beetroot, black beans, hibiscus flowers, walnut hulls, or red cabbage. Experiment with different plants to create a rainbow of colours.
Just remember to strain the plant solids before immersing your silk in the dye bath.
Setting Natural Dyes on Silk
Now for the moment of truth: setting your natural dyes on silk. Here’s the lowdown on making those colors pop and making sure they stay put.
- Simmer and soak: You’ve already done the hard work of extracting those vibrant colors. Now, simmer your fabric in the dye bath for an hour to let the colors really shine.
- Stir it up: Don’t forget to give your dye bath a good stir every now and then. This makes sure the color is even and prevents any unwanted surprises, like blotches or streaks.
- Rinse and repeat: Once you’ve achieved your desired shade, it’s time to rinse. Give your fabric a thorough rinse in warm water, followed by a cold-water rinse to lock in the color.
- Air it out: The final step is to let your newly dyed silk air-dry. Avoid the temptation to toss it in the dryer—a little patience goes a long way in preserving your masterpiece.
Dyeing Silk Blends and Special Fabrics
So you’ve got your hands on some fancy silk blends and special fabrics, and you’re wondering if you can work your dyeing magic on them? Well, buckle up because we’re about to explore the ins and outs of dyeing these unique materials.
Silk-Cotton Blends
Let’s talk about those tricky silk-cotton blends.
You might be wondering if you can even dye these blends, and the answer is… it depends.
See, cotton loves fiber-reactive dyes, but silk? Not so much.
So, when you’ve got a blend of the two, you might notice a color shift. The cotton might soak up more dye, leaving the silk looking a bit uneven.
But don’t worry, there are ways to manage this.
First, test, test, test.
Grab some scraps of your silk-cotton blend and experiment with different dyes and techniques.
This way, you’ll know exactly what results to expect before diving into your main project.
Silk-Polyester Blends
If you’re working with a silk-polyester blend, treat it like a synthetic fabric.
Polyester has a high melting point, so you’ll need to use disperse dyes and a hot dye bath to get the colour to take.
You can also use an acid dye, but the colour won’t be as vibrant.
Silk Chiffon and Organza
Dyeing Delicate Fabrics: A Guide for Beginners
Silk chiffon and organza are delicate fabrics known for their sheer beauty and graceful drape. Dyeing these fabrics can be a challenge, but with the right techniques, you can achieve stunning results. Here are three tips to keep in mind:
- Test your dyes on a small swatch first to make sure the colors are true and won’t bleed. This is a good way to avoid any surprises when you dye the whole fabric.
- Use a gentle hand when stirring the dye bath to avoid damaging the fabric.
- Rinse the fabric thoroughly in cold water to preserve the color and texture.
Silk Velvet and Satin
Mastering the Art of Dyeing Blends
Now, let’s get into the details of dyeing silk velvet and satin, which are blends of silk with other fibers. These fabrics have a unique feel and shine, and dyeing them requires some special considerations. You’ll want to pay close attention to the blend’s fiber content and adjust your techniques.
For silk velvet, a gentle touch is key. The pile can be delicate, so opt for low-impact dyes. As for satin, its smooth surface reflects light beautifully, but it may require a higher dye concentration for rich colors. Always test dyes on a small swatch first!
Tie-Dyeing and Patterning Techniques for Silk
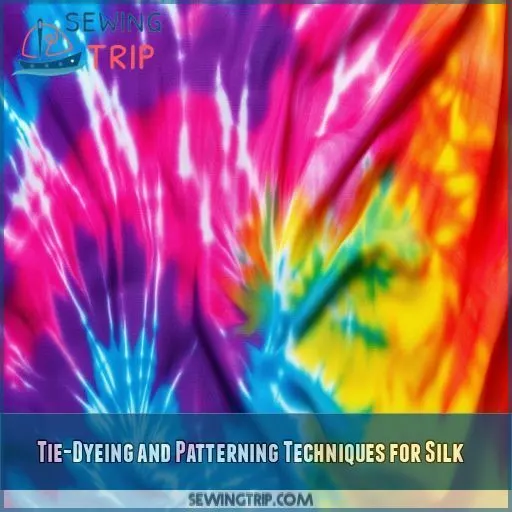
Ready to try your hand at tie-dyeing and patterning techniques for silk? In this section, you’ll explore the art of Shibori folding, resist dyeing, creating multi-color designs, and fixing tie-dye patterns on your silk fabric.
Shibori Folding Methods
Tie-Dyeing and Patterning Techniques for Silk
Shibori is a traditional Japanese tie-dyeing technique that involves folding, twisting, and binding fabric to create unique patterns and designs. Here’s a simple guide to getting started with Shibori folding methods on silk:
- Choose a folding technique: Experiment with accordion folds, fan folds, or circular binds to create distinct patterns.
- Prep your silk: Pre-wash, dry, and calculate fabric weight for accurate dye measurements.
- Mix dye: Prepare fiber-reactive, acid, or natural dye according to instructions.
- Dye: Submerge folded silk, stir, and soak.
- Rinse: Warm and cool water rinse reveals patterns.
Resist Dyeing Techniques
Resist dyeing, or tie-dyeing, is a fun way to create unique patterns on silk. Here are some tips for this technique:
- Try different folding and tying methods to create a variety of patterns.
- Use rubber bands or string to resist the dye and form interesting shapes.
- Experiment with different dye colours and combinations to create vibrant designs.
- Soak the silk in a dye fixative before dyeing to help the colours stay vibrant.
- Rinse the silk in cold water after dyeing to remove any excess dye and help set the colours.
Creating Multi-Color Designs
Now for the fun part—adding a rainbow of colors to your silk! Whether you’re going for a tie-dye look or something more structured, here’s how to create eye-catching multi-color designs:
| Technique | Steps | Tips |
|---|---|---|
| Tie-Dyeing | Soak silk in cool water, then in a dye bath with aluminum sulfate and cream of tartar. | Experiment with different colors and folding techniques for unique patterns. |
| Ombré | Dip-dye your silk, gradually lifting it out of the dye bath for a fade effect. | Use multiple dye baths for a smooth shift between colors. |
| Shibori | Fold, twist, or bind your silk with string before dyeing to create patterns. | Try different shapes and sizes of folds for variety. |
| Freehand Painting | Use dye paints to paint directly onto the silk. | Water down your dye for a watercolor effect, or go bold with thick lines and shapes. |
| Gradual Immersion | Immerse your silk in one color, then gradually move to another. | Try dipping the fabric at an angle for an ombre effect. |
Fixating Tie-Dye Patterns on Silk
Now, let’s talk about locking in those vibrant tie-dye patterns on your silk creations. Here’s the lowdown on fixating those colors so they stay put:
- Fixatives are key: Use a fixative to make sure your colors stay vibrant and don’t bleed.
- Varying techniques: Different dyes require specific fixatives, so be sure to check the instructions.
- Temperature control: Keep the dye bath at a steady temperature for the best results.
- Soak time: Give your silk enough time to soak up all that color.
- Rinse and repeat: Rinse your silk, then repeat with cold water to lock in the colors.
Aftercare for Dyed Silk Fabrics
Now that you’ve transformed your silk fabric with mind-blowing colors, it’s time to make sure your masterpiece stays vibrant and beautiful. Let’s get into the aftercare tips to keep your dyed silk fabrics looking their best.
Washing Dyed Silk
Now for the big reveal – showing off your newly dyed silk masterpiece! But before you flaunt your creation, there’s one important step left: washing. It’s time to rinse away any excess dye and make sure your fabric is clean and ready for its debut.
Hand wash your dyed silk in lukewarm water with a mild detergent. Go easy on the soap – you don’t want to strip away your hard work! Rinse the silk thoroughly with cold water to remove any lingering dye. Think of it as a relaxing spa treatment for your fabric, helping it relax and unwind after its colorful transformation.
Drying Methods for Silk
Drying your silk is a key step in the dyeing process. Here are some ways to do it right:
- Air drying: Hang your silk in a well-ventilated area, but avoid direct sunlight to prevent fading.
- Line drying: Use a clothesline or drying rack to hang your silk, ensuring it’s not overcrowded to allow for airflow.
- Shade drying: If you’re concerned about sunlight, opt for shade drying. Hang your silk in a shaded area outdoors or near an open window.
- Flat drying: Lay your silk flat on a towel or drying rack, ensuring it’s not folded or bunched up.
- Tumble drying: While not recommended for all fabrics, you can tumble dry your silk on a low heat setting if you’re short on time.
Preventing Color Bleeding
You’ve put in the work to dye your silk, now it’s time to make sure your hard work doesn’t bleed down the drain. Here are some tips to prevent color bleeding and keep your silk looking vibrant:
- Rinse your silk thoroughly with cold water after dyeing to remove any excess dye.
- When washing, always use cold water and a gentle cycle. Hand washing is ideal, but if you must use a machine, put your silk items in a mesh laundry bag to protect them.
- Avoid using fabric softener, as it can cause colors to bleed.
- Dry your silk in a well-ventilated area, away from direct sunlight, which can cause colors to fade.
- If you need to iron your silk, use a low heat setting and place a cloth between the iron and the fabric to protect it from direct heat.
Ironing and Steaming Dyed Silk
First things first: always iron your silk when it’s slightly damp. Why? Because it’s a delicate fabric, and this helps avoid those pesky shine marks that can happen when ironing dry silk. So, give your silk fabric a light spritz with water, set your iron to a low heat setting, and get to it!
But what about steaming? Is it a good idea for silk? Absolutely! Steaming is a gentler alternative to ironing and is perfect for more delicate silk items. Go ahead and give it a try—your silk will thank you!
Troubleshooting Common Silk Dyeing Issues
You’ve mastered the basics of silk dyeing, but what happens when things don’t go according to plan? From uneven color distribution to fading and fabric damage, we’ll troubleshoot common issues so you can transform your silk with confidence.
Uneven Color Distribution
- Fabric type and dye ratio: Different types of silk fabric may absorb dye unevenly, especially if you don’t get the dye ratio just right.
- Agitation: Make sure you’re giving your dye bath a good stir to make sure the dye is evenly distributed throughout the fabric.
- Soak time: Leaving your fabric in the dye for too long or not long enough can also impact evenness, so keep an eye on those timings.
Fading and Color Loss
We’ve all been there—that favorite silk scarf or shirt that loses its vibrant hue after a few washes. Fading and color loss can be a real bummer, but there are ways to minimize this issue. First, let’s understand why this happens.
Silk is a delicate fabric, and sometimes dyes don’t fully bond with the fibers. This can lead to colors fading over time, especially with frequent washing. But don’t fret; there’s hope for your fading fabrics yet!
Dye Not Adhering to Fabric
If your dye isn’t sticking to the silk, it’s a headache, but don’t panic. Here are some reasons why this might be happening:
- Fabric isn’t prepped properly: If you skip pre-soaking or don’t give it enough time, the dye may not adhere well.
- Dye bath is too cool: Make sure your dye bath is at the right temperature. If it’s too cool, the dye won’t bond properly.
- Not enough dye: Double-check you’ve added enough dye to the bath. Too little dye means not enough to stick to the fabric.
- Not enough agitation: Stirring the dye bath is really important. It helps the dye bond evenly to the fabric.
- Fabric type: Some silk blends, especially those with polyester, may resist dye.
Silk Fabric Damage During Dyeing
Dyeing silk is a delicate process, and mishandling can lead to permanent damage. Here are some tips to prevent your silk from getting ruined:
- Always do a fabric test to check for colourfastness.
- Be careful with heat. Silk is a delicate protein fibre that can be damaged by high temperatures.
- Avoid aggressive agitation to prevent damaging the fibres.
- Rinse thoroughly with lukewarm water to remove excess dye.
- Dry in a well-ventilated area, avoiding direct sunlight to prevent fading and discolouration.
Frequently Asked Questions (FAQs)
Can Silk be dyed at home?
You can dye silk at home using a variety of methods and supplies. It’s a fun and creative way to transform your silk items and give them a unique touch.
How to choose natural dyes for silk fabric?
Avocado skins, onions, turmeric, beetroot, black beans, hibiscus flowers, walnut hulls, and red cabbage. Simmer your fabric in a vinegar and water mix, then strain and soak.
Can You dye silk with natural ingredients?
You can dye silk with natural ingredients like food colouring, tea, avocado skins, onions, turmeric, beetroot, black beans, hibiscus flowers, walnut hulls, and red cabbage.
How do you dye silk?
Like a blank canvas, silk is ready for your artistic touch. Dyeing silk is a fun, creative process with many options. You can use acid or fiber-reactive dyes, natural dyes, or even food coloring. The key is preparing the dye bath, choosing the right dye, and carefully following instructions.
What dye can I use on silk?
You can use acid dyes, fiber-reactive dyes, box dyes, and natural dyes on silk. Acid dyes are the most reliable, but you can experiment with others for unique effects.
Can you use Rit dye on silk?
Yes, you can use Rit dye on silk. One crafter raved about the "insanely rich" results they got when dyeing silk/rayon velvet with Rit. Just remember to dissolve the powder thoroughly and agitate the dye bath for an even colour.
Does silk hold dye well?
Yes, silk holds dye well. But it’s easier to get darker colours than lighter ones. And remember, polyester stitching won’t change colour.
How to change the color of silk?
So, you want to give your silk a makeover? Well, there are a few ways to go about it, depending on the type of silk and the dye you’re using. But don’t worry, we’ll walk you through it with a step-by-step guide to achieve your desired colour.
Can you dye silk with food colouring?
Yes, you can dye silk with food colouring. It’s a great way to add colour to natural protein fibres like silk, wool, and cashmere.
How do you tie-dye silk?
First, lay the silk flat. Pinch and pull the fabric into peaks, then wrap rubber bands around the peaks. Apply dye, then blot and allow to dry. Rinse, wash, and dry.
Can you dye polyester silk?
You can dye polyester silk, but it’s not as simple as dyeing natural fabrics like cotton or silk. The higher the polyester content, the more pastel and uneven your dye. Use Rit’s DyeMore line, designed for synthetics, or iDye Poly from Jacquard.
How do you get a lighter colour when dyeing silk?
To get a lighter colour when dyeing silk, start with less dye than suggested. Avoid pouring it directly on the fabric to prevent dark spots.
Whats the best way to dry silk?
Avoid wringing out or tossing your silk in the dryer. Instead, blot excess water with a towel, then hang it on a padded hanger or lay it flat to dry. Silk dries quickly, but avoid direct sunlight to prevent fading.
Conclusion
So, there you have it, dyeing silk is an art and a science. You now have a rainbow of options to transform that drab silk scarf or tired-looking blouse into something spectacular. Go forth and dye, but remember, handle that silk with care!

