This site is supported by our readers. We may earn a commission, at no cost to you, if you purchase through links.
Splotchy, faded, uneven color ruins more cotton projects than bad dye ever does. The real culprit hides earlier, in a skipped prewash or a rushed soak that leaves fibers unprepared to accept pigment.
Cotton’s plant-based structure absorbs dye differently than synthetic fabric, which means shortcuts show up fast as pale patches or streaky rings. Get the prep right, though, and even a beginner can achieve rich, even color that holds up wash after wash.
This guide walks through how to dye cotton the right way, from soda ash soaks to bucket techniques and beyond.
Table Of Contents
Key Takeaways
- Proper prewashing, wetting, and a soda ash soak prepare cotton fibers to absorb dye evenly and prevent blotchy results.
- Fiber-reactive dyes form permanent chemical bonds with cotton’s cellulose, giving more lasting color than direct or all-purpose dyes.
- Keeping fabric fully submerged, agitated, and at a stable temperature during dyeing ensures consistent color across the whole piece.
- Rinsing until water runs clear, washing with mild detergent, and drying in shade lock in color and prevent fading over time.
Prepare Cotton for Even Dyeing
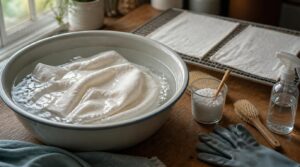
Even color starts long before the dye hits the fabric. Your cotton needs the right prep work to soak up color evenly, without blotches or resistant spots. Here’s exactly what to do before you mix a single drop of dye.
Give your cotton a long, thorough soak in plain water first—this beginner-friendly fabric dyeing guide walks through why hydration is the unsung hero of even, blotch-free color.
Prewash With Detergent
Grab your cotton and give it a hot wash with detergent first — this removes manufacturing waxes and oils blocking dye absorption.
- Loosens embedded soil
- Breaks down set stains early
- Works best in hot water
- Use liquid detergent for quick mixing
- Skip optical brighteners
This fabric pretreatment step clears up to 95% of residue, letting dye bond directly with cotton fibers.
Skip Fabric Softener
Once your cotton’s washed, leave fabric softener out of the routine entirely. It coats fibers with a thin polymer layer that blocks dye absorption and leaves residue behind, causing duller, uneven color.
Skipping it also keeps porosity intact, so towels stay absorbent and cotton takes dye brighter. For static control alternatives, try air drying or a vinegar rinse instead — no coating, no dye interference.
Soak in Soda Ash
Fiber-reactive dyes need an alkaline environment to bond with cotton, and that’s exactly what soda ash creates. Dissolve it fully in warm water, then soak fabric for 15 to 60 minutes, keeping the solution warm but not hot. This raises pH to roughly 11, swelling fibers so dye penetrates deeper.
Skip this step, and even a perfect Wash Fabric routine won’t stop patchy color. For best results, use warm distilled water to achieve maximum solubility benefits.
Keep Cotton Fully Saturated
Once soda ash does its job, don’t let the fabric sit half-dry. Keep a water-to-fabric ratio of at least 10:1 during the soak, and check folds for dry spots.
Gentle agitation frequency every few minutes prevents surface films.
Full submersion depth matters here—no fabric poking above the waterline gets even color.
Press Out Wrinkles
Grab your iron before you dye—smooth fabric takes color better than wrinkled fabric. Steam pressing relaxes fibers using heat and moisture together, so set your iron to a cotton-safe temperature and press with even pressure across the surface.
Keep the iron moving to avoid scorching. Let the fabric cool flat once you’re done; this locks in the smooth finish and preps it fully for dyeing.
Choose and Mix The Right Cotton Dye
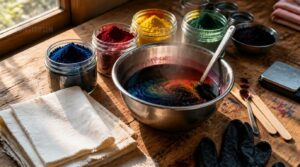
Once your cotton is prepped, the next choice shapes everything: which dye you use. Different dyes bond with cotton in different ways, and picking the right one saves you time and disappointment. Here’s what you need to know before you mix anything.
Fiber-reactive Dyes
Chemical bonding sets fiber-reactive dyes apart from every other option on your shelf.
Unlike acid dyes, which need those amino groups found in protein fibers like wool, fiber-reactive dyes actually form permanent covalent bonds with cellulose—here’s a deeper look at why wool takes dye so differently than plant-based fibers.
These dyes react with cotton’s hydroxyl groups, forming permanent covalent bonds rather than sitting on the surface. Soda ash creates the alkaline activation needed to trigger this reaction. The payoff? Impressive colorfastness and minimal dye hydrolysis, meaning your color stays vivid wash after wash.
Direct Fabric Dyes
Where fiber-reactive dyes bond chemically, direct dyes work by attraction, not covalent bonds, so they’re simpler but less permanent.
They dissolve fast and rely on:
- Warm dye bath (60-90°C)
- Even fabric prep
- Correct dye concentration
- Salt for uptake
Colorfastness testing matters here, since washfastness lags behind reactive dyes without extra fixation steps. Great for quick, budget-friendly projects.
Natural Dye Options
Your kitchen already holds a dye studio. Plant-based dyes like indigo, madder root, and turmeric color cotton beautifully with the right mordant and pH control.
Tea, coffee, and cocoa lean earthy—think sepia and warm browns. Onion skins and pomegranate rind round out food-based options.
Aluminum sulfate or tannin-rich mordants boost fastness, locking color into cellulose fibers for lasting results.
Measure Dye Accurately
Eyeballing dye measurements leads to blotchy, unpredictable color. Use a calibrated digital scale, weighing to 0.1 gram for larger batches, and record your liquor ratio for accurate dye concentration.
Serious hobbyists go further with a spectrophotometer calibration and a quick absorbance check, comparing results against a reference standard. This confirms your dye solution preparation matches the target shade before the fabric ever touches the bath.
Add Fixatives Correctly
Fixation locks color in for good — and cotton dyeing depends on getting it right.
- Spray fixative 12–18 inches away
- Use light, even passes
- Let each coat dry fully
- Test on scrap fabric first
- Work in ventilated spaces
Soda ash fixes fiber-reactive dyes chemically; salt only boosts uptake. Skip vinegar — it won’t bond dye to cotton. Iron mordanting suits natural dyes only.
Dye Cotton in a Bucket or Sink
Once your fabric is prepped and your dye is mixed, it’s time for the fun part. A bucket or sink gives you full control over every stage of the process, right in your own space. Here’s what you need to know to get even, vibrant color from start to finish.
Wet Fabric First
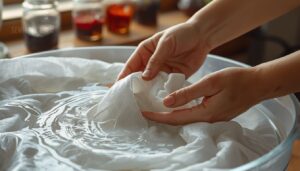
Before you prepare the dye bath, pre-wet cotton fibers in plain water. This opens the weave and lets fibers hydrate evenly, so color spreads without blotches.
| Fabric State | Result |
|---|---|
| Dry cotton | Uneven, blotchy color |
| Wet cotton | Smooth color absorption |
| Partially damp | Streaks near folds |
| Fully saturated | Balanced edge-to-edge tone |
Moisture before dyeing prevents capillary gaps that cause patchy spots later.
Submerge Cotton Completely
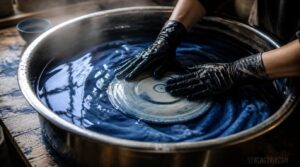
Once your fabric is wet, lower it into the dye bath and push it under until every inch sits below the surface. Submerge fabric evenly—no dry corners peeking out. Air pockets trap oxygen and block dye absorption, so smooth out folds by hand. A plate or weight keeps stubborn cotton from floating back up, giving you full immersion and steady liquid coverage throughout.
Stir for Even Color
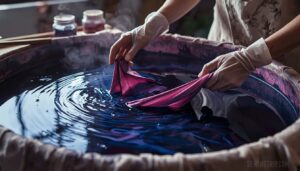
With cotton fully submerged, keep it moving. Gentle agitation in a slow circular motion keeps every fiber suspended and exposed to fresh dye. Pull fabric away from the container’s edges to dodge streaking, and reposition it often.
Continuous motion prevents patchy spots and boosts even color absorption. Pause briefly between stirs to let dye diffuse—your reward is richer, more even color intensity.
Control Dye Bath Temperature
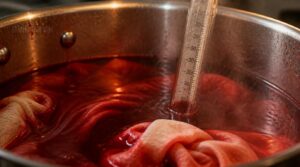
Heat matters as much as motion. Reactive dyes need a stable water temperature within 2°C of your target, so check with a calibrated thermometer at bath level, not just guesswork.
Warm the bath slowly, 1–3°C per minute, avoiding spikes that cause blotchy uptake. Even heat distribution keeps every fiber absorbing dye at the same rate, which sets up longer dye bath exhaustion later.
Adjust Color Intensity

Vividness is a dial, not a switch — you control it by adjusting dye concentration and timing.
- Add more dye or fixative for deeper color intensity
- Dilute the bath or shorten dwell time for softer tones
- Watch natural dyes closely, since small amount changes shift shade fast
Prewetted fabric absorbs evenly, avoiding blotchy saturation once you’ve optimized dye concentration.
Rinse, Wash, and Set Dyed Cotton

Once your fabric comes out of the dye bath, the real work of locking in that color begins. What you do next determines whether your project stays vibrant for years or fades after a few washes. Here’s how to rinse, wash, and set your cotton the right way.
Rinse Until Water Clears
Clear water is your finish line. Rinse thoroughly in lukewarm water, 30–40°C, checking clarity every few passes.
Most cotton loads reach a water clarity test pass within two full rinses, using 4 liters first, then 2–3 liters each round.
Dye removal rate slows fast after that. Once water runs clear for two passes, the final rinse feel should be smooth, not slick.
Wash With Mild Detergent
Grab a mild detergent for this step, not your regular laundry soap. Gentle formulas prevent detergent residue, reduce skin irritation, and preserve color brightness.
Look for:
- Nonionic or anionic surfactants
- No optical brighteners
- Low fragrance load
Wash and dry in cool water, 30–40°C, to maintain fabric softness and boost colorfastness testing accuracy before storing your finished piece.
Avoid Vinegar on Cotton
Skip the vinegar rinse—it’s a myth that doesn’t hold up on cotton. Acid exposure disrupts dye bonds in fiber reactive dyes, causing color fading or blotchy shifts.
Vinegar works as a mordant on protein fibers like wool, not cellulose. On cotton, it risks fiber weakening with repeated use.
If contact happens, rinse immediately to protect colorfastness and dye absorption.
Air Dry in Shade
Sunlight can undo hours of careful dyeing in minutes. UV rays break down dye molecules and fade fresh color fast, so shade drying protects your work.
Hang cotton on a well-ventilated line, away from direct sun and heat sources. Keep humidity between 40-60%, with light breezes helping evaporation. Rotate items for even drying, and separate dark from light pieces to stop dye transfer.
Prevent Fading Later
Color doesn’t fade on its own—your habits speed it up or slow it down. Cool water washing, a gentle cycle, and shade drying all protect dye fixation long after the bucket dries.
Fading isn’t inevitable—cool washes, gentle cycles, and shade drying keep dye fixation strong long after dyeing ends
- Wash inside out
- Use color-safe detergent
- Limit sun exposure
Reapplying a color fixative occasionally boosts wash fastness and blocks color bleeding between loads.
Try Alternative Cotton Dyeing Methods
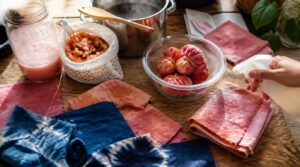
Ready to explore beyond the dye bucket? Cotton opens the door to several creative techniques, from kitchen staples to household appliances. Here are five methods worth trying.
Natural Plant Dyes
Nature’s pigments turn cotton into a canvas: indigo leaves for blue, madder root for red-orange, turmeric for yellow. Mordants like alum or iron shift shades and boost fastness.
| Plant | Color | Mordant |
|---|---|---|
| Indigo | Blue | Alkali/ferment |
| Madder | Red-orange | Alum |
| Turmeric | Yellow | Alkaline heat |
Simmer plant matter to extract tannin and anthocyanin pigments—eco-friendly, layered depth included.
Tea and Coffee Dyeing
Your kitchen pantry doubles as a dye shop. Brew 8–10 tea bags or 1 cup of coffee grounds per 4 cups water, simmering 15–30 minutes for strong pigment extraction. Strain, cool, then soak fabric.
- Black tea: warm browns
- Green tea: light beige
- Coffee: deep espresso tones
Reuse tea bags for lighter batches. Longer soaks and stronger brews boost color intensity naturally.
Tie-dye Patterns
Once your cotton’s dyed evenly, folding and binding turns it into art. A Spiral Design twists fabric from the center outward for rainbow swirls. Bullseye Rings use rubber bands at intervals for a target look.
Try Geode Patterns, Stripes Banding, Mandala Motifs, or a loose Crumple Design for random, marbled color bursts.
Washing Machine Dyeing
If tie-dye felt like a lot of hands-on work, your washing machine can do the heavy lifting instead. Use hot water temperature dyeing (60–90°C), full drum agitation control, and soda ash to boost dye fixation.
- Prewash with detergent, no softener
- Load fully damp cotton
- Run 30–60 minute dye bath
- Finish with a cold rinse
Iron Mordant Effects
Rust and vinegar create a simple iron solution that shifts color in surprising ways. Brush it onto tannin-rich natural dyes and watch reds turn charcoal within minutes.
This darkening boosts lightfastness enhancement and colorfastness, especially with madder or oak gall. Iron works best on cotton fibers—wool can overdarken. Rinse well, since leftover iron causes stiffness.
Frequently Asked Questions (FAQs)
Can you dye 100% cotton?
Yes—your fabric choice determines everything downstream. Cotton’s cellulose fibers hold hydroxyl groups that bond eagerly with dye.
Fiber-reactive dyes work best, especially with a soda ash soak for pH and dye fixation, giving vibrant, wash-fast color.
What kind of dye do you use on cotton?
Fiber-reactive dyes like Procion MX work best on cotton, bonding permanently with soda ash. All-purpose dyes offer easy application but fade faster. Natural dyes from plants give eco-friendly, muted tones with proper mordanting.
Will Rit dye work on cotton?
Rit All Purpose Dye works great on 100% cotton, since it’s built for natural fibers. Prep your fabric, use hot water in the dye bath, and stir well — you’ll get even color absorption and richer, longer-lasting tones.
How to dye cotton at home?
Success starts with prewashing cotton, then soaking it in soda ash before mixing your dye bath. Submerge fabric fully, stir often, and choose fiber reactive dyes for lasting color—cotton’s cellulose bonds beautifully with them, giving you rich, dependable results at home.
Can I dye cotton that already has printing or embroidery on it?
Crisp white cotton meets bold splashes of color — old print, new life.
Absolutely, though dye reaction zones vary: fiber-reactive dyes bond cotton fibers strongly but shift printed inks or embroidery threads unpredictably. Always run embroidery testing on a hidden patch first for print compatibility.
What do I do if there are splotches or uneven dye coloring on my cotton project?
Uneven color usually means dry spots or poor agitation. Try spot treatment techniques with a brush, or overdye the whole piece darker. For color bleeding prevention, always rinse thoroughly after correcting patches, then wash to lock in even tone.
How long does cotton dyeing typically take?
Think of it like baking bread: prep, rise, bake, cool. Cotton dyeing follows the same rhythm—prep takes 30 minutes to 4 hours, mixing dye needs 30-60 minutes, and dye bath immersion runs 30-50 minutes for full color absorption.
Can you dye cotton blends successfully?
Cotton and synthetics don’t absorb dye the same way, so fabric mix compatibility matters.
Reactive dyes color cellulose well but miss polyester, causing uneven uptake and weaker color fastness. Test swatches first, and match your dye selection strategy to the mix’s fiber ratio.
What safety precautions are needed when dyeing?
Slip on nitrile gloves and work near an open window for real ventilation. Patch test 48 hours ahead, checking your inner elbow. Keep soda ash sealed and labeled, then rinse skin well and watch for irritation over the next 72 hours.
How do you achieve vibrant colors on cotton?
Vibrant color comes from proper pH level adjustment, full dye absorption, and correct dye fixation methods.
Pre-treatment, accurate dye concentration, and controlled bonding with reactive dyes bring bright, lasting shades—true color intensity control, not guesswork.
Conclusion
One skipped step is all it stands between rich color and a faded regret. Now you know better.
Learning how to dye cotton comes down to respecting fiber, prep, and patience, not luck. Soda ash opens the door, even saturation keeps color honest, and proper rinsing locks it in for good.
Your next project won’t just take color, it’ll hold it. That’s true mastery.
- https://cottonworks.com/learning-hub/dyeing/dyeing-preparation
- https://austinpublishinggroup.com/textile-engineering/fulltext/arte-v2-id1016.php
- https://berrylakefiberarts.com/how-to-scour-cellulose-yarn-for-dyeing
- https://jagson.com/blog-details.php?id=12&title=REACTIVE-DYES-FOR-COTTON
- https://www.funendeavors.com/tie-dye-blog/zd1qlk7dvuzwrglfbio4yvs2t6c97d