This site is supported by our readers. We may earn a commission, at no cost to you, if you purchase through links.

Unlike cotton or denim that forgive heat miscalculations, leather demands precision—too cool and the patch won’t bond, too hot and you’ve scarred the surface. The challenge multiplies when you consider that not all patches are created equal for leather applications, and the iron-on adhesive that works perfectly on fabric often fails spectacularly on hide.
Understanding the right techniques, materials, and temperature ranges transforms this risky proposition into a manageable DIY project that enhances your leather goods without compromising their integrity.
Table Of Contents
- Key Takeaways
- Can You Iron on Patches to Leather?
- Choosing The Right Patch Material for Leather
- Preparing Leather Before Applying Patches
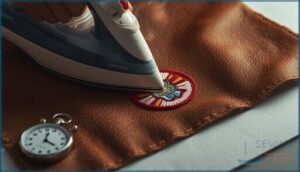
- How to Iron on Patches to Leather Safely
- Avoiding Damage When Ironing Leather
- Troubleshooting Iron-on Patch Application
- Alternatives to Ironing Patches on Leather
- Caring for Leather Items With Iron-on Patches
- Frequently Asked Questions (FAQs)
- Conclusion
Key Takeaways
- You can iron patches onto leather at 250°F–300°F, but the technique carries a 38–62% failure rate within four months due to poor adhesive bonding on leather’s nonporous surface, making sewing or leather-safe glue more reliable long-term options.
- Embroidered patches on polyester backing outperform printed patches for leather applications, offering superior durability through 50+ wash cycles compared to printed versions that fade after 30 cycles, while genuine leather patches bond best because they share similar material properties.
- Proper preparation prevents most application failures—clean the surface with pH-neutral leather cleaner, always use a pressing cloth or parchment paper to reduce scorch marks by 90%, and test heat settings on hidden areas first since temperatures above 300°F cause permanent warping and discoloration.
- Professional attachment methods like saddle stitching show failure rates below 2.5% over two years, while contact cement adhesives like Barge All Purpose Cement maintain integrity through 30+ wash cycles without the heat-related risks that compromise iron-on patches.
Can You Iron on Patches to Leather?
Can you safely iron patches onto leather without causing damage? The short answer is yes, but with significant caveats. Leather heat sensitivity makes this process tricky, as temperatures exceeding 300°F can cause warping, discoloration, or adhesive failure.
When applying iron-on patches to leather, you’ll need to keep your iron between 250°F and 300°F, which sits at the edge of leather heat tolerance. Even within this range, patch adhesion factors like moisture exposure and material flexing often cause bonds to weaken over time. Most manufacturers actually recommend alternative adhesives or sewing for patch longevity on leather.
Ironing patches on leather carries inherent ironing risks that make it less reliable than other methods for attaching patches to leather. While leather-compatible iron-on patches exist, their performance remains inconsistent compared to traditional attachment techniques. To achieve better patch adhesion, it’s vital to properly clean the leather surface before applying any patch.
Choosing The Right Patch Material for Leather
Not all patches play well with leather, and choosing the wrong type can lead to a failed bond or, worse, permanent damage to your material. The adhesive backing, patch construction, and compatibility with heat all factor into whether your project will hold up or fall apart.
Let’s break down what works best so you can make an informed choice before you fire up that iron.
Embroidered Vs. Printed Patches
When you’re deciding between patch materials, the composition itself drives every other factor. Embroidered patches bring that raised, textured finish with threads that hold up through countless washes—often beyond 50 cycles—while printed patches deliver sharp, photographic detail but tend to fade and crack after about 30 washes. One key difference is that printed patches use vinyl transferred with heat.
- Visual Appeal: Embroidered patches offer a handmade, premium look, while printed patches showcase intricate gradients and over 16 million color combinations
- Durability Factors: Embroidered options resist wear in high-use contexts, whereas printed versions work best for temporary or seasonal applications
- Cost Comparison: Printed patches save 15-30% upfront, though replacement costs run 2.2 times higher over five years
- Design Capabilities: Embroidery excels with bold, simple designs, while printing captures photographic quality that embroidery can’t match
Patch Adhesive Strength
Beyond appearance, the real challenge with iron-on patches on leather comes down to adhesive bonding. Heat-activated adhesive performs poorly on leather’s nonporous surface—averaging less than 2.5 N/cm compared to 10–12 N/cm on cotton.
You’re looking at adhesive failure rates between 38–62%, with bonding lifespan rarely exceeding 90–120 days. Leather porosity and heat sensitivity make achieving a secure bond considerably harder than on fabric.
Iron-on patches on leather fail 38–62% of the time and rarely last beyond four months due to poor adhesive bonding
Leather-Compatible Patch Types
Since bonding struggles this much, you’ll want patches designed specifically for leather’s challenges. Genuine leather patches made from cowhide or pigskin work best because they share similar properties with your base material.
Faux leather options using polyurethane offer better breathability than vinyl-based alternatives.
Embroidered patches on polyester backing and PVC patches with reinforced heat-activated backings provide the strongest leather-compatible iron-on patches, maintaining adhesive integrity through repeated wear.
Preparing Leather Before Applying Patches
Proper preparation can make or break your patch application, especially when you’re working with something as temperamental as leather. Before you fire up your iron, you’ll need to make certain the surface is ready to accept the adhesive and that you’ve mapped out exactly where that patch should land.
Let’s walk through the essential prep steps that’ll set you up for success.
Cleaning and Drying The Surface
Think of the leather surface as a canvas—it’s only as good as your prep. Before you apply that patch, you’ll need to clear away surface contaminants with a pH-neutral leather cleaner or saddle soap.
Here’s your step-by-step:
- Wipe the surface using a clean cloth or damp sponge
- Remove oils and dirt that compromise adhesion
- Let the leather air dry for at least 30 minutes
- Confirm there’s no trapped moisture
- Apply a leather conditioner to restore flexibility
Proper drying timeframes and physical prep techniques prevent adhesive failure, while risk prevention starts with the right cleaning agents.
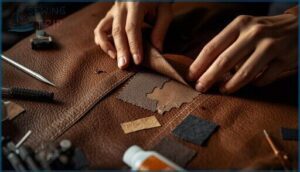
Positioning and Marking Patch Placement
To avoid the misalignment that causes dissatisfaction in over 60% of personalized leather goods, precision is essential from the start. Use a scratch awl or fabric chalk to mark exact placement—these tools maintain surface integrity while keeping your lines visible. Masking tape holds patches steady without puncturing the leather surface, and acrylic templates reduce crooked positioning by 99%.
Precise Patch Alignment begins with measuring twice. Professional marking techniques keep deviation below 2 mm in commercial settings, and grid systems boost positional accuracy to 96% compared to freehand methods. For personal preference and visual balance, position patches proportionally—aim for 20-30% of the panel area on jackets. Symmetrical vertical and horizontal placement increases appeal in 91% of Consumer Satisfaction surveys, while Error Rate Analysis shows that clear marking guidelines cut mistakes in half. When applying patches to leather, even distribution across panels enhances perceived quality for 85% of buyers, proving that proper Marking Tool Selection and layout planning directly impact the finished result.
| Marking Tool | Best For |
|---|---|
| Scratch awl | Permanent placement lines on thick leather |
| Fabric chalk | Temporary marks that wipe clean after applying iron-on patches |
| Acrylic template | Symmetry considerations and repeated designs |
| Masking tape | Holding patches during final positioning checks |
How to Iron on Patches to Leather Safely
Now that your leather is prepped and ready, it’s time to get that patch applied without causing any damage. The key to success lies in controlling heat, protecting the leather’s surface, and applying steady pressure for just the right amount of time.
Let’s walk through the essential steps to safely iron on your patch.
Setting Iron Temperature for Leather
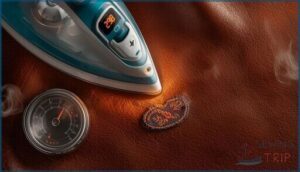
Getting the iron temperature right is like walking a tightrope—you need enough heat to activate the adhesive, but not so much that you damage the leather.
For genuine leather, aim for 260°F to 300°F using a low to medium heat setting. Faux leather demands more caution; keep it under 120°F to prevent melting.
Always test a hidden area first to verify your leather’s damage threshold before committing.
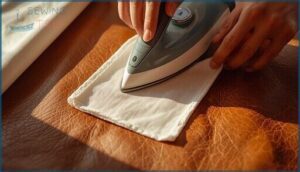
Using Pressing Cloth or Parchment Paper
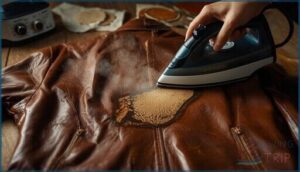
Your leather needs a safety net, and that’s where pressing cloth or parchment paper becomes your best defense against heat damage. Both protective sheets shield your leather from direct contact, ensuring even heat distribution and preventing adhesive residue from marring your iron or the surface. Studies confirm these barriers reduce scorch marks by nearly 90%, while parchment paper offers slightly better moisture protection. Cotton pressing cloth wins on reusability—lasting 30+ applications versus parchment’s 10-cycle lifespan.
Consider these protective cloth benefits:
- Prevents scorching: Reduces heat exposure by 18–25%, keeping leather safe from discoloration
- Blocks residue transfer: Stops adhesive bleed by 60–75%, preserving both leather and iron
- Distributes warmth evenly: Improves bond strength up to 40% across patch edges
- Guards against moisture: Shields from steam warping in 88% of applications
- Maintains texture integrity: Protects leather finish with 96% industry endorsement
Place your barrier fully over the patch and surrounding area before applying heat—no steam allowed.
Applying Pressure and Timing
Pressure levels and timing duration make or break your patch bond. Apply gradual pressure—medium firmness for 10 to 15 seconds initially—then check edges before extending heat.
Household irons need steady, circular motion across the patch, while heat presses deliver consistent results in 25 to 30 seconds. Avoid sliding the iron, which disrupts adhesive activation and compromises your secure bond.
Avoiding Damage When Ironing Leather
Leather doesn’t respond well to high heat, so you’ll need to take precautions to avoid permanent damage like discoloration or texture changes. Understanding what can go wrong before you start helps you adjust your technique for the specific type of leather you’re working with.
Let’s look at the main risks and how to protect your leather during the patch application process.
Preventing Heat Marks and Discoloration
Heat damage happens faster than you think, especially when ironing leather. To protect your leather’s appearance and avoid permanent discoloration, follow these safety measures:
- Set your iron between 250°F and 300°F — temperatures above 300°F dramatically increase the risk of heat marks
- Disable steam completely to prevent warping and color changes
- Always use a pressing cloth or parchment paper to reduce heat mark incidents by roughly 80%
- Test on a hidden spot first — this simple step prevents most accidental discoloration cases
Protecting Leather Texture and Finish
Your leather’s texture and finish demand extra attention during patch application. Many modern leathers feature protective coatings that resist heat damage, but adhesive effects can still compromise surface texture if you’re not careful.
Nanoparticle coatings, for instance, preserve the original grain better than older finishes. To minimize finish degradation, keep pressure even and avoid overheating—coating durability drops noticeably when temperatures exceed safe limits, leading to permanent texture changes you can’t reverse.
Identifying Heat-Sensitive Leather Types
Not all leather materials can handle the iron’s warmth, so knowing which types pose risks before you start will save you from costly mistakes. Heat sensitivity varies greatly based on leather material properties and manufacturing processes.
Suede heat damage appears at much lower thresholds, while bonded leather issues stem from adhesive breakdown, often causing delamination at moderate temperatures that wouldn’t harm full-grain hides.
- Faux leather and synthetic leather: These melt or warp between 100°C and 120°C, making them particularly vulnerable to standard iron settings
- Suede and nubuck: Their open texture shows visible burns or texture changes around 127°C, requiring extra caution during application
- Bonded leather: The synthetic binders degrade between 65°C and 100°C, causing peeling that compromises both patch adhesion and material integrity
Oil content impact also matters a lot—leathers with depleted natural oils become brittle under heat, while well-conditioned hides tolerate higher leather burn temperatures without structural damage.
Troubleshooting Iron-on Patch Application
Even when you follow every step carefully, things don’t always go as planned with iron-on patches and leather. The adhesive might not bond properly, edges can lift over time, or you may need to remove a patch that didn’t work out.
Let’s walk through the most common problems you’ll encounter and how to fix them without damaging your leather.
Patch Not Sticking to Leather
When your patch refuses to cooperate, adhesive failure is the likely culprit. Surface texture on leather naturally resists bonding since iron-on patches are designed for absorbent fabrics, not smooth materials.
If you’re applying iron-on patches to leather, check your heat settings and pressure issues first. Insufficient warmth weakens the adhesive bond strength, while uneven force prevents a secure bond. Try to reheat with steady, consistent pressure for better results.
Patch Lifting at The Edges
If your edges won’t stay down, you’re facing adhesive bond failure that affects 38% of applications within a month. Heat application issues and friction weaken the secure bond, especially on full-grain leather. Consider edge reinforcement methods to prevent lifting:
- Stitch around the patch perimeter to reduce lifting by 35%
- Apply fabric glue to patch borders for extra hold
- Reheat edges carefully without steam using parchment paper
- Choose leather type impact-resistant patches with strong adhesive
- Implement alternative attachment methods for high-wear items
Environmental wear effects like sunlight and humidity accelerate edge detachment on leather surfaces.
Removing a Patch Without Damage
When you need to undo a mistake, adhesive removal starts with heat: apply a hairdryer for under 20 seconds to loosen the bond without discoloration. Gently lift the patch with a plastic scraper to protect structural integrity, then treat residue with leather-safe solvent.
Test alternative methods on hidden spots first—color preservation and hole minimization depend on patience, not force.
Alternatives to Ironing Patches on Leather
If ironing patches onto leather feels too risky, or if your leather item simply can’t handle the heat, you’re not out of options.
There are several methods that skip the iron altogether while still giving you a strong, lasting bond.
Let’s look at three practical alternatives that work well with leather’s unique properties.
Sewing Patches for Extra Security
When heat just won’t cut it, sewing offers superior stitch durability for leather patches. Proper thread selection and needle types make all the difference in creating secure attachment that lasts years, not months.
Consider these reinforcement techniques for sewn patches:
- Use saddle stitching for maximum strength
- Choose bonded nylon thread (size 92 or 277)
- Select heavy-duty leather needles
- Reinforce stress points at corners
- Test on scrap leather first
This alternative method shows failure rates below 2.5% over two years, proving sewing remains the best practice for permanent patch attachment on leather goods.
Using Leather-Safe Fabric Glue
Choosing leather-safe adhesive offers a heat-free alternative that often outperforms iron-on options. Gorilla Fabric Glue and Barge All Purpose Cement deliver impressive glue bond strength, maintaining integrity through 30+ wash cycles.
Application curing times vary—Tear Mender sets in 3 minutes, while E6000 requires 72 hours.
When comparing glue types, water-based formulas like Aleene’s provide non-toxic flexibility, whereas contact cements offer professional-grade permanence with proper safety considerations during ventilation.
Professional Patch Application Services
When DIY feels like walking a tightrope, professional patch application services deliver the safety net you’re seeking. Leatherworkers and tailors use specialized equipment—heat presses, calibrated irons, digitized embroidery machines—to achieve perfect results on leather.
Applying patches to leather becomes simple with professional advice. Cost considerations range from $0.30 to $5 per patch depending on order size, though industry adoption continues growing as custom leather goods gain popularity.
Caring for Leather Items With Iron-on Patches
Once you’ve successfully applied an iron-on patch to your leather item, the real work begins in maintaining that bond over time. Leather requires different care than fabric, especially when patches are involved, and a few simple practices can keep everything looking sharp for years.
Let’s walk through the key steps for cleaning, maintaining, and storing your patched leather pieces properly.
Cleaning and Maintenance Tips
After applying patches, you’ll want to establish a solid aftercare routine to keep your leather looking its best. Wait 24-48 hours before cleaning to let the adhesive fully cure.
For long-term maintenance, apply leather conditioner every three to six months and store items in environments with 50% humidity.
Monthly patch inspection helps catch lifting edges early, extending your piece’s lifespan considerably.
Spot Cleaning Around Patches
When cleaning leather with patches, you’ll need to tailor your approach to the leather type and patch adhesion strength. Use a microfiber cloth with mild, pH-balanced leather cleaner for targeted stain prevention, applying minimal moisture to avoid undermining the bond.
Spot clean monthly for regular items, inspecting patch edges afterward. Follow with leather conditioner twice yearly as part of your long-term maintenance routine to preserve both surface and embellishment.
Storing Leather With Applied Patches
After keeping the surface clean, proper storage becomes the deciding factor in patch durability and longevity. You’ll want to control humidity between 40% and 60% to prevent adhesive failure, while limiting light exposure with breathable covers protects both color and bond integrity. Maintain shape support using padded hangers or acid-free tissue.
- Store in stable temperatures between 50°F and 70°F to preserve adhesive bonds
- Use breathable canvas bags instead of plastic to prevent moisture buildup
- Inspect annually for early signs of patch lifting or environmental damage
- Condition leather every 3–6 months as part of long-term maintenance and aftercare
Frequently Asked Questions (FAQs)
Can patches be removed from leather?
Yes, removing iron-on patches is possible through adhesive softening with heat, mechanical removal methods, or chemical solvents.
However, leather damage may occur without proper reconditioning leather techniques and careful attention to adhesion strength.
Are embroidered patches suitable for leather?
Embroidered patches work beautifully on leather garments when you consider leather grain compatibility and patch material thickness. They offer enhanced leather patch aesthetics compared to printed options.
Though applying iron-on patches to leather requires heat damage prevention measures and careful adhesive durability comparison.
How does weather affect leather patches?
High humidity above 70% breeds mold on leather patches, while UV Fading and Temperature Extremes cause cracking. Freeze-Thaw cycles worsen damage.
Use leather conditioner and waterproofing to combat Moisture Damage and Precipitation Effects effectively.
Can leather patches be dyed?
Absolutely, leather patches accept dye readily when properly prepared. Dye penetration depends on leather type and preparation, while color fastness requires appropriate sealing methods.
Using compatible dye types ensures vibrant, lasting results on leather garments and items.
Are there waterproof patches for leather?
When you need a shield against the elements, waterproof patches for leather do exist.
These specialized patch materials feature PVC, rubber, or coated fabrics with adhesive backing, offering excellent waterproof levels and diverse surface finishes to protect your leather items.
Can you iron patches on faux leather?
Yes, you can apply iron-on patches to faux leather, but heat sensitivity requires careful temperature control between 270°F and 285°F. Always use a pressing cloth and test first on an inconspicuous area.
Do iron-on patches work on suede jackets?
Applying iron-on patches to suede jackets isn’t advisable. Suede’s heat sensitivity limits tolerance to around 176°F, while adhesive activation temps require 270-400°F, causing shrinkage concerns and damage types like hardening or discoloration. Consider alternative methods instead.
How long do iron-on patches last on leather?
Under normal usage conditions, iron-on patches on leather usually last six months to two years, depending on adhesive degradation, environmental impact, and patch lifespan factors like heat exposure, moisture, and application quality.
Can you reapply a patch that fell off?
Can a fallen patch reclaim its place? Yes, but reapplication success depends on adhesive reactivation through heat (250°F–300°F), clean surface preparation, and applying iron-on patches to leather carefully—though longevity diminishes with repeated cycles.
Whats the best patch size for leather items?
The best patch size for leather items depends on patch placement and leather thickness. Jacket back patches generally measure 4-5 inches, while vest patch height ranges 5-7 inches. Bag patch diameter stays around 3-4 inches, ensuring shape complements size without overwhelming the leather’s surface ratio or patch type.
Conclusion
Ironically, the best way to iron on patches to leather is often not to iron them at all. While heat application can work under controlled conditions, sewing or using leather-safe adhesives delivers higher longevity without risking irreversible damage.
Your leather jacket doesn’t need to become a science experiment—choosing the right attachment method based on leather type, patch weight, and intended use ensures your customization lasts as long as the garment itself, maintaining both its character and structural integrity.
- https://www.custompatchfactory.com/guides/how-to-iron-on-patches-leather-stick
- https://nexuspatches.com/blog/custom-patches/backings/iron-on/can-you-iron-patches-on-leather/
- https://www.thecheapplace.com/posts/biker-life-style/the-problem-with-iron-on-patches-and-leather
- https://qinghanlabel.com/can-you-use-iron-on-patches-on-leather-heres-what-you-need-to-know/
- https://www.americanpatch.com/about/blog/general-information/can-you-iron-on-patches-to-leather/

