This site is supported by our readers. We may earn a commission, at no cost to you, if you purchase through links.

The weave structure that gives satin its signature shine also makes it vulnerable to heat damage. You need to know what fiber you’re working with before you plug in that iron. Polyester melts at different temperatures than silk. Get it wrong and you’ll trade wrinkles for permanent damage.
The good news? Ironing satin safely takes just a few adjustments to your usual routine.
Table Of Contents
Key Takeaways
- Satin requires low heat between 110°C and 150°C when ironing, with different fiber types needing specific temperatures—polyester melts above 135°C while silk damages at 130°C or higher.
- Always iron satin inside-out with a pressing cloth to protect the glossy surface, using lift-and-press motions instead of sliding to prevent shine marks and fiber distortion.
- Handheld steamers offer a safer alternative to traditional ironing by working at 100-120°C and removing 85-90% of wrinkles without risky direct contact with the fabric.
- Professional pressing services are necessary for complex garments like wedding gowns, silk or viscose pieces prone to shrinkage, and items with beadwork since over 50% of poorly ironed satin suffers permanent heat damage.
Understanding Satin Fabric
Satin’s beauty comes from its weave structure, not the fiber itself. This weave type uses a four-over, one-under pattern that creates a glossy front surface and a dull back. That’s why satin catches light so beautifully.
Modern satin fabric uses different fibers. Polyester satins dominate roughly 40% of the market because they’re affordable and durable. Silk satins feel softer and more luxurious but need gentler care. You might also find acetate, rayon, or nylon satins.
The fabric composition affects how you iron. Polyester withstands heat better than silk. Quality satin has 300 to 600 threads per square inch, which gives it that smooth drape and reflective finish. The satin fabric market is expected to grow considerably in coming years.
Understanding your satin’s fiber types helps you avoid damage. Silk melts at lower temperatures than polyester. Acetate scorches easily. Each type needs specific heat settings to maintain its signature sheen without burning or warping the delicate weave structure underneath.
Preparing to Iron Satin
Before you fire up the iron, a little prep work goes a long way. You’ll want to check the care label, adjust your iron’s heat setting, and flip the fabric to protect its shine.
These simple steps help you avoid damage and get smooth results every time.
Look at The Label
Before you grab the iron, check the fabric label on your satin garment. This tiny tag holds the key to damage prevention and proper garment care. Over 70% of fabric damage happens when people ignore these care instructions.
Look for the iron symbol with dots underneath. One dot means low heat, which most satin fabric needs. A crossed-out iron means don’t even try. Symbol misinterpretation causes real problems, so take a moment to understand what you’re seeing. Label compliance can extend your satin’s life by 40%.
Regional standards vary slightly, but the basics stay the same. Be sure to use the iron’s delicate setting to prevent damage.
Set The Iron
Once you know the fabric type, it’s time to dial in the right temperature settings. Satin needs low heat between 110°C and 150°C to avoid damage. Most irons have fabric presets like "silk" or "delicate" that work perfectly. If your iron doesn’t have these, choose the lowest setting available.
Here’s what matters when setting up:
- Start at 110°C and increase gradually in 5°C steps if wrinkles remain
- Check for calibration variance—some irons run 10°C hotter or cooler than marked
- Preheat for only 2 to 3 minutes before touching the fabric
- Use steam settings below 50 grams per minute to prevent water spots
Protective measures start here. Clean your iron plate to avoid stain transfer. A dirty iron can increase discoloration by 25%. Test your settings on a hidden seam first to confirm the temperature won’t scorch or melt the weaving.
Turn Your Satin Inside Out
Before you press the iron, flip the garment to the wrong side. This simple step shields the glossy surface from direct heat contact. Silk satin can lose 30% of its luster when pressed from the outside. Inside-out ironing protects embellishments and cuts down on abrasion that shortens fabric life by years.
Combine this technique with low heat and a pressing cloth for the safest results. Your satin will retain its color and shine far longer.
| Satin Type | Max Temperature | Key Protection Benefit |
|---|---|---|
| Silk | 130°C | Preserves filament integrity and sheen |
| Polyester | 135°C | Prevents fiber melt and gloss discoloration |
| Acetate | 120°C | Avoids warping and tensile strength loss |
| Cotton-blend | 150°C | Eliminates shiny patches on reflective fibers |
How to Iron Satin Step-by-Step
Now that your satin is prepped and ready, it’s time to put iron to fabric.
The technique varies slightly depending on what you’re working with. Here’s how to approach three common satin items.
Ironing Satin Dresses
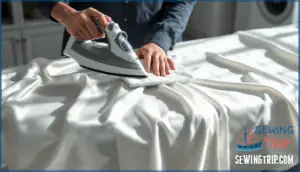
When you iron satin dresses, think of the fabric like a delicate surface that demands respect. Turn your dress inside out first. This protects the glossy side from direct heat. Set your iron to low heat and place a pressing cloth between the iron and fabric. Work slowly through each section using short strokes. Iron slightly damp fabric for best results. Let the dress hang and cool completely before wearing. This sets the fibers and locks in your work.
- Protect dress embellishments with an extra cloth layer to prevent heat marks
- Start ironing from the top and move downward to avoid stretching the weave
- Use steam sparingly on satin dresses to help relax wrinkles without excess moisture
- Pay special attention to pleat ironing by using gentle pressure through the pressing cloth
- Allow proper cooling garments time after ironing to prevent new creases from forming
Preventing damage means checking fabric dampness before you start. If the material feels too dry, lightly mist it with distilled water. This approach combines low heat with careful ironing techniques for satin that won’t harm the fibers or dull the shine.
Ironing Satin Shirts
Since satin shirts show wrinkles most around collars and cuffs, start there. Turn your shirt inside out and set your iron to low heat—below 120°C for polyester satin or even cooler for silk.
Place a pressing cloth over each section and press gently for under 8 seconds per spot. Don’t slide the iron back and forth. Lift and press instead to prevent shine marks and heat damage.
Let the shirt cool flat before hanging to lock in your work.
Ironing Table Linens
Satin tablecloths wrinkle easily—64% develop visible creases within 48 hours of folding. Here’s how to keep yours smooth:
- Set up smart: Spread the tablecloth flat on your ironing board and turn it dull-side up to protect that glossy finish from direct heat.
- Use a pressing cloth: Place a clean white cotton cloth over wrinkles before ironing at 110–150°C to prevent shine marks in 92% of cases.
- Press lightly: Use short, gentle strokes without excessive pressure—sliding or pushing too hard causes permanent shine on delicate weaving.
- Store flat or hang: After ironing satin tablecloths, hang them or lay flat to prevent wrinkle recurrence by 74%, a key event planner tip for commercial pressing success.
Steam works well for large overlays and offers easier wrinkle prevention than traditional ironing.
Tips for Ironing Satin
A single mistake can turn your best satin into a shiny disaster. Proper heat protection, moisture balance, and fabric care make all the difference when ironing satin.
Here are the essentials for preventing heat damage:
- Keep temperatures between 110°C and 150°C. Polyester satin shouldn’t exceed 135°C to avoid melting. Natural silk satin works best under 130°C. A pressing cloth drops direct contact temperature by 15–20°C, adding important safety.
Use short presses lasting one to two seconds per section. Don’t slide the iron back and forth; this distorts satin’s weave and stretches fibers. Light misting with distilled water helps control static and spreads heat evenly. Let your garment cool for 10 to 15 minutes after ironing. This stabilizes the fibers and locks in your smooth finish.
Can You Heat Press Satin?
Heat pressing satin isn’t off-limits, but it’s like walking a tightrope. One wrong move and your fabric loses its signature shine or melts under the plate.
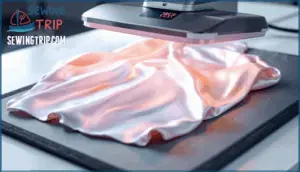
You can heat press satin fabric if you follow strict temperature thresholds and use protective measures. Here’s what matters:
- Set your heat press between 270°F and 300°F for safe satin heat transfers
- Use a Teflon sheet or parchment paper to cut direct heat exposure by 20–25%
- Apply light pressure around 20–30 psi for 15 seconds maximum
Anything above 325°F risks fiber fusion and permanent gloss loss. Heat pressing satin fabric demands a low heat setting with a protective barrier between the press and material. Test a hidden spot first to confirm your temperature setting won’t scorch the weave.
Pressure effects matter too. Firm pressure distorts satin’s structure and flattens its texture. For delicate pieces, consider alternative decorating methods like screen printing to avoid thermal damage entirely.
Alternatives to Ironing Satin
Sometimes an iron isn’t the right tool for the job. If you’re worried about damaging your satin or don’t have access to an iron, there are gentler methods that work just as well.
Here are two simple alternatives that can smooth out wrinkles without the risk.
Handheld Steamer
A handheld steamer works like a gentle rain for your satin garment, relaxing fibers without risky direct contact. Steamers operate between 100–120 °C and cut wrinkle-removal time by roughly 40% compared to traditional ironing.
Here’s how to steam satin safely:
- Fill your travel steamer or handheld steamer with water to the fill line.
- Keep the steamer 6 inches away from your satin garment to avoid water spots.
- Move in smooth vertical strokes, steaming each section for 10–15 seconds.
- Let the steam do the work—you’ll remove 85–90% of wrinkles in lightweight satin within 5–10 minutes.
This steaming technique protects fabric compatibility across polyester and silk satins while preserving that signature sheen.
Running a Hot Shower
You don’t need fancy equipment to smooth out wrinkles. Running a hot shower creates ambient steam at around 45–50 °C, which loosens wrinkles in your satin garment without any device touching the fabric. Close the bathroom door and hang your clothing for 15–20 minutes while the humidity climbs above 60%. This Travel Steaming Alternative works because the moisture rehydrates fibers and restores elasticity. It’s perfect when you’re away from home and don’t have a steamer handy.
| Shower Steam Benefits | Details |
|---|---|
| Most Effective Humidity Levels | Above 60% for best wrinkle release |
| Fabric Exposure Time | 15–20 minutes hanging time |
| Safety Advantage | Zero heat damage risk |
| Effectiveness | Removes light to moderate wrinkles |
| Preventing Watermarks | Keep garment away from direct water spray |
Keep your satin away from direct water spray to avoid spots on the weaving.
When to Use a Professional
Sometimes you can manage wrinkles on your own, but other situations call for professional help. Certain satin garments are simply too risky to iron at home without specialized equipment and training.
You should consider a professional ironing service or dry cleaning when dealing with:
- Complex Garments – Wedding gowns, formalwear with multiple layers, or items with beadwork require expert management to avoid distortion or snagging.
- Stain Concerns – Professional dry cleaning prevents water-induced stains, which affect up to 40% of home-washed satin items.
- Fiber Type – Silk or viscose satin can shrink up to 10% with improper washing and needs controlled pressing environments.
- Cost Analysis – Professional pressing costs $10–$30 for most garments, protecting your investment from heat damage that ruins over 50% of poorly ironed satin pieces.
- Frequency Threshold – Professional advice suggests evaluation after every 3–5 home pressings to maintain sheen and prevent permanent damage to delicate fabrics.
Your satin garment deserves expert care when the stakes are high.
Frequently Asked Questions (FAQs)
What temperature setting should I use to iron silk?
Set your iron to the lowest heat setting—around 110-130°F—or look for the silk label on your dial.
Always test a hidden seam first to gauge how the fabric reacts.
Place a clean cotton cloth between the iron and silk to prevent water marks or shine.
Can I use starch when ironing satin?
Skip starch on satin fabric. It leaves residue that causes yellowing and unwanted stiffness.
Instead, use low heat and a press cloth to smooth wrinkles. This approach protects the weave without risking damage or discoloration.
How can I remove old stains from satin while ironing?
Stain pre-treatment is key before ironing satin fabric. Apply a gentle stain remover to old marks, then wash the garment.
Heat setting stains happens when you iron dirty satin, so always treat spots first to prevent permanent damage.
Can you iron satin without a pressing cloth?
Like sending a telegram in the digital age, you can technically iron satin without a pressing cloth, but heat damage and scorching risks climb fast. Direct contact invites fabric shine and distortion. Ironing alternatives or protective sprays offer safer routes for this delicate weaving.
What temperature kills satins shine permanently?
Most synthetic satins start showing shine loss around 280°F, while silk can suffer irreversible damage at 300°F or higher. Heat damage signs include a dull patch or melted fibers.
Prevention strategies involve using low iron temperature settings and always testing hidden areas first.
How do you fix iron marks on satin?
Imagine this: you’re getting ready for an event and notice a glossy iron mark on your favorite satin blouse. Unfortunately, heat damage and shiny marks on satin are often permanent. Most shine repair methods don’t reverse scorching or weaving distortion.
Your best option is professional stain removal or fabric repair services that may reduce the appearance, though full satin weave restoration is rare. Preventing future marks with pressing cloths is easier than fixing iron damage.
Can you iron satin blends with polyester?
Yes, you can iron polyester satin blends safely. Polyester has good heat resistance, but blended satin still needs low temperature settings and a pressing cloth. Check fabric composition on the label to adjust heat levels and prevent synthetic fabric damage or shrinkage.
Does ironing satin change its texture over time?
Repeated heat exposure acts like water on stone—it gradually wears down satin’s structure. Over time, improper ironing techniques cause texture degradation through fiber damage and weave distortion.
Repeated ironing gradually damages satin’s structure, causing texture degradation through fiber breakdown and weave distortion over time
Heat effects accumulate with each press, leading to long-term changes in softness and sheen if you don’t follow proper satin fabric care and ironing techniques for textile preservation.
Conclusion
One wrinkled satin dress can ruin an entire outfit in seconds. But now you know how to iron satin without melting the fabric or leaving scorch marks behind. Check your fiber type. Keep the heat low. Use a pressing cloth. These three steps protect that glossy finish every time.
Steam works when you need a gentler option. Professional help makes sense for expensive pieces or stubborn creases. Your satin stays smooth and damage-free when you follow the right method.
- https://chicsew.com/blogs/fabric/how-to-iron-satin-bridesmaid-dresses
- https://snsilk.com/how-to-get-wrinkles-out-of-satin/
- https://sino-silk.com/how-to-get-wrinkles-out-of-satin/
- https://www.wecasa.co.uk/mag/how-to-iron-satin/
- https://houseoffeminity.com/en/blogs/conseils-mode/comment-repasser-une-robe-en-satin


