This site is supported by our readers. We may earn a commission, at no cost to you, if you purchase through links.
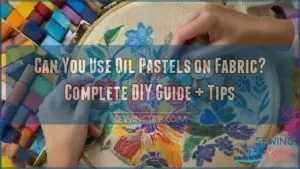
Oil pastels create vibrant colors on natural fabrics like cotton and linen, though they won’t penetrate fibers the same way water-based mediums do.
The waxy consistency sits on top of the fabric surface, making heat setting essential for permanence.
Without proper heat treatment, your artwork might transfer onto other surfaces or fade with washing.
Cotton works best because its texture grabs the pastel particles, while synthetic fabrics can be slippery and challenging.
The key lies in choosing the right fabric weight and understanding that oil pastels require specific techniques to achieve lasting results, and that they are best used on fabrics like cotton to ensure the artwork is permanent.
Table Of Contents
- Key Takeaways
- What Are Oil Pastels?
- Can Oil Pastels Be Used on Fabric?
- How Permanent Are Oil Pastels on Fabric?
- Heat Setting Oil Pastels on Fabric
- Tips for Using Oil Pastels on Fabric
- Choosing The Right Fabric for Oil Pastels
- Priming The Fabric for Oil Pastels
- Techniques for Using Oil Pastels on Fabric
- Removing Oil Pastels From Fabric
- DIY Projects With Fabric Fun Pastels
- Frequently Asked Questions (FAQs)
- Conclusion
Key Takeaways
- You can’t achieve true permanence with oil pastels on fabric – They contain non-drying mineral oils that keep them soft and prone to smudging, even after heat setting
- Choose cotton or linen for best results – Natural fibers grip oil pastels better than synthetic fabrics, which tend to repel the waxy medium
- Prime your fabric before applying pastels – Use gesso or thin acrylic paint to create better adhesion and prevent oils from degrading the textile fibers
- Heat setting improves durability but won’t make them washable – Iron with parchment paper protection to reduce smudging, but don’t expect your artwork to survive regular laundering
What Are Oil Pastels?
Think of oil pastels as pigmented wax sticks that behave like solid oil paints.
Oil pastels transform fabric into your personal canvas with just heat and creativity.
Their unique pastel composition blends pigment quality** with wax binders and oil content, creating a creamy texture that’s perfect for fabric projects.
Unlike regular crayons, these art supplies contain mineral oil that keeps them soft and blendable.
The texture differences between brands affect how they perform on textiles.
When you’re planning oil pastel fabric projects, remember that their non-drying oils make them ideal for oil pastel textile art that stays workable longer than traditional paints.
Can Oil Pastels Be Used on Fabric?
Yes, you can use oil pastels on fabric, though success depends on your fabric choice and expectations.
Natural fibers like cotton and linen absorb the waxy pigments better than synthetic materials, which tend to repel the oils.
The creamy texture of oil pastels allows for beautiful blending techniques, but fabric texture plays a major role in how smoothly the pastels glide.
Different pastel brands offer varying consistency and pigment quality.
Softer pastels work better on fabric art with pastels, while harder formulations may skip across rough textures.
You’ll find that oil pastel textile art requires patience and experimentation to master.
Here’s what affects your results:
- Surface preparation – Priming creates better adhesion than working on raw fabric
- Application pressure – Light touches prevent tearing while heavy pressure embeds color deeper
- Fabric weight – Medium-weight fabrics provide the best balance for pastel fabric techniques
While you can use pastels for fabric applications, durability concerns arise since these mediums weren’t designed for textiles.
Sealing options help preserve your artwork, though complete permanence remains challenging.
How Permanent Are Oil Pastels on Fabric?
Oil pastels on fabric present unique permanence challenges that you’ll need to understand before starting your project.
Understanding oil pastel permanence upfront saves heartbreak later—your masterpiece deserves proper planning.
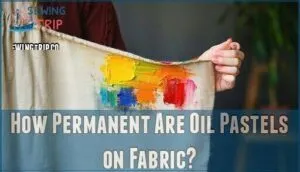
The non-drying mineral oil in these pastels means your artwork won’t fully cure, leaving it vulnerable to smudging and environmental damage.
Fading Factors affect oil pastels differently than other mediums.
While professional-grade pastels offer decent lightfastness, the waxy binder attracts dust and debris over time.
Smudging Concerns remain constant since the pastels never completely harden on fabric surfaces.
Washability Issues pose the biggest challenge – regular laundering will cause colors to fade, smear, or disappear entirely.
Even gentle hand washing compromises the artwork’s integrity.
Long-Term Durability depends heavily on protection methods.
Without proper sealing, your vibrant colors will deteriorate from handling and exposure.
Fixative Options help reduce immediate smudging but don’t create true washability.
Here’s the reality about fixing pastels on fabric:
- Heat setting alone won’t make oil pastels permanent – the mineral oil prevents complete bonding with fabric fibers, leaving colors prone to migration and fading.
Your best strategy involves combining multiple preservation techniques for maximum longevity.
Professional brands are known for superior archival stability.
Heat Setting Oil Pastels on Fabric
While oil pastels aren’t truly permanent on fabric, you can improve their staying power through careful heat setting techniques. However, understand that oil pastels contain non-drying mineral oil, making complete permanence unattainable.
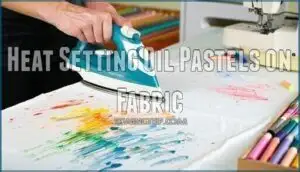
Start by placing parchment paper or a protective cloth over your design. Set your iron to medium heat without steam – temperature control is critical since excessive heat causes fabric degradation and pigment brittleness. Gently press the iron over the barrier for 30-60 seconds, checking periodically to avoid overheating.
The ironing process slightly melts and smooths the pastels, improving color fastness temporarily. You’ll notice the surface feels less tacky when properly heat-set. However, don’t expect miracles – the oil pastels will still attract dust and remain vulnerable to smudging over time.
To remove any mishaps, you can try rubbing alcohol and blotting the affected area. For setting alternatives, consider layering thin acrylic sealant after cooling, though this risks color alteration. Remember that fixing pastels on fabric remains challenging due to their non-drying formulation.
Heavy applications may crack when heated, so work with lighter layers for better results. This approach will help you achieve the best possible outcome with oil pastels on fabric, despite their inherent limitations regarding complete permanence.
Tips for Using Oil Pastels on Fabric
Success with oil pastels on fabric starts with smart preparation and technique choices. After exploring heat setting methods, mastering application techniques becomes your next creative challenge.
Working with oil pastels on fabric requires strategic planning for lasting results. Here are key strategies for fabric art success:
- Choose appropriate fabrics – Light-colored, tightly woven cottons work best; avoid silks that stain easily
- Prime surfaces first – Apply gesso or acrylic paint to prevent dye bleeding and improve color adhesion
- Master layering strategies – Start with light colors, building darker accents gradually for depth
- Focus on flat areas – Avoid high-friction zones like sleeves where pastel brands may crack or wear
Blending techniques work beautifully on primed fabric, while color selection impacts final vibrancy. To guarantee longevity, consider gentle washing techniques. Fabric texture affects how pastels grip the surface. When mistakes happen, gentle scraping with rubbing alcohol or ice cubes helps remove unwanted marks without damaging your fabric art project.
Choosing The Right Fabric for Oil Pastels
Your fabric choice can make or break your oil pastel project, turning a masterpiece into a frustrating mess if you’re not careful.
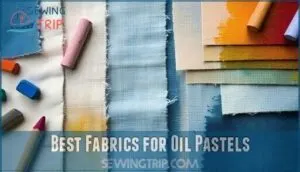
Light-colored, tightly woven cotton or canvas works best because the smooth surface lets you blend colors easily while the tight weave prevents the pastels from sinking too deep into the fibers, making canvas a good option for oil pastel projects.
Best Fabrics for Oil Pastels
Choosing your fabric makes all the difference in achieving stunning results. Cotton naturally absorbs oil pastel pigments for vibrant colors, while canvas provides durability for layered techniques. Denim offers experimental possibilities, though lighter shades work best for color visibility.
You can find various art supplies online for your project.
| Fabric Type | Weave Benefits | Color Considerations |
|---|---|---|
| Cotton Canvas | Medium weight, stable surface | Light tones enhance definition |
| Linen | Firm weave, crisp lines | Natural color complements pastels |
| Denim | Heavy, non-stretch durability | Lighter shades show color best |
| Primed Canvas | Prevents oil degradation | Neutral base maximizes vibrancy |
| Art Fabrics | Ideal tooth for blending | Pre-treated for color retention |
Your fabric selection directly impacts texture and final appearance. Fiber content determines oil pastel compatibility—natural fibers like cotton and linen absorb pigments effectively. Fabric weight influences handling; medium-weight materials balance flexibility with stability.
Consider how fabric weave affects blending techniques and color saturation for your specific project needs. This understanding will help you achieve the desired visual effects and ensure your project turns out as expected, with vibrant colors and a professional finish, using the right art supplies and techniques for the best color visibility and durability.
Priming Fabric for Oil Pastels
Proper fabric preparation makes all the difference between artwork that lasts and colors that disappear overnight.
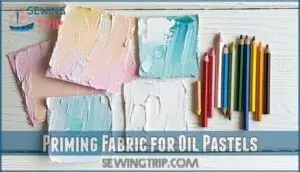
You’ll want to create a stable foundation that helps oil pastels grip the surface better. Think of priming as building a bridge between your fabric and the pastels—without it, you’re working against the material’s natural properties.
- Acrylic Undercoat: Apply thin water-based acrylic paint as a barrier against oil degradation
- Gesso Application: Use fabric-safe gesso to create tooth for better adhesion
- Color Impact: Prime with white or light colors to maintain pastel vibrancy
- Texture Enhancement: Light primer coats preserve fabric flexibility while improving grip
Using acrylic-coated materials can further enhance the longevity of your artwork.
Challenges of Heat Setting
Three major hurdles await when heat setting oil pastels on fabric.
Uneven heating creates patchy results, while excessive temperatures cause color fading and unsightly wax residue buildup.
Your fabric risks permanent damage from repeated ironing attempts.
Maintaining precise temperature control is essential for avoiding damage.
Standard heat setting proves ineffective since oil pastels resist permanent bonding due to their non-drying mineral oil composition, leaving you seeking setting alternatives.
This is because precise temperature control is crucial, and permanent damage can occur if not managed correctly.
Priming The Fabric for Oil Pastels
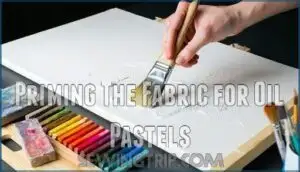
Beyond simply applying oil pastels directly onto fabric, priming creates a protective barrier that prevents oils from degrading textile fibers over time.
This essential fabric preparation step involves applying an acrylic undercoat or clear gesso to create better adhesion between your pastels and the material. You’ll want to use water-based acrylic paint as your primer alternative, brushing it evenly across the intended artwork area.
Two thin coats work better than one thick application—let each layer dry completely before adding the next. Gesso application provides tooth for better pastel grip while blocking oil absorption that typically dulls colors.
This priming process dramatically improves color impact, keeping vibrant hues on the surface rather than soaking into fibers. Light sanding between coats using fine-grit sandpaper creates an even smoother finish.
These techniques make certain your oil pastels perform more like traditional drawing surfaces while maintaining fabric flexibility.
Techniques for Using Oil Pastels on Fabric
Several methods will transform your fabric art supplies into stunning masterpieces. Blending techniques work best when you apply gentle pressure with your fingertips or cotton swabs, creating smooth color shifts across your cloth canvas.
Master these essential fabric pastel drawing approaches:
- Layering effects: Start with light colors, gradually building darker tones for depth and dimension
- Stippling methods: Dab the pastel tip repeatedly to create textured, dotted patterns that add visual interest
- Shading techniques: Use side-to-side motions with the pastel’s edge for gradual color gradations
- Texture creation: Scratch through layers with a pastel’s corner or blend with different tools for unique surfaces
Pastel painting on cloth responds beautifully to burnishing—small circular motions that smooth and intensify colors. When working on oil pastels on fabric, dust away excess pigment between layers using a dry brush. This prevents muddying and maintains color clarity. Remember that how to pastel on fabric involves building slowly; patience yields professional results.
Removing Oil Pastels From Fabric
Accidents happen, but removing oil pastels from fabric doesn’t require panic.
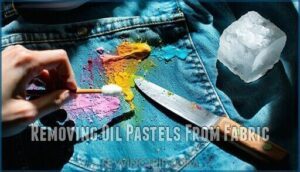
Start by scraping excess pastel with a dull knife, working gently to avoid fabric damage.
For stain removal, rubbing alcohol works wonders—dab from outside edges inward using cotton swabs.
Ice cubes can harden remaining residue for easier lifting.
Try dish soap for oily components or specialized stain remover for stubborn spots.
These cleaning methods tackle most oil pastels on fabric situations.
Test solvent options on hidden areas first.
Professional cleaning becomes necessary for delicate or valuable textiles when home removal methods fall short.
DIY Projects With Fabric Fun Pastels
Creative fabric transformation begins when you explore DIY projects with oil pastels on fabric. These versatile mediums let you create stunning fabric art through simple transfer techniques. Draw your design on paper with oil pastels, place it face-down on fabric, then apply heat with an iron to transfer the vibrant colors permanently.
The heat-transfer method works beautifully for clothing embellishment and home decor projects. After transferring, wait 24 hours before heat-setting with another pass of your iron to guarantee lasting results. This technique opens endless possibilities for gift personalization and accessory creation.
Try these inspiring pastel project ideas:
- Design custom t-shirts with bold geometric patterns or nature motifs
- Create personalized tote bags featuring family portraits or favorite quotes
- Transform plain pillowcases into artistic statement pieces with abstract designs
Fabric painting with oil pastels offers freedom to experiment without expensive equipment. Whether you’re crafting unique gifts or adding personality to everyday items, these DIY projects turn ordinary fabric into wearable art that reflects your creative vision.
Frequently Asked Questions (FAQs)
Does oil pastel work on fabric?
Yes, you can use oil pastels on fabric, but they won’t be permanent.
They’re made with non-drying oils that remain soft and prone to smudging.
Works best for temporary art projects rather than clothing you’ll wash regularly.
Do oil pastels wash off clothes?
Like an old telegram message, you’ll find oil pastels don’t completely wash out of clothes since they’re made with non-drying mineral oils that resist water-based cleaning methods permanently.
Do oil pastels work on synthetic fabrics?
Oil pastels can work on synthetic fabrics, but you’ll face challenges with adhesion and permanence.
The smooth texture of polyester or nylon makes blending difficult, and the waxy medium won’t set properly without priming.
Which fabric markers work better than pastels?
Ironically, while you’ve been wrestling with messy pastels, fabric markers offer the precision you’ve been craving.
Permanent fabric markers like Sharpie or Tulip provide vibrant, washable results that won’t smudge or fade like oil pastels.
Can you layer oil pastels on fabric?
Layering creates stunning depth and texture on fabric, though you’ll face blending challenges. Start light, build gradually, and experiment with stippling techniques for rich, dimensional effects that pop.
Are oil pastels safe for childrens clothing?
While tempting as finger paints, oil pastels aren’t recommended for children’s clothing.
They contain mineral oils and wax that won’t wash out, creating permanent stains and potential skin irritation from prolonged contact.
Will oil pastels crack when fabric stretches?
Yes, oil pastels will crack when fabric stretches because they contain wax and non-drying oils that remain flexible but brittle.
The waxy binder can’t accommodate significant fabric movement, causing visible cracks and flaking.
Conclusion
Absolutely, you can use oil pastels on fabric to create stunning artwork that’s virtually indestructible when properly heat-set.
Cotton and linen provide the best surfaces for oil pastel adhesion, while synthetic fabrics present more challenges.
Remember that heat setting transforms your temporary creation into permanent fabric art.
With the right preparation, proper technique, and careful fabric selection, you’ll discover that oil pastels offer incredible versatility for textile projects.
Your creativity combined with these proven methods guarantees beautiful, lasting results on fabric, making oil pastels a great choice for creating permanent fabric art.
- https://www.reddit.com/r/Embroidery/comments/11suflz/first_attempt_using_oil_pastels_never_even/
- https://makezine.com/article/craft/how-to-print-on-fabric-with-oil-pastels/
- https://www.youtube.com/watch?v=N7bYKa0pGtI
- https://lightwish.com/blogs/news/oil-pastels-dry-out
- https://www.art-is-fun.com/how-to-seal-oil-pastels-and-acrylic-paints




Jill
June 15, 2025 at 11:00 PM
Hi there, I’m confused. You say use natural fabrics such as cotton or linen, then later you say dont use them for heat setting. Can you explain which one I should be doing? Thanks, Jill
Mutasim Sweileh
August 15, 2025 at 06:21 PM
Hi Jill! Thanks for bringing this up—let me clarify.
Here's the breakdown:
Use Natural Fabrics Like Cotton or Linen: These are the best options for applying oil pastels because they grip onto the pigments better than synthetic fabrics. Their slightly porous texture also enhances adhesion, making your artwork look vibrant and less prone to smudging.
Heat Setting on Natural Fabrics:
Yes, you can heat-set oil pastels on cotton or linen, but it needs to be done carefully because these fabrics are sensitive to over-heating. Use a piece of parchment paper or a pressing cloth to protect the fabric while heat setting. Set the iron on a low to medium heat setting appropriate for the fabric type (check the care label). Avoid synthetics entirely for this step because they can melt or distort under heat.Essentially, the confusion might come from the wording: natural fabrics (like cotton/linen) are safe to heat-set oil pastels, but only with proper caution—too high heat can damage them. However, synthetic fabrics usually aren't suitable at all for oil pastel application or heat setting.
I hope this clears everything up! Let me know if you’d like tips on the heat-setting process or sealing methods for longer-lasting results. 😊