This site is supported by our readers. We may earn a commission, at no cost to you, if you purchase through links.
Pair delicate materials like silk with microtex needles and lightweight thread, and tackle heavy denim with robust needles and strong thread weights. Consider your project’s demands too: marine projects need size 22-24 needles with marine thread, while auto upholstery requires bonded nylon thread with heavy-duty needles.
Understanding needle sizing systems, from US sizes 8-20 to European 60-110, guarantees you select the perfect match. The secret lies in recognizing that thread weight, needle gauge, and fabric characteristics must work together harmoniously—and there’s a systematic approach to getting this trio perfectly balanced.
Table Of Contents
- Key Takeaways
- Matching Needle and Thread for Projects
- Understanding Needle Sizes and Systems
- Choosing The Right Thread Type
- Selecting The Ideal Needle Type
- Decoding Needle and Thread Compatibility
- Needle and Thread Tips for Machine Sewing
- Preventing Thread and Needle Breakage
- Recognizing and Using Specialty Needles
- How Often to Change Needles and Maintain Tools
- Advanced Techniques and Troubleshooting Tips
- Frequently Asked Questions (FAQs)
- Conclusion
Key Takeaways
- Match your needle type to fabric characteristics – You’ll prevent runs in knits with ballpoint needles, while sharp universal needles work best for woven fabrics, and microtex needles handle delicate materials like silk without damage.
- Pair thread weight correctly with needle size – You need heavier needle gauges (90/14-100/16) for thick threads and lighter gauges (75/11-80/12) for fine threads to avoid breakage and skipped stitches.
- Consider your project’s specific demands – You’ll need marine-grade threads with size 22-24 needles for outdoor canvas work, while indoor upholstery requires bonded nylon thread with heavy-duty needles.
- Replace needles regularly and maintain proper tension – You should change needles every 8 hours of sewing time and adjust tension settings when switching thread weights to maintain professional stitch quality.
Matching Needle and Thread for Projects
Matching the right needle and thread creates the foundation for professional-looking projects, whether you’re sewing marine canvas or delicate home décor.
Your fabric type, project demands, and desired finish quality all determine which combinations will give you the strongest, most attractive results.
Fabric Type Considerations
When you’re picking the right needle and thread combo, fabric type sets the foundation for your entire project. Different fabric types demand specific considerations to avoid frustration and achieve professional results.
Here’s what drives your fabric-based decisions:
- Knit Fabric – Requires ballpoint needles to prevent runs and snags in the stretchy fibers
- Woven Fabric – Works best with sharp universal needles that pierce cleanly between threads
- Delicate Fabrics – Need microtex needles and lightweight thread to prevent damage
- Heavy Fabrics – Demand robust denim needles paired with stronger thread weights
- Stretch Fabrics – Call for ballpoint tips and elastic thread types for flexibility
Fabric weight directly influences thread weight selection, creating the perfect marriage between materials.
Project-Specific Pairings (e.g., Marine, Home, Auto)
When tackling specialized sewing projects, you’ll need thread types and needle types that match your specific application. Marine Thread paired with size 22-24 needles handles marine canvas and boat covers, while Auto Upholstery requires bonded nylon thread for seat durability.
Perfect pairings prevent project problems—match your needle size to thread weight for flawless stitching every time
Home Decor projects work best with all-purpose polyester and universal needles. Outdoor Gear demands UV-resistant threads, and Canvas Projects need heavy-duty combinations for lasting results.
Proper selection guarantees longevity, and you can find marine canvas threads for these demanding tasks, which often require marine canvas.
Achieving Professional Stitch Quality
Professional stitch quality depends on matching your thread size with the correct needle size and proper sewing machine needle selection.
When your needle selection complements your thread and fabric handling, you’ll achieve consistent tension and balanced feed throughout your project.
This combination creates smooth seams with precise stitching that won’t pucker or skip.
Follow thread and needle recommendations for your specific fabric weight to maintain professional results every time.
Understanding Needle Sizes and Systems
You’ll encounter needle sizes marked with confusing numbers like 80/12 or just 14, but understanding this system makes choosing the right needle simple.
The dual numbering shows European size first (80) and US size second (12), while single numbers typically follow the US system where higher numbers mean thicker needles, and this can be seen in dual numbering and thicker needles.
US Vs. European Sizing Explained
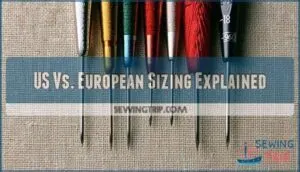
Understanding the differences between US and European needle sizing systems helps you select the right needle for any project. While US sizing uses numbers like 8, 10, or 12, European sizes correspond to the needle’s diameter in hundredths of millimeters.
- US sizing follows historical wire gauge conventions – smaller numbers mean thinner needles
- European sizing directly indicates diameter – size 80 equals 0.8mm shaft thickness
- Common conversion pairs include – 60/8, 70/10, 80/12, 90/14, and 100/16
- Modern packaging displays both systems – look for dual formats like "80/12" on labels
- Sizing conversion charts prevent selection errors – essential when using international guides or manuals
Understanding US versus European needle sizing is key to successful sewing projects. The fraction 80/12 represents a needle that’s a European size 80 and a US size 12, with the European system directly indicating needle diameter in hundredths of millimeters. A helpful resource to consult is a sewing machine needle chart for more details.
- US sizing follows historical wire conventions – US labeling typically ranges from sizes 8-20, with lower numbers reflecting finer needles
- European sizing shows actual diameter – a 100 needle is 1 mm in diameter, so a size 90 needle is 0.9 mm
- Common conversion pairs include – European sizes range from 60 to 110, American sizes range from 8 to 18
- Modern packaging displays both systems – dual formats prevent confusion when selecting needles
- Sizing conversion charts prevent errors – essential when using international guides or switching between brands
Needle Gauge and Its Impact
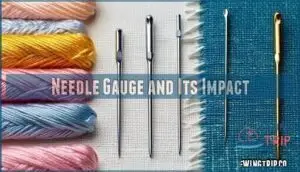
Needle gauge represents the diameter of your needle shaft, and this measurement directly impacts how your machine handles different fabrics.
A thicker needle gauge creates larger holes in delicate materials, while a thin gauge might bend when piercing heavy fabrics.
When you match needle gauge to fabric thickness, you’ll achieve superior stitch quality and prevent machine performance issues like needle deflection, which can cause uneven stitches and thread breaks.
Needle Size Selection Charts
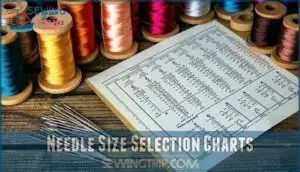
Throughout your sewing journey, needle size selection charts serve as your roadmap to perfect stitch quality. These charts display compatible needle sizes alongside fabric types, thread weights, and project requirements. Most charts include metric conversions between US and European sizing systems for universal compatibility.
Updated chart versions often feature gauge measurement specifications for precise needle selection. Finding charts online or in sewing manuals helps match machine needle sizing to your specific projects, ensuring superior performance every time, with the use of metric conversions and following a roadmap to perfect stitch quality.
Choosing The Right Thread Type
Thread selection determines your project’s success before you even start stitching. You’ll want to match thread properties to your fabric type, project environment, and desired durability.
Choose your thread wisely—it’s the foundation that makes or breaks every stitch you take
Polyester, Nylon, Cotton, and Silk Threads
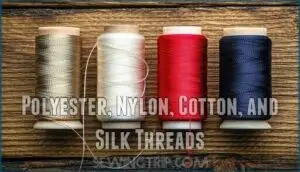
Each thread type brings unique strengths to your sewing projects. Polyester thread dominates with standard tensile strength and flexibility, accounting for 65% of garment manufacturing usage. Cotton thread offers a matte appearance perfect for vintage projects and quilting, representing 20% of specialty thread sales.
Nylon thread excels in upholstery applications due to its superior elasticity comparison and high-tension resistance. Silk thread delivers lustrous, smooth seams ideal for luxury work. For general use, all-purpose thread is often recommended.
Outdoor Vs. Indoor Thread Applications
Location matters when selecting thread. Outdoor projects face harsh conditions that quickly destroy indoor threads, while upholstery projects need different properties than marine applications.
- UV Resistance: Outdoor polyester thread maintains strength after 200 hours of sun exposure, while indoor threads show color fading within three months
- Moisture Effects: Marine-grade polyester retains 95% strength after six months in saltwater; non-outdoor threads risk rot in 12-18 months
- Abrasion Factors: Weather-resistant threads boost abrasion resistance by 30% through bonded finishes
- Material Degradation: Nylon thread for outdoor tents maintains flexibility for four seasons, outperforming cotton alternatives
Thread Strength and Flexibility
Understanding tensile strength and thread elongation helps you match thread performance to your project’s demands. Polyester thread delivers standard tensile strength while maintaining flexibility for everyday sewing.
When working with heavy fabric, higher thread weight provides better seam durability and abrasion resistance. Nylon excels in knot strength for upholstery projects. Choose your needle size based on thread weight to prevent breakage during high-stress applications.
Selecting The Ideal Needle Type
You’ll find that needle selection makes the difference between smooth, professional stitching and frustrating thread breaks or skipped stitches.
The right needle type protects your fabric while ensuring your thread flows smoothly through every stitch, which is related to smooth, professional stitching.
Universal, Ballpoint, Microtex, Denim Needles
Most sewers can master four essential needle types, each designed for specific fabrics and projects. Your Universal Needle works perfectly for both Knit Fabrics and Woven Fabrics, covering 80% of home projects. Ball Point Needle tips gently push between fibers instead of cutting, preventing Fabric Damage on stretchy materials. Microtex Sharp needles pierce delicate fabrics precisely, while DenimJeans Needle strength handles thick materials without breaking. A universal needle purchase is a great starting point for any sewer.
- Universal Needle handles most fabrics with its slightly rounded tip, making it your go-to Sewing Machine Needle
- Ball Point Needle displaces knit fibers instead of cutting them, extending Needle Longevity on stretch fabrics
- Microtex Sharp creates clean entry points in silk, microfiber, and densely woven materials
- DenimJeans Needle features reinforced shafts that power through multiple layers without bending
- Match your Needle Points to fabric weight – finer fabrics need sharper points, heavier fabrics need stronger needles
Embroidery, Tapestry, Chenille, and Specialty Needles
Beyond basic needle types lies a specialized world designed for specific techniques. Embroidery needles feature large eyes that reduce thread breakage by 25%, perfect for handling specialty threads in decorative work.
Tapestry needles use blunt tips for counted cross-stitch and needlepoint, passing between fibers without damage. Chenille needles combine sharp points with large eyes for crewel techniques and ribbon embroidery on dense fabrics.
Selecting the correct needle impacts stitching is crucial. Proper needle storage extends their lifespan substantially, and using the right needle is essential for decorative work.
Matching Needle Points to Fabrics
Choosing the right needle point style becomes essential when your fabric dictates success. Different point shapes handle woven vs. knit materials differently, ensuring your sewing machine needles won’t damage delicate fabrics or struggle with heavy materials.
Here’s how to match points to fabrics:
- Sharp points – Use for woven fabrics and delicate materials like silk or cotton where precision cutting matters
- Ballpoint tips – Choose for knit fabrics since they push between fibers instead of piercing through them
- Cutting points – Select for specialty fabrics like leather where clean punctures through thick materials are essential
Your sewing machine needle’s point determines whether you’ll achieve professional results or frustrating failures.
Decoding Needle and Thread Compatibility
You’ll achieve professional results when you match thread weight correctly with needle size, but getting this pairing wrong can ruin your project.
Most sewing problems stem from mismatched combinations that cause skipped stitches, thread breaks, and poor stitch quality.
Pairing Thread Weight With Needle Size
Thread weight compatibility directly impacts your stitch quality and machine performance. When you match thread thickness to the proper needle gauge, you’ll avoid common problems like thread breakage and skipped stitches.
| Thread Weight | Needle Size |
|---|---|
| 40-50wt | 75/11-80/12 |
| 30-40wt | 80/12-90/14 |
| 20-30wt | 90/14-100/16 |
Your sewing machine needle must accommodate the thread’s thickness while penetrating fabric density smoothly. Heavy threads need larger needle sizes to prevent shredding. For marine projects, consider using UV resistant polyester thread, which affects thread breakage, skipped stitches, needle size, and overall machine performance.
Charting Compatible Combinations
Most compatibility charts organize needle sizes with corresponding thread weights to simplify your selection process.
Standard charts pair 80/12 needles with 40wt thread for everyday sewing, while fabric-specific charts recommend ballpoint needles for knits and leather needles for heavy materials.
These references prevent troubleshooting mismatches and guide advanced pairings, ensuring your sewing machine needle sizes align perfectly with thread weight requirements.
Common Mistakes and How to Avoid Them
Mismatched thread pairing creates tension problems and skipped stitches that frustrate even experienced sewers. Using wrong needle sizes for your fabric causes thread fraying and potential fabric damage.
Heavy thread with small sewing machine needles leads to breakage, while thin thread through large needles produces loose, uneven stitches. Always match needle type to fabric weight, check your machine’s thread capacity limits, and test combinations on scraps before starting your project to avoid issues like thread fraying.
Needle and Thread Tips for Machine Sewing
Your sewing machine has specific limits that determine what needle and thread combinations you can use successfully.
Understanding these boundaries helps you choose the right equipment for your projects and avoid costly damage to your machine.
Home Machine Limitations and Upgrades
Your home sewing machine hits its limits when you need Thread Weight Limits beyond Tex 70 or encounter Needle Size Issues with sizes above 18. These constraints affect your ability to tackle Heavy Fabric Sewing projects effectively.
Consider these Machine Upgrade Options when your current setup falls short:
- Enhanced needle compatibility for sewing machine needles up to size 20
- Improved tension systems handling decorative threads smoothly
- Stronger motors managing multiple fabric layers without strain
- Advanced presser feet for specialized techniques and materials
- Computerized controls offering precision stitch selection and automated features
Home sewing machines excel at standard projects but struggle with demanding materials that require Industrial Machine Benefits. These machines often feature cast iron frames for enhanced durability.
Heavy-Duty and Industrial Options
When home machines can’t handle heavyweight projects, industrial sewing machines become your best friend. These powerhouses accommodate Industrial Threads beyond Tex 70 thread limits, tackle Heavy Fabrics with ease, and handle demanding Upholstery Needs. Commercial Machines like the Ultrafeed Sewing Machine excel at marine projects and Leather Sewing tasks.
| Machine Type | Thread Capacity | Best Applications |
|---|---|---|
| Home Machine | Up to Tex 70 | Light fabrics, garments |
| Heavy-Duty Machine | Tex 90-140 | Canvas, denim, upholstery |
| Industrial Machine | Tex 200+ | Leather, marine, automotive |
| Ultrafeed Models | Tex 270 | Sailmaking, awnings, covers |
| Commercial Units | Variable | Production environments |
Industrial machine needles withstand extreme pressures that would snap standard needles instantly.
Maintaining Machine Performance
Regular cleaning keeps your sewing machine running smoothly and prevents thread breakage. Modern machines accept most needle brands, but automatic threaders work best with compatible needle sizes 75/11 to 90/14. Clean your machine frequently and adjust tension settings when switching thread weights or specialty threads.
Essential Maintenance Tips:
- Change needles every 8 hours of sewing time
- Clean lint from thread paths and bobbin area regularly
- Test tension fine-tuning with different thread weight limits
- Use proper sewing machine needle sizes for your fabric type
Preventing Thread and Needle Breakage
Nothing breaks your sewing flow like a snapped needle or shredded thread mid-project.
The right needle and thread pairing, proper machine settings, and a few key adjustments can eliminate these frustrating interruptions and keep your stitching smooth, which is crucial for maintaining a sewing flow.
Causes of Needle Breakage
Needle breakage frustrates sewers, but understanding why it happens prevents costly mishaps.
Fabric thickness mismatches with sewing machine needle sizes cause bending and snapping.
Needle defects from manufacturing create weak points that fail under pressure.
Machine vibration from loose parts or uneven surfaces stresses needles beyond their limits.
Excessive thread tension pulls needles sideways during stitching.
Incorrect installation, like backwards insertion or loose tightening, leads to immediate failure.
Choose compatible needle sizes for your sewing projects to avoid these common problems, including fabric thickness mismatches and issues with machine vibration or needle defects.
Thread Breakage Troubleshooting
When thread keeps snapping, check your thread quality first—poor quality thread breaks 30% more often. Examine the threading path for lint buildup, which increases breakage by 40%.
Verify your sewing machine needle isn’t bent or damaged, and confirm correct threading through all guides. Replace old, brittle thread spools immediately, as using poor quality thread can lead to more breaks.
Adjusting Tension and Stitch Settings
Proper tension balance prevents seam puckering and thread breakage when working with lightweight fabrics or woven fabrics. Adjust your sewing machine needle sizes based on fabric weight.
Metallic threads require reduced upper tension and slower stitch length. Check that your feed dog and presser foot pressure match your fabric type.
Fine-tune tension gradually until stitches lie flat without loops appearing on either fabric surface, using proper tension balance.
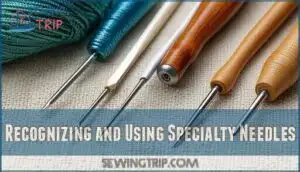
Recognizing and Using Specialty Needles
You’ll encounter projects that demand more than standard universal needles can deliver.
Specialty needles facilitate professional results for embroidery, leather work, decorative stitching, and unique thread applications that transform your sewing from basic to exceptional.
Embroidery and Topstitch Needles
Five different embroidery needles facilitate professional decorative stitching results. Embroidery needles feature elongated eyes that prevent thread shredding during machine embroidery, while their sharp points create precise fabric penetration.
Topstitch needles deliver bold finishes with robust shafts and large needle eyes designed for heavier embroidery threads. These specialty needles reduce fabric texture distortion and guarantee smooth machine embroidery thread flow for flawless stitching.
Leather and Decorative Stitching Needles
When working with tough materials like leather or canvas, you’ll need leather needles with cutting points rather than standard sharp tips. These specialized leather needle points slice cleanly through non-woven materials without tearing. Their heavy-duty construction handles decorative thread types and specialty stitching projects.
- Leather needles feature triangular cutting points that pierce rather than push
- Use needle sizes 90/14 to 110/18 for most leather projects
- Choose heavy-duty thread like polyester or nylon for strength
- Clean the needles eye frequently when using waxed threads
- Replace needles often since leather dulls cutting points quickly
Regular needle maintenance prevents troubleshooting seams later, especially when your sewing machine needle encounters thick materials.
Twin, Triple, and Invisible Thread Needles
Beyond leather’s demands, specialty multi-needle setups open exciting possibilities. Double needle configurations create parallel stitching perfect for decorative hems on stretch fabrics, while triple needle arrangements deliver reinforced seams.
Needle spacing options range from 1.6mm to 6.0mm, letting you customize results. For invisible finishes, pair monofilament thread with fine sewing machine needle sizes like 60/8. Each decorative stitching technique requires careful thread tension adjustment to prevent skipped stitches.
How Often to Change Needles and Maintain Tools
You’ll extend your sewing success by knowing when to change needles and how to maintain your tools properly.
Regular needle changes every 8 hours of sewing time prevent dull tips from damaging fabric and creating poor stitch quality.
You can improve your sewing by following these guidelines and applying regular needle changes to your routine.
Signs You Need a New Needle
Your sewing machine needle works hard, but like a well-used tool, it eventually wears out. Here’s when to replace it:
- Skipped Stitches – Your sewing machine struggles to catch the bobbin thread, creating uneven seams that signal a dull needle.
- Bent Needles – Visible curves or damage from hitting pins or thick seams compromise stitch quality and risk thread shredding.
- Burred Points – Sharp needle tips become rough or damaged, snagging fabric fibers and causing pulls in delicate materials.
- Thread Shredding – Machine embroidery threads or topstitch thread fray excessively, indicating the needle eye has developed rough edges.
Cleaning and Maintenance Best Practices
Regular cleaning is your sewing machine’s lifeline. Remove lint buildup from the bobbin case and feed dogs after every project using a small brush. Check tension settings monthly, ensuring smooth thread flow for both regular thread and specialty options like topstitch thread or machine embroidery threads.
Oil mechanisms according to manufacturer guidelines. Clean needle plates thoroughly, paying special attention to different needle sizes’ requirements. Proper bobbin care and feed dog maintenance prevent costly repairs while maintaining consistent stitch quality across all projects, using threads like machine embroidery threads.
Extending Needle and Machine Life
Smart maintenance habits can transform your sewing experience from constant frustration to smooth sailing. Regular cleaning removes lint buildup that dulls needle points and clogs your home machine’s mechanisms. Quality threads paired with proper tension settings prevent unnecessary strain on both needle and stitch plate components. A key aspect is knowing when to replace your needle, as irregular stitching indicates wear.
Follow these three maintenance pillars:
- Store needles properly – Keep them in original packaging or magnetic holders to prevent damage
- Clean your machine weekly – Remove thread particles and oil moving parts as recommended
- Monitor needle performance – Replace when you notice skipped stitches or fabric pulls
Avoiding damage starts with matching needle sizes to your project’s demands. Your sewing machine will reward consistent care with decades of reliable service.
Advanced Techniques and Troubleshooting Tips
Even experienced sewers face challenges when working with specialty threads, mixed fabrics, or troubleshooting persistent stitch problems.
These advanced techniques and solutions will help you achieve professional results regardless of your project’s complexity.
Preventing Skipped Stitches
Skipped stitches frustrate sewers, but understanding the root causes helps you troubleshoot effectively. Your sewing machine creates consistent stitches when the needle type matches your fabric, tension settings align properly, and fabric feed operates smoothly.
| Problem | Likely Cause | Quick Fix |
|---|---|---|
| Uneven skips | Wrong needle size | Match needle to fabric weight |
| Consistent skips | Tension issues | Adjust upper/bobbin tension |
| Random skips | Poor thread quality | Use high-quality thread |
| Stretch fabric skips | Wrong stitch plate | Use ballpoint needle |
| Thick seam skips | Fabric feed problems | Add stabilizers, use walking foot |
Common mistakes include using dull needles or forcing fabric through the machine. Check your stabilizers use on difficult materials.
Working With Metallic and Specialty Threads
Metallic threads demand a delicate touch and specialized needles to prevent frustration. Choose Metallic Needles with special coatings and larger eyes to reduce friction by 80%. Apply Thread Lubrication and practice Speed Control below 400 stitches per minute.
Master Tension Balancing for superior Stitch Quality. High-quality thread selection guarantees threads sparkle without snapping. These embroidery techniques transform challenging specialty needles work into stunning results.
Sewing Mixed Fabrics and Difficult Materials
When tackling fabric combinations, choose your needle size based on the finest material to prevent damage. For slippery fabrics, use a sharp needle and consider a straight stitch plate to minimize shifting.
Thick seams require specialty needles with reinforced shafts to avoid needle deflection. Preventing puckering starts with proper tension adjustments and matching your embroidery needles to thread weight.
Hand embroidery on mixed materials demands patience—test combinations first to guarantee smooth stitching without fabric distortion, using the right techniques for the straight stitch.
Frequently Asked Questions (FAQs)
Can you use hand sewing needles in machines?
Unfortunately, you can’t use hand sewing needles in machines – they’ll break or damage your equipment.
Machine needles have flat shanks that lock into the needle clamp, while hand sewing needles are round and won’t fit properly.
What causes thread to bunch underneath fabric?
Thread bunches underneath when your upper thread tension‘s too loose, you’re using the wrong needle size for your thread weight, or there’s lint buildup in the bobbin area that’s disrupting smooth thread flow.
How do you store needles to prevent damage?
Store needles in their original packaging or use a magnetic cushion to keep them organized.
Keep them in a dry place away from humidity to prevent rust.
Label different needle types clearly for easy identification.
Why does thread keep breaking during quilting?
You’re likely using the wrong needle size or thread weight for your project. Try switching to a sharper needle, reducing machine speed, or adjusting thread tension to prevent breaks.
Whats the difference between sharp and cutting needles?
Sharp needles pierce woven fabrics with pointed tips, while cutting needles slice through leather and non-woven materials using wedge-shaped or chisel points that create clean holes without tearing.
Conclusion
Sarah struggled for months with skipped stitches on her marine canvas project until she discovered the essential relationship between needle size 22 and V-92 thread weight. This breakthrough highlights why choosing the right needle thread combination transforms amateur work into professional results.
You’ll prevent frustration and achieve consistent stitches when you match fabric type with proper needle points and thread weights. Remember that ballpoint needles protect knits while sharp needles penetrate wovens cleanly. Heavy materials demand robust needles and strong threads, while delicate fabrics require fine combinations. Master these fundamentals and you’ll stitch confidently every time.
- https://directus.sailrite.com/assets/5427bdca-47d7-48f5-be6e-05fae1d1417e
- https://www.wawak.com/sewing/needles/home-machine/
- https://www.bernina.com/getdoc/b93fdfd7-cb85-4ebb-bd72-f6bc55cf9133/BERNINA_Nadelbroschuere_EN_low-res
- https://www.blog.wawak.com/post/sewing-machine-needle-and-thread-size-chart
- https://www.diamondneedle.com/organ-needles/size-chart

