This site is supported by our readers. We may earn a commission, at no cost to you, if you purchase through links.
Maybe your thread tension is tighter than a drum, turning perfect lines into wobbly zigzags. Skipped stitches can pop up if your needle’s on its last leg or your thread’s the wrong weight—think square peg, round hole.
Throw in a mismatched needle or low-quality thread and you’re practically inviting tangled nests under the fabric.
Stay sharp by picking the right needle for your fabric, double-checking tension, and listening for funny sounds. Stick around—more tips ahead on stopping slip-ups before they unravel your work.
Table Of Contents
Key Takeaways
- Double-check your needle and thread selection every time—using the wrong type or size quickly leads to broken stitches.
- Maintain even thread tension and keep an eye on stitch density to stop your seams from turning into zigzags or unraveling over time.
- Clean, inspect, and swap out your needle and thread regularly; dull, bent, or low-quality parts cause most stitching headaches.
- Monitor your sewing speed and fabric handling—rushing or awkward movement often results in wonky stitches or hidden defects in your finished project.
Stitch Defects Causes
You might think a stitch is just a stitch, but even small errors can turn your project into a patchwork of problems.
Even a tiny misstep in your stitching can unravel a masterpiece into a patchwork of frustration and fixes.
Let’s look at why uneven stitching, broken threads, and wonky tension happen, so your next seam isn’t the thread version of rush hour traffic.
Uneven Stitching Issues
Ever sewn a seam and found it looks like a zigzag road? That’s uneven stitching in action.
Watch your Stitch Density—if Fabric Feed is off, or you’ve got Needle Vibration or poor stitch tension, you’ll spot uneven stitch density fast.
Check for thread breakage and stitch consistency; those faults invite stitch defects and other sewing stitch problems every time.
Broken Stitch Causes
Uneven stitching can be frustrating, but broken stitches are their rowdy cousins—caused by high-speed sewing, Tension Issues, or worn-out needles.
Ever hear your machine make a clunk? That’s often Needle Damage, bobbin thread breakage, or even thread breakage waving hello.
Watch your Stitch Density; adjust machine speed, and double-check those thread tension faults before your seams unravel on you.
Thread Tension Problems
While broken stitches can really test your patience, it’s those sneaky tension issues that cause most headaches.
Poor thread tension messes with stitch density, leads to thread breakage, and turns fabric puckering into a sworn enemy.
If your needle’s dancing a jitterbug, don’t panic—check tension settings, rethread, and watch those stubborn stitch tension faults clear up faster than you’d expect.
Understanding thread tension basics is essential to identifying and resolving these common sewing errors.
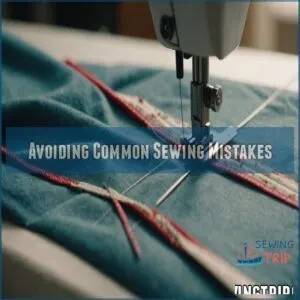
Common Stitch Mistakes
You might think stitching errors only happen to beginners, but even seasoned sewists find their seams wobbling or skipping a beat when they’re not paying attention.
With a few simple tweaks, you’ll keep those dropped and staggered stitches from sneaking into your projects and turning your shirt into a "wearable experiment.
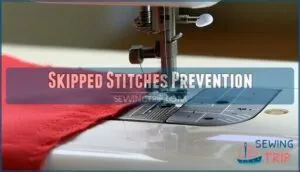
Skipped Stitches Prevention
Precision is essential when taming skipped stitches. Start by checking Needle Alignment—it’s like straightening shelves before stacking books.
Double-check Bobbin Issues and keep your thread quality of the highest standard. Regular sewing machine maintenance—think of it as giving your trusty steed a tune-up—makes all the difference.
Make sure fabric feed is smooth, and stay alert for odd Machine Timing quirks. A frequent cause is incorrect needle insertion.
- Check Needle Alignment
- Inspect Bobbin Issues
- Use high Thread Quality
- Maintain your sewing machine
- Monitor Machine Timing and Fabric Feed
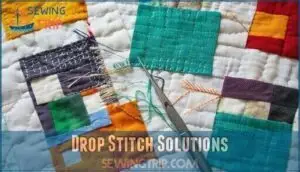
Drop Stitch Solutions
Frequently, a drop stitch can unravel your hard work faster than you can say “sewing stitch faults.”
Jump on solutions by inspecting the needle, cleaning the bobbin case, and checking feed dog issues.
Timing adjustments and choosing the right thread compatibility can also help.
Trust me, addressing these common knitting stitch mistakes or crochet stitch errors saves frustration—nobody likes surprise stitch defects!
| Oops Moment | Quick Fix |
|---|---|
| Stitch starts to unravel | Needle inspection |
| Unexpected gaps | Bobbin case cleaning |
| Wonky seam | Thread compatibility |
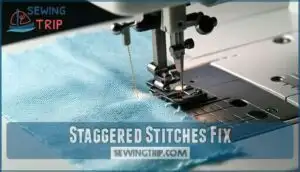
Staggered Stitches Fix
If drop stitches weren’t enough of a headache, staggered stitches can make your seams look like they’ve hit a pothole.
To fix this sewing stitch fault, focus on needle stabilization and keep a firm grip for proper fabric control. Vibration dampening helps too.
Regularly cleaning your machine can prevent common sewing errors.
Adjust feed dogs, maintain a consistent speed, and you’ll sidestep uneven stitching and stitch defects in no time.
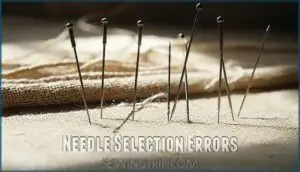
Needle Selection Errors
You can stitch a straight line, but using the wrong needle size or type might make your thread break, skip stitches, or leave your seams looking wobbly.
Don’t let a bent needle or the wrong point ruin your hard work—choose the right needle for your project and swap it out regularly, just like changing the batteries in a remote before movie night, to ensure a smooth stitching experience.
Incorrect Needle Size
Ever wondered why your seams look wonky or thread breaks like it’s on strike?
Chances are, it’s the wrong needle size. Using a needle too thin for heavy fabric thickness or too thick for light cotton causes ugly stitch defects, poor seam strength, and even machine damage.
Match your needle point and thread to the project—your sewing mistakes will shrink instantly! Regularly changing needles can prevent many sewing issues and this simple step can lead to better sewing results with less machine damage.
Wrong Needle Type
You’ve looked at needle size, but choosing the right needle type is a different ballgame.
Use the wrong one, and you might see skipped stitches, snags, or even needle breakage.
Keep these in mind:
- Match Needle Point Types for fabric damage prevention.
- Always check needle system compatibility.
- Use project specific or specialty fabric needles for best results.
When considering these factors, it’s essential to remember that using the correct needle can prevent issues like needle breakage.
Needle Maintenance Tips
Choosing the right needle type is only half the battle—taking care of it matters just as much. Always check for needle damage with quick Needle Inspection, swap needles after two projects (hello, Needle Replacement!), and keep alignment tight.
Remember, a dull or bent tool ruins stitches fast. Lint Removal after every session keeps machine maintenance a breeze. Regular checks using specialized inspection devices can prevent damage.
| Task | How Often |
|---|---|
| Needle Inspection | Before each use |
| Needle Replacement | Every 2 projects |
| Lint Removal | After every use |
Thread Selection Mistakes
You might think any spool of thread will do, but choosing the wrong weight, type, or quality can turn a simple project into a tangle of skipped stitches and frayed seams.
Don’t let bargain-bin thread become your secret sewing nemesis—let’s get you matching threads to your fabric like a pro.
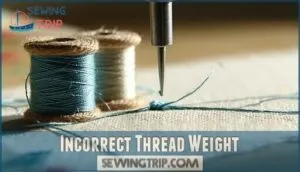
Incorrect Thread Weight
If you use the wrong thread weight for your fabric, you’re basically asking for sewing mistakes to crash your scene.
Too heavy? You risk broken stitches, seam strength issues, and even fabric damage. Too light? Weak seams and poor stitch quality follow.
Always match thread weight to needle size for balanced tension control, proper thread compatibility, and a finished look you’ll actually trust.
Proper selection involves understanding thread weight measurement for ideal results, which is crucial for achieving proper thread compatibility and ensuring a finished look that is trustworthy.
Wrong Thread Type
If picking the right thread weight matters, choosing the correct thread type is just as important.
Mixing up Thread Fiber or Thread Finish can cause thread breakage, tension issues, or unattractive seams.
Polyester thread shines on stretchy fabrics, cotton on wovens.
Mismatched thread types or poor Thread Color match can lead to unbalanced stitches and visible quality problems.
Understanding different thread fiber types is vital for achieving the best results with the right thread type.
Thread Quality Issues
If your stitches look like the thread’s giving up the ghost, check those spools for uneven Thread Composition and weak Thread Strength.
Cheap thread isn’t a bargain when it snaps mid-seam.
Here’s what to watch:
- Store spools properly—no sunlight or moisture.
- Invest in good Thread Finishes.
- Avoid bargain bins for thread types; thread quality pays off.
The key to successful sewing is to ensure that your thread is of high quality and properly maintained.
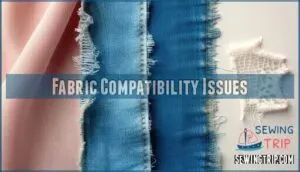
Fabric Compatibility Issues
If you’ve ever watched your carefully stitched seam mysteriously pucker, fray, or bleed color faster than your patience, fabric compatibility issues might be the culprit.
A perfect seam can unravel in seconds if your fabric and tools aren’t on speaking terms.
Pairing the right fabric with the proper stitch type, thread, and needle makes all the difference—otherwise, even the fanciest stitch can end up looking like a rookie’s first try, which is why proper pairing is essential.
Fabric Stretching Problems
Ever wonder why your seam looks wavy or your knit fabric stretch gets out of hand? Blame fabric stretching and poor handling, not gremlins!
Too-tight presser foot, ignored tension adjustments, or bias cut issues can distort. Combat these sewing mistakes with a walking foot, adhesive stabilizers, and proper sewing machine settings.
Always pre-wash to minimize potential fabric shrinkage. Master these tweaks to dodge stitch defects.
Fabric Fraying Solutions
Someone once said a frayed seam will haunt your closet.
Stop fabric fraying with Edge Finishing like zigzag or serging, and reinforce seams for extra strength.
Fray-Check usage works magic around tricky curves, and Interfacing Application gives delicate fabrics backbone.
Smart Fabric Selection helps, but raw edge finishing will keep even the wildest threads in line—no fabric rebellions allowed!
Fabric Bleeding Prevention
Worried about fabric bleeding? Trust me, nobody wants tie-dye towels after laundry day.
Nail fabric selection and follow these tips for bulletproof colorfastness:
- Pre-wash fabrics separately
- Do colorfastness testing on scraps
- Add dye-setting agents in the first wash
- Toss in Color Catcher sheets
- Use gentle washing machine settings
You’ll keep colors crisp and drama-free.
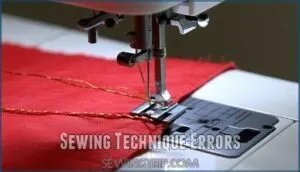
Sewing Technique Errors
You’ll want to watch out for sneaky sewing technique errors like incorrect presser foot pressure, improper tension settings, or inconsistent stitching that can turn even the best fabric into an accidental art project.
Mastering a few simple habits saves you from crooked seams, surprise puckers, and those mysterious thread nests that seem to appear out of nowhere, and helps to prevent other issues related to improper tension.
Incorrect Presser Foot Pressure
Moving from fabric compatibility, let’s talk about presser foot pressure.
Too much push and your fabric’s squished; too little, and materials slip and bunch.
Delicate fabric pressure keeps chiffon smooth, while heavy fabric pressure flattens denim.
Master pressure foot adjustment and avoid fabric feed issues, uneven seam creation, or stitch quality headaches.
Make sewing machine troubleshooting part of your regular sewing machine settings optimization.
Improper Tension Settings
After adjusting your presser foot, don’t let tension settings run the show—improper thread tension can lead to seam puckering or “bird nesting.”
Check for balanced stitching by inspecting both sides; bobbin tension should play nice with the upper thread.
If loops or tangles pop up, tackle tension troubleshooting, rethread, clean, and add a drop of thread lubrication for smoother sewing.
Inconsistent Stitching Techniques
Now that you’ve got a handle on tension settings, let’s talk inconsistent stitching techniques.
If you rush or let the fabric drift, seam alignment takes a beating and stitch consistency goes out the window.
Maintain a steady speed, focus on fabric handling, and use guiding techniques—think of your hands like bumpers in bowling.
Smooth moves fight uneven stitching and elevate your stitch quality.
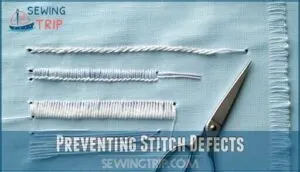
Preventing Stitch Defects
You won’t need a magnifying glass to spot stitch defects if you keep your machine maintained, check your work, and know how to fix those pesky issues as they pop up.
By understanding why seams misbehave and learning a few simple troubleshooting tricks, you’ll prevent crooked lines from turning your project into a patchwork puzzle.
Regular Machine Maintenance
Your sewing machine’s worse enemy is neglect—ignore oiling frequency and it’ll sound like a rusty bicycle.
Tackle lint removal every session—those feed dogs deserve a break from fuzz.
Needle replacement matters: swap every two projects for sharp results.
Don’t forget the tension discs and machine settings; regular checks keep thread tension smooth and sewing machine problems at bay.
Simple habits, flawless stitches, with regular checks.
Quality Control Checks
Every stitch has a story, but you want your seams telling tales of quality, not chaos.
Use quality control checks—start with thorough Seam Inspection, noting Defect Details as you go.
Schedule Factory Visits and keep a solid Quality Guidebook on hand.
Regular Follow-up with your team stops sewing mistakes before they become epic fails in garment quality and stitch defect trouble.
Troubleshooting Common Issues
Right off the bat, when troubleshooting sewing stitch problems, don’t let seam puckering or seam slippage trip you up—most times, it’s about tension or fabric choice.
Defect evaluation means checking for imbalanced stitching, thread fusing, or other stitch defects.
Practically speaking, pause and retrace your steps; the best sewing solutions often spring from spotting those common sewing mistakes before they multiply, which involves defect evaluation and understanding seam puckering.
Frequently Asked Questions (FAQs)
How do I prevent stitches from unraveling over time?
Picture your stitches marching down the fabric—don’t let them unravel by always backstitching at seam starts and ends, trimming threads close, and tying knots if needed.
Secure those seams, or face the dreaded wardrobe malfunction parade, by following these steps to ensure your work is secure.
What is the best way to secure seam ends?
Always backstitch at the start and end of your seam—think of it as locking the door behind you.
Two to three reverse stitches keep threads from slipping out, saving you from “wardrobe malfunction” territory.
Trim tails!
Can weather or humidity affect stitch durability?
Yep, weather swings and sticky humidity can mess with your stitches.
High moisture makes thread swell or pucker, weakening seams.
Dry air? Thread gets brittle and snaps.
Keep your sewing stash in cool, controlled conditions for best durability.
How does sewing speed impact stitch formation?
When you sew too fast, your machine’s timing can get thrown off—think “speeding ticket” for stitches.
You’ll get skipped stitches, thread breakage, or uneven seams.
Stick to a steady rhythm for smooth, sturdy results.
What are signs of hidden stitch damage in a finished garment?
Watch for subtle seam puckering, uneven topstitching, thread tails poking out, or slight grinning when you tug on seams.
If buttons gape or hems twist, those small quirks often mean trouble is lurking beneath the surface.
Conclusion
Imagine if your stitches held auditions—some break a sweat, others just barely show up on cue.
Tackling common stitch types mistakes isn’t a Hollywood script, but it does mean keeping your star players—needle, thread, tension—right for the job.
Regular tune-ups, double-checks, and the occasional pep talk for your presser foot keep your work sharp.
Catch these goofs early, and your projects stay seamless, literally and technically, making you the director of perfect results every time.
- https://textilelearner.net/fabric-characteristics-for-garment-manufacturing/
- https://www.msn.com/en-us/news/technology/15-professions-that-are-far-more-enjoyable-than-most-people-realize/ss-BB1nWfnv?cvid=2b1f74b61ae24203fe89b5af3b225ac9&ei=15
- https://youtu.be/_WMC1hsKfA8
- https://siemachtsewingblog.com/2022/11/why-is-my-sewing-machine-skipping-stitches/
- https://www.wonderfil.ca/blog/6-issues-that-cause-skipped-stitches/9/3/2020

