This site is supported by our readers. We may earn a commission, at no cost to you, if you purchase through links.
Adjust the thread tension dial—higher numbers mean tighter, lower numbers mean looser. If your top thread is looping, try lowering the tension one notch at a time and test on a fabric scrap.
Check your bobbin as well; sometimes the culprit is hiding underneath. Always use quality thread and keep your machine clean, calling it “stitch ready.”
With steady hands, you’ll see those perfect stitches roll out—no more mystery tangles. Stick around, because the real secrets to perfect tension are coming right up, and having a steady hand will be crucial.
Table Of Contents
Key Takeaways
- You’ll achieve consistent sewing machine tension settings by testing on scraps, adjusting gradually, and keeping your machine clean, which helps you avoid common issues like puckering or thread breakage.
- It’s crucial to choose the right thread type and quality, as different threads vary in thickness and finish, and a quick test stitch will help you avoid surprise snarls or uneven seams.
- You should document your tension settings for different fabrics to save time later, and consider factors like fabric thickness, needle size, and thread weight when determining the ideal stitch length and tension.
- Regular maintenance and scheduling servicing will help you prevent problems and ensure your sewing machine runs smoothly, allowing you to create beautiful, professional-looking projects every time.
Sewing Machine Tension Basics
You’ll need to master tension settings to create perfect stitches every time you sew.
Tension controls how tightly your threads pull together, and getting it right means the difference between professional-looking seams and frustrating tangles.
Importance of Correct Tension
Getting tension settings right is like tuning a guitar – it’s the foundation for everything that follows.
Perfect tension is the secret chord that brings all your stitches into harmony for flawless, frustration-free sewing.
Proper tension creates the sweet spot where your upper and lower threads mesh perfectly, giving you professional-looking seams every time.
- Seam Strength – Balanced tension creates durable seams that won’t pull apart
- Stitch Appearance – Correct settings produce clean, even stitches on both fabric sides
- Fabric Distortion – Proper tension prevents puckering and fabric pulling
- Thread Breakage – Right tension consistency stops frustrating thread snaps mid-project
Effects of Incorrect Tension
You’ll encounter issues like fabric puckering, thread breakage, and skipped stitches if your tension is off.
Incorrect tension causes looping seams, uneven stitches, and tension problems, making tension troubleshooting necessary to fix these tension issues and prevent fabric puckering and thread loops, which is a result of tension problems.
Thread Interlock and Stitch Quality
You control thread tension to achieve a balanced interlock, impacting stitch formation and seam strength.
Proper tension settings guarantee aesthetic appeal and high-quality stitches, while incorrect settings lead to poor stitch quality, affecting the overall appearance of your sewing project, with thread tension and bobbin tension playing key roles.
Maintaining ideal tension involves understanding thread guides importance, which is crucial for a balanced interlock.
Balancing Top and Bobbin Threads
Every masterpiece starts with balanced sewing—think of it as a dance between top and bobbin thread tension.
Finding tension equilibrium means both threads meet in the fabric’s middle, creating perfect seam integrity.
If top or bobbin thread tension is off, stitch harmony disappears.
Regularly check your machine’s tension settings to keep thread interplay smooth and your stitches crisp.
Tension Settings for Fabrics
Getting the right tension setting for each fabric type helps you avoid messy stitches and keeps your seams strong.
You’ll see how adjusting tension based on fabric thickness can make all the difference, so your sewing projects don’t end up looking like something your cat played with, which is why complete concepts like these are crucial for a successful sew.
Lightweight Fabric Settings
For lightweight fabrics, use a needle size of 70/10 and adjust tension settings to 2-3.
This guarantees smooth stitching and prevents fabric distortion.
Choose the right thread type and consider fabric stabilizers to achieve perfect stitches on delicate materials like lawn or cotton voile.
Selecting the correct needle type is vital for these delicate fabrics.
Thick Fabric Settings
You’ll often sew thick fabrics, so adjust tension settings accordingly.
For thick fabrics:
- Use a larger Needle Size
- Adjust Presser Foot
- Increase Stitch Length
to prevent tension problems and achieve strong seams.
Selecting the right needle for denim is essential for success.
Stretchy Fabric Settings
For stretchy fabrics, you’ll use lower tension settings and specific needle types, like ballpoint or stretch needles, to achieve smooth stitches and prevent distortion.
Adjusting your serger tension and using stabilizers as needed to master working with these fabric types.
Fabric-Specific Tension Ranges
Moving from stretchy fabrics, let’s look at how tension changes with fabric types. You’ll need to adjust those dials as you swap materials, just like switching shoes for the right occasion.
- Tension 2–3 for lightweight fabrics
- Set 3–4 for thick fabrics
- Use 4 for medium-weight cottons
- Polyester tension is usually 4
- Heavy fabrics need 4–6
For medium-weight cotton, a 2.5mm stitch length is generally recommended.
Troubleshooting Tension Issues
When your stitches go haywire, it’s usually a sign the machine tension isn’t right.
You can spot the problem, make a quick fix, and get back to sewing without much fuss.
Common Tension Problems
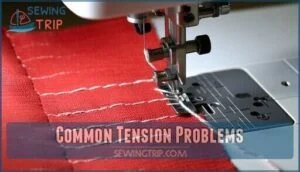
You’ll encounter common tension issues like thread looping, fabric puckering, skipped stitches, and thread breakage.
These problems indicate uneven stitches, requiring a tension troubleshooting guide.
Refer to a tension settings guide to adjust your sewing machine tension settings and resolve these tension issues for better results, using a guide to ensure accuracy.
Solutions for Tension Issues
You’ll fix tension issues by checking thread quality, adjusting bobbin settings, and cleaning your machine.
Needle problems and bobbin issues can be solved with a tension troubleshooting guide, providing tension fixes and solutions to common tension problems, ensuring perfect stitches with the right tension settings.
Fabric puckering often indicates incorrect thread tension, which can be addressed by following the guide to achieve perfect stitches and resolve issues with thread tension.
Maintenance and Prevention
You maintain your sewing machine with regular cleaning, checking thread quality, and scheduled servicing.
Here are key tasks:
- Clean tension discs
- Remove lint
- Check needle condition
- Record tension settings
- Adjust as needed, ensuring smooth operation and perfect stitches.
To ensure your sewing machine works properly, it is crucial to follow these steps and adjust as needed.
Professional Machine Calibration
You’ll need professional machine calibration for ideal sewing machine settings.
Certified technicians perform tension finetuning, ensuring proper tension calibration.
Regular maintenance, including lubrication of moving parts, is essential for long-term machine performance.
Consider calibration frequency, cost analysis, and warranty implications when deciding between DIY calibration and professional services for sewing machine optimization.
Stitch Length and Fabric Type
You’ll need to adjust your stitch length based on the type of fabric you’re working with, as it affects the appearance and feel of your project.
By choosing the right stitch length for your fabric, you can guarantee that your stitches are even and your project turns out as expected.
Factors Influencing Stitch Length
When sewing, you consider several factors.
- Fabric Thickness
- Needle Size
- Thread Weight
- Sewing Speed to determine stitch length, ensuring a balanced tension dial for perfect stitches on your chosen fabric type.
Thread Weight and Stitch Length
You balance thread weight and stitch length for ideal results.
Thread compatibility affects fabric appearance and seam strength.
Needle influence and quilting balance depend on thread weight and stitch length, ensuring proper tension balance for each fabric type and needle size, which is crucial for seam strength.
Sewing Speed and Stitch Length
Sometimes, pushing your sewing speed feels like racing a go-kart—fun, but you’ve got to steer right.
Quick speeds can stretch fabric, making stitches uneven or odd-sized.
Adjust your stitch length as you go, especially if you’re after consistent seams.
Finding your ideal speed settings helps your fabric feed rate and keeps that speed tension balance for smooth, sturdy sewing machine stitches.
Quilting Techniques and Stitch Length
Speed isn’t everything—stitch length can make or break your quilting game.
With a Walking Foot, try longer stitches for thick fabrics, but shorten up for tight Paper Piecing or when using Basting Stitches.
Free Motion quilting lets you control stitch density.
Adjust stitch length and tension based on fabric type and thread. Securing the quilt sandwich is essential for stability.
Consistency means smoother, better-looking quilts.
Adjusting Tension for Consistency
You’re now ready to adjust your sewing machine’s tension for consistency, which is key to achieving perfect stitches.
By following the steps outlined in this section, you’ll learn how to make gradual adjustments to your upper and bobbin thread tensions to get the best results.
Upper Thread Tension Adjustment
After understanding stitch length basics, you’ll need to check your upper thread tension. Start by testing with your presser foot up – the thread should move freely without resistance. When you lower the presser foot, you should feel slight tension as the thread passes through the tension disks.
- Threading Resistance Test: Pull thread with presser foot down – you should feel moderate resistance
- Tension Dials Check: Higher numbers tighten, lower numbers loosen your thread tension
- Rethreading Necessity: If there’s no resistance with foot down, rethread your machine completely
Thread movement through tension discs creates the control you need for balanced stitches. Proper tension adjustment prevents loops and guarantees your upper thread tension works correctly.
Bobbin Thread Tension Adjustment
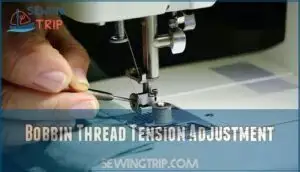
You adjust bobbin thread tension using the tension screw control.
A drop test method checks tension:
Pre-wound bobbins simplify this process.
The use of a drop test method is crucial for ensuring the correct tension.
Gradual Tension Adjustments
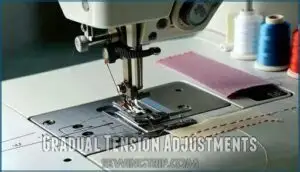
You make incremental changes to sewing machine tension settings, testing fabrics to verify dial sensitivity is balanced, allowing for bobbin fine-tuning and thread compatibility.
This process results in perfect stitches through careful tension adjustment and control, allowing for a precise outcome.
Maintaining Consistent Tension
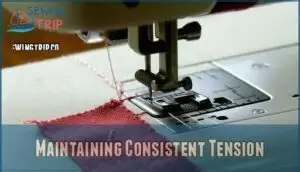
You’ll maintain consistent tension by regularly cleaning your machine and checking thread quality.
By doing so, you’ll guarantee your stitches remain even and prevent common issues like puckering or thread breakage.
Regular Machine Cleaning
You’ll keep your sewing machine running smoothly with regular cleaning.
Remove lint from tension disks and oil mechanisms. Use a Sew Clean Brush Set for feed dog care and shuttle maintenance, ensuring proper tension cleaning and preventing lint buildup in the tension assembly.
Consistent cleaning also helps prevent broken needles, which is a key aspect of maintaining your machine, and it involves regular cleaning to ensure smooth operation and prevent issues like broken parts.
Checking Thread Quality
You check thread quality by examining Thread Fiber, Thread Weight, and Thread Finishes.
Good thread, like Gutermann sewing thread, guarantees smoother tension settings for different fabrics, including lightweight and heavyweight ones.
Many sewers prefer quality thread options for their projects, and good thread reduces issues with Storage Impacts and Brand Reputation affecting your sewing projects.
Scheduling Machine Servicing
A stitch in time saves money—literally!
Routine sewing machine maintenance, like biannual Service Frequency checks, keeps tension in tip-top shape and reduces surprise sewing machine repair bills.
Choose a certified technician to avoid warranty headaches.
Preventative Maintenance and smart Downtime Planning help you dodge last-minute tension inspection panic, while proper Technician Selection protects long-term tension maintenance and keeps your projects humming.
Recording Tension Settings for Future Reference
Every seasoned sewist knows a good Setting Journal saves headaches later.
When you record tension settings for each project, start a Fabric Log or Thread Database for easy sewing machine tension control.
Add Sample Swatches and a digital records folder.
Use a tension settings chart as your go-to tension settings reference, providing quick tension settings recommendations for future projects, following these tension settings guidelines.
Frequently Asked Questions (FAQs)
What is the perfect tension on a sewing machine?
You want your sewing machine tension set so that top and bottom threads meet neatly in the fabric center, no puckering or looping.
For most jobs, start with a setting around 5—adjust as needed for fabric weight.
What is the best tension and length for sewing?
Set your tension between 4 and 5 for most fabrics, and aim for a stitch length around 5 mm. Thin fabrics like lawn need 2–3 tension and 5–2 mm length. Always test scraps first.
How to tell if tension is too high sewing?
Notice your fabric puckering or thread snapping like a rubber band at a birthday party? That’s tension turned up too high.
You’ll also see bobbin thread sneaking onto the top, making stitches look uneven or harsh.
How do environmental factors affect tension consistency?
Humidity, temperature, and dust can mess with thread tension.
Hot, sticky air might make threads swell or stick, while dry conditions make them snap.
Dust and lint sneak in, too—clean your machine often for smooth stitches.
Can thread brand changes require tension adjustments?
It’s tempting to stick with your favorite thread, but switching brands can mean tweaks to your tension dial.
Different threads vary in thickness and finish.
A quick test stitch helps you avoid surprise snarls or uneven seams.
A quick test is essential in this context.
Why does tension drift during long projects?
You might notice tension drifting during long sewing projects because thread heats up, lint builds up, or fabric pulls unevenly.
As your machine works, tension parts can loosen or slip, throwing your stitch balance off.
Do presser foot types influence tension requirements?
Unlike basic feet that maintain steady contact, specialty presser feet create varying pressure points that’ll change your tension needs. Walking feet reduce tension requirements while zipper feet increase them.
How often should tension dials be recalibrated?
You’ll rarely need to recalibrate tension dials since they’re built to stay accurate. Only recalibrate if you notice persistent issues after cleaning and basic troubleshooting, typically every few years.
Conclusion
Perfect sewing is like tending a garden – it requires patience, attention, and the right conditions to flourish.
You’ve learned that consistent sewing machine tension settings aren’t magic, but they’re achievable with practice. Remember to test on scraps, adjust gradually, and keep your machine clean.
Quality thread makes a difference, and regular maintenance prevents problems. Document your settings for different fabrics to save time later.
With these skills, you’ll create beautiful, professional-looking projects every time.
- https://singerco.com.au/learn-create/how-to-fix-sewing-machine-tension-issues/
- https://www.youtube.com/watch?v=b4JDAkByMlQ
- https://www.threadsmagazine.com/2008/11/02/understanding-thread-tension
- https://www.superiorthreads.com/education/tension-guide
- https://sabrinawhartonbrown.wordpress.com/2011/05/23/how-to-get-your-sewing-machine-thread-tension-and-stitch-quality-right/

