This site is supported by our readers. We may earn a commission, at no cost to you, if you purchase through links.
First, check that your thread’s properly seated in the tension disks and bobbin case—it’s like making sure your shoelaces are tied right.
Next, adjust your tension dial gradually, testing on scrap fabric as you go.
If your upper thread’s showing on the bottom or vice versa, you’ll need to balance both upper and bobbin tension until they lock together neatly in the fabric’s center.
Sometimes the culprit isn’t tension at all—worn needles or poor-quality thread can masquerade as tension troubles.
Table Of Contents
Key Takeaways
- Start with proper threading and seating – You’ll solve most tension problems by re-threading your machine with the presser foot up and ensuring your bobbin is seated correctly in its case.
- Make gradual adjustments and test frequently – You should turn your tension dial in small half-number increments, testing each change on scrap fabric before continuing with your project.
- Check thread and needle quality first – You cannot achieve balanced tension with old, brittle thread or worn needles, so replace these components before adjusting settings.
- Maintain your machine regularly – You’ll prevent most tension issues by cleaning lint from tension discs monthly, oiling mechanisms as directed, and scheduling annual professional servicing.
Thread Tension Basics
You’ve probably wrestled with thread tension before—it’s like trying to balance two stubborn toddlers on a seesaw.
Getting your upper and lower threads to play nicely together determines whether you’ll create beautiful, even stitches or end up with a tangled mess that looks like your machine had a bad day.
Importance of Balanced Tension
Think of thread tension as the handshake between your upper and lower threads—when they meet perfectly in your fabric’s center, you’ll get balanced seams with superior durability and stitch quality.
Perfect tension means your threads shake hands in the fabric’s heart, creating stitches that won’t quit on you.
Proper sewing machine tension creates strong seam strength while maintaining beautiful fabric appearance.
Without balanced tension, you’re basically asking your threads to play tug-of-war, resulting in weak stitches that’ll unravel faster than your patience during sewing tension troubleshooting sessions.
Incorrect threading often causes most tension problems, which can lead to sewing machine issues and affect the overall stitch quality.
Factors Affecting Thread Tension
Several factors play tug-of-war with your sewing machine tension, creating headaches when you least expect them.
Understanding these culprits helps you troubleshoot thread tension problems before they wreck your project:
- Fabric type – Heavy denim versus delicate silk requires different tension settings
- Thread weight – Thick threads need looser tension than thin ones
- Needle size – Wrong needle creates uneven pull through fabric
- Bobbin winding – Loose or tight winding affects lower thread flow
- Machine maintenance – Dirty tension discs throw everything off balance
Common Signs of Tension Problems
Spotting tension troubles isn’t rocket science—your machine practically screams for help.
Uneven thread tension creates telltale signs that’ll make you want to throw your fabric across the room, but don’t panic yet.
| Problem | What You’ll See | Where to Look |
|---|---|---|
| Loose stitches | Loopy underside threads | Bottom fabric side |
| Tight stitches | Fabric puckering, breaking threads | Top fabric surface |
| Thread nests | Tangled mess underneath | Bobbin area |
These uneven stitches are your machine’s way of saying "help me!
Identifying Tension Issues
When your stitches start acting up, you’ll notice the telltale signs pretty quickly—loops appearing where they shouldn’t, threads breaking mid-seam, or fabric bunching like it’s having a bad day.
These visual clues are your machine’s way of waving a red flag, signaling that your thread tension needs some TLC before your next project turns into a frustrating mess.
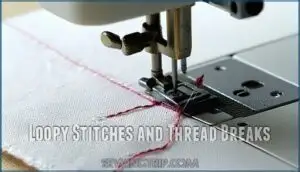
Loopy Stitches and Thread Breaks
Two telltale signs reveal uneven thread tension: loops appearing beneath your fabric and threads snapping mid-stitch.
Loop formation occurs when your top thread’s too loose, while thread snapping happens when tension’s cranked too tight.
These tension imbalances create skipped stitches and potential fabric damage, turning your sewing machine into a stubborn mule that won’t cooperate, causing issues with thread tension.
Uneven Stitches and Fabric Puckering
Uneven stitches scream tension troubles, while fabric puckering signals your sewing machine tension‘s gone rogue.
These issues plague lightweight fabrics and stretchy fabrics most, causing problems that can be frustrating to resolve.
Causes include incorrect thread tension settings or mismatched stitch length, which can lead to a range of sewing issues.
Prevention means testing on scraps first, to ensure that your settings are correct before starting your project.
Solutions involve adjusting your tension dial incrementally and checking stitch quality after each change for smooth results.
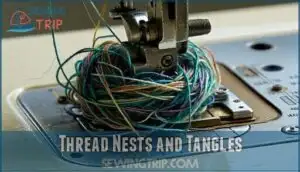
Thread Nests and Tangles
Thread nests happen when your machine’s tension goes haywire, creating bird’s nest-like tangles beneath your fabric.
When your machine throws a tension tantrum, those dreaded bird’s nests appear like unwelcome surprises beneath your fabric.
These frustrating thread tangles form when sewing machine tension isn’t balanced properly.
Causes include incorrect threading, bobbin issues, or mismatched thread weights.
The impact? Ruined projects and wasted time.
Prevention involves regular cleaning and proper threading.
Solutions include re-threading with presser foot up, checking bobbin placement, and adjusting tension gradually.
Severity ranges from minor annoyances to complete project disasters.
To address these issues, it’s essential to understand the importance of balanced tension and take steps to prevent thread nests, ensuring a smooth sewing experience with regular cleaning and adjusted tension.
Adjusting Thread Tension
Now you’re ready to tackle the real work—adjusting your machine’s tension settings to get those perfect stitches.
Whether you’re working with a mechanical dial or fancy computerized controls, the key is making small changes and testing as you go.
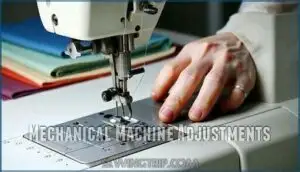
Mechanical Machine Adjustments
Adjusting sewing machine tension on mechanical models requires a hands-on approach.
Turn the tension dial in small incremental changes—half numbers work best.
Test stitching on scrap fabric after each adjustment reveals what’s working.
Regular cleaning of tension disks prevents lint buildup that throws off your settings.
Exploring options for a mechanical sewing machine can provide insight into different models.
Mastering these adjustment techniques through patient practice will help you develop an intuitive feel for perfect bobbin tension balance, and achieve a good understanding of mechanical sewing machine settings.
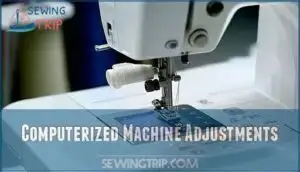
Computerized Machine Adjustments
Computerized machines transform sewing machine tension adjustment through digital settings displayed on screens.
You’ll adjust values with button presses instead of turning dials, typically working within ranges from 0-9.
Most projects need settings between 3-5.
These machines often store saved profiles for different fabrics and threads.
Some machines even auto-adjust tension based on material.
- Digital precision: Make exact adjustments using numerical values rather than guessing with manual dials
- Custom memory: Save your perfect tension settings for specific projects and recall them instantly
- Smart guidance: Get on-screen prompts and warnings to prevent common threading mistakes
Modern computerized models incorporate sensor technology that reads material thickness and suggests ideal settings.
This material adaptation feature takes the guesswork out of sewing machine tension adjustment, especially when switching between projects.
Auto-Adjusting Tension Features
Modern sewing machines feature auto-adjusting tension that’s like having a built-in expert.
These smart systems use sensor technology for real-time material adaptation, automatically detecting fabric thickness and adjusting accordingly.
You’ll enjoy tension reliability with profile saving for different projects.
This enhanced stitching technology eliminates guesswork in sewing machine tension adjustment, making tension troubleshooting nearly obsolete for most sewers.
Some models even offer automatic tension systems that function without user intervention.
Troubleshooting Tension Problems
When tension problems strike, you don’t need to panic—most issues have simple fixes hiding in plain sight.
Start by checking if your machine’s threaded correctly and your bobbin’s seated properly, because these common culprits cause more headaches than a Monday morning coffee shortage, including simple fixes and common culprits.
Incorrect Threading and Bobbin Woes
You’ve adjusted your machine’s settings, but now let’s tackle the sneaky culprits behind most threading headaches.
Incorrect bobbin insertion creates chaos—check that it’s seated properly and spinning counterclockwise when pulled.
Follow your machine’s thread path exactly; missing one guide wreaks havoc on sewing machine tension.
Poor bobbin winding creates uneven thread distribution, causing thread snapping and casing issues that’ll drive you nuts during important projects.
Utilizing proper bobbin winding tools can help prevent these threading headaches and ensure smooth sewing.
Thread Quality and Needle Drama
Beyond threading troubles, your needle and thread quality can make or break perfect stitches.
Poor thread quality increases tension drag by 30%, while bent needles cause skipped stitches and thread breakage.
Match thread weights with proper needle types—size 80/12 for medium threads, 60/8 for fine ones.
Quality thread reduces friction and prevents those frustrating nests under your fabric.
Regular maintenance prevents most tension problems, which is crucial for achieving smooth operation and avoiding tension problems.
Wrong Presser Foot Pressure
Your presser foot pressure can make or break your sewing machine tension balance.
Too much pressure crushes delicate fabrics, causing tight stitches and fabric damage. Too little pressure creates loose stitches and fabric feed issues.
Adjust pressure foot height based on fabric thickness—lightweight materials need gentle pressure, while heavy fabrics require firm contact.
Wrong foot type impact affects tension relationship dramatically.
Mastering Tension Adjustment
You’ve tackled the basics of thread tension troubleshooting, but now it’s time to become a tension master who can prevent problems before they start.
Think of mastering tension adjustment like learning to drive—once you understand the fundamentals, you’ll develop that "feel" for your machine that makes every project smoother and more professional.
Regular Machine Maintenance
Your machine needs regular TLC to keep tension problems at bay.
Clean tension discs monthly with a soft brush—lint buildup acts like sandpaper on your threads.
Oil mechanisms per your manual’s schedule, typically every eight hours of sewing.
Check needles weekly for burrs and replace dull ones immediately.
Remove bobbin lint daily, and schedule professional servicing annually for peak performance.
Balanced tension is key, so evaluate stitches carefully after adjustments to ensure peak performance and maintain balanced tension, which requires regular professional servicing.
Using High-Quality Thread
Quality threads act like reliable partners in your sewing journey, delivering Thread Consistency that prevents frustrating sewing machine tension problems.
You’ll notice immediate Breakage Reduction and improved Stitch Quality when you invest in premium materials.
High-quality threads offer superior Fabric Compatibility, reducing thread breakage while maintaining proper thread tension. Consider using stronger threads for sewing heavier fabrics.
These Long-Term Savings outweigh cheaper alternatives that create sewing machine tension headaches.
Advanced Techniques for Tension Control
Taking your tension game to the next level means mastering specialized adjustments.
Free-motion quilting demands loosened upper tension, while metallic thread requires reduced settings to prevent breakage.
Thread weight mismatches need careful balancing, and slippery fabrics often require presser foot pressure changes rather than tension tweaks alone.
- Loosen tension for free-motion quilting to allow smooth thread movement
- Reduce settings when using metallic thread to prevent snapping
- Match thread weights or adjust tension for consistent stitch formation
- Modify presser foot pressure on slippery fabrics before changing tension settings
Frequently Asked Questions (FAQs)
How do you fix thread tension problems on a sewing machine?
Like untangling a stubborn knot, fixing thread tension requires patience and systematic testing.
Start by re-threading your machine with the presser foot up, then test-stitch on scrap fabric and adjust the tension dial incrementally until both sides show balanced stitches.
How do you adjust thread tension?
Start with test stitches on scrap fabric, then adjust your tension dial in small half-number increments.
Check both fabric sides after each adjustment until stitches appear balanced without loops or puckering.
How do you troubleshoot thread problems?
Ninety percent of sewing problems trace back to thread tension issues.
Start troubleshooting by re-threading your machine with the presser foot up, then test stitch on scrap fabric to identify loops or uneven stitches before making dial adjustments to fix tension issues.
Why should you master thread tension adjustment in your sewing machine?
Mastering tension adjustment gives you complete control over stitch quality, preventing loops, puckers, and thread breaks. You’ll create professional-looking projects with strong, balanced seams that won’t unravel.
Do you need a thread tension adjustment?
You’ll know if tension needs adjusting when stitches look loopy, uneven, or bunched on either fabric side.
Check your work regularly—balanced stitches should appear flat and even on both sides without visible loops or thread nests, which is crucial for achieving even stitches.
How do I troubleshoot thread tension?
Use a two-color thread test to check tension visually.
Thread your machine with different colored threads—examine both fabric sides after stitching.
Perfect tension shows top thread on top, bobbin thread underneath, with threads locking in fabric’s center.
How to fix uneven tension on a sewing machine?
Think your machine’s having a rebellious phase?
First, re-thread completely with presser foot up.
Check your tension dial setting, test on scrap fabric, then adjust incrementally while examining both stitch sides.
Why is my straight stitch bumpy?
Bumpy straight stitches usually signal uneven thread tension between your top and bobbin threads. Check your threading, clean lint from tension discs, and test stitch adjustments on scrap fabric first.
Can different fabric weights require tension adjustments?
Picture silk chiffon flowing like water against heavyweight denim—each demands its own tension dance.
Yes, you’ll need adjustments when switching between fabric weights.
Lighter fabrics require less tension to prevent puckering, while heavier materials need more pull for proper stitch formation.
How does thread age affect tension performance?
Old thread becomes brittle and weak, causing frequent breaks that disrupt your machine’s tension balance.
You’ll notice inconsistent stitches and constant re-threading as aged thread loses its strength and flexibility over time, leading to frequent breaks.
Conclusion
Like a perfectly choreographed dance, correcting uneven thread tension requires both partners—upper and bobbin threads—to move in harmony.
You’ve learned the steps to diagnose problems, make precise adjustments, and maintain your machine properly.
Remember, tension issues often mask themselves as other problems, so check your threading, needle condition, and thread quality first.
With practice, you’ll develop the muscle memory to spot and fix tension troubles quickly, and your sewing projects will thank you with professional-looking stitches every time.
- https://www.ageberry.com/sewing-machine-tension-problems-solutions/
- https://citeseerx.ist.psu.edu/document?repid=rep1&type=pdf&doi=7148327ebc031833485f6281a53413f6ff73748d
- https://www.threadsmagazine.com/2008/11/02/understanding-thread-tension
- https://www.fibossensor.com/can-a-thread-tension-sensor-prevent-sewing-machine-breakdowns.html
- https://www.longsew.com/news/exploring-the-benefits-of-sewing-machines-featuring-automatic-tension-adjustment-for-seamless-stitching.html

