This site is supported by our readers. We may earn a commission, at no cost to you, if you purchase through links.
Start with the running stitch—it’s your bread and butter for quick seams. Simply weave your needle in and out through both fabric layers, keeping stitches even.
The backstitch creates stronger joins by overlapping each stitch backward. For edges that won’t fray, use the whip stitch around raw fabric edges.
Thread your needle with about 18 inches of thread, knot the end, and keep your stitches consistent. These fundamental techniques work on most fabrics and don’t require expensive tools. The secret lies in choosing the right stitch for each specific joining task, using the right technique to achieve a stronger join.
Table Of Contents
Key Takeaways
- You’ll master fabric joining with just three essential stitches: running stitch for quick seams, backstitch for maximum strength, and whip stitch for clean edge finishing.
- You’ll achieve professional results by using 18 inches of thread, keeping stitches consistent, and matching your stitch choice to your fabric weight and project needs.
- You’ll create stronger seams by combining techniques like running backstitch for speed with durability, or adding whip stitches to finish raw edges and prevent fraying.
- You’ll ensure lasting results by properly securing thread with anchor stitches, hiding knots within fabric layers, and using appropriate finishing techniques for each fabric type.
Hand Sewing Basics
You’ll need basic materials and techniques to join fabric pieces effectively by hand.
These foundational skills include threading your needle properly, securing your thread with knots, and understanding how different stitches work for various fabric types, which involves complete concepts and techniques.
Essential Stitches
Starting with hand sewing techniques, you’ll master fabric joining methods through eight fundamental stitches.
Each basic sewing stitches offers unique fabric suitability and stitch durability for different projects.
Understanding these simple hand stitches gives you flexibility when sewing fabric together.
From temporary basting to permanent seams, stitch variations provide specific solutions.
Historical context shows these seam finishes have served sewers for centuries, providing a basis for permanent seams and simple hand stitches.
Running Stitch
The running stitch forms the foundation of hand sewing techniques, creating quick fabric joining methods through simple over-and-under needle movements.
Master the running stitch—your gateway to confident hand sewing with simple, rhythmic needle movements.
You’ll master this basic stitch by maintaining 4-5mm spacing between stitches, and it is perfect for basting applications and gathering technique, it prioritizes speed over strength.
While ideal for visible seams and temporary holds, running stitch variations offer versatility when sewing fabric together using simple hand stitches.
Backstitch
Backstitch creates the strongest hand sewing seams by securing each stitch completely.
This historical technique mimics machine stitching, making it perfect for mending techniques and durable fabric joining.
You’ll insert your needle backward into the previous stitch, then forward beyond your thread.
Backstitch durability works on all fabric types, from delicate silk to heavy denim, ensuring your hand sewing tutorial projects last with strongest hand sewing seams and are suitable for durable fabric joining.
Whip Stitch
The whip stitch creates a spiral effect around fabric edges, making it perfect for edge finishing and seam concealment.
You’ll loop the needle over the edge and back through the fabric repeatedly.
This hand sewing technique offers excellent tension control for hemming and preventing fraying.
Historical usage shows it’s ideal for quick fabric joining when you need clean, finished edges.
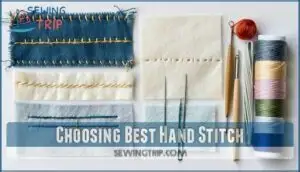
Choosing Best Hand Stitch
You’ll need to match your stitch choice to your specific fabric and project needs for the best results.
Consider factors like fabric weight, seam strength requirements, and whether the stitching will be visible when selecting between running stitch for quick basting, backstitch for durable seams, or whip stitch for clean edge finishing.
Importance Of Effective Communication
When joining fabric pieces by hand, clear instructions make the difference between frustration and success.
You’ll need active listening skills to understand pattern requirements, plus conflict resolution when seams don’t align perfectly.
Effective feedback delivery helps you identify mistakes early, while team alignment with your project goals guarantees your hand sewing fabric techniques produce professional results every time.
Benefits Of Team Collaboration
When you’re hand sewing fabric pieces together, working alongside fellow crafters brings incredible advantages.
Shared expertise helps you master tricky seams faster, while creative solutions emerge naturally through collaboration.
You’ll discover increased efficiency in your sewing projects and experience significant skill development.
This teamwork approach provides a real morale boost, making joining fabric pieces more enjoyable and successful.
Strategies For Conflict Resolution
When selecting your hand stitch method, you’ll face fabric conflicts that require smart resolution.
Choose mediation techniques like backstitch for strong seams or running stitch for quick fixes.
Active listening to your fabric’s needs prevents tension issues.
Negotiation tactics help balance speed versus durability.
Compromise strategies in your fabric joining guide guarantee perfect hand sewing results every time.
Hand Sewing Supplies
You’ll need basic supplies to start hand sewing fabric pieces together successfully. Gather thread, needles, scissors, pins, and fabric pieces before you begin any sewing project.
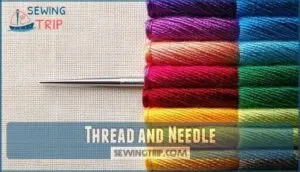
Thread and Needle
Your needle and thread form the backbone of any hand sewing project.
Choose polyester all-purpose thread in matching colors for durability.
Sharp or embroidery needles work best for most fabrics.
Mid-sized needles offer good control for beginners.
Different needle materials affect how smoothly they glide through fabric.
Selecting the right needle impacts stitching is crucial for a successful project.
Master proper threading techniques and knotting methods to prevent frustration during your hand stitch guide journey, and understand the importance of complete concepts in hand sewing.
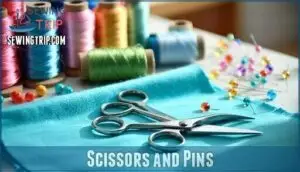
Scissors and Pins
Sharp fabric scissors cut cleanly through material without fraying edges. You’ll need small embroidery scissors for trimming threads and larger shears for cutting fabric pieces.
Choose ergonomic scissors that fit your hand comfortably during long sewing sessions.
Straight pins hold fabric layers together while you stitch. Select glass-head pins that won’t melt under iron heat.
Fabric clips work well on thick materials where pins might leave holes. To find the best tools, consider purchasing very sharp fabric scissors.
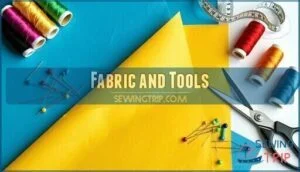
Fabric and Tools
You’ll need two fabric pieces for practice—cotton works great for beginners since it’s forgiving and easy to handle.
Choose contrasting colors so you can see your stitches clearly. Different fabric types require specific needle sizes and thread material combinations.
Quality scissors make clean cuts, while various pin types hold layers securely. Hand sewing supplies are readily available online.
These basic sewing tools form your hand sewing foundation, which includes quality scissors and various pin types to ensure a solid start in hand sewing.
Preparing Hand Sewing
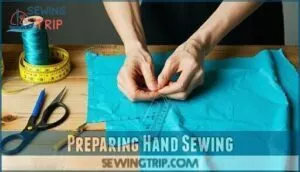
Before you start stitching fabric pieces together, you’ll need to prepare your thread, needle, and fabric properly.
Cut your thread to twice the length from your thumb to your elbow, thread it through your needle.
Mark your stitch line on the fabric’s wrong side with a ruler and pen.
Cutting Thread
Before starting any project, you’ll need to cut thread properly to avoid waste and frustration.
Unravel thread from your spool, measuring twice your elbow-to-thumb distance for ideal thread length.
Use sharp scissors to cut thread cleanly, preventing fraying at the edges.
This cutting angle creates smooth ends that won’t tangle, and proper preparation saves time and reduces thread waste substantially.
Threading Needle
After cutting your thread, it’s time to get it through the needle eye.
Choose a needle size that matches your thread type – thicker thread needs larger eyes.
Threading tools like needle threaders make this easier if you struggle.
Pull the thread halfway through, then fold it for double threading. Tie a secure knot at the ends to prevent the thread from slipping during your hand sewing project.
Marking Stitch Line
You’ll want to mark your stitch line before diving into hand sewing projects.
Use tailors chalk or erasable fabric marking tools on the wrong side of your fabric for accurate line placement.
A ruler helps create straight seam allowance guides with marking precision tips.
These visible stitch lines become your roadmap for consistent sewing stitches and professional fabric crafts results.
Hand Sewing Strong Seams
When you’re joining fabric pieces that need to last, you’ll want to learn the backstitch techniques that create strong, durable seams.
The full backstitch and half backstitch methods secure each thread placement, making them perfect for clothing construction and repairs that won’t come apart with regular use.
Full Backstitch
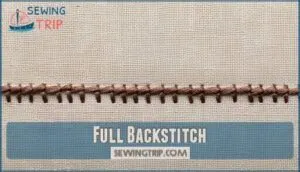
The full backstitch creates your strongest hand sewing seams because you secure each individual stitch completely.
This backstitch technique involves going backward to lock every thread placement, making it ideal for clothing construction and mending techniques.
Historical accuracy shows this method lasted centuries across all fabric types.
Even if one thread breaks, your seam stays intact with superior seam strength, due to the full backstitch technique, which provides strongest hand sewing seams.
Half Backstitch
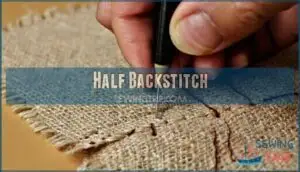
Although half backstitch resembles full backstitch, it creates small gaps between stitches, slightly reducing seam durability.
You’ll find this hand sewing technique faster than full backstitch while maintaining reasonable stitch strength for most fabric types.
Historical use shows it balanced speed comparison needs with adequate fabric seam techniques, and these sewing stitches work well when backstitch precision isn’t critical for your project, providing adequate fabric seam techniques.
Tips for Backstitch
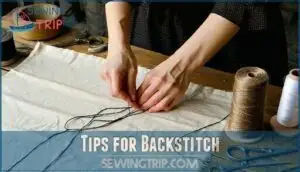
Backstitch durability shines when you maintain consistent stitch length—aim for 1-2mm spacing.
Historical backstitch techniques used one stitch per two fabric threads for maximum strength.
Your fabric choice matters too; linen holds backstitch variations beautifully for centuries.
Keep your needle straight as a guide, and mark guidance lines every few inches on tricky seams for professional results.
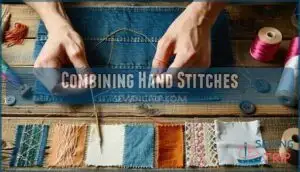
Combining Hand Stitches
You can create stronger, more durable seams by combining different hand stitches together in one project.
This technique allows you to use the running backstitch for speed, add whip stitches to finish edges, and apply stretch stitches where fabric needs flexibility.
Running Backstitch
Running backstitch combines the speed of running stitch with backstitch strength, giving you the best of both worlds for hand sewing projects.
This hybrid technique works small stitches for fabric durability while maintaining faster speeds than full backstitch.
Historical uses include time-sensitive garment construction where seam appearance matters.
These sewing techniques create strong joints without sacrificing efficiency in your sewing stitches.
Whip Stitch Variation
When hemming lightweight fabrics, the whip stitch creates a spiral effect that prevents fabric fraying while maintaining flexibility.
You’ll loop thread around raw edges, controlling tension to avoid puckering.
This versatile technique excels at edge joining without bulk, making it perfect for delicate seam allowance finishes, and helps to achieve professional-looking sewing seams by hand, which is an essential hand sewing method.
Stretch Stitch
Working with stretchy fabrics requires a different approach than regular sewing techniques.
Your stretch stitch becomes the game-changer for knit materials, allowing fabric to retain its natural elasticity after hand stitching.
Master stretch stitch success with these fabric types:
- Jersey knits – T-shirts and casual wear
- Spandex blends – Athletic and swimwear
- Ribbed materials – Cuffs and necklines
- Elastic waistbands – Comfort fit garments.
This sewing technique prevents popped seams when fabric stretches during wear.
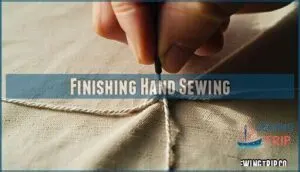
Finishing Hand Sewing
You’ve completed all your stitches, but proper finishing techniques will make your seams look professional and last longer.
Securing your thread with strong knots, hiding thread ends neatly, and folding fabric edges correctly are essential steps that prevent unraveling and create clean, durable seams, using techniques such as strong knots and hiding thread ends to ensure longevity.
Securing Thread
After completing your final stitch, you’ll need proper seam finishing to prevent unraveling.
Leave six inches of thread length, then insert your needle under the nearest stitch. Pull gently to form a one-inch loop, pass the needle through, and pull tight.
This anchor stitch creates a secure knot. Double knotting with thick fabrics guarantees your knot tying holds permanently.
Hiding Knots
A messy knot can ruin your hand sewing projects.
Make a tiny stitch through both fabric layers, then reinsert your needle through the same spot. Pull gently to form a loop, pass the needle through it, and pull tight.
This invisible starts technique guarantees secure closure while maintaining proper thread tension.
Perfect knot placement hides within fabric creases for sewing for beginners.
Folding Fabric
Folding fabric neatly is key to polished hand sewing projects.
Start by double folding the seam allowance inward for clean hem finishes.
Use these tips:
- Press folds with an iron for crisp edges.
- Pin or baste for edge alignment.
- Stitch along folds using steady sewing techniques.
- Trim excess for tidy seams.
- Create mitered corners for professional results.
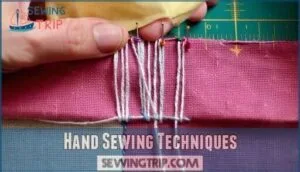
Hand Sewing Techniques
You’ll need specific techniques to handle advanced hand sewing tasks like gathering fabric for ruffles, creating clean hemmed edges, and working with curved seams.
These methods build on basic stitches but require careful attention to fabric tension and stitch placement for professional results, utilizing techniques that demand a good understanding of how to achieve professional results.
Gathering Fabric
Creating beautiful ruffles starts with the running stitch technique.
You’ll pull the thread gently to bunch your fabric into even gathers.
Master this skill by controlling stitch length and thread tension based on your fabric type.
| Fabric Type | Stitch Length | Thread Tension |
|---|---|---|
| Lightweight Cotton | 5mm | Light Pull |
| Medium Weight Linen | 4mm | Moderate Pull |
| Heavy Denim | 3mm | Firm Pull |
Adjust ruffle density by spacing your sewing stitches closer together.
Keep your needle moving steadily for even gathers.
These sewing tips help you create professional-looking fabric ruffles every time.
Hemming Edges
You’ll master hemming edges using catch stitch for professional results.
This crisscross pattern works perfectly for straight hems and curved edges alike.
For blind hemming, pick up just two fabric threads to keep stitches nearly invisible.
Rolled hems create elegant finishes on lightweight fabrics, while decorative hems add visual interest.
Practice mitered corners for crisp, polished looks on tablecloths and curtains.
Sewing Curves
Curves challenge even experienced sewers, but you’ll conquer them with smart sewing techniques.
Start by clipping curves every half-inch to reduce bulk – notches needed for concave curves, small clips for convex ones.
Use bias binding for smooth fitted curves around necklines.
Work slowly, easing fabric gently, and remember that your hand sewing guide success depends on patience and proper curve ease methods.
Frequently Asked Questions (FAQs)
What fabric types work best for beginners?
Cotton and linen fabrics work best for beginners because they’re forgiving, don’t stretch much, and hold stitches well.
You’ll find them easier to handle than slippery silks or stretchy knits while learning.
How do you repair torn seams effectively?
Like mending a friendship after a quarrel, torn seams need careful attention.
You’ll reinforce the damaged area with backstitch, matching thread color perfectly.
Start beyond the tear, stitch through both layers, and finish with secure knots.
Can you hand sew stretch fabrics successfully?
You can absolutely hand sew stretch fabrics.
Use a herringbone stitch or stretch stitch that moves with the fabric’s natural give.
Keep your stitches loose and flexible to prevent breaking when the material stretches.
Whats the ideal workspace setup for sewing?
Every stitch tells a story when you’ve got the right setup.
Choose a comfortable chair with good back support, bright lighting from multiple angles, and organize your tools within arm’s reach for smooth sewing sessions, where every stitch is a testament to your careful preparation.
How do you prevent fabric puckering while sewing?
Keep your fabric tension even by pinning every 2-3 inches along the seam line.
Don’t pull the thread too tight, and use consistent stitch lengths.
Press lightly as you sew to avoid stretching the fabric.
Conclusion
Picture yourself confidently joining fabric pieces with steady, even stitches flowing like a gentle stream across your material.
You’ve now learned the fundamentals of easy hand sewing fabric joining that’ll serve you for years.
Start with simple projects to build your muscle memory, then tackle more complex seams as your skills develop.
Remember, consistent practice makes perfect stitches.
Whether you’re mending torn clothes or creating new garments, these eight essential techniques will keep your fabric connections strong and durable.

