This site is supported by our readers. We may earn a commission, at no cost to you, if you purchase through links.
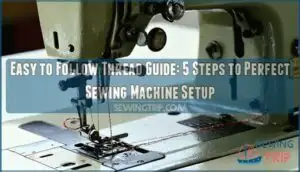
Wind your bobbin first, thread the upper machine from spool to needle, and insert the bobbin correctly. The key is taking it slow and following each thread guide in order.
Most threading troubles come from skipping guides or rushing the process. Your thread should flow smoothly without catching or pulling.
Once you master this easy to follow thread guide, you’ll avoid those frustrating tangles and broken threads that can derail any project.
Table Of Contents
Key Takeaways
- You’ll avoid threading frustrations by following your machine’s numbered guides in order—think of it as connecting the dots from spool to needle without skipping any steps.
- You can prevent most thread breaks and tangles by starting with proper bobbin winding, then threading the upper machine systematically through each guide before securing your thread ends.
- You’ll maintain consistent stitch quality by ensuring your thread guides are clean and properly spaced, since these small parts control tension and prevent snags throughout your sewing process.
- You can troubleshoot common threading problems by checking your needle size matches your thread weight, adjusting tension settings, and using quality thread from reputable brands.
Thread Guide Basics
Thread guides are your sewing machine’s traffic controllers, directing thread from the spool to the needle while keeping everything smooth and tangle-free.
Think of thread guides as the unsung heroes of your sewing machine—small parts that make all the difference between smooth stitching and endless frustration.
You’ll need to understand how these small metal or plastic pieces work together to create the perfect thread path, since proper guide placement makes the difference between professional-looking stitches and frustrating thread breaks.
Thread Path Control
Your sewing machine’s thread path acts like a highway system, guiding thread from spool to needle with precision. Proper thread control prevents costly mistakes and guarantees professional results every time.
Proper threading prevents tangling and guarantees even tension for perfect stitches.
- Thread guide spacing directly affects stitch quality and tension consistency
- Guide material impact determines durability and thread smoothness during operation
- DIY guide solutions can replace missing guides using eyelet screws
- Aftermarket guide compatibility requires matching your machine’s specifications exactly
- Guide wear effects cause tension problems requiring immediate replacement
Guide Placement Importance
Proper thread guide placement makes the difference between frustrating sewing sessions and smooth stitching. Each guide serves as a checkpoint along your thread path, maintaining tension consistency from spool to needle.
When positioned correctly, these small but mighty components guarantee superior stitch quality and machine performance.
| Guide Position | Function | Impact on Sewing |
|---|---|---|
| Upper Guides | Direct thread downward | Controls initial tension |
| Middle Guides | Maintain thread alignment | Prevents skipping stitches |
| Lower Guides | Guide thread to needle | Ensures clean penetration |
| Take-up Lever | Creates thread slack | Balances upper/lower tension |
The correct placement of these guides is crucial for achieving consistent tension and preventing issues such as skipping stitches or poor stitch quality, which can be frustrating and affect the overall machine performance.
Preventing Snags and Tangles
Positioning your thread guide correctly acts like a traffic cop for your thread, preventing chaos before it starts.
Guide alignment keeps thread flowing smoothly while proper needle condition and machine cleaning eliminate rough spots that catch fibers.
Quality thread paired with correct threading process reduces snags substantially.
Regular maintenance stops thread tangles from ruining your perfect stitches.
Maintaining Tension Consistency
Beyond avoiding snags, your thread guide’s real job is keeping tension steady throughout your sewing machine threading process.
When guides wear out or spacing gets wonky, your thread tension goes haywire.
Here’s how to maintain perfect tension consistency:
- Check guide spacing – gaps between guides affect thread flow
- Replace worn guides with aftermarket guides when needed
- Clean tension discs regularly for smooth operation
Threading Process Steps
You’ll master threading your sewing machine by following four simple steps that work like a roadmap for your thread.
These steps guide you from winding the bobbin to securing your thread ends, turning what seems tricky into a routine you can do with your eyes closed.
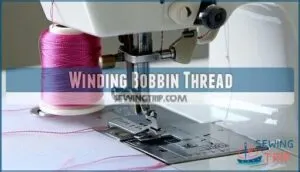
Winding Bobbin Thread
Getting your bobbin ready sets the stage for smooth sewing. Place your thread spool correctly on the spool placement pin, then guide it through the bobbin tension disc.
Your bobbin is the foundation of flawless stitching—get it right, and everything else falls into place.
Insert thread through the bobbin hole and wrap it several times for thread securing. Many sewers find that specialized thread types work best for bobbin winding.
Start winding at moderate winding speed to guarantee even winding without loose spots or overstuffing, ensuring a complete and proper setup for your sewing needs.
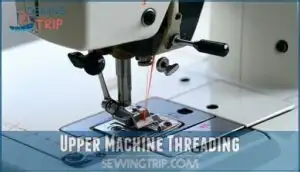
Upper Machine Threading
Threading your sewing machine’s upper section follows a specific path that’s easier than you think.
Start with proper spool pin usage, then guide thread through tension disc settings and around the take-up lever.
Follow your machine’s thread path diagrams carefully, ensuring each thread guide is engaged.
Complete the threading process by passing thread under the needle bar before threading the needle itself.
Correct tension relies on proper thread placement and is crucial for a smooth sewing experience.
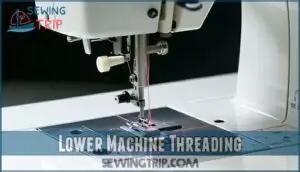
Lower Machine Threading
Now you’ll tackle the bobbin threading process, which involves three key steps.
Start with bobbin winding using your machine’s built-in winder. Then focus on bobbin insertion into the case, ensuring proper bobbin placement in your sewing machine. Finally, guide the thread through the tension slot for ideal thread securing.
- Wind bobbin evenly using controlled speed and proper spool placement
- Insert bobbin correctly following your machine’s side-loading or top-loading design
- Thread through tension slot to maintain consistent lower thread control
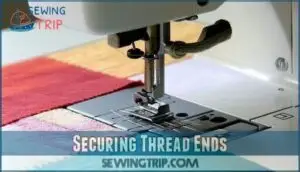
Securing Thread Ends
Why leave loose ends when backstitching methods and knotting techniques can lock your hard work in place?
After completing your sewing machine threading through thread guide placement, secure those thread tails by backstitching three stitches or tying a simple knot.
This seam security prevents unraveling and keeps your project looking professional—it’s like putting the period at the end of your sewing sentence.
Top 5 Thread Guides
You’ll need the right tools and supplies to make your sewing machine setup smooth and successful.
These five essential items will help you thread your machine properly and keep your projects running without frustrating tangles or breaks.
1. Brother 90/14 Sewing Machine Needles Bulk
With 100 Brother 90/14 needles in your toolkit, you’re set for countless sewing projects.
These universal needles work perfectly with medium to light fabrics like cotton, polyester, and silk.
You’ll love how they glide through your Brother or Singer machine without skipping or breaking.
The Japanese manufacturing guarantees high-quality that rivals original equipment needles.
At this bulk price, you won’t worry about running out mid-project, and you can keep a fresh needle handy – it’s the secret to professional-looking stitches every time.
Best For: Hobbyists and seamstresses who frequently sew medium to light fabrics and need reliable, compatible needles.
- High-quality needles with smooth finish for professional-looking stitches.
- Bulk pack ensures a long-lasting supply for frequent sewing projects.
- Universal compatibility with most home sewing machines.
- Not suitable for heavy-duty fabrics or tougher materials.
- Some users miss the older gum wrapper-style packaging.
- Occasional reports of incompatibility with certain Brother embroidery machines.
2. SINGER Assorted Polyester Hand Sewing Thread
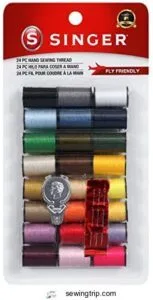
Every seamstress needs reliable thread in their toolkit, and SINGER’s assorted polyester collection delivers exactly that.
You’ll get 12 mini spools with 25 yards each, plus bonus needles and a threader.
The colorfast polyester won’t fade after washing, making it perfect for repairs and patches.
While these spools work great for hand sewing, don’t use them in your machine – they’re designed for hand projects.
The compact size makes this kit travel-friendly for quick fixes on the go.
Best For: Beginners, travelers, or anyone needing a compact, affordable hand sewing kit for quick repairs.
- Compact and travel-friendly design with 12 assorted colors.
- Includes bonus hand needles and a threader for convenience.
- Affordable and great value for small sewing projects.
- Limited thread quantity per spool (25 yards each).
- Not suitable for sewing machines or heavy-duty projects.
- Small spools can be difficult to handle and easy to misplace.
3. Nicapa 12×12 Cutting Mat 3 Pack
While thread guides handle your machine’s upper threading, cutting mats like the Nicapa 12×12 pack keep your fabric prep game strong.
These transparent mats work with Silhouette Cameo machines, giving you precise material placement for pattern cutting. You’ll get three grip levels—standard, light, and strong—plus protective covers to maintain stickiness.
They’re thicker than brand-name alternatives, lasting longer under heavy use. These mats are often made with flexible PVC materials, offering both durability and flexibility.
Store them properly with covers on, and they’ll support your sewing projects from start to finish.
Best For: Crafters and hobbyists using Silhouette Cameo machines who need durable, multi-purpose cutting mats at an affordable price.
- Durable and long-lasting, even with heavy use.
- Includes three grip options (standard, light, strong) for versatility.
- Affordable multi-pack offering great value compared to branded alternatives.
- Initial adhesive may be too strong and require preparation before use.
- Registration issues with print-and-cut tasks may need adjustment.
- Requires proper storage and maintenance to preserve stickiness.
4. US Art Supply Thread Organizer
You’ll love how this 60-spool thread organizer transforms your chaotic thread collection into a neat workspace.
Made from premium beechwood, it holds sewing, quilting, and embroidery spools plus mini cones.
The flip-out legs let you place it on tables or mount it on walls. You can paint or stain the natural wood to match your décor.
Users rave about finding threads quickly instead of digging through boxes, it’s like having a personal thread library at your fingertips, making it easy to access your threads and get to work on your quilting projects.
Best For: Crafters, quilters, and sewing enthusiasts looking to organize and access threads efficiently.
- Holds 60 spools and mini cones, offering ample storage.
- Flip-out legs for tabletop or wall-mount versatility.
- Natural beechwood can be painted or stained to match décor.
- Limited to 60 spools, which may not suit larger collections.
- Assembly needed for wall mounting.
- Not suitable for very large or unconventional spool sizes.
5. Brother CS6000i Sewing and Quilting Machine
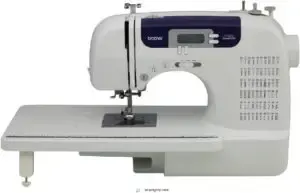
Combining advanced features with user-friendly design, this computerized machine transforms your sewing experience from frustrating to fantastic.
You’ll love the automatic needle threader that eliminates squinting and thread-wrestling battles.
The jam-resistant drop-in bobbin system means fewer tangles and more smooth sailing.
With 60 built-in stitches and an LCD display, you’re getting professional results without the learning curve.
The included accessories and 25-year warranty make this investment worthwhile, like having a patient sewing instructor built right into your machine.
Best For: Beginners and experienced sewists looking for a reliable, versatile, and user-friendly sewing and quilting machine.
- Automatic needle threader and jam-resistant bobbin system simplify sewing.
- 60 built-in stitches with LCD display ensure creative flexibility and ease of use.
- Comprehensive accessories and 25-year warranty add value and long-term reliability.
- Warranty is voided if used or sold outside the US.
- Limited to 120-volt power, restricting international use.
- LCD screen may feel small for some users seeking more detailed displays.
Troubleshooting Thread Issues
When your sewing machine starts acting up with broken threads, twisted tangles, or skipped stitches, you’ll need to troubleshoot these common issues quickly.
Most thread problems stem from simple mistakes like incorrect tension settings, poor thread quality, or skipping threading steps, and you can fix them with a few basic techniques.
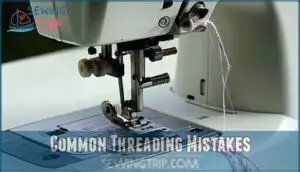
Common Threading Mistakes
Even experienced sewers make mistakes that turn smooth sewing machine threading into a frustrating puzzle. Understanding these common pitfalls saves you time and prevents headaches down the road.
Here are the top threading mistakes that cause thread tangles and breakage:
- Skipping Guides – Missing thread guides creates uneven tension and causes loops
- Wrong Spool Placement – Upside-down spools make thread twist and snag constantly
- Ignoring Tension Settings – Incorrect adjustments lead to frayed thread and poor stitches
To prevent thread breakage, verify proper threading tension settings.
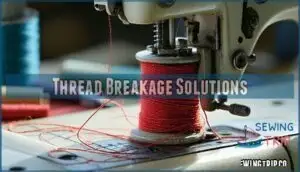
Thread Breakage Solutions
When thread breakage turns your sewing session into a frustrating mess, don’t panic.
Start by checking your needle size against thread weight, then examine thread quality for inconsistencies.
Proper tension adjustment often solves most problems, while guide cleaning removes hidden debris.
If issues persist, rethreading machine completely usually fixes stubborn breakage patterns.
Many users find solutions by adjusting optimal thread settings.
| Problem | Quick Fix | Prevention |
|---|---|---|
| Thread snapping during stitching | Lower thread tension settings | Match needle size to thread weight |
| Shredding at needle eye | Replace with appropriate needle size | Use quality thread from reputable brands |
| Breaking at thread guide | Clean guides thoroughly | Regular guide cleaning maintenance |
| Inconsistent thread flow | Complete machine rethreading | Check thread spool positioning |
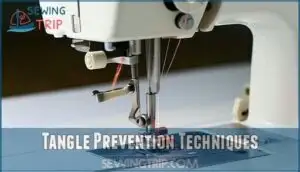
Tangle Prevention Techniques
Why do thread tangles happen when everything seems perfect?
Start with proper spool placement on vertical pins for straight-wound threads.
Keep your presser foot up during threading to open the thread path completely. Regular guide cleaning prevents debris buildup that causes snags.
Check your tension adjustment settings match your thread weight, and monitor needle condition since dull needles create thread nests.
Using quality thread helps in preventing thread breakage.
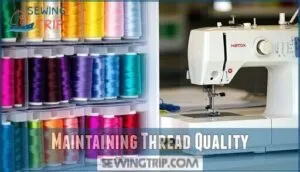
Maintaining Thread Quality
Quality thread storage in cool, dry spaces away from sunlight prevents deterioration that ruins your thread path.
Choose reputable brands with consistent fiber matching for smooth stitching. Regular guide cleaning removes lint buildup affecting thread tension.
Replace old spools before they cause snags. Proper tension settings paired with quality thread create the foundation for professional results every time.
Consider various thread organizers to maintain ideal thread condition and ensure smooth stitching.
Frequently Asked Questions (FAQs)
What is a thread guide on a sewing machine?
Like traffic signs directing cars on a highway, a thread guide acts as your thread’s GPS system.
You’ll find these small metal or plastic pieces directing thread from spool to needle, preventing tangles and maintaining proper tension throughout your sewing project.
How to thread a sewing machine?
Start by placing your thread spool on the pin, then follow the numbered guides or arrows on your machine.
Thread through tension discs, the take-up lever, and finally the needle from front to back, ensuring that you follow the correct sequence to avoid any issues.
Where is the upper thread guide on a sewing machine?
The upper thread guide sits above your needle area, usually near the tension discs.
You’ll spot it as a small metal or plastic hook that directs thread downward toward the needle threading path.
What is a thread path on a sewing machine?
Think of your thread’s journey as a scenic route through town.
The thread path is the specific roadway your thread follows from spool to needle, winding through guides and tension discs for perfect stitches.
What should I know before threading a sewing machine?
Before threading, have scissors, matching thread, and a wound bobbin ready.
Verify the machine’s off, needle raised, and manual nearby.
Check tension settings, use quality thread, and follow diagrams for smooth stitching.
How do I choose the best sewing thread?
Like choosing the perfect dance partner, selecting thread requires harmony between your fabric and project.
Match thread weight to fabric thickness, choose quality brands like Coats and Clark, and verify that colors complement your material for professional results.
Can thread guides be used on vintage machines?
Yes, you can absolutely use thread guides on vintage machines.
Most aftermarket guides work perfectly if they match your machine’s specifications.
You might need to get creative with placement, but they’ll improve your stitching quality substantially, which can be a significant benefit when using vintage machines.
How often should thread guides be cleaned?
While some folks obsess over daily cleaning, you’ll only need to clean your thread guides monthly during regular use.
Simply wipe them with a soft cloth to remove lint buildup that causes tension issues.
What materials make the best thread guides?
Metal thread guides offer superior durability and smooth thread flow, while ceramic guides provide excellent wear resistance.
You’ll find stainless steel guides work best for heavy-duty sewing, though quality plastic guides handle everyday projects just fine.
Are universal thread guides compatible with machines?
Universal thread guides work with most machines if they match your machine’s specifications and mounting style.
You’ll need to check diameter, spacing, and attachment method.
Proper installation guarantees they’ll perform just like original guides, with proper installation being key to their function.
Conclusion
Mastering machine threading transforms your sewing experience from frustrating to fantastic.
You’ve learned the fundamental steps of this easy to follow thread guide, from bobbins winding to securing thread ends.
Remember, patience pays off when following each numbered guide in sequence.
Don’t rush the process or skip steps, as proper threading prevents most common sewing problems.
With consistent practice using these techniques, you’ll thread your machine confidently every time, creating beautiful projects without interruption.

