This site is supported by our readers. We may earn a commission, at no cost to you, if you purchase through links.
 You’re about to give your shirts a personal touch by learning to embroider letters on them.
It’s easier than you think, and with the right tools, you’ll be stitching your name or favorite quotes in no time.
To embroider letters on shirt, start by choosing the right fabric and transferring your design, and then select a font that fits your style.
With practice, you’ll master the art of embroidering letters, and soon you’ll be creating unique, personalized shirts that reflect your personality, and that’s just the beginning of your journey to customize your clothing with embroidering.
Table Of Contents
- Key Takeaways
- Embroider Letters Basics
- Selecting Embroidery Stitches
- Embroidery on Different Fabrics
- Top 9 Embroidery Letters Products
- 1. Iron On Letter Patches for Fabric
- 2. White Iron On Letter Patches
- 3. Letter A Varsity Initial T-Shirt
- 4. Black Iron On Letter Patches
- 5. Iron On Letters for Clothing
- 6. Alphabet Embroidery Kit Stick and Stitch
- 7. Alphabet Number Embroidery Stabilizer Sheets
- 8. Baby Boy Birthday Outfit Clothes
- 9. Iron On White Heat Transfer Letters
- Choosing The Right Font
- Transferring Letters Onto Shirt
- Hand Embroidering Letters
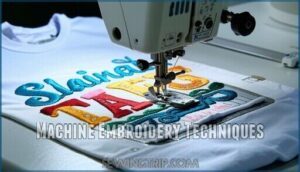
- Machine Embroidery Techniques
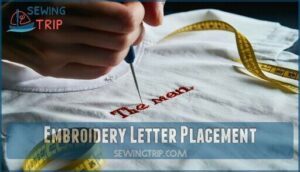
- Embroidery Letter Placement
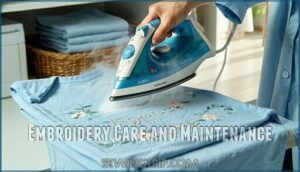
- Embroidery Care and Maintenance
- Frequently Asked Questions (FAQs)
- Conclusion
Key Takeaways
- Get the basics right: Choose the right fabric (like cotton) and use stabilizers to keep it steady and wrinkle-free.
- Start simple: Use beginner-friendly stitches like backstitch or chain stitch for clean, visible letters.
- Transfer designs carefully: Use tools like disappearing ink pens or tracing paper to position and align letters accurately.
- Take care of your embroidered work: Wash embroidered shirts gently, and use a pressing cloth when ironing to protect stitches.
Embroider Letters Basics
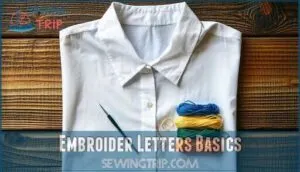
Getting started with embroidering letters on a shirt is easier than you think if you’ve got the right tools and know the basics.
Embroidering letters on a shirt is easier than you think with the right tools and basics.
From choosing fabric to transferring your design, a little preparation goes a long way in creating neat, eye-catching results.
Essential Tools and Materials
To embroider letters on a shirt, gather essentials: fabric, thread, needle, hoop, and stabilizer.
Choose cotton fabric for ease.
Use embroidery floss for vibrant designs and match needle sizes to thread thickness.
Explore different types of floss for unique effects.
Stabilizer options like cutaway or tearaway prevent stretching.
A hoop keeps fabric taut—pick one that fits your design.
Preparation guarantees smooth stitching every time, ensuring a successful embroidery project.
Choosing The Right Fabric
Picking the right fabric is half the battle for shirt embroidery.
Consider these factors:
- Fabric Durability: Choose cotton or blends that hold up well.
- Thread Compatibility: Verify the fabric pairs with your thread choice.
- Stitch Visibility: Light fabrics make stitches pop.
- Texture Considerations: Smooth fabrics like cotton avoid snagging.
Always pair stretchy fabric with an embroidery stabilizer for neat results.
Transferring Letters Onto Fabric
Start with design transfer methods like tracing paper or dressmakers carbon paper for precision. Use a water-soluble pen or disappearing ink for clean marks.
Stabilizer application keeps fabric steady, preventing wrinkles.
Center letters carefully—measure twice, mark once! For accuracy, try letter centering techniques like folding fabric to find the middle.
Transferring letters smoothly guarantees your embroidery shines.
Selecting Embroidery Stitches
Choosing the right embroidery stitch can make or break your design, so it’s worth a little thought.
Whether you’re outlining straight lines, tackling tricky curves, or filling bold letters, there’s a stitch that’ll get the job done perfectly, which is why selecting the right stitch is a complete concept to consider for your design.
Back Stitch for Straight Lines
Back stitch uses simple techniques to create clean, precise straight lines, making it perfect for embroidering letters on a shirt.
Focus on stitch length control to keep your lines even. Maintain fabric tension to avoid puckering—nobody wants wavy letters!
This stitch is versatile, offering straight line accuracy while being beginner-friendly. It’s a go-to for neat, polished stitching results.
Stem Stitch for Curves
For smooth curves, the stem stitch is your go-to hero. It hugs the lines beautifully, making it perfect for handwriting-style fonts.
Adjust your thread weight to match the fabric’s stretch for cleaner results.
Tight curves? Use smaller stitches for precision.
Practice stem stitch variations to tackle curve difficulty levels and master lettering design tips effortlessly.
Chain Stitch for Thick Letters
Chain stitch is perfect for thick letters, creating bold lines that pop.
Use it to outline fonts or fill letters with rows of decorative chain stitch.
For extra flair, try chain stitch variations to add texture.
The thickness makes it ideal for statement designs when you embroider letters on a shirt, it’s simple yet effective!
Embroidery on Different Fabrics
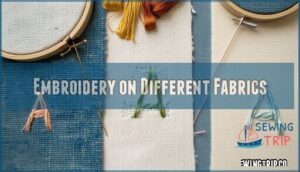
Different fabrics need different approaches to embroidery, and knowing how to handle each one makes a big difference.
Whether you’re stitching on stretchy fabric, soft cotton, or thick felt, the right techniques keep your letters neat and your fabric smooth.
Embroidering on Cotton
Cotton’s a forgiving fabric, making it perfect for embroidery.
To embroider letters on a shirt:
- Pre-wash cotton to prevent shrinking.
- Use cotton embroidery floss for smooth stitching.
- Stabilize with watersoluble stabilizer or fusible interfacing.
- Avoid hoop burn by loosening tension.
- Adjust stitch density based on font choice for clean lines.
Enjoy crisp, professional results!
Embroidering on Stretchy Fabric
Stretchy fabric can be tricky, but it’s manageable with the right stabilizer types and tension control.
Prevent fabric distortion by using fusible interfacing or water-soluble stabilizers. Short stitches add stitch flexibility, adapting to the fabric’s stretch.
Stick to simple font limitations for clean results. Always test embroidery on a swatch first to guarantee your personalized shirts look flawless.
Always remember to handle the fabric with care, as simple font limitations can greatly affect the outcome.
Embroidering on Felt and Crochet
Working with felt or crochet adds charm but needs care.
Felt stabilizers keep fabric steady, while crochet stitches like surface slip or chain stitch work wonders.
Remember these tips:
- Keep felt tension even—no puckering!
- Match yarn weight to your crochet.
- For monogram placement, think visible yet balanced.
- Stitch letters slowly—precision matters.
It’s all about patience!
Top 9 Embroidery Letters Products
If you’re looking to personalize your shirts with embroidered letters, having the right tools and products makes all the difference.
From iron-on patches to complete embroidery kits, these top picks will help you create clean, professional designs with ease.
1. Iron On Letter Patches for Fabric
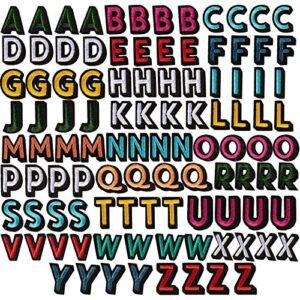
Iron-on letter patches are a game-changer for quick fabric customization.
These colorful, embroidery-thread patches stick easily with just an iron and some heat. They’re perfect for personalizing shirts, backpacks, or even hats—no sewing skills required!
To apply, cover the patch with a thin cotton cloth, press with a medium-hot iron for 30-60 seconds, and let it cool.
For extra durability, consider adding a few stitches. Whether it’s initials or fun designs, these patches make DIY projects simple and stylish.
Best For: DIY enthusiasts and anyone looking to personalize clothing or accessories quickly and creatively.
- Adhesive strength may require additional sewing or glue.
- Limited color variety for more diverse designs.
- Patches may come off after washing if not securely applied.
- Easy to apply with just an iron and cotton fabric.
- Durable embroidery thread ensures long-lasting use.
- Includes 104 patches, offering great value for the price.
2. White Iron On Letter Patches
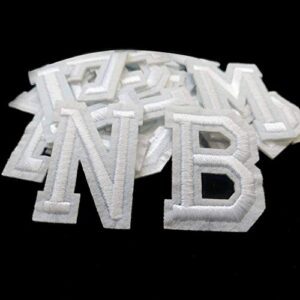
White iron-on letter patches are a quick way to personalize shirts, bags, or hats.
They come in various sizes, including cursive or uppercase options, making them versatile for any project.
To apply, preheat your iron, position the patch, and use a pressing cloth to protect the fabric.
For durability, sew the edges, especially on denim. These patches resist fading and hold up well with care, but adhesive strength may vary—consider adding glue for extra security.
They’re perfect for quick, stylish customization!
Best For: DIY enthusiasts and crafters looking to personalize clothing, bags, or accessories with ease and style.
- Adhesive strength may vary, requiring additional glue for certain fabrics.
- Slight size variations in letters may affect uniformity in designs.
- Not ideal for long-term use without sewing edges for added security.
- Easy to apply with an iron for quick customization.
- Available in various sizes and styles, including cursive and uppercase.
- Durable and fade-resistant when sewn properly.
3. Letter A Varsity Initial T-Shirt
The Letter A Varsity Initial T-Shirt is a stylish choice for personalizing your wardrobe.
Made from soft, breathable cotton, it’s perfect for school spirit, sports teams, or casual outings.
Its classic varsity design adds a nostalgic, sporty vibe, while the slim fit guarantees a modern look—just size up if you prefer a looser feel.
Durable double-needle stitching means it’ll last through plenty of washes, and with free returns and shipping, it’s an easy addition to your collection, making it a risk-free purchase.
Best For: Those looking for a personalized, sporty t-shirt ideal for school, sports teams, or casual wear.
- Soft, breathable cotton for all-day comfort.
- Durable double-needle stitching for long-lasting wear.
- Free returns and shipping for a hassle-free purchase.
- Slim fit may require sizing up for a looser feel.
- Limited color options for some preferences.
- Processing time of 2-8 business days could delay delivery.
4. Black Iron On Letter Patches
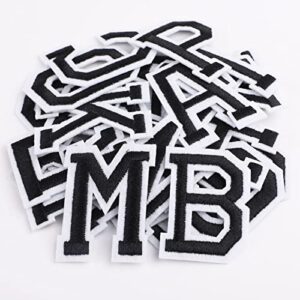
Black iron-on letter patches are a game-changer for quick and stylish personalization.
They’re perfect for jeans, jackets, or even baby clothes, and with their sleek design and versatility, these patches let you refresh your wardrobe without breaking a sweat—no embroidery skills required!
Measuring 1.5 inches, these patches feature a transparent adhesive backing, making application a breeze, and for added durability, sew them on after ironing.
Just preheat your iron, cover the patch with a cloth, and press firmly for a secure bond.
Best For: Fashion enthusiasts, DIY crafters, and anyone looking to personalize or repair clothing and accessories easily.
- Easy iron-on application with transparent adhesive backing.
- Durable and versatile for various fabrics and projects.
- Sleek 1.5-inch design suitable for stylish customization.
- Requires precise temperature settings for proper adhesion.
- May need sewing for extra durability on heavy-use items.
- Not ideal for fabrics sensitive to heat.
5. Iron On Letters for Clothing
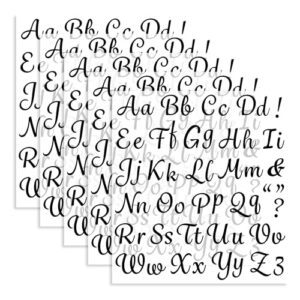
For quick, no-sew personalization, iron-on letters for clothing are a game-changer.
They are made from durable PU material, which allows them to stick firmly to shirts, hats, and more with just a little heat.
Simply cut, arrange, and press with an iron—no embroidery hoops or needles required!
These letters hold up well after washing, making them perfect for DIY projects or small business needs.
Whether you’re customizing a jersey or adding flair to a tote, they’re easy to use and save loads of time, making them a great option for those looking for a quick and easy to use solution.
Best For: DIY enthusiasts, crafters, and small business owners looking for quick, no-sew customization options.
- Durable PU material resists tearing and cracking.
- Easy to apply with minimal tools required.
- Holds up well after washing and drying.
- Requires high heat for proper adhesion.
- Capital letters may need additional cutting tools for precision.
- Deteriorates after multiple washes if not cared for properly.
6. Alphabet Embroidery Kit Stick and Stitch
The Alphabet Embroidery Kit Stick and Stitch makes personalizing shirts a breeze.
With a peel-and-stick water-soluble template, you can skip the hassle of tracing designs.
Just stick it on, stitch, and rinse with warm water to reveal your clean embroidery.
Perfect for beginners, the kit includes colorful floss, needles, and a hoop, ensuring you’re ready to get started.
Whether you’re adding initials to a tote or decorating a tee, this kit keeps things simple and fun—no fancy tools or skills required!
Best For: Beginners and hobbyists looking for an easy and fun way to personalize fabrics with embroidery.
- Includes all necessary tools for starting embroidery projects.
- Water-soluble templates simplify the process and leave no mess.
- Offers creative freedom with various floss colors and designs.
- Templates are single-use, limiting repeated applications.
- Preprinted designs may appear off-centered and require adjustment.
- Instructions can be unclear without watching the tutorial video.
7. Alphabet Number Embroidery Stabilizer Sheets
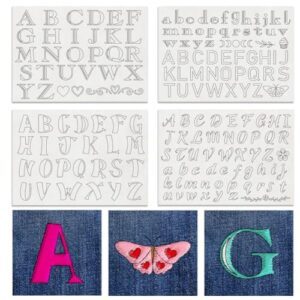
For versatile embroidery projects, Alphabet Number Embroidery Stabilizer Sheets are a game-changer. These water-soluble A4 sheets let you cut, stick, and stitch with ease.
Perfect for beginners and pros alike, they dissolve in warm water, leaving your design crisp and clean. Whether you’re embellishing shirts, hats, or bags, these sheets simplify the process—no need for messy transfers.
Plus, their disposable nature keeps things tidy. With 165 letters and symbols, you’ll have endless creative options. It’s embroidery made simple and satisfying!
Best For: embroidery enthusiasts, craft lovers, and anyone looking for a simple and convenient way to add decorative patterns to their projects.
- Easy to use and suitable for all skill levels, from beginners to experienced embroiderers
- Water-soluble material makes it easy to remove the stabilizer after embroidery, leaving a clean and crisp design
- Offers a wide range of creative options with 165 letters and symbols, and can be used on various fabrics and surfaces
- Limited to 4 A4 sheets per package, which may not be enough for large or complex projects
- May not be suitable for very delicate or thin fabrics, as the adhesive can be too strong
- The price range of $0.68 to $12.34 may be considered expensive for some users, especially for small projects or occasional use
8. Baby Boy Birthday Outfit Clothes
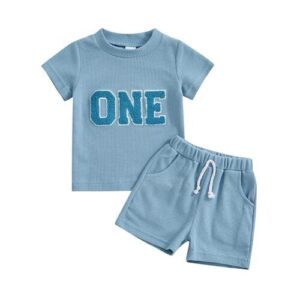
You’re looking for adorable baby boy birthday outfit clothes.
Someone might opt for a cute short sleeve t-shirt and shorts set with embroidery. These outfits are perfect for birthday parties, photo shoots, or daily wear, featuring soft, comfortable cotton blend material and adorable letter embroidery designs.
They make a great choice, with adorable letter embroidery designs, making them a great choice for any occasion.
Best For: parents or guardians looking for adorable and comfortable birthday outfit clothes for their baby boys, suitable for various occasions such as birthday parties, photo shoots, or daily wear.
- Soft and comfortable cotton blend material for all-day wear
- Adorable letter embroidery designs making the outfits perfect for special occasions
- Affordable price with good value for the quality
- Limited to warm weather due to lightweight and breathable material
- Only available in specific sizes, which may not fit all babies
- May not be suitable for formal events due to casual design
9. Iron On White Heat Transfer Letters
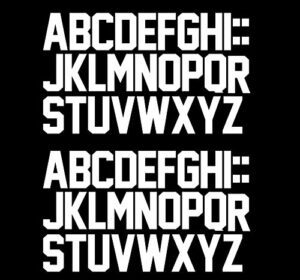
In the case of hassle-free shirt lettering, iron-on white heat transfer letters are a game-changer.
These 3-inch vinyl letters stick like magic with just a household iron, creating sharp, professional results.
Perfect for T-shirts, hoodies, or sportswear, they’re durable, stretchable, and resist cracking or fading.
Just apply medium pressure, let them cool completely, and peel away the backing.
Missing a letter? Get creative—turn a Q into an O! Whether personalizing gifts or team jerseys, these letters simplify customization beautifully.
Best For: Individuals looking to easily and affordably customize clothing with durable, professional-looking lettering.
- Simple application process with household irons or heat presses.
- Stretchable vinyl ensures durability and resistance to cracking or fading.
- Versatile use on various fabrics, from sportswear to casual wear.
- Some packages may have missing letters, requiring improvisation.
- Requires careful adherence to instructions for proper adhesion.
- Cooling time before peeling can take up to an hour.
Choosing The Right Font
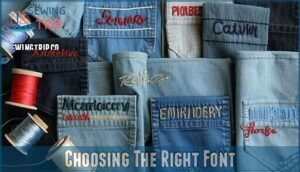
Picking the right font can make or break your embroidery project, so it’s worth a little thought.
Choose a font that shines with simplicity and style
Whether you want something bold, elegant, or modern, the font sets the tone and guarantees your letters are both readable and stylish.
Simple Fonts for Small Letters
When you embroider letters on a shirt, simple fonts shine for small letters.
Their font legibility and minimalist designs make stitching a breeze.
Stick to clean, sans-serif styles for better stitch adaptability.
Keep letter spacing even, and adjust thread thickness for clarity.
A straightforward font style guarantees your work pops, even at a smaller font size, with simple fonts and clean designs.
Serif Fonts for Formal Looks
Serif fonts, like Times New Roman or Georgia, add a touch of elegance to formal projects.
Their classic, decorative edges enhance font legibility while creating traditional styles perfect for monograms or wedding attire.
When you embroider letters on a shirt, keep letter consistency in size and spacing to maintain a polished look.
This font style suits timeless, sophisticated clothing designs.
Consider using free embroidery fonts to expand your design options.
Sans-Serif Fonts for Modern Styles
You choose sans-serif fonts for modern aesthetics, prioritizing font readability.
They’re perfect for minimalist designs and versatile applications, making it easy to embroider letters on a shirt with digital integration, ensuring legibility and a clean look with the right font size.
Ensuring legibility and a clean look is crucial, and with the right approach, it can be achieved easily.
Transferring Letters Onto Shirt
You’re ready to transfer your chosen letters onto a shirt, and there are a few methods to do this.
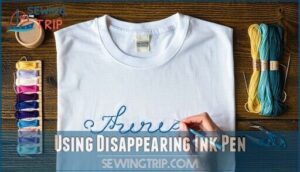
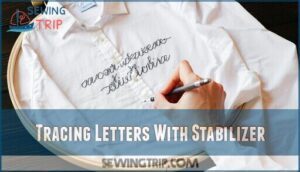
You can use a disappearing ink pen to trace your letters, or try tracing them with a stabilizer for a more precise transfer.
Then, center them for symmetry.
Using Disappearing Ink Pen
You’ll use a disappearing ink pen for ink visibility, making fabric marking easy.
This pen has a limited lifespan, but it’s great for erasing mistakes, and you can explore alternative markers like a watersoluble pen to embroider letters on a shirt with your chosen font.
Tracing Letters With Stabilizer
After marking with a disappearing ink pen, stabilizer helps keep everything smooth.
For tracing, try these steps:
- Pick Stabilizer Types: Tearaway works for cotton; cutaway suits stretchy fabrics.
- Use Transfer Methods: Tracing paper or transfer paper pairs well.
- Verify Fabric Tension: Secure tightly in a hoop.
- Double-check Letter Positioning: Avoid awkward placements.
After marking, consider that you can purchase these pens online. Now you’re ready to embroider letters on shirts and use a disappearing ink pen for your next project, making it easy to start tracing your design.
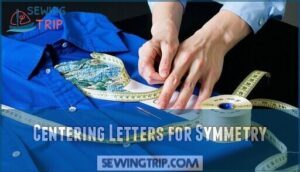
Centering Letters for Symmetry
For a balanced layout when you embroider letters on a shirt, start with precise measurements.
Use mirroring techniques to align letters visually. Center the font by folding the shirt and marking the midpoint.
Make iterative adjustments to guarantee symmetry. Double-check visual alignment before stitching—nobody wants crooked letters!
A little patience here saves you from redoing the embroidery later.
Hand Embroidering Letters
Hand embroidering letters lets you add a personal touch to your shirts with just a needle, thread, and a bit of patience.
Whether you’re stitching a name or a favorite quote, simple techniques and steady hands can bring your design to life, with patience being key to achieving the desired outcome.
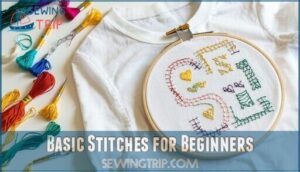
Basic Stitches for Beginners
Starting embroidery for beginners? Focus on simple stitches that build confidence.
- Back Stitch: Perfect for straight lines and outlines.
- Running Stitch: Great for small, block letters.
- Stem Stitch: Adds elegance to curves.
- Chain Stitch: Creates bold, thick lines.
- Satin Stitch: Ideal for filling letters beautifully.
Grab your embroidery floss, hoop, and start stitching! Remember that needle size matters for stitching success.
Advanced Stitches for Complex Designs
Once you’ve mastered basics like the satin stitch and French knot, it’s time to explore advanced embroidery techniques.
Thread painting adds shading, while stumpwork letters create a 3D pop. Goldwork accents bring elegance, and needle lace offers intricate textures.
Dimensional embroidery, like padded stitches, transforms flat designs into art. Embroidery tutorials can guide your creativity with these bold embroidery stitches, and help you master techniques like thread painting.
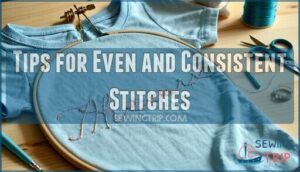
Tips for Even and Consistent Stitches
To keep your stitches even when you embroider letters on a shirt, focus on steady hands and patience.
- Control tension: Avoid pulling thread too tight—it warps fabric.
- Match stitch length: Use small, consistent lengths for clean lines.
- Practice techniques: Scrap fabric is perfect for testing pressure and thread choice.
Perfecting embroidery takes time, so stitch with care!
Machine Embroidery Techniques
Machine embroidery makes adding letters to shirts faster and more precise, but it does take some setup.
With the right fabric, thread, and machine settings, you can create clean, professional designs without breaking a sweat, using machine embroidery for precise results.
Preparing The Fabric and Thread
Prepare your fabric and thread like a pro! Stabilize stretchy fabric with fusible interfacing for smooth stitching. Choose embroidery floss that contrasts beautifully with your fabric for standout designs.
Adjust thread tension for even stitches, and secure your fabric tightly in the hoop. For enhanced stability, consider the use of different types available.
Here’s a quick guide:
| Step | Tool Needed | Purpose |
|---|---|---|
| Fabric Stabilization | Fusible Stabilizer | Prevents fabric distortion |
| Thread Selection | Embroidery Floss | Enhances color coordination |
| Hoop Placement | Embroidery Hoop | Keeps fabric taut |
Setting Up The Sewing Machine
Setting up your embroidery machine is key to smooth stitching.
Follow these steps:
- Thread Tension: Test with the "H test" for balanced tension.
- Needle Selection: Use sharp needles for clean embroidery.
- Bobbin Winding: Make certain it’s evenly wound.
- Stitch Settings: Choose straight or zigzag stitches.
- Machine Maintenance: Clean lint and oil regularly for peak performance.
Proper embroidery also requires tearaway stabilizer application.
Adjusting Stitch Length and Width
Once your machine’s ready, tweak the stitch length and width based on the fabric type and design complexity.
Longer stitches suit bold fonts, while shorter ones enhance intricate letters. Adjust for stitch density to match thread thickness and letter size.
Here’s a quick guide:
| Factor | Recommended Length | Why It Works |
|---|---|---|
| Thin Fabric | 1.5-2 mm | Prevents puckering |
| Thick Fabric | 3-4 mm | Handles bulkier textures |
| Small Letter Size | 1.5-2 mm | Keeps stitches neat |
Embroidery Letter Placement
Getting the placement right for embroidered letters can make or break your design.
Whether you’re centering text or working around seams and pockets, a little planning guarantees your shirt looks polished and professional.
Positioning Letters on The Shirt
Positioning letters on a shirt is like arranging a puzzle—every piece matters.
Focus on these essentials:
- Shirt area: Center designs for symmetry or embrace asymmetry for flair.
- Letter spacing: Keep consistent gaps to avoid clutter.
- Design balance: Align fonts and sizes for a polished look.
Visual hierarchy guarantees your embroidered letters on shirt pop perfectly!
Considering Pockets and Seams
When you embroider letters on a shirt, watch out for pocket obstruction and seam allowance.
These areas can disrupt your design flow if not planned carefully. Keep lettering size proportional to the available space, and explore placement options that avoid bulky seams.
Use a stabilizer to keep stitches even, especially near tricky fabric edges or seams.
Balancing Letter Size and Style
You balance letter size and style by considering font readability, size constraints, and style impact.
Choose a font size that’s clear, not too small, and suitable for your shirt’s fabric choice, guaranteeing your embroider letters on shirt project looks great with small letters and various font styles.
Using high-quality high-quality embroidery floss ensures vibrant colors and smooth stitching, making your project look great.
Embroidery Care and Maintenance
You’ve successfully embroidered letters on your shirt, now it’s time to learn how to care for it.
You’ll want to wash and dry your embroidered shirt gently, and iron it carefully to make sure the embroidery lasts a long time, which is crucial for the embroidery to last.
Washing and Drying Embroidered Shirts
When washing embroidered shirts, use cold water and mild detergent to preserve colors.
Hand wash or use a gentle machine cycle.
Air dry to prevent shrinkage, and avoid using a dryer to protect delicate fabrics and embroidery.
Follow care instructions for long-lasting results.
Ironing and Pressing Embroidered Fabric
When ironing embroidered clothing, consider heat settings, fabric type, and steam usage.
Use pressing cloths to protect stitches.
Follow this ironing order:
- Wrong side
- Right side
- Steam if needed, for best results and to preserve embroidery.
Tips for Long-Lasting Embroidery
To keep your embroidered shirt looking great, consider fabric preparation, thread quality, and stitch tension.
| Care | Tips |
|---|---|
| Washing | Gentle cycle |
| Storage | Cool dry place |
Practice proper washing techniques and store embroidered apparel properly for long-lasting results, using proper care techniques.
Frequently Asked Questions (FAQs)
How to embroider letters on a shirt?
You’ll embroider letters on a shirt using a needle, thread, and stabilizer, starting with simple fonts and backstitch technique for a neat result.
What is embroider lettering?
You’re creating custom designs by stitching letters onto fabric using various techniques, threads, and tools, making each piece unique and personalized with beautiful, decorative lettering.
How to embroider letters by hand?
Start by tracing your design with a disappearing ink pen.
Secure fabric in a hoop.
Use simple stitches like backstitch or chain stitch.
Choose contrasting thread colors, and remember, practice makes perfect for clean, bold letters!
How to stitch a letter in embroidery?
Trace the letter onto fabric, secure it in a hoop, and choose your stitch.
Back stitches are great for clean lines; chain stitches add boldness.
Use contrasting thread for pop, and stitch neatly!
What are the best embroidery stitches for letters?
Back stitch is versatile for outlines, chain stitch adds boldness, and satin stitch fills letters beautifully.
For curves, try split or stem stitches.
Experiment with these to give your embroidered letters personality and flair!
How do you embroider a name?
Embroidering a name feels magical—it transforms fabric with personal charm.
Draw the name using a water-soluble pen, secure the fabric in a hoop, then use simple stitches like back stitch or chain stitch.
How to transfer letters onto fabric for embroidery?
Align your stencil or printed design on the fabric using disappearing ink or chalk.
Tape it down or lightly trace through thin paper, ensuring clear, even markings.
Match placement with your embroidery hoop for precision.
What type of needle should I use for embroidering letters on a shirt?
Think of your needle as the hero of the story—choose a sharp, chenille hand needle.
It pierces fabric easily, handles embroidery floss well, and keeps your stitches looking neat on shirt fabric.
Can I use the same embroidery techniques on hats and shirts?
Absolutely, you can use the same techniques!
For hats, though, you’ll need a smaller hoop and extra patience to avoid bunching.
Stabilizer’s your best friend—keeps everything flat while you stitch like a pro.
What type of stabilizer should I use for embroidering letters on a shirt?
When stitching letters on shirts, a medium-weight cutaway stabilizer is your secret weapon.
It keeps your fabric from puckering, guarantees clean stitching, and stays put after washing—perfect for a lasting and professional look, with a lasting impact on the overall appearance.
Conclusion
Practice makes perfect, and in the case of learning how to embroider letters on a shirt, patience is your best friend.
With the right tools, techniques, and a little creativity, you’ll soon personalize your wardrobe with ease.
Whether you use hand stitching or a machine, each letter adds character to your shirts, making them unique.
Don’t rush—focus on steady progress, and enjoy the process.
Before you know it, you’ll master this timeless craft!
- https://cookingmydreams.com/how-to-embroider-text-on-t-shirts/
- https://crewelghoul.com/blog/2018-5-23-how-to-embroider-words-onto-clothing-stitch-sayings/
- https://www.papernstitchblog.com/how-to-embroider-any-design-on-clothing-by-hand/
- https://www.reddit.com/r/Embroidery/comments/a1cvfk/any_advice_on_hand_embroidering_letters_this_is/
- https://www.youtube.com/watch?v=CmMkgrL2KuU&pp=0gcJCdgAo7VqN5tD

