This site is supported by our readers. We may earn a commission, at no cost to you, if you purchase through links.
A crooked line can unravel hours of careful stitching. One smudged mark, one shifted pattern, and your embroidery project loses its crisp, professional edge before you’ve threaded the first needle.
Most transfer errors happen in the prep stage—distorted fabric, bleeding ink, or a design that drifts halfway through your work. The fix isn’t more patience or a steadier hand. It’s using the right embroidery design transfer sewing tricks at each step.
Test your tools, secure your materials, and match your method to your fabric. These targeted techniques eliminate guesswork and keep your patterns sharp from trace to final stitch.
Table Of Contents
Key Takeaways
- Most embroidery transfer errors happen during prep—distorted fabric, bleeding ink, or shifting patterns—so testing your tools, securing materials, and matching your transfer method to your fabric type eliminates guesswork before you start stitching.
- Water-soluble markers work best on light cotton, chalk pencils excel on dark or textured fabrics, and heat transfer methods require precise temperatures (180–220°C) with no steam to prevent ghosting or fading on heavy materials like denim.
- Fabric tension, proper securing with tape or stabilizers, and working top-to-bottom with clean hands prevent the shifting and smudging that ruin transfer accuracy, while letting marked lines air-dry before stitching protects line integrity.
- Pre-washing fabric boosts transfer adhesion by 40%, and allowing transfer marks to cure for 24 hours before washing improves wash resistance by 15–20%, ensuring your patterns stay crisp through multiple washes and years of use.
Essential Tools for Embroidery Design Transfer
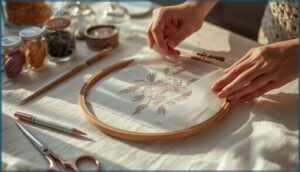
Before you start transferring any design onto fabric, you’ll want to have the right tools close at hand. The materials you pick play a big role in getting crisp, accurate lines. Here’s what you should know before choosing your essentials.
Choosing The Right Marking Pens and Pencils
Choosing the right marking pens and pencils is where your embroidery transfer truly begins. A water-soluble transfer pen offers a safe bet for most cotton fabrics, while a chalk-based marking pencil stands out on dark cloth. For detailed projects, heat transfer pencils provide lasting lines. Test your chosen tool—fabric markers, pen types, pencil selection—against your fabric’s weave for ink durability. When selecting a marker, consider the water soluble options for easy removal and design flexibility.
- Water-soluble transfer pen: easy removal for light and medium fabrics.
- Chalk-based marking pencil: clear marks on dark or textured textiles.
- Heat transfer pencils: durable lines for iron-on methods.
- Permanent fabric markers: best for items meant to last through washes.
Light Boxes and Windows for Tracing
Once you’ve picked your marking tools, it’s all about the right light source. Modern LED light boxes give you steady brightness and unbeatable tracing accuracy—especially if you’re working indoors.
Prefer a window? Window techniques rely on daylight, making fabric visibility a moving target. Both options help you pin down details, but light box ergonomics win for comfort and control.
For best results, understanding the window method techniques is essential.
Types of Transfer Papers and Stabilizers
Once you’ve found your favorite light source, next comes the hunt for the perfect transfer materials. With options like Saral white transfer paper for dark cloth, carbon papers, wax transfers for smooth lines, or iron-on methods for thick fabric, there’s a solution for any project.
Watersoluble stabilizer or tracing paper offers flexibility, while specialized stabilizer types keep your stitches sharp and fabric in check.
Tracing Techniques Using Light Sources
Tracing embroidery designs is all about seeing the lines clearly and keeping your fabric steady. There are a few trusted methods for using light to guide your marks.
Let’s walk through your best options for neat, accurate tracing.
How to Trace Designs on Thin Fabrics
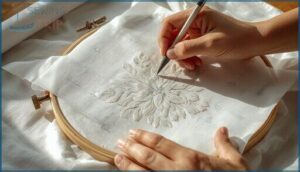
Ever struggled to make your design show up on sheer cotton or voile? Utilize a light source—the sun through a window or a steady LED light box. For true embroidery accuracy, watch these essentials:
- Thin Fabric Prep: iron first
- Use the right Tracing Tools
- Mind your Fabric Tension
- Opt for transfer paper or tracing paper
- Try watersoluble stabilizer
Securing Fabric and Design for Accurate Tracing
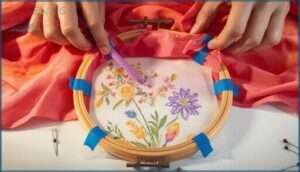
Fabric tension sets the tone—stretch your fabric to a gentle tautness in the hoop for crisp tracing accuracy. Anchor your pattern and fabric with low-tack tape or adhesive stabilizers to stop shifting. Trace with a marking pencil under a reliable light source.
Transfer paper or stabilizer gives rebellious designs extra grip, ensuring perfect embroidery alignment, especially where the weave wants to wander.
Tips for Using Chalk, Pencil, and Water-Soluble Pens
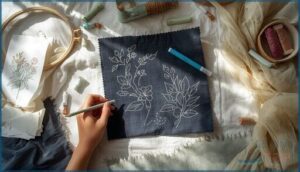
Precision starts with picking the right tool: chalk markers shine on dark cotton, lending high-contrast outlines that brush away with ease.
Reach for a marking pencil or ceramic pencil for extended sessions—lines last, tips rarely dull, and cleanup is fast.
Water soluble pens leave crisp blue or white traces that dissolve in cool water, making ink removal practically simple after stitching.
Preventing Shifting and Smudging During Tracing
Mastering transfer security sets the tone for impeccable tracing accuracy from the first line. To lock in clean marks and prevent shifting or smudge risks, use these five steps:
- Balance fabric tension with 25–30 N·cm hoop pressure.
- Tape tracing paper at all corners.
- Work with clean, dry hands.
- Trace top to bottom.
- Air-dry marked lines before stitching.
Heat and Iron-on Transfer Methods
Transferring embroidery designs with heat or iron-on methods opens up new options, especially for working with heavier fabrics. It’s simple once you know the right tools and tricks.
Here’s what you need to watch for as you explore your next set of options.
Using Heat Transfer Pencils and Pens
Let’s strip away the mystery: your heat transfer pencil or pen is built for control. Pick a fine-tipped tool and trace your design in reverse on light paper—think iron-on transfer method, not guesswork.
For bold, lasting lines, set your iron between 180–220°C; steady, dry heat lets transfer ink melt seamlessly onto natural fibers, not into disappointment.
Iron-on Pattern Transfers for Thick Fabrics
Ever found your crisp iron-on lines ghosting or fading on that favorite heavy denim? The trick is all in the numbers: 320–350°F for 15–20 seconds, no steam. Cotton and denim shine here—providing peak pattern clarity and transfer durability.
Anchor everything—heat tape or hoops prevent shifting, ensuring even adhesion where heat transfer methods demand real consistency.
Mirroring Designs for Heat Transfers
Hold up the mirror—or risk wasted vinyl. Mirroring designs for heat transfer, especially HTV, isn’t just a safety net—it’s error prevention in action.
All major software functions offer this: flip before cutting for perfect results. Mirror images guarantee your lettering and logos always face forward on any fabric, cutting both frustration and material cost with every iron-on or heat transfer pen.
Covering Permanent Lines With Embroidery
Once your embroidery design is transferred, permanent marker lines can feel like a tightrope act for clean fabric decoration. Here’s where thread color selection, stitch density, and fabric preparation shine.
By layering dense stitches, choosing darker threads, and prepping fabric with stabilizer, you control line concealment. Smart embroidery techniques hide markings, turning a possible mishap into flawless artistry.
Alternative Transfer Methods for Challenging Fabrics
Sometimes, the classic methods won’t cut it, especially when you’re working with dark or textured fabrics. That’s when it pays to have a few alternative tricks up your sleeve.
Here’s what to keep in mind when a simple trace just won’t work.
Carbon and Wax-Based Transfer Papers
When tough or dark fabrics block your view, carbon and wax-based transfer papers step in. These sheets hold pigment that lifts onto fabric as you trace—dark carbon for light materials, white or yellow for darker ones.
Wax variants last through dozens of uses and stay visible for over 100 stitching hours, though they’re too heavy for sheer silks. Non-waxed versions wash out cleanly after two or three cycles, giving you flexibility without permanent marks.
Pouncing and Prick-and-Punch Techniques
When tracing fades or fabrics fight you, prick technique takes over. Needle-punch tiny holes along your design lines on vellum tracing paper, spacing them 2–3 mm apart for transfer accuracy.
Secure the pricked template to fabric, then swirl pounce powder through the holes using a felt pad—black for light materials, white for dark. Brush off the excess and fix the dotted outline with a pencil before the pounce methods fade, locking in your pattern for precise stitching.
Transferring Patterns to Dark or Textured Fabrics
Dark fabrics and textured weaves demand a shift in fabric selection strategy. White carbon paper or wax-free DMC transfer paper delivers high contrast on navy cotton or charcoal linen, while Kores brand sheets handle dense weaves with repeat tracing.
Dressmaker’s chalk pencils with 0.9 mm ceramic leads mark sharply on pile surfaces.
For transferring embroidery patterns on dark fabrics, tape your design to a rigid board, press wrinkle-free cloth flat, then trace with firm stylus pressure—embroidery pattern transfer methods that rely on surface contact beat lightbox tracing every time.
Using Water-Soluble Stabilizer Rolls
When sheer voile or stretchy knits fight your best transfer techniques, flip to the watersoluble stabilizer method. Cut your stabilizer roll to hoop size, smooth it over fabric, then mark patterns using a watersoluble transfer pen.
This precision stitching approach locks designs in place—no shifting—and dissolves completely in lukewarm water within three minutes, leaving zero residue on finished embroidery.
Tips and Tricks for Accurate Embroidery Transfers
You’ve learned the core transfer methods—now it’s time to master the execution. Even the best technique falls flat without attention to detail and preparation.
Here’s how to nail every transfer, whether you’re working with delicate silk or heavy canvas.
Avoiding Common Transfer Mistakes
Most transfer mistakes boil down to one thing: rushing through prep work. Testing your tools and taking your time can prevent over 60% of common errors that derail your embroidery design. Fabric distortion, ink bleeding, and alignment issues happen when you skip critical setup steps.
Watch out for these frequent transfer errors:
- Ink bleeding from markers: Test your watersoluble transfer pen on fabric scraps first—untreated cotton shows 42% more bleeding than pre-washed material
- Heat damage: Keep iron temperatures between 360–430°F; going above 375°F scorches polyester 73% of the time
- Fabric warping during tracing: Secure your design sheet with tape to cut pattern drift by 70%
- Residue removal struggles: Use kneadable putty on carbon transfer paper marks—it eliminates 80% of visible traces without damaging fibers
- Misalignment from loose hooping: Tighten your hoop properly to reduce design shifting by 33%
Heavy pen pressure enlarges traced lines by 0.6 mm on average, so use a light touch when working with any transfer methods.
Ensuring Design Visibility on All Fabrics
Fabric contrast makes or breaks design visibility—67% of pros switch marking colors to match their material. Your color choice matters more than you think: water-erasable markers excel on light fabrics, while tailor’s chalk dominates dark textiles.
Test your fabric marking tools first—poor contrast causes 58% of visibility failures when transferring patterns onto dark fabrics.
Texture effects visibility too, dropping 42% on fleece without stabilizer options like Solvy toppers, which maintain 90% design clarity using light sources and proper transfer methods for tracing onto fabric.
Best Practices for Clean, Lasting Transfers
Pre-washing boosts transfer adhesion by 40%—that’s why fabric preparation matters before you mark anything. Air-dry your material to cut color loss by 18% across ten washes. Pre-heat fabric before applying heat transfer pens to sharpen lines by 27%. Tape both design and tracing paper to prevent 92% of shifting errors.
Let transfer paper or fabric marker lines cure for 24 hours before washing to improve wash resistance by 15–20%, keeping your embroidery pattern crisp and smudge prevention reliable for years.
Frequently Asked Questions (FAQs)
Can embroidery transfers be removed after stitching?
It depends on the transfer method you used. Water-soluble markers and Frixion heat-erasable pens vanish completely with proper soaking or heat, achieving 90-95% success rates.
Permanent markers and heat transfers resist removal, often leaving transfer residue or causing fabric damage during restoration attempts.
How do you transfer multiple colors accurately?
You’ll need registration marks and grid lines in your digitizing software to align each layer precisely. Use erasable transfer pens like FriXion for clean registration, and stabilize your fabric with proper hooping before ironing on transfer paper or tracing paper patterns.
What fixes bleeding or fading transfer marks?
Think of transfer marks as footprints in sand—tide and time can erase them, but you’ve got tools to restore the path.
Retracing with chalk pens, lightbox methods, or water-soluble markers refreshes faded lines, while gentle alcohol dabbing removes bleeding marks without harming your fabric.
Can you reuse iron-on transfer patterns?
Most iron-on transfer patterns are single-use due to paper backing and dye-based inks.
However, high-quality pigment inks on heat-resistant backings can handle 2-3 applications if you control heat and pressure carefully, maintaining iron on transfer durability across compatible fabrics.
How do curved designs transfer without distortion?
Imagine a perfect circle drawn on paper—then watch it warp into an oval when pinned unevenly to cloth.
Curved designs stay true when you combine precision tracing methods with fabric tension control and stabilizer techniques. Use a heat transfer pencil on tracing paper for accurate curved line transfer, then secure with proper stabilizers.
This distortion prevention approach maintains embroidery design transfer integrity even on challenging weaves.
Conclusion
Perfect precision transforms plain patterns into polished projects. Your embroidery design transfer sewing tricks now give you control over every line, every mark, every stitch before it begins.
No more guesswork—just clean transfers that hold their accuracy from first trace to final thread. Test your materials, match your method to your fabric, and watch crooked lines disappear.
You’ve earned the confidence that comes from mastering the foundation. Now your designs stay exactly where you put them.
- https://www.bethcolletti.com/blog/transfer-embroidery-patterns
- https://peacockandfig.com/2018/01/top-three-transferring-embroidery-patterns/
- https://www.digitizingusa.com/showblog/FACTS-AND-FIGURES-ABOUT-EMBROIDERY-DIGITIZING
- https://maggieframestore.com/blogs/maggieframe-news/mastering-embroidery-stitch-count-estimation-free-tools-and-accurate-methods
- https://www.craftsy.com/post/how-to-use-a-tracing-wheel


