This site is supported by our readers. We may earn a commission, at no cost to you, if you purchase through links.
From DIY hangers to repurposed household items, you’ll discover ingenious Embroidery Stabilizer storage ideas that’ll transform your space from cluttered to calm.
With a dash of creativity, you’ll be maximizing storage, streamlining your workflow, and focusing on the fun part – creating stunning embroidery masterpieces!
You’re about to revolutionize your sewing space, and I’m excited to share these game-changing ideas with you.
Get ready to stitch with serenity!
Table Of Contents
- Key Takeaways
- Creative Embroidery Stabilizer Storage Solutions
- Labeling and Identifying Stabilizers
- Commercial Storage Options for Embroidery Stabilizers
- Efficient Embroidery Workspace Setup
- Thread Nets and Hanging Organizers
- Storage Solutions for Various Stabilizer Types
- Tips for Organizing Stabilizer Rolls
- Modifying Commercial Storage Solutions
- Alternative Uses for Embroidery Stabilizer Storage
- Overcoming Embroidery Stabilizer Storage Challenges
- Frequently Asked Questions (FAQs)
- Conclusion
Key Takeaways
- You’re about to become the ultimate embroidery rockstar with creative stabilizer storage solutions that transform your sewing space into a haven of organization and productivity! From DIY hangers to repurposed household items and clever IKEA hacks, you’ll discover ingenious ways to store your stabilizers and maximize storage efficiency.
- Labeling and identifying your stabilizers correctly is a total game-changer! By getting your stabilizers organized and easily identifiable, you’ll save time, reduce frustration, and open up a world of efficient and enjoyable embroidery. Think of it as giving your stabilizers name tags at a party – no more awkward "What type are you again?" moments!
- You can repurpose your embroidery stabilizer storage solutions for other sewing essentials, like Cricut Vinyl rolls, quilting supplies, or fabric scraps! With a little creativity, you can breathe new life into your storage systems and create a harmonious, clutter-free sewing space that makes you feel like a total boss.
- Don’t let small spaces cramp your embroidery style! With vertical storage, DIY dividers, and multi-purpose bins, you can conquer space constraints and keep your stabilizers organized and easily accessible. Remember, it’s all about maximizing your space and minimizing clutter – your future self will thank you for it!
Creative Embroidery Stabilizer Storage Solutions
You’re about to become the ultimate embroidery rockstar with these creative stabilizer storage solutions.
These solutions will transform your sewing space into a haven of organization and productivity!
Get ready to say goodbye to stabilizer chaos and hello to a stress-free embroidery experience.
We’ll explore ingenious ways to store your stabilizers, from DIY hangers to repurposed household items and clever IKEA hacks.
DIY Stabilizer Hangers for Organization
Get creative with DIY stabilizer hangers and take your embroidery game to the next level! Upcycle materials like fabric, ribbon, or even old CDs to craft unique hanger designs. Modify existing hangers or use IKEA SKADIS pegboards to maximize storage efficiency. With a little ingenuity, you’ll be hanging your stabilizers in style and loving every minute of it!
Repurposing Household Items for Storage
Get creative with household items to tame your stabilizer stash! Repurpose wine racks, shoe boxes, or toilet paper rolls to store your embroidery stabilizers. Even magazine holders can become mini stabilizer hubs. Think outside the box (or jar!) and turn clutter into clever storage solutions. Your sewing space – and your sanity – will thank you!
Using IKEA SKADIS Pegboards and Accessories
You’re on a roll with repurposing household items! Now, let’s hack the IKEA SKADIS pegboard for ultimate stabilizer storage. Grab some DIY accessories like hooks, bins, and baskets to create a customized embroidery stabilizer rack. Max out your space optimization with this game-changing solution. Say goodbye to clutter and hello to a streamlined embroidery organization system!
Labeling and Identifying Stabilizers
You’re about to become best friends with your embroidery stabilizers – and it all starts with labeling and identifying them correctly! By getting your stabilizers organized and easily identifiable, you’ll save time, reduce frustration, and open up a world of efficient and enjoyable embroidery.
Benefits of Consistent Labeling
Now that you’ve got your stabilizers neatly stored, let’s talk labels!
Consistent labeling is the secret sauce to a smooth-running embroidery operation.
You’ll save time, dodge costly mix-ups, and keep your workflow humming like a well-oiled machine.
Think of it as giving your stabilizers name tags at a party – no more awkward "What type are you again?" moments.
Trust me, your future self will thank you!
Types of Stabilizers and Their Uses
Now that you’ve got your labels sorted, let’s talk stabilizers!
You’ve got four main types to wrangle: washaway, heataway, tearaway, and cutaway.
Each comes in different weights, like a buffet of fabric support.
Think of them as your embroidery’s backbone – choosing the right one can make or break your project.
Testing different stabilizers is key to finding your perfect match.
It’s like dating, but for fabric!
Common Labeling Mistakes to Avoid
Now that you’re familiar with stabilizer types, let’s tackle common labeling pitfalls.
Don’t let stabilizer type confusion trip you up!
Incorrect weight labeling can throw your project for a loop, while duplicate label issues might have you seeing double.
Missing stabilizer details? That’s a recipe for disaster.
Labeling inconsistencies are like playing embroidery roulette—exciting, but risky!
Stay sharp and keep your labels clear to avoid these stitching snafus.
Commercial Storage Options for Embroidery Stabilizers
Ready to take your embroidery stabilizer storage to the next level? Let’s explore some fantastic commercial options that’ll transform your sewing space from chaotic to organized in no time.
1. Vinyl Organizer Storage Rack
Ready to take your stabilizer storage game up a notch?
Say hello to vinyl organizer storage racks!
These nifty contraptions are like a dream come true for embroidery enthusiasts.
You’ll love how they fit snugly in small spaces, even next to your desk.
Plus, they’re a breeze to set up and can hold multiple rolls per slot.
Talk about a space-saving powerhouse!
2. Pegboard Baskets and Shelves Set
Ready to take your embroidery game to the next level? Say hello to pegboard baskets and shelves! These nifty storage solutions are like a Swiss Army knife for your sewing space. Here’s why you’ll love them:
- Easy installation: No need to break a sweat – they’re a breeze to set up!
- Universal fit: They play nice with most pegboards, so you’re covered.
- Stable design: These bad boys lock in tight, keeping your precious stabilizers safe and sound.
Efficient Embroidery Workspace Setup
Ready to transform your embroidery space into a streamlined haven of creativity? Let’s explore how to set up an efficient workspace that’ll save you time, reduce strain, and maximize every inch of your sewing area – no matter how small it might be.
Maximizing Storage Space in Small Areas
Don’t let a small space cramp your embroidery style!
With a little creativity, you can turn even the tiniest corner into a stabilizer storage haven.
Think vertical storage – it’s your new best friend.
Install DIY shelves or compact cabinets to make use of every inch.
Stackable containers are a game-changer, and multi-use items will be your secret weapon.
Ergonomic Workspace Layout for Reduced Strain
Ready to stitch without the aches? Let’s whip your workspace into shape! An ergonomic setup isn’t just fancy talk—it’s your ticket to pain-free embroidery bliss. Here’s how to create your comfort zone:
- Adjust your desk height so your elbows rest at 90 degrees
- Invest in an ergonomic chair that supports your lower back
- Position your embroidery machine at eye level to avoid neck strain
Time-Saving Tips for Embroidery Setup
Now that your workspace is comfy, let’s supercharge your embroidery setup! You’ll be stitching up a storm in no time with these time-saving tricks. Check out this handy table for quick tips:
| Tip | Time Saved | Stress Level |
|---|---|---|
| Pre-cut stabilizers | 10 minutes | Low |
| Batch hooping | 15 minutes | Medium |
| Thread color sorting | 5 minutes | Low |
| Preset machine files | 8 minutes | Very low |
Thread Nets and Hanging Organizers
Say goodbye to tangled stabilizer rolls and hello to a tidy sewing space! Thread nets and hanging organizers are your secret weapons for keeping embroidery stabilizers neat, accessible, and ready for action.
Preventing Unrolling and Tangles
Now that your workspace is set up, let’s tackle a common headache: unruly stabilizer rolls.
You know the drill – you turn your back, and suddenly your neatly organized rolls have transformed into a tangled mess.
Fear not! Thread nets are your secret weapon.
These little lifesavers slip over your rolls, keeping them tidy and tangle-free.
It’s like giving your stabilizers a cozy sweater that keeps them in line!
Customizable Thread Net Options
Thread nets are a great way to prevent tangles.
But you’re not stuck with one-size-fits-all options.
Why not get creative and make your own custom thread nets?
You can tailor them to your specific needs, choosing materials like soft tulle or mesh fabric.
Experiment with different sizes to accommodate various stabilizer rolls.
It’s like giving your stabilizers their own cozy sweaters – practical and adorable!
Hanging Organizers for Embroidery Stabilizers
- Space-saver extraordinaire: Free up valuable floor space
- Visual feast: Easily spot the stabilizer you need
- Customizable comfort: Adjust to fit your unique collection
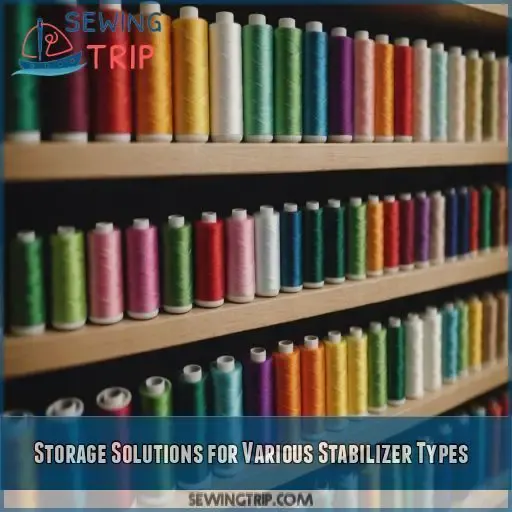
Storage Solutions for Various Stabilizer Types
You’ve mastered the art of embroidery, but are your stabilizers still in a jumbled mess? Let’s explore some clever storage solutions for different stabilizer types that’ll keep your sewing space organized and your creative juices flowing.
Washaway Stabilizer Storage Tips
Washaway stabilizer is a delicate material that needs special care.
Keep it dry and cool to prevent accidental dissolution.
Consider using airtight containers or resealable bags with a clear labeling system.
For compact storage, try rolling smaller pieces and securing them with rubber bands.
Repurpose old CD spindles for neat roll organization.
Heataway Stabilizer Storage Solutions
Heataway stabilizers need special care.
Why not create a cozy home for them?
Try using a hanging shoe organizer with heat-resistant pockets.
It’s like a spa day for your stabilizers!
Or, repurpose an old metal filing cabinet.
Those drawers are perfect for keeping heataway rolls cool and collected.
Tearaway and Cutaway Stabilizer Storage Ideas
Let’s talk about tearaway and cutaway stabilizers. These are essential tools in your embroidery arsenal and deserve some special attention.
Why not try a DIY storage solution for your stabilizers? A repurposed paper towel holder is perfect for larger rolls.
For smaller pieces, consider a shelf organizer with labeled compartments. Proper labeling is key – you don’t want to grab the wrong stabilizer mid-project and end up with a mess!
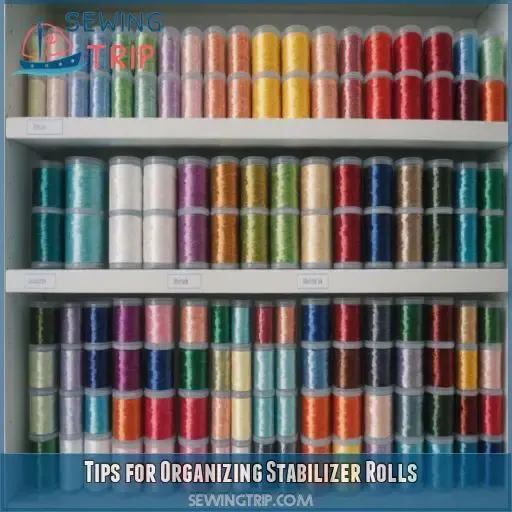
Tips for Organizing Stabilizer Rolls
Are you tired of wrestling with tangled stabilizer rolls every time you start a new embroidery project? Get ready to transform your sewing space with these game-changing tips for organizing your stabilizer rolls, making your embroidery sessions smoother and more enjoyable than ever before.
Identifying Stabilizer Rolls for Easy Retrieval
Ready to tame your stabilizer chaos? Let’s get those rolls in order!
Start by color-coding your collection. It’s like giving each type its own superhero costume.
Whip up some snazzy label templates to slap on those rolls. Don’t forget to note the roll size; you’ll thank yourself later.
Create a visual feast with storage labels that pop. Your future self will high-five you for this organized bliss!
Preventing Overlapping and Tangles
Tired of wrestling with tangled stabilizer rolls? Here’s your game plan!
Invest in roll dividers to keep each type separate – it’s like giving your stabilizers their own little apartments.
Try vertical storage to maximize space and minimize overlap.
And here’s a pro tip: use clear storage containers so you can spot what you need at a glance. No more stabilizer scavenger hunts!
Creative Roll Storage Options
Ready to take your roll storage game to the next level?
You’re in luck!
Let’s explore some creative options that’ll make your stabilizer rolls sing.
From DIY roll storage to wall-mounted solutions, we’ve got a bunch of ideas.
Repurpose those old containers or try out some nifty roll storage hacks.
With these compact ideas, you’ll be the master of your embroidery domain in no time!
Modifying Commercial Storage Solutions
You’re about to get creative and take your embroidery stabilizer storage to the next level by modifying commercial solutions to fit your unique needs. With a few clever tweaks, you can turn off-the-shelf storage solutions into tailor-made organizers that keep your stabilizers tidy, your workspace clutter-free, and your creativity soaring.
DIY Hanger Attachments for Customization
Get creative with DIY hanger attachments and turn commercial storage solutions into your dream embroidery station!
Use materials like clear vinyl, fabric scraps, or even old CDs to craft custom hanger designs.
Add hooks, clips, or magnetic strips for extra functionality.
Make sure your creations are strong with sturdy stitching or hot glue.
Your perfect stabilizer storage is just a DIY away!
Adding Personal Touches to Storage Solutions
You’ve picked a storage solution, now it’s time to make it yours. Adding personal touches will make your stabilizer storage system truly shine. Think color coding, fun labels, and upcycling old items. Get creative and make it your own.
- Use bright markers to color code your stabilizers by type or weight
- Add cute labels or stickers to your storage bins for a pop of personality
- Repurpose old jars or containers to store small stabilizer rolls or notions
Adapting IKEA SKADIS Pegboards for Stabilizer Storage
Get creative with your stabilizer storage using IKEA SKADIS pegboards. Who says you can’t hack a great thing? With a few simple mods, you can turn this versatile board into the ultimate stabilizer storage hub.
| SKADIS Pegboard Hacks | Stabilizer Roll Storage | SKADIS Accessories |
|---|---|---|
| Add hooks for hanging | Store rolls by type and size | Baskets for small rolls |
| Use bins for small rolls | Label each hook for easy access | Pegs for large rolls |
| Utilize shelves for supplies | Keep frequently used rolls front | Customizable bins |
| Incorporate a cutting mat | Store scissors and rotary cutters | Hanging organizers |
| Make it mobile with casters | Take your storage wherever | DIY mods welcome |
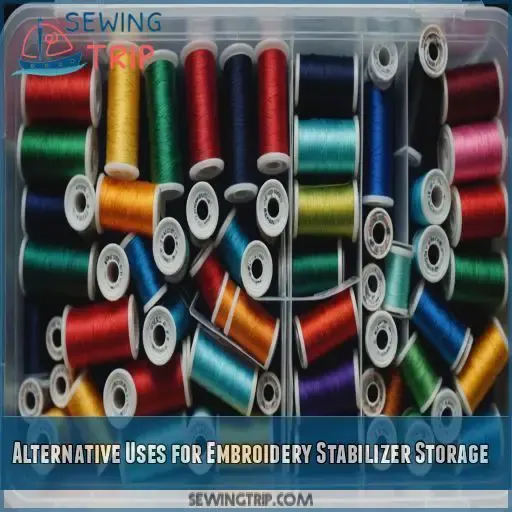
Alternative Uses for Embroidery Stabilizer Storage
You’ve got your embroidery stabilizers neatly organized, but have you ever thought about repurposing those storage solutions for other sewing essentials? From Cricut vinyl rolls to quilting supplies, you can breathe new life into your storage systems and create a harmonious, clutter-free sewing space.
Storing Cricut Vinyl Rolls
You’ve got your commercial storage solutions dialed in. Now, let’s tackle those Cricut vinyl rolls.
Who says embroidery stabilizer storage can’t double as vinyl roll organization?
Repurpose your DIY vinyl racks or use storage solutions like the Vinyl Storage Organizer to keep those pesky rolls tidy.
Follow roll storage tips to prevent unrolling and tangles.
Voilà – Cricut vinyl storage made easy!
Adapting Stabilizer Storage for Quilting and Sewing
Now that you’ve mastered storing Cricut vinyl rolls, let’s adapt those skills for quilting and sewing! You can repurpose your stabilizer storage for other fabrics and projects. Here are three ideas to get you started:
- Quilt backing storage: Use your stabilizer storage to keep quilt backing fabrics organized and wrinkle-free.
- Fabric scrap management: Store fabric scraps in labeled bins or bags to keep your sewing space tidy.
- Sewing tool organization: Utilize your stabilizer storage to keep sewing tools, like threads and needles, within easy reach.
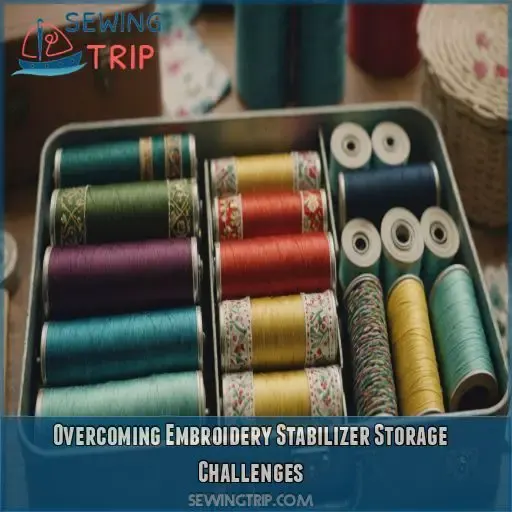
Overcoming Embroidery Stabilizer Storage Challenges
You’re probably no stranger to the frustration of dealing with a cluttered sewing space, where embroidery stabilizers seem to multiply and take over every available surface. Let’s tackle those pesky storage challenges head-on and explore creative solutions to maximize your space, no matter how small, and keep your stabilizers organized and easily accessible.
Overcoming Space Limitations
The eternal struggle of the crafty: too many supplies, not enough space! Don’t worry, friend, we’ve got solutions for you. Here are some small-space hacks to help you conquer the chaos:
| Hack | How-to | Why it works |
|---|---|---|
| Go vertical | Install shelves or hooks | Maximizes floor space |
| DIY dividers | Use cardboard or fabric | Separates supplies, reduces clutter |
| Multi-purpose bins | Label and categorize | Keeps items accessible, contained |
Adapting Storage Solutions for Small Areas
The struggle is real – a cluttered sewing space can be overwhelming! Don’t let small areas cramp your style. Try vertical storage, a DIY organizer, or space-saving hacks like hanging shoe organizers or compact solutions. Repurpose household items for multi-purpose use, like a pegboard for stabilizers and threads. You’ll be stitching like a pro in no time!
Common Challenges and Creative Solutions
You’re not alone in the struggle to store embroidery stabilizers! Let’s tackle common challenges head-on. Here are three creative solutions to get you started:
- Conquer space constraints: Repurpose household items like paper towel holders or wine racks to maximize storage.
- Avoid labeling errors: Use a color-coding system or stickers to identify different stabilizer types.
- Tame tangled rolls: Use thread nets or hanging organizers to keep rolls organized and prevent messy storage.
Frequently Asked Questions (FAQs)
How do you store embroidery stabilizers?
You’re probably drowning in a sea of stabilizers, but don’t worry, friend! You can tame the chaos by using storage solutions like pegboards, hanging organizers, or even repurposed wine racks to keep them neatly in check.
What can I do with embroidery stabilizer scraps?
You can repurpose embroidery stabilizer scraps as backing for small projects, like DIY ornaments or patches. Get creative and reuse them as interfacing for bags, purses, or home decor items – reduce waste and get crafty!
How to tear away a stabilizer?
Ready to break free from stabilizer struggles? To tear away a stabilizer, gently pull it away from your fabric, working slowly and carefully to avoid distorting or stretching the material – voilà, liberation from stabilizer woes!
Can you use parchment paper as an embroidery stabilizer?
You can use parchment paper as an embroidery stabilizer, but it’s not the best option. It’s thin and flimsy, so it may tear during the embroidery process or when washed (Source).
What benefits do embroidery stabilizer storage solutions offer embroiderers?
You’ll love the benefits of organizing your embroidery stabilizers! You’ll save time, prevent mistakes, and enjoy a clutter-free workspace. Plus, you’ll efficiently find the right stabilizer, making your embroidery journey smoother and more enjoyable .
How can embroidery stabilizer storage impact workspace efficiency?
You’re the captain of your workspace ship, and a well-organized stabilizer storage is your trusty navigation system. By keeping your stabilizers tidy, you’ll sail through projects efficiently, saving time and avoiding frustrating mistakes.
Can embroidery stabilizer storage solutions be customized?
You can totally customize your embroidery stabilizer storage solutions to fit your unique needs and workspace. Think DIY projects, upcycled materials, or repurposed organizers – the possibilities are endless, and it’s all about what works best for you! (Source)
Are there any drawbacks to using pegboards for stabilizer storage?
Pegboards can be a game-changer for stabilizer storage, but there’s a catch – spotty stock availability for fixtures and special hooks can be a real headache, and generic pegboard accessories won’t fit the oblong holes.
Can embroidery stabilizer storage solutions be used for other purposes?
You can totally repurpose your embroidery stabilizer storage solutions for other crafts! Use them to store Cricut vinyl, wrapping paper, or even fabric scraps. Get creative and maximize your storage space – your craft room will thank you!
Conclusion
You’ve done it – tamed the stabilizer chaos and transformed your workspace into a serene oasis!
By embracing creative embroidery stabilizer storage ideas, you’ve freed yourself from clutter and can now focus on the fun part – creating stunning masterpieces.
Your newfound love for embroidery stabilizer storage ideas will keep your space organized, streamline your workflow, and have you stitching with serenity.
Keep revolutionizing your sewing space with ingenious embroidery stabilizer storage ideas!

