This site is supported by our readers. We may earn a commission, at no cost to you, if you purchase through links.
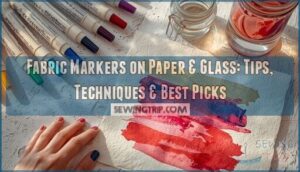
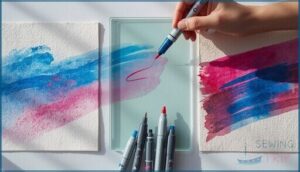
Fabric markers aren’t just for fabric—they work beautifully on paper and glass too, offering bold, vibrant colors and smooth application.
On paper, they glide effortlessly, avoiding the streaky mess some markers leave behind. Just make sure to use sturdy paper, like cardstock, to prevent ink bleed.
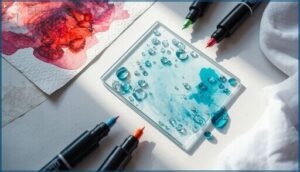
For glass, prep the surface by cleaning it thoroughly; then, go wild with designs. Opt for oil-based fabric markers—they stick better and last longer on non-porous surfaces.
A quick topcoat of sealant locks in your masterpiece. Who knew a marker could do so much? Stick around to uncover even more creative possibilities!
Table Of Contents
Key Takeaways
- You can use fabric markers on both paper and glass for vibrant, bold designs, but be sure to select the right type—water-based for paper and oil-based for glass.
- For paper, choose heavier and non-glossy options like watercolor or mixed media paper to prevent bleeding and achieve crisp lines.
- When working on glass, clean the surface thoroughly with rubbing alcohol, and use sealant to lock in your designs for durability.
- Experiment with layering colors, pressure control, and marker types (fine, broad, or brush tips) to elevate your art and achieve unique effects.
Using Fabric Markers on Paper
You’ll experience bold, consistent lines and rich pigmentation when you use fabric markers on thicker, smooth paper for your creative projects.
These versatile tools offer deeper, more saturated colors than typical paper markers and resist fading better, making them an excellent choice for long-lasting artwork.
Benefits of Using Fabric Markers on Paper
Five incredible benefits make fabric markers a standout choice for paper crafting.
You’ll discover these specialized tools offer advantages that traditional markers simply can’t match.
- Their highly-pigmented formula creates Vibrant Colors that pop off the page with unmatched intensity
- The specialized tips provide No Bleeding on most paper types, keeping your designs crisp and professional
- You’ll create Durable Designs that resist fading, making projects last substantially longer
- Their Versatile Use across different paper weights gives you creative freedom
- They’re surprisingly Cost Effective considering their multi-surface functionality
When working on marker projects, you’ll notice fabric markers deliver richer saturation than standard options.
Fabric markers burst with life on paper, delivering deeper saturation and bolder lines than standard options could ever achieve.
The dual-tip design many brands offer lets you switch between fine details and broad fills without changing tools.
For DIY crafts requiring bold, consistent lines, fabric markers excel on thicker, smooth papers that prevent absorption issues.
They’re particularly effective for paper crafts that need to maintain their vibrancy over time.
Types of Paper Suitable for Fabric Markers
While fabric markers can transform your paper projects, choosing the right paper makes all the difference.
Look for these qualities when selecting your canvas:
- Paper Weight: Heavier papers (140lb+) minimize bleed-through and warping
- Surface Texture: Slightly textured surfaces grip ink better than glossy alternatives
- Absorbency Levels: Medium absorbency prevents both pooling and excessive spreading
- Archival Quality: Acid-free papers guarantee your creations last for years
Heavy watercolor paper holds vibrant colors without buckling, while multimedia paper balances texture with smooth performance. Bristol board delivers precision for detailed work, and cotton-based papers maintain color integrity longest. Skip thin copy paper or slick cardstock—they’ll leave you with disappointing results and frustrating smudges.
Techniques for Achieving Vibrant Colors
With your paper selected, it’s time to reveal truly vibrant colors with your fabric markers.
The secret to eye-popping designs lies in how you apply your markers. Consider these proven techniques:
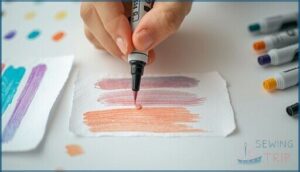
- Control marker pressure strategically—light touches create soft backgrounds while firm pressure delivers intense ink saturation
- Master layering techniques by applying colors in thin coats, allowing each layer to dry completely before adding the next
- Try cross-hatching with complementary colors to achieve rich, dimensional effects that ordinary markers can’t match
For maximum color intensity, try priming your paper with a thin white acrylic coat first. This creates a less absorbent surface where your fabric marker colors will sit beautifully on top rather than sinking in.
Paper Preparation for Fabric Marker Use
Preparing your paper surface before using fabric markers guarantees stunning results. Choose heavy watercolor paper or mixed media paper with sufficient weight to prevent bleeding.
Smooth any fibers and remove dust particles that might affect marker adhesion. For maximum color vibrancy, apply a thin primer coat on absorbent papers.
Consider sealing options after your work dries to protect your design. Proper preparation includes removing excess chemicals that could affect the final outcome.
Remember that proper preparation substantially enhances marker techniques and overall appearance.
Common Mistakes to Avoid on Paper
Before diving into your project, knowing what not to do can save your paper masterpieces from disaster.
When using fabric markers on paper, watch out for these common pitfalls:
- Using lightweight paper that can’t handle ink absorption, leading to bleeding prevention issues
- Skipping proper paper choice like heavy watercolor paper or Bristol board
- Applying too much pressure, causing smudging control problems
- Making layering mistakes by not allowing each color to dry completely
- Overlooking erasing errors techniques for quick fixes
For smooth paper art that maintains vibrancy, test your marker techniques on scrap paper first.
The right combination of markers and paper will guarantee your designs stay crisp and vibrant.
Fabric Markers on Glass
You’ll discover that paint or oil-based fabric markers work surprisingly well on glass surfaces, creating bold, permanent designs that resist fading.
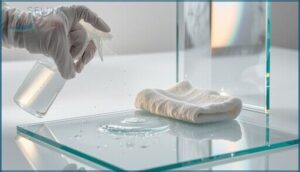
Glass requires proper preparation with rubbing alcohol to remove oils, ensuring your designs adhere properly and maintain their vibrant appearance over time.
Preparing Glass Surfaces for Fabric Markers
Unlike paper’s porous surface, glass demands thorough preparation for marker designs to stick. Clean thoroughly with warm, soapy water first, then apply rubbing alcohol to remove invisible oils that prevent adhesion.
For ideal surface preparation, use 400-600 grit sandpaper to lightly scuff smooth glass, creating microscopic texture that helps markers grip. Always test your cleaning solutions and preparation methods on an inconspicuous area first.
- Feel the frustration melt away when your designs stay vibrant instead of flaking off
- Experience the pride of displaying professional-looking glass art that withstands time
- Enjoy the satisfaction of seeing your creative vision perfectly executed on glass
Choosing The Right Fabric Marker for Glass
Now that your glass surface is properly prepped, selecting the right marker makes all the difference. For ideal surface adhesion on glass, choose markers specifically designed for non-porous surfaces.
Paint-based fabric markers offer excellent color opacity and project longevity. Consider these options:
Marker Type Finish
Best Use
—————
Acrylic paint markers
Glass-specific markers
Multi-surface markers
Permanent markers
Different tip styles (fine, brush, chisel) affect your ability to create details. Many artists find great success using specialized marker options for their projects.
Remember, marker permanence varies—some require heat-setting while others dry permanently.
Techniques for Creating Intricate Designs
When creating intricate designs on glass, fine-tip control is a game-changer.
Start with detailed marker designs like geometric patterns using fabric markers or fine tip markers for crisp lines and edge definition.
Layering techniques are key—apply lighter shades first, then darker tones for depth.
Enhance marker art with stippling effects or subtle feathering for unique textures.
Experiment with color mixing directly on glass for smooth gradients.
Painter’s tape guarantees clean edges, letting your creativity shine without messy mistakes, and allowing for smooth gradients.
Sealing and Protecting Fabric Marker Art on Glass
Your fabric marker masterpieces on glass deserve proper protection to maintain their beauty and longevity.
To effectively seal your artwork, follow these essential steps:
- Clean the glass surface thoroughly with alcohol before applying any sealer to guarantee proper adhesion.
- Apply Krylon Make it Last Sealer or Mod Podge Spray in 2-3 thin coats, allowing each layer to dry completely between applications.
- Spray from 8-12 inches away in a well-ventilated area, using steady, even motions to prevent drips.
For maximum durability, choose a UV-resistant acrylic polymer varnish that won’t yellow over time.
Avoid brushing sealers directly onto your designs as this can cause smudging.
Remember to test your chosen sealer on a small area first.
Glass Types Suitable for Fabric Marker Use
Your marker art pops when you pick the right glass, as not all surfaces work well. Some provide better adhesion and vibrant colors than others.
Here are five glass types that excel for marker art:
- Tempered Glass: Tough and fantastic for functional, everyday pieces.
- Stained Glass: Bursts with dramatic, colorful flair for creative projects.
- Frosted Glass: Soft, dreamy finishes add an artistic touch effortlessly.
- Etched Glass: Grips ink perfectly with its textured surface.
- Recycled Glass: Unique, eco-friendly options give your designs character.
Quick tip: Clean with vinegar if your ink starts to bead!
Fabric Marker Ink Composition
You’ll find fabric markers contain either water-based or solvent-based inks that determine how they perform on paper and glass surfaces.
Understanding the composition of these inks helps you select markers with the right flow, pigmentation, and durability for your specific creative projects.
Water-Based Vs. Solvent-Based Ink
When choosing between marker types for your projects, understanding ink composition makes all the difference.
Water-based fabric markers offer excellent blending properties with vibrant pigmentation that flows smoothly on paper. They’re environmentally friendly with minimal health concerns, making them perfect for creative sessions with kids.
Solvent-based markers provide superior surface compatibility and ink permanence on glass and non-porous materials. They deliver bold, weather-resistant results that won’t wash away.
- For paper projects: Choose water-based for forgiving application and easy cleanup
- For glass masterpieces: Select solvent-based for durability and striking opacity
Lightfastness and Durability of Fabric Markers
While water-based inks offer easy application, let’s look at what keeps your creations lasting through time.
The lightfastness of your fabric markers determines their staying power. According to the Blue Wool Scale (1-8), markers with ratings of 7-8 offer superior UV resistance against fading.
For outdoor projects, consider xylene paint markers with their impressive 15+ year longevity factors. Your surface impact matters too—markers perform differently on various materials.
High-quality options like Tulip Permanent and Sharpie Stained deliver excellent wash durability, withstanding up to 20 washes without significant fade resistance. For heirloom-worthy projects, store your finished pieces away from direct sunlight—the primary culprit behind color deterioration.
Ink Flow and Consistency
Understanding ink flow transforms your fabric marker experience on both paper and glass.
The viscosity directly affects your application smoothness—press too firmly and you’ll battle bleed-through, use gentle pressure for precise control.
Quality tips guarantee consistent ink saturation, while worn ones create frustrating streaks.
Always test your marker’s behavior on scrap material first.
On paper, respect drying time between layers to prevent blotchy results.
For glass projects, slow and deliberate strokes maintain bleed resistance and crisp lines that won’t smudge during your creative process.
To guarantee longevity, consider heat setting techniques after application.
Color Range and Pigmentation
The color-rich world of fabric markers offers a treasure trove of pigmentation possibilities for your paper and glass projects.
You’ll find remarkable color versatility when you select markers with high pigment opacity, giving your designs depth and dimension that ordinary markers simply can’t match.
The secret to stunning creations lies in understanding how pigmented inks perform across different surfaces.
On paper, you’ll enjoy intense color saturation that stays vibrant even after multiple applications.
For glass, look for markers with high lightfastness ratings to prevent fading when exposed to sunlight.
Color mixing becomes intuitive once you’ve mastered the basics—start with primary colors and blend your way to custom hues that perfectly match your vision.
- Feel the satisfaction when your colors pop with life-like intensity
- Experience the thrill of creating perfect gradients without streaking
- Enjoy the confidence of knowing your work won’t fade with time
- Discover the excitement of accessing unlimited color combinations
- Appreciate the luxurious feeling of smooth, consistent color application
Safety Precautions for Fabric Marker Ink
When handling fabric markers, safety should never take a back seat.
Always opt for nontoxic markers, especially around children, and verify proper ventilation needs are met to avoid inhaling solvent-based ink fumes. Wear gloves to prevent skin contact with potentially irritating pigments. If ink touches your eyes, flush immediately with water.
Concern Precaution
Why It Matters
—
Ink toxicity
Skin contact
Ventilation
Child safety
Disposal methods
Fabric Marker Tips and Uses
You’ll find the right fabric marker tip transforms your paper and glass projects from ordinary to extraordinary, whether you’re creating fine details or filling large areas.
From brush tips for smooth blending to specialized nibs for unique effects, selecting the appropriate tip guarantees the best results for your specific creative needs.
Fine Tips for Details and Outlines
Moving from ink composition to application techniques, fine-tipped fabric markers are your precision instruments for creating exquisite details in your marker art.
These slender nibs deliver line crispness that’s essential when working on intricate geometric patterns on both paper and glass.
For flawless results with fine tips:
- Hold your marker at a 45° angle for ideal ink flow and controlled strokes
- Practice stippling effects by creating texture with tiny dots rather than lines
- Work from top to bottom when drawing vertical lines to maintain consistency
- Keep a white correction pen nearby for quick error correction
Your steady hand and these specialized tips will transform ordinary surfaces into detailed masterpieces. Consider using specialized art supplies for best results.
Broad Tips for Filling and Coloring
Broad-tipped workhorses in your fabric marker collection excel at covering large areas on both paper and glass projects.
When filling space on paper, use gentle side-to-side strokes for maximum color saturation while preventing bleed-through. For glass surfaces, apply firm pressure in circular motions for consistent coverage.
You’ll achieve stunning blending effects by overlapping wet layers or create depth through strategic layering techniques.
Explore fabric markers broad for your art projects.
Test your broad tips on scrap materials first to master control—each marker brand offers slightly different ink flow that affects your final art’s vibrancy.
Brush Tips for Blending and Shading
The five brush tips on fabric markers transform ordinary blending and shading into professional-level artistry on both paper and glass.
Simply adjust your pressure—light touches create delicate gradients while firm pressure delivers bold saturation.
- Master color blending by working wet-on-wet for seamless shifts
- Control brush pressure to achieve various texture effects from feathery to dramatic
- Apply circular motions when using blending solution for smooth gradients
- Create depth by layering colors from light to dark, allowing drying time between applications
- Tilt your marker at different angles to vary line thickness and shading intensity for unique effects, enhancing your overall artistic expression.
Calligraphy Tips for Lettering and Script
Fabric markers’ versatility shines in calligraphy, transforming ordinary lettering into artistic script variations. With controlled pen pressure, you’ll create stunning lettering styles on both paper and glass.
- Feel the satisfying glide as fine tips dance across your surface
- Experience the thrill when perfect flourishing techniques emerge from practice
- Enjoy the meditative calm of consistent ink flow during calligraphy practice
- Celebrate small victories when your script variations improve with each session
Try holding brush tips at a 45-degree angle for ideal control and experiment with varying pressure for dimensional effects.
Specialized Tips for Unique Effects
The magic of specialized fabric marker tips reveals a world of unique effects for your paper and glass projects.
Try layering techniques with fine tips to build depth, starting with lighter shades before adding darker details. Create stippling effects by gently dotting markers for textured dimensions that catch the eye.
Layer light to dark shades and dot gently—stunning textures and depth will bring your designs to life beautifully.
For seamless shifts, practice ink mixing directly on non-porous surfaces, using brush tips for smooth blending. Apply painter’s tape for crisp, geometric boundaries when precision matters.
Enhance your designs by incorporating mixed media elements alongside your markers. Don’t be afraid to experiment with calligraphy tips held at different angles—you’ll discover signature effects that transform ordinary projects into extraordinary art pieces.
Creative Projects With Fabric Markers
You’ll transform ordinary paper and glass into stunning art pieces with fabric markers that offer vibrant colors and versatile applications.
Your creative options expand beyond textiles when you apply these markers to different surfaces, creating everything from decorative home accents to personalized gifts with rich pigmentation and lasting results, utilizing vibrant colors.
Decorative Designs for Paper and Glass
Decorative designs transform ordinary paper and glass into stunning artwork when you apply the right pattern techniques.
Release your creativity with these stunning approaches:
- Blend complementary color palettes on cardstock to create gradient sunset effects for greeting cards
- Apply glass markers in layers on wine glasses, using stippling to achieve textured, opaque finishes
- Create mixed media masterpieces by combining marker designs with watercolors on multimedia paper
Seal your paper creations with clear acrylic spray and glass projects with heat setting for lasting design inspiration, and remember to use the right techniques to achieve the desired effects, which will lead to stunning artwork.
Functional Art and Gift Ideas
Now that you’ve mastered decorative designs, transform them into meaningful gifts. Create personalized coasters, monogrammed glassware, or custom journal covers using fabric markers on paper and glass.
Your DIY crafts—like painted glass jars or upcycled storage boxes—combine beauty with function. Turn ordinary items into stunning home decor pieces that friends will treasure.
Customize tote bags with wearable art, or design holiday crafts like ornaments and gift tags. These thoughtful, handmade presents won’t just save money—they’ll showcase your creativity in practical ways.
Mixed Media and Collage Techniques
Releasing the versatility of mixed media art becomes infinitely more exciting when you incorporate fabric markers into your collage techniques.
When blending artistic elements, these versatile tools create stunning dimension across different surfaces. Marker Integration allows you to enhance paper collages with vibrant details that complement other mediums like acrylics or colored pencils.
Try these Embellishment Ideas to elevate your mixed media projects:
- Layering Effects: Build depth by overlapping transparent fabric marker colors with paper elements
- Texture Variety: Apply markers to rough-textured papers for unexpected visual interest
- Image Transfers: Use fabric markers to embellish transferred images on both paper and glass
- Glass Marker Accents: Add metallic or reflective details to create focal points
- Material Fusion: Combine fabric scraps, pressed flowers, and marker art for tactile dimension
Don’t limit yourself—experiment with blending techniques on different surfaces to discover your unique artistic voice.
Fabric Marker Art for Home Decor
Transform your living space with DIY wall art and personalized decor using fabric markers on various surfaces. You’ll be amazed at how these versatile tools can breathe new life into custom textiles like throw pillows, table runners, and curtains with your unique designs and color palettes.
For stunning home accents, try decorative designs on glass vases, picture frames, or candle holders—the transparent surface creates a beautiful luminous effect when light shines through.
Upcycled furniture benefits from fabric marker touches too; add intricate patterns to wooden chair backs or cabinet doors for one-of-a-kind pieces. For fabric art projects, markers work wonderfully on lampshades, creating a warm glow when illuminated.
Don’t forget seasonal accents—customize plain fabric napkins for holiday gatherings or create themed wall hangings that you can change throughout the year. This approach allows you to personalize your space with unique designs and color palettes, making it truly special with DIY wall art and personalized decor.
DIY Crafts and Seasonal Projects
After beautifying your home with fabric marker art, why not extend that creativity to seasonal projects? Fabric markers shine in holiday-themed DIY crafts with their versatility and vibrant colors.
- Holiday Cards: Create personalized greeting cards with intricate designs using fine-tip markers
- Party Favors: Decorate glass jars for guest takeaways
- Seasonal Crafts: Embellish paper lanterns for summer gatherings
- Home Accents: Customize glass candle holders for ambient lighting
- Personalized Gifts: Design unique gift tags with metallic art markers
For summer projects, consider how breathable cotton is ideal.
Removing Fabric Markers From Paper and Glass
You’ll need specific techniques to effectively remove fabric marker stains from paper and glass, as these surfaces interact differently with marker inks.
Whether you’ve made an accidental mark or need to start fresh on a creative project, understanding the right removal methods will save your materials from permanent damage, and this knowledge is crucial for effectively dealing with fabric marker stains.
Methods for Removing Fabric Markers From Paper
When accidental fabric marker stains appear on your paper projects, you’ll need effective removal methods that won’t cause paper damage.
Here’s how different solutions work:
Method | Effectiveness | Surface Impact |
---|---|---|
Rubbing Alcohol | High for most inks | Minimal damage |
Hand Sanitizer | Medium-high | May wrinkle paper |
Dry Erase Marker | Medium | Works on smooth paper |
Heat Application | Low-medium | Can yellow paper |
For stubborn stains, try nail polish remover as a powerful solvent option.
Understanding fabric marker washability can help determine the best removal approach.
Avoid bleach effects, which can deteriorate paper fibers.
Remember that ink lifting works best when fresh, and abrasive methods should be your last resort.
Removing Fabric Markers From Glass Surfaces
If you’ve discovered fabric marker stains on glass, we’ve got simple solutions to restore crystal clarity.
Various solvents offer excellent effectiveness without scratching:
- Magic Eraser Method: Slightly dampen a melamine foam sponge and gently rub stained areas with minimal pressure.
- Solvent Application: Apply rubbing alcohol or nail polish remover to a cloth and wipe glass surfaces.
- Baking Soda Solution: Create a paste with equal parts baking soda and water for stubborn stains.
- Careful Scraping: Use a razor blade at an angle for excess marker before applying cleaning solutions.
Common Mistakes to Avoid When Removing Fabric Markers
Removing fabric markers can be tricky if you’re not careful.
Avoid these pitfalls to protect your surfaces:
Mistake | Consequence | Solution |
---|---|---|
Ignoring Ink Type | Causes surface damage | Check ink compatibility first. |
Scrubbing Too Hard | Results in scratches | Use gentle, circular motions. |
Ineffective Solvents | Stains persist | Test cleaning solutions in small areas. |
Avoid unsuitable cloths that shed fibers or spread ink.
Letting ink sit too long increases adhesion, making removal tougher.
For best results, follow proper surface preparation and use marker removal tips that match ink type without harsh chemicals.
Safety Precautions for Removing Fabric Markers
Safety should be your priority when tackling marker removal projects.
Let’s build on our understanding of removal techniques with proper precautions:
- Skin protection matters – Always wear gloves to prevent irritation from harsh chemicals
- Your eyes deserve safeguarding – Don safety goggles to shield against cleaning solution splashes
- Your lungs will thank you – Address ventilation needs by opening windows when working with strong solvents
- Your surfaces stay intact – Test safe solvents on inconspicuous areas first
- Your environment stays clean – Plan for proper residue disposal
Before beginning surface preparation, verify you’ve gathered appropriate safety gear.
When removing fabric markers from paper or glass, these simple precautions turn potentially frustrating cleanup into smooth sailing.
Choosing The Right Fabric Marker for Your Project
You’ll need to match your fabric marker type to your specific surface, whether you’re working with porous paper that absorbs ink differently than non-porous glass.
Consider the marker’s base (gel, ink, or paint) and tip style (fine, broad, or brush) to achieve the precise effects you want for your creative project.
Factors to Consider When Choosing a Fabric Marker
Your marker’s success hinges on selecting the right tool for your specific needs.
When choosing fabric markers, consider these critical factors:
Surface Compatibility: Different markers work best on specific surfaces—paper requires absorption-friendly inks while glass needs paint-based options.
Ink Composition: Water-based formulas suit porous surfaces, while solvent-based options adhere better to glass and synthetic fabrics.
Tip Types: Fine tips create intricate details; brush tips blend colors seamlessly; broad tips cover large areas efficiently.
Project Goals: Temporary decorations need different markers than permanent keepsakes.
Budget Constraints: Quality varies widely—invest where it matters most for your project.
Fabric Types: Cotton accepts most markers, while synthetics require specialized options.
Consider washability, lightfastness, and drying time based on your project requirements.
Remember, the perfect marker for paper might perform poorly on glass, so match your tool to your medium.
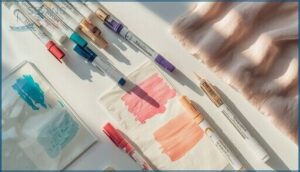
Types of Fabric Markers for Different Surfaces
Now that you understand what factors influence your marker selection, let’s match specific marker types to different surfaces.
Selecting the right fabric marker for your surface guarantees flawless results every time:
- Paper Projects – Gel-based fabric markers with high pigmentation offer vibrant colors without bleeding through thinner papers
- Glass Creations – Paint-based or oil-based markers provide excellent adhesion and permanence on non-porous glass surfaces
- Fabric Applications – Ink-based markers with specialized formulations work best for different fabric types
- Multi-Surface Use – Dual-tip acrylic paint markers like ARTISTRO or Sharpie Creative Markers handle diverse surfaces
Surface compatibility determines your marker’s performance.
Think of markers as specialized tools—using oil-based markers on absorbent paper would be like painting watercolors on glass.
Choose wisely for stunning results!
Budget and Quality Considerations
When selecting fabric markers for your paper and glass projects, balancing price vs. quality directly impacts your results.
While value sets at lower price points might catch your eye, they often struggle with ink quality issues like uneven application and poor pigmentation.
For lasting projects, invest in archival-quality markers that offer consistency and durability.
Calculate the true project cost by considering longevity vs. cost—those budget-friendly options might require frequent replacement, costing more in the long run.
Many artists find mid-range markers deliver the best balance.
Remember, you’re not just buying markers—you’re investing in your creative vision!
Frequently Asked Questions (FAQs)
Can I use a fabric marker on paper?
Using a fabric marker on paper works great for bold, vibrant colors, though the ink might soak in fast.
Choose thicker, smooth paper to prevent bleeding.
Avoid markers requiring heat-setting, since paper can’t handle ironing.
What kind of markers can you use on glass?
You can use acrylic paint markers, permanent markers, or glass-specific markers for glass projects.
Dry erase, wet erase, and chalk markers work well for temporary designs.
Always clean the surface first for better adhesion.
What marker does not come off glass?
Permanent markers, like oil-based Sharpies or acrylic paint markers, won’t come off glass easily.
Their ink bonds strongly, resisting smudging and water.
For a foolproof hold, you can apply a clear acrylic sealant afterward.
What can I use to write on glass that won’t wash off?
Sharpie Creative Markers, oil-based paint markers, or acrylic paint markers work great for glass.
Their permanent ink resists washing off, leaving bold, vibrant designs.
Just clean and prep the glass surface for best results.
Can fabric markers be used on glass?
Fabric markers can work on glass, but choose oil- or paint-based ones for better adhesion.
Clean the surface thoroughly, and let your design dry fully.
For permanence, consider sealing it with a clear acrylic spray.
Can fabric markers be used on paper?
Imagine paper as a sponge soaking up creativity—it absorbs fabric marker ink deeply, creating bold, permanent lines.
While effective, typical paper markers are better suited since paper’s porous nature can limit precision and cause ink bleed.
What is a fabric marker?
A fabric marker is a tool filled with specially formulated ink or paint that works on textiles and other surfaces.
It’s great for creating bold, permanent designs with vibrant colors on fabrics, glass, or paper.
What kind of markers do you use on a glass whiteboard?
Studies show dry erase markers erase cleaner than others on glass whiteboards.
Go for bold colors and fine tips for clarity.
Avoid permanent markers unless you’re creating art—cleaning them off is a headache!
What is a glass marker?
A glass marker is a tool designed for marking on glass surfaces.
It’s great for creating bold, vibrant designs on windows, mirrors, or whiteboards.
Some are permanent, while others wipe off easily for temporary use.
Can fabric markers be used on canvas?
Yes, you can use fabric markers on canvas.
They work great for vibrant, bold designs.
Just verify the canvas is smooth and clean before starting.
Layer colors carefully for depth, and let it dry fully.
Conclusion
Did you know fabric markers, originally made for cloth, can last up to five years on glass with proper sealing?
Whether you’re designing on sturdy paper or prepping glass surfaces, fabric markers offer bold colors and versatility.
Make sure to choose the right type—oil-based for glass durability or water-based for smoother paper results.
Experiment with techniques, avoid common mistakes, and let your creativity flow.
Fabric markers used on paper and glass truly reveal endless possibilities!
- https://uchida.com/collections/markers-1?srsltid=AfmBOop9k7i0EDGBliR8HNbRw1LY1FopxlHEc5wA0j5TvUuh32f3fDYI
- https://artistro.com/products/artistro-24-acrylic-paint-pens-acrylic-paint-markers-fabric-markers-for-textile-canvas-rock-glass-wood-paper-pumpkin-diy-paint-markers-for-kids-and-adults-dual-tip-dot-fine-24?srsltid=AfmBOoo4ezUjRQTiRGKdzQ_J3wCruyoiHX1EQblx0eQrv0SRQtynMN6C
- https://help.sharpie.com/s/article/Sharpie-Creative-Markers
- https://www.reddit.com/r/sewing/comments/1htyzmm/currently_suffering_from_a_rookie_mistake_psa_use/
- https://www.quora.com/What-types-of-markers-are-best-for-writing-on-glass-or-ceramic-surfaces-without-fading