This site is supported by our readers. We may earn a commission, at no cost to you, if you purchase through links.
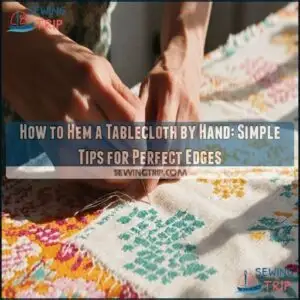 To hem a tablecloth by hand, start by cutting the fabric to your desired size, adding an extra 1-2 inches for the hem. Use a ruler or tape measure to mark the hemline with chalk for accuracy.
Fold the edge over twice (about ½ inch each fold) to create a clean finish, and secure it with pins. Thread a needle with matching thread, tie a knot, and use a blind stitch or slip stitch to sew along the folded edge.
Keep stitches small and even. Remove pins as you go. For crisp results, press the hem with an iron afterward.
Table Of Contents
- Key Takeaways
- Essential Supplies for Hand Hemming a Tablecloth
- Preparing Your Tablecloth for Hand Hemming
- Measuring and Marking The Hem
- Folding and Pinning The Tablecloth Hem
- Hand Stitching Techniques for Tablecloth Hems
- Step-by-Step Guide to Hand Hemming
- Finishing Touches and Pressing The Hem
- Troubleshooting Common Hand Hemming Issues
- Frequently Asked Questions (FAQs)
- Conclusion
Key Takeaways
- Start by measuring your tablecloth and adding a hem allowance, then fold the edges twice for a clean finish.
- Use tools like pins, a measuring tape, and fabric scissors to ensure precise folds and cuts.
- Choose a stitching technique like a blind stitch or slip stitch for neat and durable hems.
- Press the hem with an iron after stitching to create clean, crisp edges.
Essential Supplies for Hand Hemming a Tablecloth
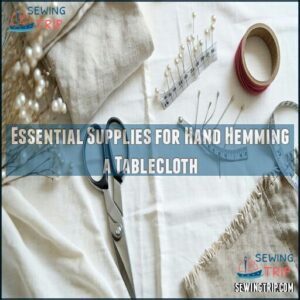
To hem a tablecloth by hand, you’ll need a few essential supplies to guarantee clean, professional edges.
For a polished tablecloth hem, gather scissors, thread, pins, a needle, and a tape measure to ensure clean, professional edges.
Gather fabric scissors, straight pins, a measuring tape, thread, a needle, and optional tools like a thimble or seam ripper for the best results.
Choosing The Right Fabric
Your tablecloth’s fabric sets the tone, so thoughtful fabric selection is vital. Consider how the material’s durability, stain resistance, and drape quality align with your needs.
Here’s a quick breakdown of common fabric types:
- Cotton: Popular for its breathable texture, easy care, and versatility in casual or formal settings.
- Linen: Offers classic elegance with a natural texture, though it requires extra ironing for crisp aesthetics.
- Polyester: A practical option, resistant to stains and wrinkles, with long-lasting color fastness.
- Cotton-polyester blends: Combines durability and softness, making it highly functional and easy to handle.
- Organic/sustainable fabrics: Eco-friendly choices like organic cotton balance aesthetics and environmental responsibility.
Pay attention to texture variety, fabric aesthetics, and compatibility with your style. Consider exploring different tablecloth fabric options for your project. Pre-washing fabrics prevents shrinkage and guarantees smoother handling during hemming.
Selecting Appropriate Thread and Needle
Choosing the right needle and thread is essential for smooth stitching and professional hems.
It all begins with understanding how thread fiber, needle size, and fabric weight work together. A balanced combination guarantees stitch compatibility.
Here are four things to remember for perfect hand sewing:
- Thread Selection: Go with all-purpose cotton or polyester for strength and elegance.
- Needle Types: Use an 80/12 needle—it’s sharp enough for most fabrics but gentle on delicate ones.
- Color Matching: Pick thread that blends closely with your tablecloth for invisible seams.
- Stitch Compatibility: Test thread on a scrap to see how it handles.
The right needle and thread make hems effortlessly beautiful. Selecting durable sewing threads guarantees longevity.
Measuring Tools: Ruler, Tape Measure, Chalk
Accurate measuring tools are your best friend for tablecloth hemming. A reliable ruler guarantees precision in straight lines, while a durable tape measure handles curves and longer edges effortlessly.
Fabric rulers simplify consistent folds, and chalk (available in washable or disappearing types) creates clear, temporary markings. These tools boost marking precision and help you measure in consistent units, guaranteeing a neat tablecloth hem.
For precise cuts, consider a specialized fabric ruler. Skipping this step risks uneven hems.
Start with accurate guidelines to make hand hemming your tablecloth smoother and more professional-looking.
Pins and Scissors for Fabric Preparation
Getting great results in hand hemming a tablecloth starts with the right tools. Sharp scissors and dependable pins make all the difference in fabric preparation.
Here’s what you need:
- Scissors Sharpness: Use high-quality fabric scissors to get clean, smooth edges. Dull blades create uneven cuts, making hemming more challenging.
- Pin Types: Choose sturdy straight pins with glass heads. They hold fabric securely and won’t melt under an iron during edge finishing.
- Fabric Handling: Keep scissors nearby for quick thread trimming and precise cutting techniques. This guarantees your folds stay crisp. With the right fabric, you can use pinking shears for decorative edges.
Clean cuts and firm pinning techniques keep your sewing tablecloth project professional. With these essentials, even your tablecloth hem will look polished and fastidious!
Optional Tools: Thimble and Seam Ripper
A thimble is a must-have for hand hemming, protecting your finger from needle pricks during tricky stitches.
For thick fabrics, consider thimble alternatives like rubber fingertip grips.
A sharp seam ripper saves time when removing errors. Ergonomic rippers reduce hand strain for longer sewing sessions.
Check thimble sizing for a snug, comfortable fit. Store tools carefully—keep the seam ripper covered to avoid dulling the blade.
These sewing tools make every hem stitch smoother!
Preparing Your Tablecloth for Hand Hemming
Before starting your tablecloth hem, proper fabric preparation is essential for smooth hand hemming. Think of it like laying the groundwork for a sturdy building—it sets the stage for success.
Here’s how to prep your fabric:
- Fabric Washing: Wash and dry the tablecloth to prevent shrinkage later.
- Ironing Techniques: Iron the fabric completely to remove wrinkles and creases.
- Edge Trimming: Trim loose threads and smooth uneven edges.
- Flaw Inspection: Check for snags, pulls, or weak spots in the material.
- Surface Prep: Lay the fabric flat on a clean, spacious table.
Handle every detail carefully. Removing selvage, cleaning edges, and using measuring tools guarantees your tablecloth is ready for hand hemming with crisp, professional results.
Measuring and Marking The Hem
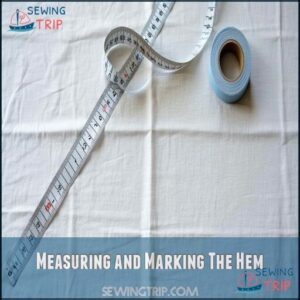
To guarantee a clean and professional hem, begin by measuring and marking your fabric with precision.
Use a tape measure and fabric marking tool to create even, accurate guidelines around the tablecloth.
Determining The Ideal Hem Length
Determining the tablecloth hem length depends on table size, fabric type, and the desired drop length.
For casual settings, a drop of 8-12 inches works, while formal events demand 29-30 inches.
Don’t skip the 1-inch hem allowance; it guarantees neat, clean edges.
Lightweight fabrics call for narrow hems to avoid bulk.
Use the table below for reference:
Factor Casual Setting Formal Setting
Take your time—precision guarantees professional results.
Creating Even Markings Around The Tablecloth
Accuracy is key when marking your tablecloth hem. Lay the fabric on a smooth surface and flatten out any wrinkles. Grab your measuring tools—tape measure, fabric markers, or chalk—and begin marking.
To maintain consistent spacing, measure the hem depth every 6 inches along the edges. For measurement accuracy, keep lines straight using a ruler.
- Measure and Draw Lines: Use chalk or fabric markers for temporary, clear markings.
- Check Hem Alignment: Align markings with a straight edge for precision.
- Secure Edges: Use lightweight pins for delicate tablecloth fabrics.
These hemming techniques guarantee a professional, polished finish.
Accounting for Corner Folds and Miters
Corner folds and mitered corners give your tablecloth hem a polished, refined appearance. Start by folding each edge inward ½ inch and pressing firmly. Then, fold the corner diagonally to form a neat triangle. Align this fold with the inside hem for sharp results.
Mark two inches from each corner to guide your folds and avoid uneven angles. Precise corner angles and fabric overlap will keep the corners neat and prevent bulk.
Here’s a quick guide:
| Step | Action |
|---|---|
| 1. Fold edge | ½ inch inward |
| 2. Press | Firm creases |
| 3. Fold corner | Into triangle |
| 4. Align edges | With hem triangle |
| 5. Pin edges |
Prevent shifting.
Perfect mitered corners elevate your hand hemming skills! They help you achieve a neat triangle and ensure your tablecloth looks professionally made with precise corner angles.
Double-checking Measurements for Accuracy
Double-checking your tablecloth hem is key to a professional finish. It guarantees your drop length and seam allowance align perfectly, saving time and preventing frustration later.
Follow these steps for accuracy:
- Inspect your measuring tools. Verify your tape measure or ruler is accurate and functioning properly.
- Re-measure all sides to verify even hem length and consistent drop length.
- Use a formula to confirm your hem dimensions and check unit consistency (inches, centimeters, etc.).
- Compare opposite sides for symmetry, correcting uneven areas as needed.
- Double-check folds and hem alignment for clean edges around corners.
Accurate measuring tools and precise application of formulas guarantee a crisp, polished tablecloth finishing. Taking time now means your hand hemming will look seamless and professional.
Folding and Pinning The Tablecloth Hem
Folding and pinning the hem sets the foundation for neat, even edges.
By creating a double fold and securing it with pins, you’ll guarantee the fabric stays in place during stitching.
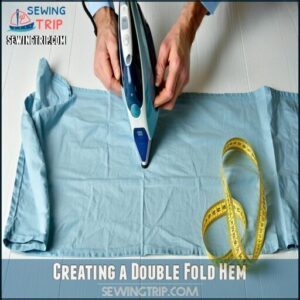
Creating a Double Fold Hem
Start your double fold hem by folding the fabric edge under 1/4 inch and ironing it flat. Then, fold it again to your preferred width—typically 1/2 to 1 inch works well.
This helps with Fold Consistency and prevents fraying. Use this table as a reference:
| Fabric Thickness | Fold Width | Corner Mitering | Tip |
|---|---|---|---|
| Thin (e.g., cotton) | ½ inch | Moderate | Secure folds with firm pressure. |
| Medium (e.g., linen) | ¾ inch | Standard | Use sharp Pin Placement along edges. |
| Thick (e.g., canvas) | 1 inch | High | Make certain folds lay evenly. |
| Stretchy (e.g., jersey) | ½ inch | Low | Stabilize with hemming tape first. |
For hand hemming, consistently press each fold to maintain your tablecloth hem’s professional finish. This is crucial for achieving a neat and visually appealing result, and it requires attention to detail and precision.
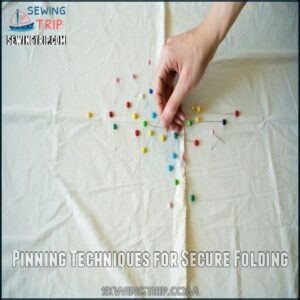
Pinning Techniques for Secure Folding
When pinning a tablecloth hem for hand sewing, precise pin placement is key. Insert pins perpendicular to the fold every 2-3 inches to keep the fabric steady.
Follow these steps to guarantee control:
- Use extra pins for delicate or slippery fabric types.
- Smooth the fabric between pins to maintain tension control and avoid puckering.
- Focus on consistent spacing to guarantee even folding before stitches.
These pinning techniques make the hand hemming process smoother and guarantee a clean, professional finish. Using ball point pins can prevent snags on delicate materials.
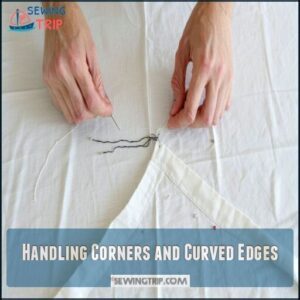
Handling Corners and Curved Edges
To achieve clean mitered corners and smooth curved hemlines, start by folding the fabric at a 45-degree angle to form sharp, crisp corner folds.
This method reduces bulk and creates professional edges. When handling curved edges, use incremental pinning to hold the fabric firmly without distortion. A basting stitch is helpful for guiding curved hemlines, ensuring even tension and preventing puckering.
Remember, careful fabric manipulation is essential for neat hand hemming. Smaller folds around corners distribute thickness evenly, making it easier to sew. On curved edges, avoid stretching the fabric to maintain its shape.
These techniques guarantee a durable and polished tablecloth hem.
- **Master mitered corners with diagonal folds.
- **Prevent puckering with incremental pinning.
- **Maintain even tension for smooth hemlines.
- **Use basting stitches for precision.
- **Shape curved edges with careful fabric manipulation.
Ensuring Even Fold Width Throughout
Perfect hem alignment starts with consistent measuring.
Use a ruler to mark precise hem measurements every 4–6 inches.
Fold the fabric edge carefully, creating a double fold—½ inch each time.
Secure the folds with straight pins placed incrementally.
Tackle curved edges using small adjustments and smooth folds to prevent puckers.
Regularly check your work, confirming the tablecloth hem stays even.
This combination of marking precision, controlled fabric folding, and pinning techniques guarantees a polished, professional finish.
It ensures that the hem alignment is accurate and visually appealing, making it a crucial step in the process, with consistent measuring being the foundation.
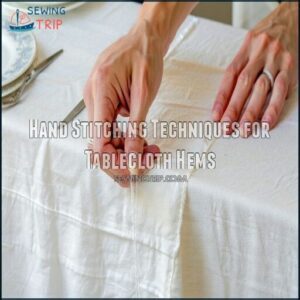
Hand Stitching Techniques for Tablecloth Hems
Hand stitching a tablecloth hem requires precise techniques to achieve clean, professional results.
Hand stitching transforms simple fabric into a polished masterpiece with care, precision, and attention to every detail.
From invisible blind stitches to secure catch stitches, you’ll learn methods suited for any fabric and finish.
Blind Stitch for Invisible Hems
The blind stitch, a technique favored for invisible stitching, guarantees a seamless, professional finish for your tablecloth hem.
It’s ideal for hand hemming when a clean edge matters most.
Here’s how to do it:
- Choose a needle and matching thread that suits your fabric choice—double your thread for extra strength.
- Catch one tiny thread from the main fabric to maintain an invisible stitch.
- Move 1/4 inch and grab a small sliver from the folded hem.
- Maintain even thread tension to avoid puckering or pulling the blind hem.
Slip Stitch for Delicate Fabrics
For delicate fabrics like silk or chiffon, a slip stitch creates nearly invisible seams while preserving the tablecloth’s elegance.
Use light tension to avoid puckering and match the thread to the fabric—fine silk thread for silk or polyester for chiffon.
Insert the needle into the hem allowance, then pick up just a few threads from the fabric’s edge.
This precise and gentle technique guarantees a durable hem without bulk, leaving your tablecloth edge smooth and professional.
Catch Stitch for Added Strength
For hems needing durability and added strength, the catch stitch is your go-to. It creates a secure criss-cross pattern that holds up well, especially on thick fabrics or hand-embroidered tablecloths.
Follow these steps for stitch security:
- Position the folded hem facing you for control.
- Insert your needle right-to-left, about 5mm from the edge.
- Use angled strokes, catching a few threads from the fabric.
- Maintain even stitch spacing and steady thread tension.
- Check for durability testing by gently tugging the stitches.
This efficient hand-stitching method guarantees a neat finish and enhances fabric compatibility.
Whipstitch for Quick and Easy Hemming
Need to hem a tablecloth quickly? A whipstitch guarantees simple, speedy hand stitching for casual tablecloths.
Grab a needle and thread, then wrap the thread diagonally around the fabric edge, keeping Stitch Spacing consistent for neat results.
| Aspect | Details |
|---|---|
| Whipstitch Speed | Quick for casual projects |
| Fabric Suitability | Medium-weight fabrics work best |
| Thread Choice | Match thread color to fabric |
| Durability Concerns | Less ideal for heavy use |
| Stitch Spacing | Keep stitches even and snug |
This technique balances speed and reliability, creating a durable tablecloth hem without needing a machine.
Fell Stitch for Decorative Visible Hems
The fell stitch is an excellent choice for decorative, visible hems, offering both durability and charm.
Originally popular in traditional quilting, this technique works well on thicker fabrics.
Follow these clear steps to master it:
- Double-fold your tablecloth hem and press firmly for a clean edge.
- Thread your needle and begin hand stitching from right to left, keeping an even rhythm.
- Space stitches about 1/4 inch apart for a polished appearance.
- Lightly tighten stitches so the hem holds securely without puckering.
Perfect for adding both style and strength!
Step-by-Step Guide to Hand Hemming
Hemming a tablecloth by hand requires care and attention to detail, but it’s entirely manageable with the right steps.
Follow this guide to guarantee your stitches are neat, even, and professional-looking.
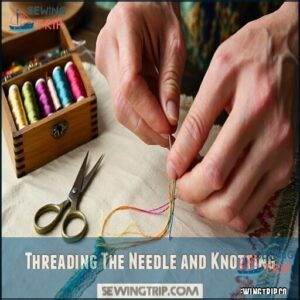
Threading The Needle and Knotting
Precision matters when threading a needle for hand stitching.
Trim the thread’s end cleanly to ease threading methods, and select a needle size suited to your thread type and fabric.
For added control, consider a needle threader.
Secure your stitching with a strong knot—like the wreath knot—for knot security.
Proper tension control starts here, so focus on these sewing techniques for beginner hemming success.
Keep it simple!
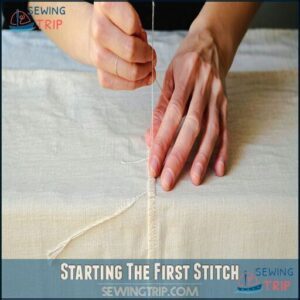
Starting The First Stitch
Now that your thread is ready and the knot is secure, it’s time to begin sewing your tablecloth hem. Starting the first stitch correctly guarantees a neat, even finish and sets the rhythm for your hand stitching.
Follow these steps for accurate stitch placement and knot hiding:
- Push the needle upward through the folded fabric edge, about 1/4 inch from a corner. Keep stitches small to avoid a bulky look.
- Pull the thread gently. Maintain tight, smooth initial tension without over-pulling.
- Insert the needle back down through both fabric layers, concealing the stitch inside the fold.
These beginner hemming tips guarantee a clean and professional edge. A neat hem starts with careful attention to detail from the very first stitch, ensuring a professional look.
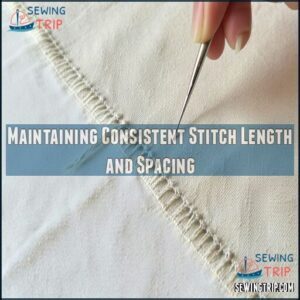
Maintaining Consistent Stitch Length and Spacing
As you stitch your tablecloth hem, focus on keeping each stitch exactly 1/4 inch apart.
Think of it as your Stitch Length Guide to achieve clean, professional results.
Maintain steady tension control—too tight pulls fabric, too loose won’t hold.
Smooth fabric feed supports even stitch spacing.
Practice techniques like counting “one, two” rhythmically.
Your hand stitching will shine when spacing consistency reflects precision, making the final product as neat as a machine stitch!
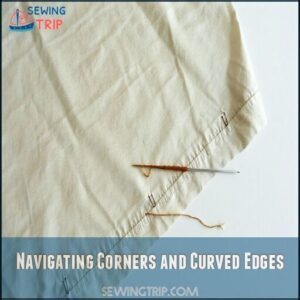
Navigating Corners and Curved Edges
Corners and curved edges can be tricky, but with a little patience and technique, your tablecloth hem will look seamless.
Follow these steps for consistent curves and crisp mitered corners:
- Stop stitching 1/8" before each corner to prepare for precise corner folds.
- Baste 1/4" from raw edges, creating folding guides for clean lines.
Clip curved edges every inch to prevent puckering and guarantee smooth curved hemlines. For smoother results, consider easing fabric curves before stitching.
- Stitch 1/4" from curved edges to act as a guide for easy fabric manipulation.
- At corners, use tighter hand stitching to maintain control over corner handling.
Press folds firmly for crisp, professional results that elevate your hand stitching, and remember to handle the fabric with care for the best outcome, achieving a professional finish.
Securing The Final Stitch
When you reach the end, securing the final stitch is essential to keeping your hem intact.
Weave the thread back through the last few stitches for Stitch Reinforcement. Form a tiny Knot close to the fabric for proper Knot Security, avoiding puckering. Gently pull to tighten. Trim thread tails neatly for a Seam Concealment finish.
To finalize, here’s a quick guide:
| Task | What to Do | Tip |
|---|---|---|
| Reinforce Stitch | Weave back through stitches | Prevent unraveled threads |
| Create Knot | Tie close to fabric | Maintain stitch tension |
| Trim Thread Tails | Cut excess for clean finish | Avoid visible threads |
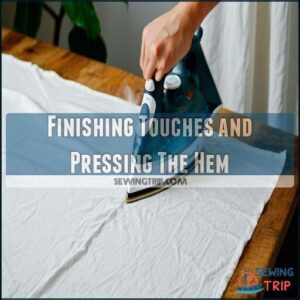
Finishing Touches and Pressing The Hem
Once your stitches are secure, it’s time to focus on smoothing and perfecting the hem.
Proper pressing and careful attention to detail will guarantee crisp edges and a polished finish.
Removing Pins and Trimming Excess Thread
You’ve completed your hand stitching—now let’s tackle the finishing steps to perfect your tablecloth.
Proper pin removal and thread trimming guarantee a polished final look while preventing snags or fraying.
- Pin Removal Timing: Remove each pin slowly, pulling it straight out to avoid snagging the fabric.
- Thread Tail Length: Use sharp scissors to trim thread tails, leaving about 1/8 inch for a clean finish.
- Trimming Techniques: Inspect both sides of the hem to confirm all threads are neatly trimmed.
- Preventing Fraying: Ensure your scissors are sharp to create smooth, precise cuts without damaging the fabric.
Before celebrating your sewing completion, double-check for overlooked pins or loose threads. These simple techniques elevate your work, making sure every edge looks crisp and professional.
Proper Ironing Techniques for Different Fabrics
Ironing techniques are key to a polished tablecloth hem.
Adjust iron temperature based on fabric types: cotton needs high heat with steam, while silk requires low heat without steam.
Always iron inside out to protect delicate surfaces, especially textured fabrics. Use an ironing board with a pressing cloth for fabric protection.
Spray stubborn wrinkles with water to keep the hemming fabric damp. These steps guarantee smooth, professional-looking results without damaging your tablecloth, ensuring a polished tablecloth hem.
Steam Settings for a Crisp Finish
Steam reveals the magic of a professional finish for your tablecloth hem when paired with proper techniques.
Here’s how to match the fabric type with iron temperature and steam level:
- Cotton/linen: Use high heat with steady steam, adding a pressing cloth for even moisture content.
- Polyester blends: Opt for medium heat and short steam bursts to prevent distortion.
- Delicate fabrics: Set low heat with minimal steam to avoid scorching.
- Synthetics: Choose low-medium heat with gentle steam for crisp edges.
Your ironing techniques guarantee smooth, flawless hemming fabric results.
Addressing Any Puckering or Uneven Areas
If puckering or uneven stitches pop up after ironing, don’t stress—these issues are fixable. Check stitch tension to confirm it’s not pulling too tightly.
For subtle puckering, try fabric relaxation by laying your tablecloth flat overnight. Using a walking foot attachment can also help prevent puckering on delicate fabrics.
Use these fixes for common issues:
- Gently stretch fabric to redistribute tension.
- Apply moisture with a spray bottle, then press lightly.
- Loosen tight stitches with stitch correction techniques.
- Adjust tension and redo uneven sections if needed.
- Use blocking techniques like weighing corners with books for better alignment.
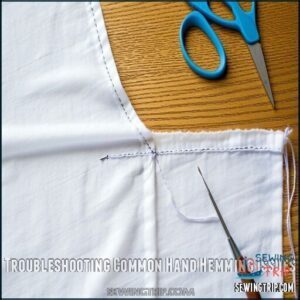
Troubleshooting Common Hand Hemming Issues
When hand hemming a tablecloth, you might run into uneven stitches, puckering, or misaligned corners.
Understanding how to identify and fix these common issues guarantees a polished and professional finish every time.
Fixing Uneven Stitches
Spotting uneven stitches? Start by checking the stitch tension—loosen overly tight stitches causing puckers or tighten gaps from loose tension.
Use a quality thread and sharp needle suited to your fabric. Secure your fabric stability with extra pins before sewing tricky sections.
For consistent results, mark stitch guidelines and monitor your hand pressure while stitching.
To fix issues, carefully use a seam ripper to remove uneven sections. Re-stitch with precision, ensuring a steady tension adjustment for clean, aligned hems without distortions.
Dealing With Puckered or Wavy Hems
A wavy hem can make your hard work look untidy, but it’s often avoidable with the right techniques.
Most puckering happens due to improper stitch tension or fabric tension during sewing. To smooth things out, start by checking alignment with the fabric grain—it guides how the fabric behaves.
Here’s how to fix or prevent puckering:
- Use a gentle iron setting with steam to relax moisture effects in the fibers.
- Apply double-fold bias binding for stability on edges prone to stretching.
- Adjust stitch density and tension issues to guarantee even, flat stitches.
- Pin carefully along the fold, easing the fabric to control wave correction.
Working steadily and respecting the fabric’s natural properties guarantees a crisp, professional finish. By following these steps, you can achieve a smooth hem and avoid the issues associated with puckering, ensuring your work looks neat and well-made.
Correcting Misaligned Corners
Struggling with uneven tablecloth hem corners? Start by removing the incorrect stitches using a seam ripper.
For precise corner alignment, fold edges at 45° angles to create neat mitered corners. Press the folds firmly to prevent fabric bulking before stitching.
Accurate angle precision and proper corner folds are key. If stitches seem off, minor seam adjustments or stitch realignment can make all the difference.
Patience guarantees flawless, professional-looking corners every time.
Adjusting Tension for Different Fabric Types
Ever wonder why your stitches look uneven despite your best effort? It’s all about thread tension. Different fabric types demand careful tension adjustment for smooth, professional results.
- For lightweight fabrics like silk or chiffon, keep thread loose and delicate. Pull the needle gently, avoiding puckering or taut stitches.
- For heavyweight fabrics such as denim or canvas, tighten the thread slightly for firm, even stitches without bunching the material.
Test on a scrap to verify stitch length, thread type, and fabric weight match well. A balanced tension lets the thread lie flat and secure. Don’t forget needle size—smaller needles suit thin fabrics; larger ones stabilize thicker materials.
Smooth stitching starts with proper tension settings!
Removing and Redoing Incorrect Stitches
When tackling stitch repair, start by identifying mistakes like uneven stitches or puckering.
Grab your seam ripper and gently slide it under each stitch, point up, to avoid fabric damage during stitch removal.
Once cleared, brush away loose threads and press the fabric flat for a smoother canvas.
Before re-threading your needle, check your tension settings.
Incorrect tension often leads to repeat errors.
Use pins to outline your new stitching path—this helps prevent errors and maintain stitch consistency.
Restitching techniques like keeping an even depth (about 1/8 inch) and steady spacing will guarantee clean, professional results.
Patience is key.
Removing and redoing incorrect stitches may feel tedious, but every repaired section brings you closer to a flawless hem.
Frequently Asked Questions (FAQs)
How do you Hem a tablecloth?
Start by trimming and pressing the tablecloth edges.
Fold the edge under twice, about ¼ inch per fold, and pin it securely.
Use a slip stitch or blind stitch to sew the hem neatly.
How do you make a rectangular tablecloth?
Think of fabric as your canvas.
Measure table dimensions, add desired drop and seam allowances, then cut your fabric.
Press, trim edges, fold twice for a clean hem, pin securely, and hand-sew evenly, which involves working with your fabric to create a clean finish.
How do you sew a tablecloth?
Cut fabric to size, fold edges twice to create a clean hem, and pin securely.
Use a matching thread and a slip or blind stitch to sew edges.
Press seams for a polished finish.
How to choose a tablecloth?
Pick a tablecloth based on table size, shape, and occasion.
Measure dimensions, including drop length. Choose durable fabric for everyday use or elegant materials like linen for formal events.
Match colors or patterns to your décor.
How do you make a hem hem?
Making a hem hem sounds fancy, doesn’t it?
All it takes is folding the fabric edge twice, pinning it securely, and sewing along the fold.
Use tidy stitches for a clean, professional finish.
Do you cut off selvage before Hemming a tablecloth?
Yes, always trim off the selvage before hemming.
It’s often tighter and can cause puckering.
Removing it guarantees a smoother, even finish and helps the hem lay flat for a polished look.
How do I choose a tablecloth?
Choosing a tablecloth starts with your table’s size and shape.
Measure dimensions, account for drop length, and pick durable fabric.
For special occasions, match colors to your theme.
For everyday use, consider easy-to-clean materials and durable fabric.
How do you make a round tablecloth?
Cut fabric to the table’s diameter, adding the desired drop and hem allowance.
Use a measuring tape for accuracy.
Fold and press edges twice for a neat hem, then stitch carefully for a polished finish.
What is a hand embroidered tablecloth?
A hand-embroidered tablecloth showcases intricate designs stitched directly onto the fabric.
You use needles and colorful threads to create patterns, adding a personal, artistic touch.
Each piece reflects craftsmanship, transforming a simple cloth into decor.
How do I make a tablecloth pattern?
Measure your table, adding desired drop length and hem allowance.
For squares or rectangles, mark dimensions on fabric and cut.
For circles, trace a large round object. Use fabric markers for precise, clean guidelines.
Conclusion
Imagine finishing a family dinner with a perfectly hemmed tablecloth you crafted by hand.
Hemming a tablecloth by hand doesn’t have to feel intimidating.
By following these steps—measuring, marking, folding, pinning, and stitching—you can create crisp edges and a professional finish.
Choose the right tools, take your time with even folds, and use small, consistent stitches for cleaner results.
With patience and practice, you’ll master how to hem a tablecloth by hand like a pro.

