This site is supported by our readers. We may earn a commission, at no cost to you, if you purchase through links.
Every sewist has been there: you’re halfway through assembling a garment when you realize the notches don’t line up, the darts sit at odd angles, and somehow your carefully cut pattern pieces refuse to cooperate. The culprit? Inconsistent or invisible markings that vanished when you needed them most.
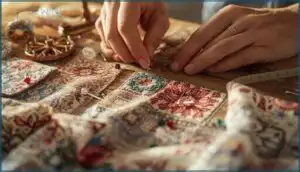
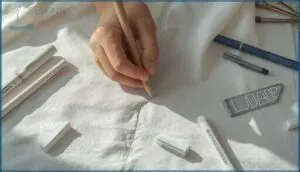
Fabric marking methods for sewing form the invisible scaffolding of every successful project, translating pattern symbols into precise points that guide your stitches. The right marking technique transforms a stack of fabric pieces into a garment that fits beautifully, while the wrong choice can leave you squinting at faded lines or scrubbing stubborn marks that won’t disappear.
Understanding which tools work best for your fabric—from whisper-thin silk to sturdy denim—means fewer mistakes, less frustration, and finished projects you’ll actually want to wear.
Table Of Contents
- Key Takeaways
- Why Fabric Marking is Essential for Sewing
- Most Common Fabric Marking Methods
- Choosing The Right Marking Tool
- Top 10 Fabric Marking Tools for Sewing
- 1. Professional Tailors Chalk Fabric Markers Set
- 2. YEQIN Chalk Wheel Fabric Marker White
- 3. Dritz Chalk Cartridge Set with Sharpener
- 4. Dritz Dual Purpose Marking Pen
- 5. Leonis Water Erasable Fabric Marking Pens
- 6. Clover Water Soluble Marking Pencil Set
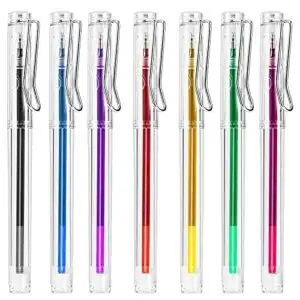
- 7. Pilot FriXion Erasable Gel Pen Set
- 8. ibotti Washable Fabric Marking Pen Set
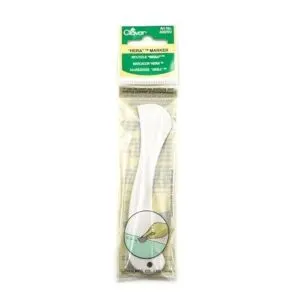
- 9. Clover Hera Fabric Marker Tool
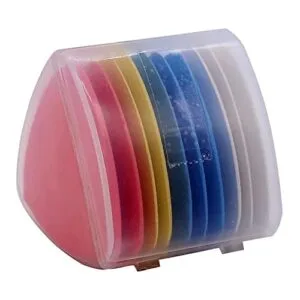
- 10. Triangle Tailors Chalk Sewing Fabric Markers
- Best Practices for Accurate Fabric Marking
- Frequently Asked Questions (FAQs)
- Conclusion
Key Takeaways
- Accurate fabric marking forms the invisible foundation of professional sewing, directly impacting how darts align, seams match, and finished garments fit—making your choice of marking method as critical as the fabric itself.
- Different fabrics demand different marking tools: delicate materials like silk need gentle thread tracing or soft chalk, while sturdy fabrics like denim handle bold marks from chalk wheels or transfer paper without damage.
- Always test your marking method on fabric scraps first and place marks inside seam allowances to prevent permanent stains, breakage issues, or marks that won’t erase when you need them gone.
- The right marking tool depends on your specific project needs—water-soluble pens excel for temporary precision on cotton, hera markers leave zero residue on any fabric, and tailor’s tacks provide couture-level accuracy for complex construction.
Why Fabric Marking is Essential for Sewing
Getting markings right is where precision starts in any sewing project. The tools and methods you choose shape how your patterns and details come together.
Here’s what to keep in mind before you reach for your favorite marking tool.
Role of Marking in Pattern Accuracy
Accuracy sits at the heart of sewing mastery. When you mark fabric with precision, every pattern piece lines up, laying the foundation for seam alignment and pattern matching. Consistent, clear pattern markings directly drive fit consistency and defect reduction.
Your marking tools are more than helpers—they’re the quiet force ensuring each step matches your vision, project after project. Accurate sewing starts with precise pattern markings on both the pattern and fabric.
Ensuring Precise Darts, Pleats, and Notches
Getting darts, pleats, and notches in the right spot begins with smart marking fabric choices. Strong dart markings—using dart point precision with tailor’s tacks—help create crisp structure where it counts. Pleat alignment techniques rely on accurate notches and thread tracing for even folds. Transfer paper methods give you clear pattern lines, while notch marking strategies keep those seams perfectly matched. A significant step involves drafting a flat pattern to make certain of accurate fabric cutting.
- Marking both dart point and dart legs prevents misaligned darts
- Notch marking techniques guide pleat alignment for smooth assembly
- Tailor’s tacks and transfer paper methods improve accuracy when transferring pattern markings
Impact on Professional-looking Results
When your markings land exactly where intended, everything else falls into place—seam alignment stays sharp, notches line up, and the visual quality of each piece speaks for itself.
Precise markings are the invisible architecture of polished sewing—when they land true, seams align, notches match, and quality speaks for itself
Reliable marking tools and tested marking methods prevent avoidable errors, reduce waste, and guarantee the professional results most sewists chase.
Consistent, accurate markings are the backbone of clean, polished finishes.
How Fabric Type Influences Marking Methods
Tailoring your choice of fabric marking methods to the specific fabric type pays off in clearer results and fewer headaches. Delicate fabrics call for thread tracing or soft tools, while thick fabrics like denim welcome chalk or bold marks. With knit fabrics and dark fabrics, visibility and mark removability take center stage.
Consider these factors:
- Understanding fabric sensitivity
- Marking method compatibility
- Fabric selection and performance
Most Common Fabric Marking Methods
There are several ways to mark fabric that make sewing easier and more accurate. Each method has its place, depending on your fabric and what you need to sew.
Here’s what you should know about the main approaches.
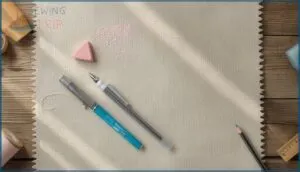
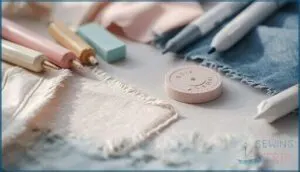
Direct Marking With Pens, Pencils, and Chalk
Ever wondered why some lines vanish while others stubbornly cling to your fabric? Direct marking with Tailors Chalk, marking pens, or fabric pencils offers speed and control, but each comes with pitfalls—think Chalk Smudging, Pen Bleeding, or the wrong Pencil Hardness.
Always test for Mark Removal to avoid lasting marks or fabric damage when using these practical marking tools.
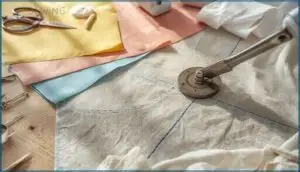
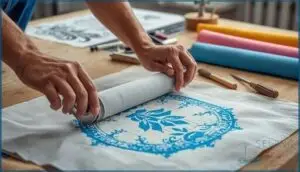
Using Tracing Paper and Tracing Wheels
If you crave crisp pattern markings, tracing paper and tracing wheels deliver reliable results. Achieve true marking accuracy by choosing the right paper types and adjusting wheel pressure. Follow these five steps for perfect Transfer Marking:
- Verify fabric alignment.
- Extend tracing paper past edges.
- Apply moderate pressure.
- Double-check visibility.
- Remove residue gently.
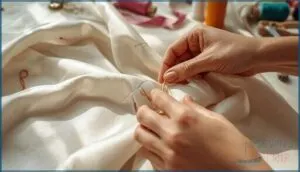
Tailor’s Tacks and Thread Tracing
If you’re aiming for accuracy in transfer marking, tailor’s tacks and thread marking offer dependable results, especially with delicate fabrics and complex seams. Their historical significance lies in couture sewing, where stitches, not ink, guide precision.
This removal process leaves no trace, making these sewing techniques reliable for accuracy advantages, especially when traditional marking fabric methods might risk permanent marks.
Marking With Pins and Pin Wheels
Pin marking marries accuracy with simplicity for many sewing projects: a handful of pins, carefully angled and spaced every few inches, will hold even the trickiest seams in line.
Pin wheels shine in quilting, letting you mark fabric quickly and precisely. Mind your technique—using the right marking tools and pin angles boosts sewing efficiency and helps you sidestep common safety concerns.
Transfer Marking Techniques
Transfer marking techniques bridge accuracy and speed, making them essential for transferring pattern markings to fabric. Here’s how you’ll navigate this method:
- Select Paper Types that suit your fabric.
- Adjust Wheel Pressure for clear marks.
- Test Fabric Suitability for crisp transfers.
- Check Mark Longevity on scraps.
- Note Industry Use—especially in mass production—proves its reliability.
Choosing The Right Marking Tool
Finding the right marking tool comes down to understanding your fabric and the results you want. Each tool has strengths and drawbacks, and some work better on certain fabrics than others.
Let’s look at the options to help you choose with confidence.
Matching Marking Tools to Fabric Types
Ever noticed how fabric type sets the tone for your entire sewing journey? Choosing marking tools isn’t guesswork—it’s about matching performance to material. For delicate fabric, micro-line markers protect fibers, while dense fabrics call for triangle tailor’s chalk. Color contrast and industrial efficiency matter too. CAD systems now fine-tune this decision. Here’s a quick comparison:
| Fabric Type | Ideal Marking Tool |
|---|---|
| Delicate Fabric | Arteza Micro-Line Marker |
| Dense Fabrics | Triangle Tailor’s Chalk |
Pros and Cons of Chalk, Pens, and Pencils
Choosing between tailor’s chalk, fabric pencils, and removable fabric pens comes down to trade-offs.
Chalk pencils erase easily but can leave chalk residue and require sharpening. Pens deliver crisp lines, yet pen bleeding or erasability issues can surprise you.
Pencil hardness affects mark clarity; too hard, and there’s a risk of fabric damage or faint lines. Assess marking tool pros and cons for each project.
Safe Marking for Delicate and Thick Fabrics
Whether you’re tackling delicate silk or dense canvas, marking fabric safely means balancing mark visibility and the risk of fabric damage. Testing imperatives matter—always try tools on scraps first. Use gentle pressure, opt for chalk wheels or tailor’s tacks, and prioritize temporary marking for clean residue removal. Different fabric types demand specific marking tools and thoughtful techniques.
- Chalk wheels: minimal pressure, easy residue removal
- Tailor’s tacks: perfect for fragile weaves, no marks left
- Water-soluble pens: test for visibility and staining
- Washi tape and removable stickers: gentle on fibers, no fabric damage
- Contrast thread: reliable for thick and plush materials
Top 10 Fabric Marking Tools for Sewing
Choosing the right marking tool can make your sewing process smoother and more accurate. You’ll find certain options work better depending on your fabric and project needs.
Here are ten trusted fabric marking tools worth having in your toolkit.
1. Professional Tailors Chalk Fabric Markers Set
A trusted staple on any sewing table, the Professional Tailors Chalk Fabric Markers Set lets you mark fabric with clarity and control. Triangular chalk or chalk pencils glide over textiles, delivering fine, sharp lines—ideal when marking precision counts.
These sets shine with their color variety, allowing you to select just the right shade for contrast. The chalk composition, generally a blend of clay and wax, washes out easily. A dedicated holder reduces breakage and keeps your tailors chalk ready to use whenever inspiration—or a tricky pattern—strikes.
Best For: Professional tailors, sewing enthusiasts, and anyone who needs crisp, temporary markings on a range of fabrics.
- Triangular shape and multiple colors make marks clear and easy to place on most fabrics.
- Marks remove easily with water or brushing, helping protect your projects.
- Included holder cuts down on chalk breakage and keeps things tidy.
- Chalk may break if dropped or handled roughly.
- Extra pressure is sometimes needed to mark on thick or tough materials.
- Can be hard to use on certain fabrics like felt, and may need edge smoothing for best results.
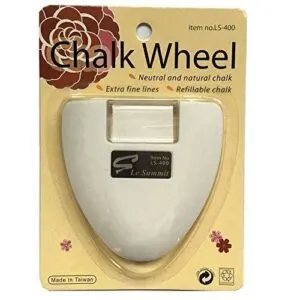
2. YEQIN Chalk Wheel Fabric Marker White
If you’re after Chalk Wheel Precision across a range of projects, the YEQIN Chalk Wheel Fabric Marker stands out for reliable line clarity. This marking tool glides smoothly—ideal for marking fabric like cotton, faux leather, or even waterproof canvas.
Its refillable design and fabric versatility mean you’ll save in the long run. Fans highlight easy erasure methods: lines brush off, wipe away with water, or vanish with a damp cloth.
Durability testing reveals strong marks that last through User Satisfaction surveys.
Best For: Quilters, sewists, and tailors who need precise and removable fabric markings on a range of textiles.
- Refillable and cost-effective for long-term sewing work
- Makes fine, visible lines on most fabrics and erases easily with water or a quick brush
- Ergonomic grip and protective cap keep hands and supplies tidy
- May require multiple passes for thicker or more visible lines
- Limited durability—some users report short life with heavy use
- Not suitable for very delicate fabrics like silk or nylon
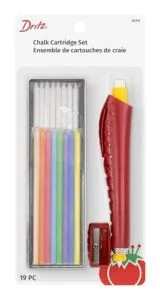
3. Dritz Chalk Cartridge Set with Sharpener
Precision meets versatility with the Dritz Chalk Cartridge Set, a practical choice when marking fabric across mixed projects. The ergonomic cartridge houses assorted chalk pencils—handy for switching hues to match any textile.
Each 4mm dritz refill for deluxe hem marker white chalk delivers fine, visible lines, though users note chalk refill breakage and occasional color stain potential.
For long-term projects, the cartridge system value shines, aided by an effective sharpener. If multi-fabric usability and fast mark removal matter in your marking fabric techniques, this marking tool stands out.
Best For: Crafters, quilters, and sewists who need a versatile, easy-to-use tool for marking a variety of fabrics.
- Includes a mix of 16 colored and white chalks for flexible marking on light or dark materials
- Cartridge and sharpener support precise, consistent lines with minimal waste
- Marks are generally easy to remove from most woven fabrics
- Chalk refills can break easily with regular use
- Some colors may stain fabric or not show up well, especially on dark or synthetic materials
- Contains chemicals flagged by California for potential health risks
4. Dritz Dual Purpose Marking Pen
Among tools for marking fabric, the Dritz Dual Purpose Disappearing Ink MarkBGone Marking Pen in Blue and Purple stands out for its dual-tip functionality. One end uses air-dissolving ink, the other a water-soluble formula—offering real flexibility for sewing tasks.
Ink durability holds steady on woven cottons, while marks remove easily with water or air. This pen’s fabric compatibility and fine points lend accuracy, while clear safety handling guidelines boost user satisfaction. It’s a practical option for diverse marking methods.
Best For: Crafters, quilters, and sewists who need flexible, temporary fabric marking on light to medium materials.
- Dual-tip design with blue and purple ink gives options for water-removable or air-dissolving marks.
- Fine point allows for precise lines, ideal for detailed sewing, embroidery, and quilting projects.
- Works well on most cottons and linens, with markings that remove cleanly and quickly.
- Purple ink may leave faint stains or not fully disappear on some synthetic or specialty fabrics.
- Blue ink can smear if wet and may dry out faster than the purple side if uncapped.
- Limited visibility on dark or heavily textured fabrics limits versatility.
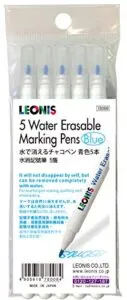
5. Leonis Water Erasable Fabric Marking Pens
The LEONIS Water Erasable Fabric Marking Pen combines ink erasability and tip precision, making it a staple for those seeking control and clarity in temporary fabric marking. With a fine, firm tip, you’ll easily lay down crisp lines that stay put during the project and vanish with a touch of water.
Reviews highlight pen longevity, noting up to 500 meters of use. These water-soluble marking pens excel in fabric compatibility, especially on cottons and synthetics, making them stand out among fabric marking tools for quilters and garment makers.
Best For: Quilters, embroiderers, and crafters who need precise, easily removable marks on light and medium-color fabrics.
- Water-erasable ink disappears completely with water, leaving no residue.
- Fine, consistent tip creates crisp, clear lines up to 500 meters per pen.
- Excellent for a wide range of fabrics, especially cotton and synthetics.
- Marks may not show well on very dark or black fabrics.
- Cap does not fit on the end of the pen, making it easy to misplace.
- Not recommended for delicate materials like wool, silk, or hand-dyed fabrics.
6. Clover Water Soluble Marking Pencil Set
Looking for a reliable way to mark fabric for sewing projects without stress? The Clover Water Soluble Marking Pencil Set strikes a balance between clarity and ease of removal. With water solubility as its standout feature, these fabric pencils offer strong color visibility on light and dark textiles.
You’ll appreciate their lead durability—testing shows fewer breaks and consistent lines—plus broad fabric compatibility, from cotton to delicate silks.
Packaging details matter, too: each set includes three protected pencils, making them easy to store and grab on busy sewing days.
Best For: Sewists, quilters, and crafters who need visible, easily removable fabric markings for a variety of textiles.
- Water-soluble markings wipe away completely and quickly with just water.
- Fine-tip lines show clearly on both dark and light fabrics, with three color choices.
- Durable leads resist excessive breakage, and protective caps help prevent accidents in storage.
- Leads can break when sharpening, especially with some pencil sharpeners.
- May not mark well or remove easily on certain specialty fabrics—testing on scraps is recommended.
- Some users find the pencils tricky to sharpen and prone to tip breakage.
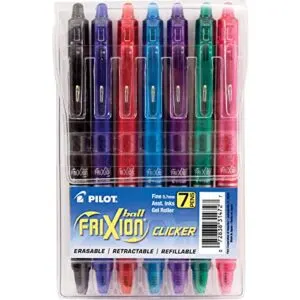
7. Pilot FriXion Erasable Gel Pen Set
Ever marked fabric only to wish you could erase it clean? Frixion Pens, well-known for their heat erasable ink, bridge that gap in fabric marking tools. With a wide color range, these erasable pens produce crisp lines that vanish under a hot iron—yet users should note the potential for erasure reappearance if chilled.
They shine on cottons and canvas, though ink safety is a consideration on delicates. User experiences highlight their reliability for marking fabric, especially in precision-driven sewing and quilting projects.
Best For: Crafters, quilters, teachers, and everyday note-takers who want crisp, erasable lines for projects or temporary fabric marking.
- Clean, fine lines erase easily with heat or friction.
- Wide range of refillable colors and quick-drying ink.
- Trusted for a variety of fabrics—great for detailed sewing, sketching, and everyday notes.
- Not intended for legal or archival documents; ink can reappear in extreme cold.
- Some fabrics (silk, synthetics) may show ghost marks or color changes.
- Limited erasure on thick or heavily marked areas; best suited for light to moderate use.
8. ibotti Washable Fabric Marking Pen Set
Precision—especially in embroidery and quilting—relies on tools you can trust. The ibotti Washable Fabric Marking Pen Set stands out due to its vivid inks and easy-to-check barrels, offering real user satisfaction and high ratings for both fabric compatibility and pen longevity.
These fine-tip markers glide smoothly, with Ink Removability via heat your best bet, though some Color Residue may persist on lighter fabrics. Ideal for marking fabric across craft and sewing projects, these removable fabric pens keep your work sharp and stress-free.
Best For: hobbyists, quilters, and embroidery fans who need sharp, colorful marks that iron away cleanly on most fabrics.
- Wide range of bright ink colors for marking on various fabric shades.
- Fine-tip design allows for super-precise lines and patterns.
- Heat erases most marks fully, especially on dark fabrics, making cleanup fast.
- Some ink colors may leave residue on light fabrics or require extra soaking.
- Not recommended for garment sewing where ironing could set the ink permanently.
- Performance is mixed on silk, wool, or when used with fusible interfacing.
9. Clover Hera Fabric Marker Tool
When you need absolutely clean marks, the Clover Hera Marker for Marking and Creasing stands out from other tools and materials. Instead of ink, the Hera marker uses pressure marking, leaving a crisp, tactile crease visible on cotton, linen, or synthetics.
With proven durability assessment and ergonomic grip, it glides smoothly without strain. You’ll find crease visibility lasts through multiple steps, yet disappears with steam or washing.
Its broad fabric compatibility and subtle touch make it an expert’s favorite for precision pattern work.
Best For: Anyone who wants residue-free, precise creases on fabric—especially quilters and sewists working on delicate, heirloom, or multi-layer projects.
- No ink or chemicals—creases vanish with steam or washing, so there’s zero cleanup.
- Ergonomic grip makes long marking sessions easy and fatigue-free.
- Works on almost any fabric without risk of damage or staining.
- May struggle to mark clearly through very thick batting or dark, heavy materials.
- Some users find it less convenient than just finger pressing or using an iron.
- Only leaves a crease—won’t show up at all on fabrics that can’t hold a fold.
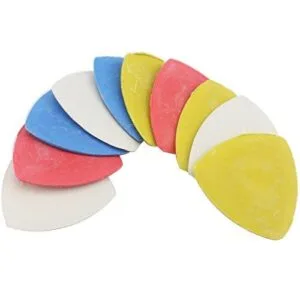
10. Triangle Tailors Chalk Sewing Fabric Markers
If your workflow calls for adaptability, triangle tailor’s chalks bring Chalk Durability, Marking Precision, and true Color Variety right to your fingertips. Each edge glides cleanly along the fabric, making this tool a favorite among those handling diverse textiles.
You’ll value easy removal methods—most marks brush away or wash out—and confidence in Fabric Compatibility, from cotton to silk. Triangle shapes prevent rolling and reduce breakage, making these marking fabric tools both practical and reliable for varied marking fabric techniques.
Best For: Anyone sewing, tailoring, or quilting who needs clear, temporary markings in a variety of colors with minimal mess.
- Marks fabric precisely with sharp triangle edges and a comfortable grip.
- Multiple chalk colors let you match markings to any fabric and boost design accuracy.
- Chalk wipes or washes away easily, reducing the chance of permanent stains.
- Chalk pieces can break if dropped or handled roughly.
- Marks may not wash out completely from very light fabrics without special care.
- Some users report occasional breakage or damage in shipping.
Best Practices for Accurate Fabric Marking
Getting fabric marking right is the foundation for clean, precise sewing. A few simple habits can make your marks far more reliable and easy to remove.
Here’s what to keep in mind for accuracy at every step.
Marking Inside Seam Allowances
When marking fabric for sewing, always place your marks within the seam allowances. Industry marking standards recommend keeping marks at least 2 mm inside the seam line for concealment, no matter the fabric type.
Use temporary marking methods and accurate tools—like chalk wheels or washable pens—to suit different materials. This keeps your stitching precise while ensuring finished garments look clean and professional.
Removing Marks Safely After Sewing
Don’t let a lingering mark ruin your hard work—removing fabric markings safely makes all the difference. Getting rid of temporary markings demands a gentle touch. Follow these expert tips for worry-free mark removal:
- Use water immersion efficacy for washable marks.
- Dry-brush chalk mark removal.
- Try ink stain removal with alcohol.
- Avoid heat on permanent markings.
- Test expert removal guidelines first.
Using Different Colors for Clarity
With color-coded markings at your fingertips, it’s easy to boost error reduction and clarity—especially when fabric contrast is a challenge. For instance, using multiple fabric marker colors streamlines industrial efficiency and helps you spot notches, darts, or seam lines fast. Most marking pens come in tool sets built for this.
See the practical combinations below:
| Marking Pen | Best Use | Fabric Contrast |
|---|---|---|
| Blue Chalk | Light fabrics | High |
| White Pencil | Dark fabrics | High |
| Red Marker | Pattern accents | Medium |
Avoiding Common Marking Mistakes
Although it’s tempting to rush, skipping a quick test mark can haunt your project—incorrect pressure sensitivity alone causes fabric damage and stubborn marks. Always match marking tools and materials to your fabric, since improper removal methods or tool suitability issues leave permanent traces.
Prioritize marking accuracy by working inside seam allowances; with every new material, preview your results on a scrap.
Storing Marking Tools Properly
To protect your marking tools and materials from premature wear, store them in a cool, dry place with proper humidity control. Temperature effects can damage inks and chalks, so avoid direct sunlight.
Tool orientation matters—lay fabric markers horizontally with caps tight. Use container types like airtight boxes with dividers to organize tools for fabric marking. These safety precautions extend tool life considerably.
Frequently Asked Questions (FAQs)
Can you mark fabric without traditional tools?
You can mark fabric using soap slivers on dark materials, freezer paper for tracing, masking tape along edges, finger pressing for temporary creases, or steam marking—proving traditional marking tools aren’t always necessary.
How do you mark stretchy or knit fabrics?
You’ll need light chalk or specialized stretch fabric markers to prevent knit fabric distortion. Test first—some pens bleed.
Tailor’s tacks offer stability, while chalk wheels work without stretching fibers during marking.
What marking methods work best for quilting?
Looking for marks that vanish like magic? Erasable pens disappear within 12 to 24 hours, while hera markers leave zero residue. Thread tacking and adhesive methods offer fabric compatibility across cotton quilts.
Do marking tools expire or lose effectiveness?
Yes, fabric markers and marking tools do expire. Most maintain effectiveness for 18–30 months sealed, but post-opening, water-soluble pens lose capacity within 6–12 months while chalk hardens after prolonged storage.
How do you mark dark or black fabrics?
Use white chalk, soap marking, or white pens for chalk visibility on dark fabric. Light tracing paper, white pencils, and cornstash paste also work well. Test each fabric marker first to make certain of clean removal.
Conclusion
The next time you reach for your pattern pieces, you’ll know exactly which tool will guide your stitches without a trace of doubt.
Mastering fabric marking methods for sewing transforms guesswork into precision, turning every project into something you’re proud to show off. Your markings become silent partners in construction—visible when you need them, invisible when you don’t.
With the right technique matched to your fabric, you’ll spend less time fixing mistakes and more time enjoying the craft itself.
- https://www.seamwork.com/fabric-guides/sewing-lab-best-way-mark-fabric
- https://www.dharmatrading.com/images/public/pdf/msds/MSDS_C28%20SDS.pdf
- https://www.sewing.org/files/guidelines/1_145_marking_tools.pdf
- https://www.studocu.com/ph/document/xavier-university-ateneo-de-cagayan/btled/s8-sewing-lecture-mastering-fabric-marking-techniques/143449409
- https://topnotchpattern.com/marker-making-in-garment-production

