This site is supported by our readers. We may earn a commission, at no cost to you, if you purchase through links.
Think of it like threading a needle – it needs to be just right.
Turn your tension dial to a lower number if stitches are too tight and puckering your fabric.
If they’re too loose and loopy, increase the tension gradually.
Test each adjustment on scrap fabric first.
Your upper and bobbin threads should lock together perfectly in the fabric’s middle, not on top or bottom.
Sometimes re-threading your entire machine works like magic, solving mysterious tension gremlins that seem to appear overnight, and it’s essential to check if your thread is properly seated and if the stitches are too tight.
Table Of Contents
Key Takeaways
- Start with small tension dial adjustments and test each change on scrap fabric – move one number at a time rather than making dramatic changes that’ll force you to start over.
- Check that your thread’s properly seated in the tension disks and rethread your entire machine with the presser foot up when mysterious tension problems appear overnight.
- Match your thread type, needle size, and fabric weight like puzzle pieces – heavy fabrics need higher tension settings while delicate materials require gentler adjustments to prevent puckering.
- Clean your tension disks monthly and maintain your machine regularly with proper oiling to prevent lint buildup that causes inconsistent stitching before problems start.
Fix Upper Thread Tension
You’ve probably stared at wonky stitches wondering why your thread keeps acting like a rebellious teenager.
Your sewing machine’s throwing a tantrum again, and those stitches look like they’ve given up on life.
Upper thread tension problems show up as puckered fabric, loose loops, or stitches that look different on each side of your material, which can be frustrating and affect the quality of your work, making loose loops a common issue.
Identifying Tension Issues
Three telltale signs reveal upper thread problems instantly.
First, check your stitch appearance – loose stitches sewing creates visible loops on fabric’s top surface.
Listen for sound clues like unusual clicking or grinding during stitching.
Always use test fabric scraps to spot thread behavior issues before starting projects.
These common symptoms help you catch sewing tension issues early and adjust thread tension properly.
Causes of Upper Thread Tension
Your upper thread tension problems usually stem from a few common culprits.
Poor thread quality creates inconsistent pull, while lint buildup clogs tension disks.
Check your thread path – incorrect threading throws everything off balance.
Bobbin issues affect the entire tension system, and worn tension disks can’t grip properly.
These sewing tension issues compound quickly, turning simple projects into frustrating battles.
Incorrect threading can lead to excessively tight tension, which is a critical issue that can cause upper thread problems, leading to frustrating battles and requiring simple solutions.
Checking Stitch Formation
Looking at your stitch formation tells the whole story about needle thread tension. Check both fabric sides for balanced stitches – you shouldn’t see loops or puckers.
Consistent loops on the underside mean your tension adjustment worked. If stitch appearance shows thread pulling through or gaps, your sewing machine tension needs tweaking.
These tension indicators guide your next move.
Adjusting Upper Thread Tension
You’ve spotted the tension problem, and now it’s time to turn that little dial on your machine to fix it.
Start with small adjustments, testing each change on scrap fabric, because even a tiny twist can make the difference between perfect stitches and a sewing disaster.
Using Tension Dial
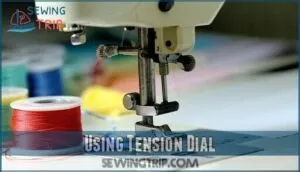
Most sewing machines feature a numbered tension dial ranging from 0-9, with 4 as the default setting.
Start your tension dial adjustment by testing different dial increments on scrap fabric.
Turn the dial clockwise to increase needle thread tension, counterclockwise to decrease it.
Always match your sewing machine tension dial settings to your thread pairing and fabric weight for ideal results.
Incremental Tension Adjustments
Making needle thread tension adjustments isn’t about dramatic dial spins – it’s about baby steps. Move your tension dial one numbered setting at a time, then test stitching on fabric scrap before continuing. Gradual retightening prevents overcorrection disasters that’ll have you starting over from scratch.
Perfect tension comes from patience, not power – one click at a time beats starting over from zero.
- Feel the satisfaction of perfectly balanced stitches forming under your needle
- Experience the relief when puckering disappears with just one dial increment
- Gain confidence knowing each test stitch brings you closer to sewing mastery
- Enjoy the peace of controlled thread tension adjustment that actually works
Balancing Upper Thread Tension
You’ve adjusted your tension dial, but now you need to match your thread, fabric, and needle like pieces of a puzzle.
Getting these three elements to work together perfectly is what separates smooth stitching from the frustrating tangles that make you want to toss your machine out the window, which is often due to the lack of perfectly matched components.
Matching Thread Types
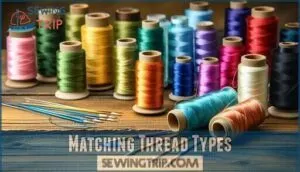
Thread material and weight differences create tension headaches faster than you’d expect.
Cotton thread behaves differently than polyester, while silk demands its own settings.
Match your needle pairing to thread thickness – heavy threads need larger needles.
Check fabric compatibility before starting any project.
Polyester offers distinct advantages depending on the project.
Different thread types require specific tension adjustments, so test combinations on scraps first to ensure the best results with various thread types and to avoid common mistakes.
Considering Fabric Thickness
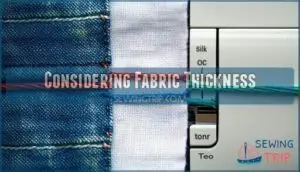
Your fabric weight directly affects tension adjustment needs.
Thick materials like denim require higher tension settings to pull the bobbin thread properly through dense layers. Lightweight fabrics need gentler tension to prevent puckering.
Test your sewing machine tension on scrap fabric first – heavy upholstery demands maximum dial settings while delicate silk barely needs adjustment above standard.
The tension discs alignment is critical for correct stitching.
Needle Size and Type
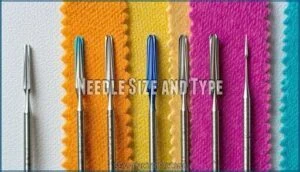
Your needle size directly impacts thread tension more than you’d think.
Universal needles work great for most fabrics, but specialty needles matter for tricky materials.
Point style affects thread flow—sharp needles for wovens, ballpoint for knits.
Poor needle condition creates tension nightmares.
Match your needle size to thread weight and fabric thickness for perfect Needle-Fabric Pairing every time.
Different fabrics require different needles, so consider needle types for ideal sewing.
Common Upper Thread Tension Issues
You’ll face three main upper thread tension problems that can turn your sewing project into a frustrating mess.
These issues include tight stitches that pucker your fabric like a ruffled shirt, loose stitches that create messy loops, and uneven tension that leaves gaps in your seams.
Tight Stitches and Puckering
When your fabric looks like it went through a washing machine disaster, tight stitches are pulling everything out of whack.
Overly tense thread tension creates fabric puckering sewing nightmares that’ll make you want to toss your machine out the window.
Here’s what’s happening with your tight stitches sewing:
- Presser Foot pressure crushing delicate fabrics against the fabric grain
- Thread Weight too heavy for lightweight materials, creating excessive pull
- Stitch Length too short, bunching fabric into accordion-style wrinkles
- Differential Feed settings fighting against natural fabric movement during sewing machine tension adjustments
Lower your tension adjustment dial immediately.
Finding the right products can help achieve consistent stitch quality.
Loose Stitches and Thread Breakage
On the flip side, loose stitches create their own headaches.
When your upper thread tension’s too low, you’ll see loops on top and thread breaks often.
Poor thread quality causes skipped stitches, while needle problems and bobbin issues compound the mess.
Check your tension guide first—tighten that dial gradually.
Most loose stitches disappear with proper tension troubleshooting and quality materials.
Using high quality thread can also help resolve these issues.
Uneven Tension and Gaps
When your stitches skip around like a broken record, you’re dealing with uneven tension and gaps.
These annoying problems make your seams look unprofessional and weak.
Here’s what causes uneven sewing machine tension:
- Skipped Stitches from incorrect needle problems or dull points
- Fabric Feed issues preventing smooth material movement
- Bobbin Issues creating inconsistent thread quality delivery
- Thread Quality variations affecting tension adjustment consistency
Maintaining Upper Thread Tension
You’ll keep your sewing machine’s upper thread tension working smoothly by cleaning those tension disks regularly and giving the moving parts a quick oil treatment.
Think of it like brushing your teeth—skip the routine maintenance, and you’ll face bigger problems later when lint builds up and makes your stitches go haywire.
Regular Machine Maintenance
Regular sewing machine maintenance prevents most thread tension headaches before they start.
Clean your machine thoroughly after each project, focusing on lint removal around feed dogs and bobbin areas.
Replace needles every 8-10 hours of use and stick to high-quality thread.
Schedule professional servicing annually—your machine will thank you with consistent, beautiful stitches every time.
Cleaning Tension Disks
Dust and lint love hiding between your tension disks like sneaky gremlins.
Clean them monthly using compressed air or a soft brush for ideal sewing machine tension.
Remove the upper thread completely, then gently blow out debris from tension disks cleaning areas.
This simple tension cleaning routine prevents thread snags and maintains smooth operation without professional cleaning services, ensuring a smooth operation.
Oiling Moving Parts
Keep your machine’s moving parts well-lubricated for smooth sewing machine tension control. Check your manual for specific oil types and lubrication frequency—typically every 8-10 hours of use.
Focus on part accessibility areas like the hook race and needle bar. Proper sewing machine maintenance prevents corrosion and guarantees residue removal, reducing costly sewing machine repair needs.
Incorrect threading can lead to tight thread tension, so make certain of proper setup.
Troubleshooting Upper Thread Tension
When your tension adjustments aren’t fixing the problem, it’s time to try some basic troubleshooting steps that often solve stubborn issues.
You’ll be surprised how many tension headaches disappear with a simple re-threading or a quick peek at your machine’s manual.
Re-threading The Machine
When sewing machine tension acts up despite your best maintenance efforts, it’s time to start fresh.
Unthread your machine completely and begin the proper threading process from scratch.
Lift the presser foot first – this releases tension disks for accurate thread path placement.
Check bobbin placement too. Sometimes a simple re-threading fixes stubborn upper thread tension issues that adjustments can’t solve, which can be a fresh start.
Consulting The Manual
When re-threading doesn’t solve your sewing machine tension woes, your manual becomes your best friend. That booklet you probably tossed aside contains goldmine information about your specific machine’s tension adjustment and sewing machine troubleshooting methods.
Your sewing machine manual offers these tension-saving resources:
- Diagram Interpretation – Visual guides showing exact tension dial positions for different fabrics
- Troubleshooting Guide – Step-by-step solutions for common thread tension problems
- Maintenance Schedules – When to clean tension disks and service moving parts
- Parts Identification – Locating tension components and understanding their functions
Don’t wing it—consult those stitch settings charts and tension adjustment specifications first. Maintaining balanced thread tension guarantees stitch durability.
Seeking Professional Help
When to seek professional consultation? If your sewing machine tension troubleshooting efforts hit a wall, it’s time to call in the experts.
Finding qualified repair services costs $50-$100 for basic sewing machine servicing, but saves you headaches.
DIY vs Professional? Sometimes surrendering to a pro beats wrestling with stubborn tension issues. Professional sewing machine tension repair guarantees proper calibration and peace of mind.
Frequently Asked Questions (FAQs)
How do you manage tension on a sewing machine?
Start with your tension dial at 4, then test on scrap fabric.
If stitches pucker, lower the number. If loops appear underneath, raise it.
Make small adjustments and rethread completely when needed.
What should I do if my bobbin thread is too tight?
Bobbin threads acting like stubborn mules?
Loosen the bobbin case screw by turning it counterclockwise in tiny quarter-turns.
Test each adjustment on scrap fabric until you’ve tamed that overly enthusiastic thread.
What is a sewing machine tension?
Tension controls how tightly your machine grips both upper and bobbin threads.
It’s the push-and-pull balance that creates even stitches.
When properly adjusted, you’ll get strong seams without puckering or loose loops.
How do you manage thread on a sewing machine?
Picture tangled thread creating a bird’s nest under your fabric – that’s poor thread management in action.
You’ll load your bobbin correctly, thread your needle with the presser foot up, and adjust tension settings gradually while testing on scrap fabric.
How to avoid sewing machine tension issues?
Clean your machine regularly, use quality thread, test settings on scrap fabric first, and rethread with the presser foot up.
Small adjustments work better than big changes when fine-tuning your tension dial.
How to adjust bobbin thread tension on a sewing machine?
Ironically, most sewers avoid this adjustment like the plague. Locate the small screw on your bobbin case. Turn clockwise to tighten, counterclockwise to loosen. Make tiny quarter-turns and test frequently.
How do you reduce upper thread tension?
Turn your tension dial to a lower number – if it’s at 5, try 3 or
Make small adjustments and test on scrap fabric first.
You’ll see looser stitches when the tension decreases properly.
How to fix loose upper thread?
Ninety percent of sewers battle loose upper thread at some point.
Increase your tension dial gradually from the default setting.
Test on scrap fabric after each adjustment.
Clean tension disks and rethread completely if problems persist.
Can old thread cause tension problems?
Old thread breaks down, becomes brittle, and creates inconsistent tension.
You’ll notice fraying, snapping, and uneven stitches.
Fresh thread flows smoothly through your machine’s tension discs, preventing frustrating adjustments and ensuring balanced stitches, with smooth flow through your machine.
Does humidity affect thread tension settings?
Like a moody weather system, humidity throws your thread tension off balance.
You’ll need to adjust settings when moisture levels change substantially.
Dry air tightens threads while humid conditions make them slack and stretchy.
Conclusion
Mastering thread tension doesn’t have to feel like wrestling with a stubborn machine.
You’ve now got six reliable methods to fix upper thread tension sewing problems that’ll transform your stitching from frustrating to flawless.
Remember to test adjustments on scraps, make gradual changes, and keep your machine clean.
When tension issues pop up, you’ll tackle them confidently instead of avoiding your sewing projects, and with perfect stitches within reach—your fabric will thank you for the attention.
- https://www.sciencedirect.com/topics/engineering/sewing-damage
- https://cdcgroup.com/fetch.php/virtual-library/387650/Bernette_65_Troubleshooting.pdf
- https://www.slideshare.net/slideshow/sewing-machines-problems-and-remedy/246816941
- https://www.researchgate.net/publication/271680974_Study_on_Dynamic_Needle_Thread_Tensions_in_a_Single_Needle_Lock_Stitch_SNLS_Sewing_Machine_II_Effect_of_Sewing_Speed_Thickness_of_Fabric_Plies_Thread_Linear_Density_and_Pre-tensions_of_Threads
- https://vtechworks.lib.vt.edu/bitstream/handle/10919/101389/LD5655.V855_1966.T656.pdf

