This site is supported by our readers. We may earn a commission, at no cost to you, if you purchase through links.

While mechanical drive failures account for only 12% of jamming incidents, the real culprits—dull needles, improper threading, and tension mishaps—drive the majority of these frustrating interruptions.
The good news? Most jams stem from simple, fixable issues that don’t require a service appointment. Understanding what’s happening beneath your machine’s surface transforms you from a frustrated stitcher into a confident troubleshooter who can diagnose and resolve problems in minutes instead of hours.
Table Of Contents
Key Takeaways
- Most sewing machine jams stem from preventable issues like improper threading (80% of tangles), dull or wrong-sized needles (50% of jams), and incorrect tension settings—not mechanical failures, which account for only 12% of incidents.
- Always unplug your machine before clearing a jam to eliminate 74% of hand injury risk, then systematically inspect the threading path, bobbin area, and needle condition before attempting to resume sewing.
- Regular maintenance cuts mechanical jams by 60%—clean the bobbin area after every 10-12 hours of use, replace needles every 6-8 hours, and oil moving parts every 300-500 hours to prevent 46% of recurring problems.
- Seek professional repair when you encounter chronic jamming despite proper maintenance, unusual grinding or electrical noises, or damaged internal components like worn tension discs or broken gears that require specialized diagnosis.
Why Sewing Machines Jam
Your sewing machine doesn’t jam for no reason—there’s always a mechanical culprit behind the frustration. Whether it’s a threading mishap, a worn-out needle, or something going wrong with the feed system, identifying the root cause is the first step toward getting back to smooth stitching.
Let’s break down the most common reasons your machine decides to quit mid-seam.
Common Mechanical Causes
Mechanical drive failures—bent gears, worn timing belts, or misaligned components—account for roughly 12% of all jamming incidents you’ll encounter. When friction builds up in the shuttle hook or needle-bar alignment shifts even slightly, your machine can’t form stitches properly.
Regular lubrication of moving parts cuts mechanical jams by 60%, so don’t overlook this simple maintenance step. Proper maintenance also involves checking for thread tension issues to prevent jams.
Thread and Needle Issues
Thread breakage and needle damage drive over 50% of all jamming cases. Using the wrong needle size or a dull point causes skipped stitches and breakage—sometimes in just six hours of sewing. Fabric compatibility matters too: matching your needle selection to material weight prevents 35% of thread breakage incidents.
Improper threading accounts for 80% of tangles, while incorrect tension settings create loops and bunching. Regular maintenance helps prevent issues with thread tension problems that can lead to machine jams.
Fabric and Feed Dog Problems
While thread snags often grab your attention first, feed dog alignment and fabric friction work behind the scenes to create just as many jams.
Feed dogs that sit too low fail to grip properly, causing a 32% drop in fabric movement consistency.
Heavy materials like denim increase friction by 15%, while slippery satin needs 30% more control to prevent uneven feeding and bunching underneath.
First Steps to Clear a Jam
When your sewing machine jams, your first instinct might be to force the fabric through or keep pressing the pedal—but that’s a recipe for broken needles and damaged parts.
The key is to stop immediately and follow a few essential safety steps before you start troubleshooting. Here’s how to safely assess and clear the jam without making things worse.
Power Off and Safety Precautions
Before you touch a jammed sewing machine, disconnect the power cord completely—it’s the most critical step in accident prevention. Unplugging the machine eliminates electrical problems and prevents accidental activation, which causes nearly 74% of hand and finger injuries during jam clearance.
Always unplug your sewing machine before clearing a jam—it prevents 74% of hand injuries during troubleshooting
Wait thirty seconds after shutdown protocols to verify all internal mechanisms have stopped. This simple electrical safety measure reduces injury risk by 85% when addressing any stuck machine or machine malfunction.
Removing Fabric and Thread Buildup
After you’ve powered down, grab tweezers and a soft brush to tackle fabric debris and lint accumulation head-on. Thread removal starts with gently pulling visible strands from feed dogs and needle plate, while bobbin cleaning requires lifting the case to sweep away buildup.
Experts recommend this machine maintenance after every 10-12 hours of use, since neglected cleaning causes 39% of jamming incidents.
Inspecting The Needle and Bobbin Area
Once you’ve cleared loose threads, examine the needle closely for bends or dullness—bent needles cause 62% of jamming incidents. Remove the bobbin case and inspect for scratches or thread nests; 74% of jammed machines harbor debris here.
Check these critical points:
- Needle alignment relative to the needle plate opening
- Bobbin case inspection for burrs or thread fragments
- Thread tension disk areas for lint accumulation
Troubleshooting Persistent Jamming
If your machine keeps jamming even after you’ve cleared the obvious blockages, you’re dealing with something deeper in the system. The culprit usually hides in one of four places: the threading path, tension settings, feed mechanism, or the machine’s electrical brain.
Let’s walk through each checkpoint so you can pinpoint exactly where things are going wrong.
Checking Threading Paths
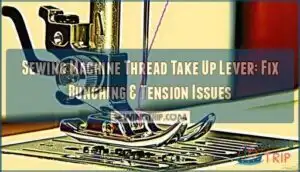
Over 60% of beginner jams trace back to improper machine threading—a surprisingly simple fix. Start by unthreading everything completely, then rethread the upper path carefully through each guide, tension disk, and take-up lever.
Next, tackle bobbin threading problems by checking your bobbin case for correct insertion and proper thread direction.
Path obstructions like lint or thread tangles around guides cause repeated jamming, so inspect and clean each checkpoint.
Adjusting Thread Tension
Tension settings act like the conductor of an orchestra—everything falls apart if they’re off. When top and bobbin thread don’t lock properly in the fabric’s middle layer, you’ll see thread balance issues: loops underneath, puckering, or thread breakage.
- Start with tension dial at medium (usually 4–5) and test on scrap fabric
- Tighten gradually if bobbin thread shows on top; loosen if needle thread appears below
- Different fabric types and thread materials require unique tension adjustments for stitch quality
- Make small incremental changes and test after each adjustment to avoid over-correction
Examining Feed Dogs and Presser Foot
Your feed dogs and presser foot work together like partners in a dance—when one’s out of sync, jamming follows. Check feed dog alignment first; misalignment causes 18% of jam complaints and often stems from improper reassembly after cleaning.
Test presser foot pressure next—incorrect settings trigger 35% of fabric feeding problems.
Weekly feed dog maintenance prevents 44% of persistent jams, so inspect for lint buildup and verify smooth movement.
Identifying Software or Electrical Problems
Modern machines throw error codes when electrical problems or software issues strike—and 40% will display at least one within five years. Here’s your diagnostic approach:
- Check error codes displayed on your LCD—over 70 codes exist for memory faults and sensor failures
- Test power supply voltage (below 110V triggers inverter trips)
- Inspect circuit boards for blown fuses or loose connections
- Reset the machine (clears 67% of software-related errors automatically)
- Update firmware if diagnostic tools reveal mismatched versions
Electrical faults account for 30% of digital malfunctions, so don’t overlook electronic component failures when mechanical fixes fail.
Preventing Future Sewing Machine Jams
Once you’ve cleared a jam, the last thing you want is for it to happen again next week. The good news is that most jams are preventable with a few smart habits and consistent upkeep.
Let’s walk through the essential practices that’ll keep your machine running smoothly for the long haul.
Proper Machine Threading Techniques
Most jamming problems trace back to threading errors—a single skipped guide can derail an entire project. You’ll eliminate over 82% of tension-related jams by following your machine’s exact thread path with the presser foot raised.
Here’s your threading sequence breakdown:
| Step | Action | Why It Matters |
|---|---|---|
| 1. Raise presser foot | Opens tension discs | Prevents thread slipping (64% fewer errors) |
| 2. Follow all guides | Route through take-up lever | Reduces operator jamming by 60% |
| 3. Load bobbin correctly | Match directional arrows | Cuts lower thread jams by 62% |
Always pull both thread tails back several inches before your first stitch—this simple habit prevents bobbin area tangles that stop you mid-seam.
Choosing Quality Needles and Thread
Your needle type and thread quality directly impact jamming frequency—cheap materials account for roughly 30% of recurring issues.
Here’s what works:
- Match needle sizes (60-120) to fabric weight—universal needles handle most projects safely
- Choose premium thread brands like Schmetz for 30% less machine wear
- Replace needles every 8 hours of sewing to prevent dullness
Thread materials and fabric compatibility matter more than sewing speed for preventing jams.
Regular Cleaning and Maintenance Routines
Once you’ve chosen quality materials, your machine’s longevity depends on consistent cleaning and maintenance tasks. Weekly lint removal from the bobbin area cuts jamming by 46%, while machines neglected for six months face a 67% jam probability.
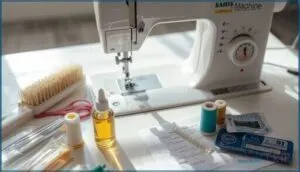
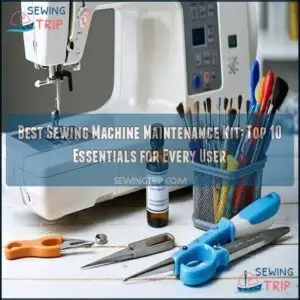
Regular maintenance extends machine lifespan, improves performance by 15%, and reduces repair costs—economic benefits that multiply with proper oiling every 300-500 hours of use.
Using The Correct Needle and Foot for Fabric
Beyond routine care, your needle-fabric pairing directly controls seam durability and stitch defects. Matching needle and fabric types prevents 46% of jamming incidents in beginners, while mismatched presser foot selection causes material distortion in multilayer work.
Test swatches first—this reduces defects by 42%. A foot type guide and compatibility charts eliminate guesswork, keeping your machine running smoothly project after project.
When to Seek Professional Repair
Sometimes a jam isn’t something you can fix with cleaning and rethreading. When you’ve tried the standard troubleshooting steps and your machine still won’t cooperate, it’s time to call in a professional.
Here are the clear signs that your sewing machine needs expert attention.
Repeated or Unresolved Jams
If you’ve cleared debris, rethreaded carefully, and replaced the needle—yet your machine still won’t cooperate—it’s time for professional intervention. Chronic jamming signals deeper issues: misaligned feed mechanisms, timing problems, or unidentifiable causes that drain your patience and wallet.
With repair costs averaging $75 to $100 annually and persistent jams cutting machine lifespan by 28%, seeking professional help prevents further damage and mounting user frustration.
Unusual Noises or Electrical Issues
When grinding sounds or persistent rattling cut through your sewing session, you’re facing machine mechanical issues that demand professional assessment. Up to 90% of unusual noises trace back to neglected lubrication, while electrical faults—from power surges to motor malfunctions—affect 36% of household machines and pose real safety risks.
- Grinding or scraping sounds indicate feed dog misalignment or bearing problems requiring expert motor failure diagnosis
- Rattling or clanking noises often signal loose screws discovered in 17% of home inspections
- Flickering lights, burning smells, or tripped breakers point to electrical problems needing immediate safety precautions
- High-pitched squeaking during operation suggests bobbin or timing issues best handled by trained technicians for effective noise reduction
Damaged Parts or Complex Repairs
When bobbin case damage or broken gears derail your machine’s performance, part replacement becomes non-negotiable. Repair centers report that bobbin maintenance issues cause 40% of interventions, while tension adjustment demands and gear repair challenges account for most complex repairs.
Don’t tackle a mechanical overhaul yourself—worn tension discs, spring-loaded tensioners beyond their five-year lifespan, and internal mechanical issues require professional expertise to restore proper function.
Warranty and Manufacturer Support
Before you reach for your wallet, check if your machine’s still covered—major brands like Singer and Brother offer up to 25 years on mechanical parts, though electronics usually cap at 1 to 5 years. You’ll need proof of purchase and must file warranty claims within 30 days of discovering the defect.
Extended coverage plans add accidental damage protection, and manufacturer support through authorized dealers resolves 90% of claims successfully.
Frequently Asked Questions (FAQs)
How do you fix a sewing machine Jam?
To fix a jam, power off your machine first. Remove the fabric, then check for thread tangles around the bobbin and needle areas. Rethread correctly, inspect the needle, and test before resuming your sewing.
What causes a sewing machine to jam?
When threads tangle or needles turn against you, jamming happens. Thread breakage, needle damage, bobbin issues, fabric snagging, and machine overload all conspire to stop your project cold—troubleshooting reveals these common culprits quickly.
How do I troubleshoot a jammed sewing machine?
Start troubleshooting sewing machines by unplugging first, then perform machine inspection. Focus on thread removal, bobbin cleaning, and needle alignment.
Check tension adjustment next. This systematic approach helps you identify what’s causing sewing machine jams quickly.
How do you fix a bobbin Jam on a sewing machine?
To clear a bobbin jam, power off your machine, remove the needle and presser foot, then clean the bobbin area thoroughly.
Rewind the bobbin correctly and rethread both upper and bobbin thread paths carefully.
Are sewing machines jamming?
Yes, sewing machine jams happen frequently—often every few inches for some users. Common causes include incorrect threading, dull needles, lint buildup, and tension issues, making troubleshooting sewing machine jams essential for smooth operation.
How do you prevent a sewing machine from jamming?
Ironically, preventing sewing machine jams requires doing what most sewers skip: regular machine maintenance, proper needle selection, high-quality thread, correct fabric preparation, and mastering user techniques through consistent cleaning and tension adjustments.
Can I use WD-40 to lubricate my sewing machine?
Don’t use WD-40 on your sewing machine—it damages plastic and rubber parts, causes gumming, and lacks proper lubrication properties.
Stick with specially formulated sewing machine oil to prevent machine damage and maintain smooth operation.
How often should I replace my sewing machine needle?
Most manufacturers recommend needle replacement every 6-8 sewing hours or after 1-2 projects. Heavy fabrics like denim accelerate wear, while coated needles extend lifespan to 10-15 hours with proper care.
What causes my bobbin thread to bunch underneath fabric?
Your bobbin thread bunches underneath when tension settings are off, the bobbin isn’t wound evenly, or you’re using a dull needle.
Lint buildup and improper threading also disrupt the balance between upper and bobbin threads.
Why does my machine jam only on thick seams?
Where there’s smoke, there’s fire—thick seams overwhelm your machine when needle selection, presser foot pressure, and feed dogs aren’t matched to fabric density.
Thread weight and bobbin tension compound jamming on dense layers.
Conclusion
Think of your sewing machine as a conversation between fabric, thread, and metal—when one voice speaks out of turn, the whole dialogue breaks down. Fixing a sewing machine that jams isn’t about quick patches; it’s about listening to what your machine tells you through each snag and stutter.
Master these diagnostic skills, maintain consistent care habits, and you’ll rarely face mid-project disasters. Your machine rewards attention with thousands of perfect stitches.
- https://www.the-littlest-thistle.com/sewing/sewing-machine-jamming/
- https://www.repaircafe.org/en/sewing-machine-broken-repair-cafe-fixes/
- https://www.arrowsewing.com/blog/why-does-my-sewing-machine-keep-jamming
- https://hellosewing.com/sewing-machine-keeps-jamming/
- https://sewguide.com/troubleshoot-sewing-machine-problems/comment-page-1/

