This site is supported by our readers. We may earn a commission, at no cost to you, if you purchase through links.
You’ll achieve this by pressing seams open rather than to one side, using directional pressing to distribute bulk evenly, and employing tools like tailor’s clappers or wool pressing mats for stubborn seams.
The key is applying proper heat, moisture, and pressure while managing seam allowances at intersections.
Steam helps fabric fibers relax, while pressing (not ironing) prevents stretching.
For complex blocks where multiple seams meet, spinning seam allowances or trimming excess fabric reduces bulk substantially.
These foundational techniques separate amateur work from quilts that truly sing with precision and craftsmanship.
Table Of Contents
Key Takeaways
- Master strategic pressing techniques – You’ll achieve flat seams by pressing open rather than to one side, using directional pressing to distribute bulk evenly, and applying proper heat, moisture, and pressure while managing seam allowances at intersections.
- Invest in specialized tools for professional results – You’ll transform your seam-pressing game with wool pressing mats that retain heat from both sides, tailor’s clappers that set crisp edges, and precision pens with fabric relaxants for immediate bulk reduction.
- Manage bulky intersections with targeted methods – You’ll eliminate thickness at complex seam meetings by spinning seam allowances in a windmill pattern, clipping corners at 45-degree angles, and grading seams by trimming layers to different lengths.
- Follow proper pressing sequences for consistency – You’ll achieve flat results by pressing seams on the fabric’s backside first, then lightly on the front, and placing pressed pieces under a weighted magazine while cooling to prevent curling and maintain flatness.
Flat Seam Basics
Flat seams form the foundation of accurate quilting by eliminating bulk that can distort your fabric pieces and throw off your measurements.
When you master basic seam pressing techniques, you’ll create blocks that lie flat, align perfectly, and make the entire quilting process smoother and more precise, which is crucial for achieving accurate quilting.
Importance of Flat Seams
Flat seams form the backbone of professional quilting results.
Flat seams transform amateur quilts into professional masterpieces with crisp, precise lines that last.
When your seams lie perfectly flat, you’ll achieve superior accuracy in piecing and trimming blocks. This foundation directly impacts your quilt’s overall appearance and longevity.
Here’s why flat seam finishes matter:
- Block Flatness – Eliminates puckering and distortion
- Quilt Durability – Reduces stress on fabric intersections
- Professional Look – Creates crisp, clean lines
- Easier Quilting – Reduces bulk for smoother stitching
- Accuracy – Guarantees precise measurements throughout construction
Benefits of Flat Seams in Quilting
Achieving flat seam finishes transforms your quilting experience in multiple ways.
You’ll notice immediate accuracy improvement when trimming and piecing blocks, as bouncy seams won’t skew your measurements.
Reduced bulk makes the quilting process easier and faster, while enhanced quality becomes visible in your finished projects.
This durability boost means your quilts withstand handling better, and investing time in proper quilting techniques and seam finishes pays dividends throughout every quilting stage.
Common Seam Pressing Challenges
Even experienced quilters wrestle with seam pressing obstacles that can derail their best efforts.
Warped fabric throws off your measurements, while seam puckering creates unwanted texture.
Getting iron temperature wrong leads to fabric shrinkage or burn marks.
Pressing overlaps create unsightly ridges that show through your finished quilt.
These common pressing tips challenges stem from rushing the process or using incorrect seam pressing techniques, but they’re entirely preventable with proper quilting tips and patience.
Seam Pressing Techniques
You’ll master flat seams by choosing the right pressing technique for your specific quilt project and fabric type.
Each method offers distinct advantages, from pressing seams open for reduced bulk to using specialized tools that set seams permanently flat.
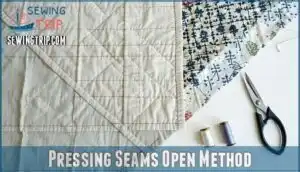
Pressing Seams Open Method
When pressing seams open, you’ll sacrifice some seam strength but gain flatter finishes perfect for fraying fabrics like linen.
Use shorter stitch length to reinforce seam allowances and prevent unraveling. This method works best for projects with minimal handling, such as wall hangings, where dense quilting patterns provide additional support for your flat seam finishes.
This technique is especially useful to reduce bulk at intersections for a smoother finish, and is particularly beneficial for achieving professional results in certain sewing projects.
Spinning Seam Allowances Technique
This technique disperses bulk at seam intersections by creating a windmill pattern with your seam allowances.
You’ll gently unpick one or two stitches at block corners, then press each seam allowance in a circular motion around the center point.
Perfect for grid construction projects, this method requires careful time investment but delivers beautifully matched intersections with superior intersection nesting results.
This guarantees quilt blocks go together more smoothly by using spinning seam techniques.
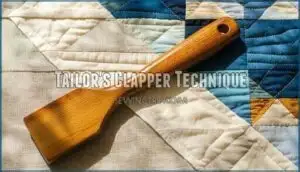
Tailor’s Clapper Technique
Your tailor’s clapper becomes quilting’s secret weapon for achieving razor-sharp seams.
This wooden tool traps steam and moisture, locking fabric fibers into crisp positions.
Place it immediately after pressing, holding for five seconds while fabric cools.
Clapper material options include hardwoods like maple or oak.
Clapper size matters—choose 10-12 inches for ideal coverage and comfort during seam pressing techniques.
Using a clapper can also help with flattening bulky seams to achieve perfectly pressed seams with a tailor’s clapper.
Easy Precision Piecing Pen and Solution
The Easy Precision Piecing Pen offers a modern approach to flat seams through targeted fabric relaxant application.
You’ll apply the solution directly along seam allowances using the pen’s precise tip, then iron for immediate results.
This portable tool maintains consistent seam pressing techniques without bulk.
Solution refills keep your quilting seams crisp and professional-looking throughout extended projects.
Essential Tools for Flat Seams
You’ll need specific tools to achieve consistently flat seams that transform your quilting results from amateur to professional.
The right equipment makes pressing seams flat easier and more effective, saving you time while improving your quilt’s overall appearance and accuracy.
Iron and Ironing Board
Your iron and ironing board form the backbone of successful seam pressing. Set your ironing board height at elbow level to avoid back strain during long sessions.
Adjust iron temperature based on fabric type—cotton needs high heat while synthetics require lower settings. Steam helps relax fibers, but dry pressing works better for certain techniques.
Consider ironing board options for ideal results. Regular iron maintenance prevents mineral buildup that creates uneven heat distribution, ensuring consistently flat seams with the use of high heat.
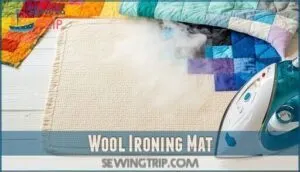
Wool Ironing Mat
A wool pressing mat transforms your quilting workspace into a precision pressing station.
This dense wool surface provides exceptional heat retention, reflecting warmth from both sides to create perfectly flat seam allowances.
The mat’s crease prevention properties eliminate those stubborn ridges that plague traditional ironing boards.
Love-Sew mats are known for their optimal heat retention, making them a popular choice.
- Portability advantage: Lightweight design travels easily to quilting classes and retreats
- Size options variety: Available from compact 13"x17" to spacious 36"x18" configurations
- Heat retention magic: Absorbs and reflects iron heat for two-directional pressing power
- Mat maintenance simplicity: Hand wash gently and air dry to preserve wool integrity
- Professional results: Creates crisp, flat seams that rival commercial quilting standards
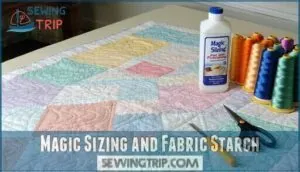
Magic Sizing and Fabric Starch
Magic Sizing works differently than traditional fabric starch by realigning fibers without creating fabric rigidity.
You’ll notice immediate warping correction when you apply it to distorted fabric pieces.
Unlike heavy starch alternatives, Magic Sizing won’t leave residue concerns or cause fabric stiffening that affects your seam work.
It’s a product focused on achieving ideal results through achieving ideal results, with a key benefit being minimal long-term effects.
Fiber alignment improves dramatically, and long-term effects remain minimal compared to conventional starches that can weaken fabric over time, making Magic Sizing a better choice for long-term fabric health.
Managing Bulky Seams
Bulky seams form when multiple fabric layers meet at intersections, creating thickness that can make your quilt blocks uneven and difficult to press flat.
You’ll encounter these challenging spots in blocks like flying geese and square-in-a-square units, where up to seven layers can stack at a single point, creating bulky seams.
Causes of Bulky Seams
Bulky seams typically develop when multiple fabric layers converge at intersection points.
Inaccurate cutting creates uneven seam allowances that compound thickness issues, while varying fabric thickness adds unexpected bulk.
Poor pressing techniques fail to distribute fabric properly, creating challenging areas that resist traditional seam flattening methods and require specialized bulk reduction approaches, especially at complex intersections where four or more pieces meet, creating areas that are difficult to manage with traditional methods and require bulk reduction techniques.
Pressing Bulky Seams Flat
Success with bulky seam intersections requires strategic pressing order and cooling techniques. When multiple fabric layers create thickness, you’ll need patience and the right approach for effective bulk reduction.
Follow this pressing sequence for flatter seam allowance results:
- Press seam intersections from the back side first
- Apply light pressure to the front for seam flattening
- Place a weighted magazine over pressed areas immediately
- Allow complete cooling before removing weight
- Stack multiple layers for efficient quilting workflow
Tools for Pressing Bulky Seams
Investing in specialized tools transforms your bulky seam battles into victories.
Your tailor’s clapper becomes essential for setting thick intersections flat, while a wool pressing mat distributes heat evenly.
Keep seam rippers handy for adjustments, and use point turners or awls for precise manipulation.
A dedicated seam presser applies consistent pressure, making seam bulk reduction achievable every time.
Using specialized pressing equipment can further enhance your results.
Tips for Reducing Bulk in Seams
Strategic pressing and layer trimming work hand-in-hand to eliminate unwanted seam bulk.
You’ll transform thick intersections into crisp, professional finishes with these targeted techniques.
- Clipping corners at 45-degree angles removes excess fabric without compromising seam allowance integrity
- Grading seams by trimming layers to different lengths creates graduated thickness
- Nested seams press in opposite directions for flatter intersections
- Strategic pressing toward darker fabrics conceals seam allowance show-through
Achieving Professional Finishes
Professional quilting finishes depend on mastering specific seam direction choices and specialized pressing techniques that eliminate bulk at critical intersections.
You’ll achieve consistently flat results by combining the right tools with proper pressing methods that address each fabric layer’s behavior during the cooling process, which helps in achieving consistently flat results.
Seam Direction and Bulk Reduction
Pressing direction impacts your quilt’s success more than you’d think.
Most patterns specify seam pressing direction to minimize bulk at key intersections flatness points.
While pressing toward darker fabric seems logical, prioritize reducing bulky seams instead.
Strategic seam allowance placement prevents seam popping and creates smoother seam intersections.
When pattern specifications conflict with bulk reduction needs, choose the path that eliminates thickness over traditional color rules to ensure smoother seam intersections.
Pressing Techniques for Flat Seams
Once you’ve chosen your seam direction, proper pressing technique makes all the difference.
Master these five steps for consistently flat results:
- Backside Pressing – Start on the wrong side to set your seam allowance properly
- Frontside Setting – Lightly press the right side to eliminate any remaining wrinkles
- Fabric Expansion control – Work quickly while fabric is warm and pliable
- Weighted Magazine placement – Cover pressed seams immediately to prevent curling
- Layer Swapping – Rotate multiple pieces under weight for even cooling throughout your quilting project.
Using a pressing cloth can prevent unwanted marks.
Using Specialty Tools for Flat Seams
Beyond traditional irons, specialty quilting tools transform your seam-pressing game.
Wool pressing mats retain heat longer, creating flat seams from both sides simultaneously.
Tailors clapper benefits include setting crisp edges by absorbing moisture and applying pressure.
Precision pens with fabric relaxants deliver immediate results, while sizing sprays reduce bulk effectively.
Regular tool maintenance keeps these investments performing at their best, ensuring your quilting projects achieve professional-quality flat seams consistently, with specialty quilting tools and crisp edges that make a difference.
Frequently Asked Questions (FAQs)
How to flatten quilt seams?
First, press seams on the fabric’s back side, then lightly on the front.
Place pressed pieces under a weighted magazine while cooling to prevent curling and maintain flatness throughout your quilting process.
What is the difference between a French seam and a flat felled seam?
Like choosing between a sturdy bridge versus a sleek tunnel, French seams enclose raw edges within double-folded fabric layers.
While flat felled seams overlap and topstitch edges flat.
French seams create bulk; flat felled seams eliminate it completely.
How do you make seams lay flat?
Press seams on the fabric’s backside first, then lightly press the front. Place pressed seams under a weighted magazine while cooling to prevent curling and maintain flatness effectively.
What can you use instead of a flat felled seam?
Like a river finding alternate paths around a boulder, you’ve got several options when flat felled seams won’t work.
Try French seams for enclosed edges, serged finishes for stretch, or simple zigzag stitching for quick, fray-free results.
What fabrics require different flat seam approaches?
Delicate fabrics like silk need gentler pressing with lower heat settings.
Heavy cottons handle aggressive steam pressing well.
Linen and shot cottons fray easily, so you’ll want open seams with shorter stitches.
How do you fix uneven seams after pressing?
Uneven seams are like stubborn wrinkles that won’t quit.
Re-press with steam, add fabric relaxant solution, then place under a weighted magazine while cooling.
Check your iron temperature and pressing technique for consistency.
Can you achieve flat seams without steam?
You can achieve flat seams without steam using dry heat from your iron, wool pressing mats that retain heat, fabric sizing sprays, or a tailor’s clapper to absorb moisture and apply pressure.
Whats the best seam allowance for flat finishes?
Most quilters swear by 1/4-inch seam allowances for flat finishes.
This standard width gives you enough fabric to work with while minimizing bulk at intersections, making your blocks lie perfectly flat.
How do you press curved seams flat?
Carefully clip curved seam allowances at quarter-inch intervals, avoiding cuts too close to stitching.
Press gently with your iron’s tip, using steam and a pressing cloth.
You’ll create smooth, flat curves without puckering or distortion.
Conclusion
Mastering flat seam finishes for quilting transforms your projects from ordinary to extraordinary.
You’ve learned that proper pressing techniques, directional seam management, and strategic tool usage create professional results.
Remember to press seams open, use directional pressing for bulk distribution, and employ tools like tailor’s clappers when needed.
These fundamental skills will elevate your quilting craftsmanship, and with consistent practice and attention to detail, you’ll achieve the smooth, precise flat seam finishes that distinguish exceptional quilts from amateur work.
- https://www1.agric.gov.ab.ca/$Department/deptdocs.nsf/all/4h7895/$FILE/QuiltLG.pdf
- https://plainstitch.co.uk/2023/10/01/hand-quilting-in-a-frame/
- https://christaquilts.com/category/tutorials/
- https://maggieframestore.com/blogs/maggieframe-news/master-machine-quilting-essential-techniques-tools-for-quilt-with-embroidery-machine
- https://www.threadsmagazine.com/2009/11/16/machine-quilt-a-supple-and-stylish-garment

