This site is supported by our readers. We may earn a commission, at no cost to you, if you purchase through links.
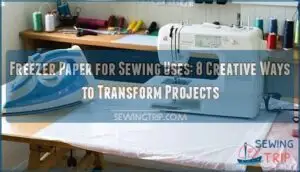
Its plastic-coated side temporarily sticks to fabric when heated, making it perfect for tracing patterns, creating appliques, and cutting precise shapes.
You can print directly on it for custom fabric designs, use it as a stabilizer for delicate fabrics, or create reusable stencils, which is like having a removable adhesive that won’t leave residue.
Simply iron the shiny side down onto your fabric, and it’ll hold firm until you peel it away, allowing you to achieve professional-looking techniques you’ve probably never considered.
This humble paper opens doors to new possibilities, enabling you to work with delicate fabrics and create complex designs with ease, making it a valuable addition to your sewing room.
Table Of Contents
Key Takeaways
- You’ll transform ordinary kitchen freezer paper into precise sewing templates by ironing the shiny side down onto fabric, creating temporary adhesion that won’t leave residue when removed
- You can print directly on freezer paper using inkjet printers to create custom patterns and designs, then iron them onto fabric for professional-looking appliqué work and stencils
- You’ll stabilize delicate fabrics and prevent shifting during cutting by using freezer paper as temporary backing, making it perfect for intricate pattern tracing and precision work
- You can reuse each freezer paper template 2-3 times before the adhesive weakens, making it an economical alternative to expensive specialty sewing supplies for multiple projects
What is Freezer Paper?
You’ve probably seen freezer paper in your grocery store’s food storage aisle, but this humble kitchen staple has a secret superpower for sewers.
It features a waxy coating on one side and plain paper on the other, making it perfect for creating temporary templates that stick to fabric when heated with an iron.
Freezer Paper Vs Parchment Paper
Imagine this scenario: you grab the wrong paper and your fabric project becomes a sticky mess.
Here’s the scoop on paper comparison – freezer paper and parchment paper serve completely different purposes in your creative toolkit.
Don’t grab the wrong paper – your sewing project depends on getting it right!
Freezer paper features a plastic wax coating on one side that creates temporary adhesive strength when heated.
This heat resistance allows it to bond with fabric during pattern tracing and sewing techniques, then peel away cleanly.
Perfect for fabric crafts where precision matters.
Parchment paper, meanwhile, sports a silicone coating designed for non-stick baking applications.
It won’t stick to fabric no matter how much heat you apply.
While excellent for storage uses in the kitchen, it’s useless for appliqué work or creating templates.
The key difference?
Freezer paper’s coating melts slightly under your iron, creating that vital temporary bond for accurate cutting and stitching.
Parchment paper remains slippery and loose – great for cookies, terrible for quilting.
Freezer Paper Vs Wax Paper
Wax paper’s dual coating creates a slippery surface that won’t stick to your fabric, making it useless for sewing projects.
Unlike wax paper, freezer paper features wax coating on just one side, giving it the adhesive properties you need for pattern tracing and crafting uses.
Here’s how these paper types differ for your sewing needs:
- Adhesive Properties: Freezer paper bonds temporarily to fabric when heated, while wax paper slides around uselessly
- Material Differences: Single-side coating makes freezer paper perfect for reusable stencils and templates
- Temperature Range: Freezer paper handles cold storage, wax paper works only at room temperature
- Crafting Applications: Freezer paper creates precise freezer paper stencils, wax paper just frustrates sewers
When you’re choosing between these materials, freezer paper wins every time for fabric work.
It’ll stick when you need it to, then peel away cleanly.
Where to Buy Freezer Paper
Finding freezer paper for your sewing projects is easier than threading a needle in good light. You’ll discover this versatile material in several convenient locations.
Your local craft store holds the key to countless creative possibilities – freezer paper awaits in aisle three.
Grocery Stores stock freezer paper alongside aluminum foil and plastic wrap. Reynolds is the household name you’ll recognize, though generic brands work just as well for sewing essentials. It’s perfect for grabbing during your weekly shopping trip.
Craft Shops like Jo-Ann’s and Michaels carry specialized options in their quilting sections. Brands like Dritz and C&T Publishing offer sheets specifically designed for sewing supplies and craft supplies.
Online Stores provide the widest selection. Amazon, Walmart.com, and Brand Websites offer bulk quantities and specialty sizes for freezer paper stencils.
Local Markets sometimes stock basic varieties, making them handy backup options.
Pro tip: Buy extra sheets when you find them – you’ll be surprised how quickly you’ll burn through your supply once you start creating templates and patterns for your sewing projects. When selecting fabrics for your projects, understanding fabric properties is essential for achieving the desired results.
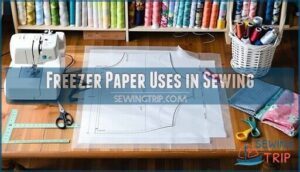
Freezer Paper Uses in Sewing
You’ve probably wondered how to make your sewing projects more precise without breaking the bank or dealing with complicated tools.
Freezer paper is your secret weapon that transforms everything from applique work to pattern tracing into foolproof tasks that even beginners can master with confidence.
Tracing Sewing Patterns
Once you’ve found your freezer paper, you can transform how you handle sewing patterns.
Instead of wrestling with flimsy tissue paper that tears at the worst moments, trace your patterns onto freezer paper’s matte side using a ballpoint pen.
This creates durable sewing templates that won’t fall apart mid-project.
For pattern transfer, press the shiny side onto fabric and cut around the edges.
You’ll get precision cutting every time since the paper stays put during tracing.
This tracing alternative beats traditional methods hands-down – no more patterns sliding around or tearing when you’re halfway through fabric tracing.
Template making becomes foolproof when freezer paper does the heavy lifting, giving you clean lines for pattern making without the usual frustrations.
Using proper sewing paper tools is essential for achieving professional results in freezer paper sewing projects.
Applique
Creating applique templates from freezer paper transforms your fabric cutting and sewing tips into professional-quality results.
Draw applique designs on the matte side, cut out your templates, then iron the shiny side directly onto fabric. This creates stable iron-on templates that prevent shifting during cutting.
Leave a quarter-inch seam allowance around each shape for clean edges. The temporary adhesive holds firm while you work, then peels away easily without residue.
These quilting methods work beautifully for embroidery designs too, giving you precise fabric marking every time.
Felt Cutouts
Beyond applique work, felt cutouts offer another exciting way to harness freezer paper’s template-making power. You’ll love how this technique transforms fuzzy felt into precise shapes for kids’ crafts and home decor projects.
Here’s your step-by-step approach for perfect felt designs:
- Print your design directly onto the matte side using an inkjet printer
- Hand-feed the freezer paper to prevent jams and guarantee smooth printing
- Allow ink to dry completely before cutting your sewing templates
- Place the shiny side against felt for ideal adhesion during precision cutting
- Reuse each iron-on template up to 20 times for multiple projects
These cutting tips make fabric cutting a breeze. The freezer paper acts like a steady hand, guiding your scissors around curves and corners. Your ironing techniques create temporary bonds that hold firm during cutting but peel away cleanly. Whether you’re making holiday decorations or educational shapes for little ones, reusable templates save time and money while delivering professional results every single time.
Fabric Printing
Freezer paper transforms fabric printing into a breeze.
It creates iron-on templates that stabilize fabric for smooth paper feed through your inkjet printer.
Cut freezer paper to 8.5"x11" and iron the shiny side onto your fabric’s wrong side.
This method allows for crisp image transfer and prevents fabric stretching and jamming.
Adjust print settings to photo quality for the best results.
The backing makes DIY printing on fabric affordable and accessible.
After printing your fabric designs, peel away the freezer paper and heat-set with an iron for lasting results.
This method beats store-bought printable sheets every time!
Understanding various fabric printing techniques can help you achieve professional-looking results.
Stencils
Custom stencils become effortless with freezer paper’s unique properties.
You’ll create professional-looking designs that stick perfectly to any surface without messy adhesives.
- Trace or print your design onto the dull side of freezer paper
- Cut out your stencil using sharp scissors or craft knife
- Iron shiny side down onto fabric and start painting or stamping
This method works brilliantly for fabric stencils, quilting stencils, and craft templates on various surfaces.
How to Print on Freezer Paper
With pattern printing mastered, you’ll want to harness your inkjet printer’s full potential for custom iron-on templates. Most home inkjet printers handle freezer paper beautifully when you follow the right approach.
Printer Compatibility matters most—stick with inkjet printers since laser printers can melt the waxy coating.
Here’s your roadmap to flawless fabric marking:
- Paper Feed Setup: Cut sheets to 8.5×11 inches and feed manually through the rear tray. Tape the leading edge to regular paper if your printer gets finicky—this trick prevents jams better than crossing your fingers.
- Inkjet Settings: Select "photo paper" or "glossy" settings to account for the waxy surface. Set Image Resolution to 600 DPI or higher for crisp pattern printing details.
- Print Side Selection: Always print on the dull, non-waxy side. The shiny side goes down in your printer tray—think of it as the "wrong" side for printing.
Test on scrap paper first to dial in your settings.
Once printed, let ink dry completely before creating your cutting templates for sewing projects.
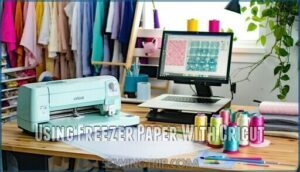
Using Freezer Paper With Cricut
Cut through the hassle of manual template-making with your Cricut machine and freezer paper.
Both Cricut Maker and Explore models handle freezer paper beautifully when you place it shiny-side down on standard 12"x12" mats.
Use lightweight paper Cricut settings with a fine-point blade for clean cuts without tearing.
Design Space lets you create custom sewing templates from scratch or browse existing patterns.
Your ironon templates will come out perfectly sized for appliqués, stencils, and pattern printing projects.
For intricate designs, understanding cricut embroidery techniques can enhance your sewing skills.
How to Iron Freezer Paper to Fabric
Now that your Cricut has precision-cut your design, it’s time to attach that freezer paper template to your fabric. This step transforms your cut piece into a working tool that’ll guide your sewing project to perfection.
Proper Fabric Prep makes all the difference. Pre-wash your fabric to remove sizing that might interfere with the temporary adhesive. Lay your fabric wrong-side up on your ironing board, smoothing out any wrinkles.
Position the freezer paper with its shiny, waxy side facing down onto the fabric. Set your Iron Temperature to medium-high with no steam – steam disrupts the bond and creates a messy situation.
Here’s your step-by-step Ironing Techniques process:
- Press firmly and move the iron slowly across the entire template for 10-20 seconds
- Apply steady pressure to activate the Adhesive Strength without scorching
- Check that all edges lay flat against the fabric surface
- Allow the piece to cool completely before handling
The result? Your freezer paper sticks like a trusty sidekick, ready for cutting, tracing, or stitching. When finished, Peel Removal starts at one corner, lifting gently to avoid fabric distortion. Understanding the correct iron temperature settings is vital for a successful bond between the freezer paper and fabric.
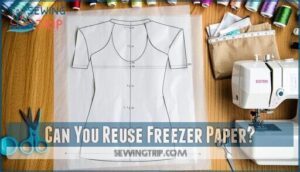
Can You Reuse Freezer Paper?
Fortunately, freezer paper templates aren’t single-use items. You can reuse each sheet 2-3 times before the adhesive strength weakens substantially.
After completing your project, gently peel off the template to preserve the waxy coating. Store reusable templates flat between parchment paper to prevent curling and maintain template durability.
The adhesive drops considerably after initial use, so reserve fresh sheets for intricate work requiring precise fabric stabilization. For simple pattern tracing, reused freezer paper works perfectly fine, making your sewing projects more economical.
Using a pressing cloth alternative can also enhance your sewing results by preventing scorching and reducing wrinkles, which is a key aspect of achieving professional-looking results with minimal effort and maintenance.
Freezer Paper Tips for Sewing
Smart sewers know that mastering freezer paper transforms ordinary projects into professional-looking masterpieces.
This kitchen staple has become one of the most valuable crafting essentials in your sewing arsenal.
- Template Making: Create durable, reusable templates by tracing patterns onto the matte side for precise fabric cutting
- Fabric Prep: Iron the waxy side down to stabilize stretchy or delicate fabrics before cutting
- English Paper Piecing: Use as temporary backing for hexagons and other geometric shapes instead of cardboard
- Quilting Tools: Mark seam allowances and cutting lines without damaging your fabric surface
- Sewing Hacks: Label fabric pieces with removable freezer paper tags to prevent mix-ups during complex projects
These sewing techniques and fabric stabilization methods will elevate your crafting game substantially.
Frequently Asked Questions (FAQs)
What is freezer paper used for in sewing?
Like a helpful template that sticks to fabric, freezer paper’s waxy coating creates reusable patterns for appliqué, quilting, and embroidery.
You’ll iron it on, cut precisely, and peel it away cleanly, which makes the process efficient with reusable patterns.
Does freezer paper leave a residue on fabric?
No, freezer paper doesn’t leave residue on fabric when you remove it properly. The waxy coating creates temporary adhesion that peels away cleanly without damaging or marking your material.
Does freezer paper work with laser printers?
Like a stubborn door that won’t budge, laser printers reject freezer paper completely.
You’ll need an inkjet printer instead – laser printers use heat that’ll melt the waxy coating, potentially damaging your printer.
How many times can freezer paper stick?
You can typically reuse freezer paper templates three to five times before the waxy adhesive loses its sticking power.
Each time you peel and reapply it, the bond weakens slightly until it won’t stick anymore.
Will freezer paper damage delicate silk fabrics?
Gentle fabrics require a soft touch, and fortunately, freezer paper won’t harm delicate silk when you use low heat and test first on scraps for peace of mind.
Can freezer paper replace interfacing for projects?
No, freezer paper can’t replace interfacing permanently. It provides temporary stability for cutting and template work, but lacks interfacing’s durability and structure for finished garments requiring long-term support.
Does freezer paper leave residue on fabric?
No, freezer paper doesn’t leave residue when you remove it properly. The waxy coating creates temporary adhesion that peels away cleanly from fabric without sticky remnants or damage.
Conclusion
Beyond your wildest telegraph dreams, freezer paper for sewing uses transforms ordinary projects into professional masterpieces.
You’ve discovered eight versatile techniques that’ll revolutionize your crafting approach. From precise applique work to custom fabric printing, this affordable tool delivers consistent results every time.
Whether you’re tracing intricate patterns or creating reusable stencils, freezer paper eliminates guesswork and reduces fabric waste.
Stock up on this kitchen-to-craft-room hero – your future sewing projects will thank you for making this simple yet powerful addition to your supplies, with consistent results.




Emilia Rosa
February 12, 2025 at 10:20 PM
Can you put clothes in the washing machine if you use freezer paper, say, under elbow patches?