This site is supported by our readers. We may earn a commission, at no cost to you, if you purchase through links.

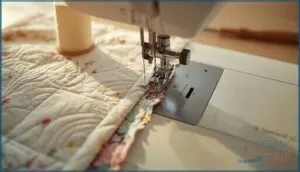
The learning curve feels steep when you’re juggling feed dogs, presser feet, and keeping three layers aligned, but here’s the good news: mastering hand quilting machine techniques isn’t about perfecting a single method. It’s about understanding how batting choice affects your stitch length, why marking tools matter before you ever touch the pedal, and which hybrid approaches let you blend the control of hand stitching with the speed of your machine.
Once you know how to prep your layers, adjust tension settings, and position your workspace to support the quilt’s weight, you’ll stitch cleaner lines with less backtracking and frustration.
Table Of Contents
Key Takeaways
- Your quilt sandwich needs backing and batting cut 3–4 inches larger than your top, with proper basting (spray, pins, or thread) to prevent puckering and fabric shifting during machine quilting.
- Machine tension between 4.0–5.0, paired with the right needle size (80/12 for standard cotton) and thread weight (40–50wt), eliminates most skipped stitches and tension headaches.
- Marking your design before you start—using test scraps to verify your tools work—saves you from ripping out stitches later, with ½-inch spacing keeping modern quilts balanced.
- Hybrid quilting combines machine speed (cutting project time by 40–60%) with hand-stitched accents, giving you efficiency without sacrificing the texture and character of traditional work.
Essential Hand Quilting Machine Techniques
Machine quilting doesn’t have to feel overwhelming once you understand the core techniques that make everything click. Whether you’re just starting out or looking to sharpen your skills, mastering a few key methods will transform how you approach your projects.
Let’s walk through the essential techniques that’ll give you confidence at your machine and help you create quilts you’re proud of.
Preparing Your Quilt Sandwich for Machine Quilting
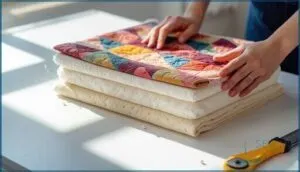
Before you dive into the quilting process, you’ll need a solid quilt sandwich. Sizing materials correctly means cutting your batting and backing 3–4 inches larger than your top—this prevents stress during stitching. Layer alignment matters more than you think, with 96% of machine quilters reporting that pressing layers first eliminates wrinkles. A key step involves creating a quilt sandwich by layering the quilt top, batting, and backing.
- Batting selection depends on your project: cotton offers breathability, polyester gives loft
- Basting methods range from spray (fastest) to pins (most popular)
- Pressing layers with proper iron temperature keeps quilting fabric smooth and workable
Marking and Planning Quilting Designs
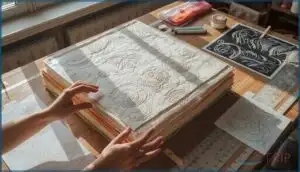
Once your quilt sandwich is ready, mapping your design comes next. Black-and-white photos help 71% of quilters preview hand quilting patterns before marking. Try auditioning quilting design ideas with clear vinyl overlays or quilting patterns and stencils—62% of experienced quilters swear by this layout strategy.
Test marking tools on scraps first; 94% of instructors require it. Design density matters too—spacing lines ½ inch apart keeps modern projects balanced without overwhelming your hand quilting design. Accurate marking requires suitable marking tools.
Mastering The Running Stitch With a Machine
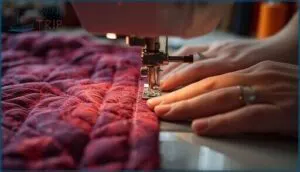
With your design in place, it’s time to bring that running stitch to life. Set your stitch length to 1.5 mm—this sweet spot balances durability outcomes with flexibility. Use 40–50wt cotton threads and adjust machine settings between tension levels 3 and 5.
Freemotion quilting demands steady hand movement at around 700–1,000 stitches per minute. Material considerations matter: heavier fabrics need larger needles, while precision adjustments keep stitch quality consistent throughout your machine quilting techniques.
Using The Rocking Stitch on a Machine
Ready for a faster approach? The rocking stitch mechanics let you load multiple stitches on the needle before pulling through—imagine creating three or four tiny tucks in one motion.
Here’s what makes this quilting technique shine:
- Speed benefits cut quilting time considerably
- Stitch quality stays uniform with practice
- Tools/setup requires a good thimble and frame
- Learning curve rewards patience with 9–14 stitches per inch
Your machine quilting just leveled up.
Achieving Even Stitches and Tension
When your machine’s tension sits between 4.0 and 5.0, you’ve hit the sweet spot for uniform stitches on standard quilting cotton. Thread matching—pairing an 80/12 needle with 50–60 wt. thread—prevents those annoying skipped stitches.
Test your quilt sandwich first, adjusting stitch length to 2.5–3.5 mm for hand quilting precision. Machine maintenance and fabric handling seal the deal for tension troubleshooting success.
Tips for Hiding Knots and Finishing Stitches
Before you snip those thread tails, pull both bobbin and top threads beneath your quilt’s surface—a gentle tug sinks knots where they belong. Burying knots inside batting keeps your hand quilting tutorial-worthy, while locking stitches through previous layers secures everything without bulk.
Fine threads minimize knot appearance, and weaving tails back through the sandwich delivers that clean finish you’re after when finishing quilting stitches and hiding quilting knots.
Comparing Hand and Machine Quilting Methods
Choosing between hand and machine quilting isn’t about right or wrong—it’s about finding what fits your project, timeline, and creative vision. Each method brings its own strengths and challenges to the table, from the meditative rhythm of hand stitching to the speed and precision of machine work.
Choosing between hand and machine quilting isn’t about right or wrong—it’s about finding what fits your project, timeline, and vision
Let’s break down what each approach offers so you can make confident choices for your quilts.
Benefits and Drawbacks of Hand Quilting
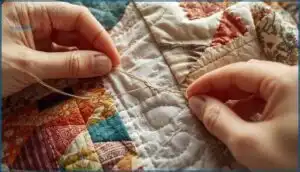
Hand quilting connects you to generations of makers through each deliberate stitch. Let’s explore what this time-honored approach offers—and what it asks of you:
- Stress reduction: Over 87% of hand quilters find the rhythmic motion meditative and calming
- Artistic expression: You’ll create unique, customizable patterns that reflect your personal style
- Time investment: Expect 37–92 hours for a throw-sized quilt, roughly 250–400% longer than machine methods
- Portability: Work anywhere with just a hoop, needles, and thread
- Physical strain: Up to 52% experience occasional neck or hand discomfort during extended sessions
Advantages and Limitations of Machine Quilting
Think of machine quilting as your productivity partner—it transforms days of work into mere hours. You’ll appreciate the consistent stitches and professional finish, but upfront costs can stretch your budget. Here’s what machine quilting advantages and disadvantages look like side-by-side:
| Factor | Advantages | Limitations |
|---|---|---|
| Speed vs. Texture | Complete quilts 35% faster; produce up to 150 pieces hourly | Less tactile connection; steeper learning curve initially |
| Cost Considerations | Reduces labor expenses by 50%; cuts fabric waste 30% | High initial investment; significant energy consumption |
| Design Complexity | Replicates intricate patterns; works with diverse fabrics effortlessly | Some improvisational designs remain challenging to automate |
| Stitch Consistency | Uniform results create polished, professional appearance | May lack subtle character of hand-stitched work |
Modern machine quilting techniques offer precision that’s hard to beat—stitch rates exceeding 1,800 per minute mean you’ll finish projects in hours instead of days.
The cost of machine quilting balances out over time as you save on labor, though that initial equipment purchase requires serious consideration. Your ergonomic impact improves too, since machines take care of repetitive motion that might strain your hands and neck during extended sessions.
Best Projects for Each Quilting Technique
Your fabric choices and quilting purpose guide which technique works best. Baby quilts and sashiko wall hangings thrive with hand quilting—they gain 25% longer lifespans and gorgeous texture.
Machine quilting suits large bedspreads and throw quilts when you need speed and consistency.
Beginner projects like simple patchwork work either way, while complex patterns with intricate designs shine under your machine’s precision.
Hybrid Approaches: Combining Hand and Machine Techniques
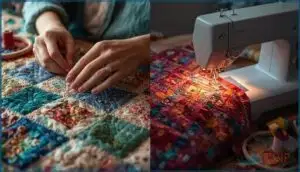
Why settle for one quilting technique when you can blend both worlds? Hybrid quilting merges machine speed with hand-stitched artistry, cutting project time by 40–60% while adding gorgeous texture contrast.
- Start with machine quilting from the center outward for stability
- Add hand-stitched accents using sashiko or 12/28-weight thread on solid areas
- Balance stitch tension between machine and hand zones carefully
- Create depth with French knots, seed stitches, or X patterns
- Join the 38% of modern quilters embracing this efficiency-boosting trend
Choosing The Right Quilting Tools and Supplies
Your tools can make or break your quilting experience, whether you’re stitching by hand or working with a machine. The right needles, threads, and frames won’t just make the process easier—they’ll help you create cleaner, more consistent results.
Let’s walk through the essential supplies you need and how to choose the ones that’ll work best for your projects.
Selecting Needles and Threads for Hand Quilting Machines
Your hand quilting needles and threads work together like partners in a dance—when they’re matched right, everything flows. Size 9 or 10 betweens are your sweet spot for most projects, balancing precision with forgiveness.
Thread weight matters too: 40wt cotton pairs beautifully with 80/12 needles, while heavier decorative threads need 90/14 or larger. Test combinations on scraps first—it saves headaches later.
Using Hoops, Frames, and Marking Tools
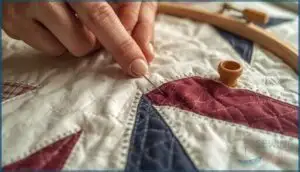
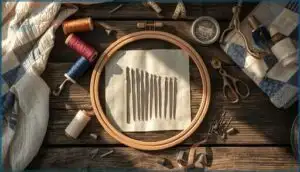
Once you’ve got your needles and threads sorted, the right support system changes everything. Quilting hoops—used by 80% of hand quilters—keep fabric taut without wrestling matches. For larger projects, floor frames with adjustable heights tackle frame ergonomics beautifully, letting you work seated or standing.
Mark your designs with air-erasable pens or Hera markers for marking accuracy that disappears when you’re done.
Maintaining Your Hand Quilting Machine
Your machine won’t stay happy on its own. Clean the bobbin area after every quilting session to dodge lint buildup, and oil the hook every three to four bobbin changes. Swap needles for each new quilt—burrs cause skipped stitches.
For heavy users, schedule annual professional servicing to keep tension and timing smooth. Think of it as preventive care: a little attention now saves headaches later.
Safety Tips and Ergonomic Considerations
Beyond machine care, your body needs attention too. Position your setup on a large table to support quilt weight and reduce arm fatigue. Keep that one-inch safety zone from moving needles—use needle guards for injury prevention.
Wear your thimble, take five-minute breaks every hour, and adjust your chair height so arms stay at 90°. Smart workspace setup and posture awareness keep you stitching comfortably for years.
Top 5 Must-Have Hand Quilting Products
You don’t need a closet full of supplies to start hand quilting, just the right few essentials that’ll make your stitches smoother and your hands happier. These five products have earned their spot on quilters’ workbenches because they solve real problems, from protecting your fingertips to threading needles without squinting.
Let’s look at the tools that’ll set you up for success without breaking the bank.
1. Cooljob Women’s Gardening Gloves Six Pairs
You wouldn’t think gardening gloves belong in a quilting kit, but these Cooljob gloves are a secret weapon for hand quilters who want to protect their fingers without sacrificing the feel of the fabric.
The latex glove material with thickened fingertips shields your hands during long hand quilting sessions, while the knitted base keeps sensitivity high.
At six pairs for under $10, they’re an affordable addition to your hand quilting supplies that resolves durability concerns through sheer quantity.
2. Clover Natural Fit Leather Thimble
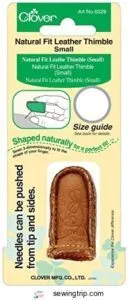
A leather thimble that actually fits your finger like it was custom-made sounds too good to be true, but Clover’s Natural Fit design delivers exactly that. The 3-dimensional stitching creates an ergonomic design that curves naturally from fingertip to middle finger, offering serious stitch protection without bulk.
While leather care matters and the product lifespan shortens with heavy use, it’s a hand quilting tool that earns its spot among essential quilting supplies.
3. Thimble Tape Finger Nail Protector
If traditional thimbles feel clunky or just won’t stay put, this moldable finger tape might be your creative innovation.
This latex-free material wraps around your finger for protection that’s made to order during hand quilting and hand stitching. You’ll get puncture-resistant coverage that flexes with your needlework, and it’s reusable several times.
Users appreciate the adjustable fit, though thin needles occasionally slip through when you’re working with delicate hand quilting tools.
4. Wonderfil Eleganza Neutrals Perle Cotton Thread
Smooth, lustrous stitches that glide through fabric like butter—that’s what 100% long staple Egyptian cotton brings to your hand quilting projects. Wonderfil Eleganza’s 8wt perle cotton offers superior stitch definition with its double-gassed, mercerized finish.
- Thread weight creates firm, visible stitches perfect for big stitch quilting
- Neutral color palette complements any fabric combination
- Material quality ensures smooth gliding through multiple layers
This adaptable thread suits sashiko, appliqué, and decorative hand quilting techniques beautifully.
5. Clover Gold Eye Embroidery Needles Pack
Threading needles shouldn’t feel like wrestling a thread through a pinhole, especially when you’re keen to dive into your next quilting project. Clover’s Gold Eye Embroidery Needles transform this tedious task with their elliptical eye design and gold plating.
| Feature | Specification | Benefit |
|---|---|---|
| Material | Alloy Steel Quality | Excellent hardness and durability |
| Needle Size Variety | Sizes 3-9 (32 needles) | Matches different hand quilting techniques |
| Threading Difficulty | Elongated gold-plated eye | Accommodates multiple threads easily |
| Stitch Smoothness | Tempered sharp point | Glides through fabric layers |
| Best For | Hand quilting supplies | Cotton and ribbon embroidery |
These hand quilting needles deliver consistent performance across various hand quilting techniques, though you might need a threader if your vision isn’t sharp.
Frequently Asked Questions (FAQs)
Can beginners start with machine quilting techniques?
Yes, you can jump right in. The learning curve spans 2-3 months for basic proficiency. Essential skills like tension control matter most.
Equipment costs start around $160, making quilting for beginners surprisingly accessible.
How do you prevent fabric puckering while quilting?
Preventing puckering starts with fabric prep—pre-wash and press thoroughly. Balance tension carefully, choose appropriate needle sizes, and use a walking foot to feed layers evenly. Proper basting and stitch length selection also help tremendously.
What thread weight works best for beginners?
Start with 50wt cotton thread—it’s forgiving, smooth through needles, and takes tension adjustment tips beautifully.
As you master thread weight basics and avoid common beginner errors, 40wt Aurifil thread works great for bolder, decorative hand quilting stitches.
How often should quilting machines be serviced?
Most quilting machines need servicing every 6–12 months, depending on usage frequency and intensity.
Heavy users working with dense materials or metallic threads should schedule professional maintenance more often to help guarantee peak performance.
Can you quilt without a walking foot?
You can quilt on a domestic sewing machine without a walking foot, but fabric shifting and puckering increase considerably.
Proper basting methods, tension settings, speed control, and understanding machine quilting fundamentals help minimize these challenges effectively.
Conclusion
You’ll waste hours troubleshooting tension issues and re-basting bunched layers if you skip the fundamentals. But once you’ve dialed in your setup—marking tools ready, batting chosen, workspace adjusted—hand quilting machine techniques transform from chaotic guesswork into rhythmic precision.
The difference between a quilt that puckers and one that glides under your needle isn’t talent; it’s understanding how preparation, tension, and tool choice work together. Start there, and every stitch becomes easier.
- https://www.google.com/search?q=gee%27s+bend+alabama&oq=gee%27s+bend+&gs_lcrp=EgZjaHJvbWUqCggAEAAY4wIYgAQyCggAEAAY4wIYgAQyBwgBEC4YgAQyBggCEEUYOTIHCAMQABiABDIHCAQQLhiABDIHCAUQABiABDINCAYQLhivARjHARiABDIHCAcQLhiABDINCAgQLhivARjHARiABDIHCAkQABiABNIBCDU2NDhqMGo3qAIAsAIA&sourceid=chrome&ie=UTF-8
- https://www.pinterest.com/stitchedmodern/big-stitch-quilts/
- https://www.karleeporter.com/
- https://snugglesquilts.com/machine-quilting-on-your-home-machine-part-1/
- https://www.quiltingdaily.com/machine-quilting-for-the-first-time-part-2-take-time-to-prepare/

