This site is supported by our readers. We may earn a commission, at no cost to you, if you purchase through links.
You’ll want to trim seam allowances to reduce bulk, then press them open or to one side using steam.
For sturdy fabrics, try flat-felled seams where you fold one allowance over the other and stitch it down.
French seams work perfectly for delicate materials that fray easily.
The key is maintaining consistent tension while stitching and using proper pressing techniques.
Your thread choice matters too—matching thread creates invisible seams, while contrasting thread can become a design feature.
Professional results come from mastering these five essential techniques.
Table Of Contents
Key Takeaways
- Choose the right seam technique for your fabric – Use flat-felled seams for sturdy materials like denim and French seams for delicate fabrics that fray easily, while avoiding stretchy knits that cause puckering.
- Master proper pressing techniques – Steam and press your seams in five steps: meld stitches flat, open from the wrong side, press the right side, fold allowances in one direction, then final press to achieve professional results.
- Trim seam allowances strategically – Cut one seam allowance to half-width to reduce bulk, then fold the wider allowance over the trimmed edge and secure with whip stitches that catch only a few fabric threads.
- Maintain consistent tension and thread choice – Keep steady stitch tension with 4-8 stitches per inch while using matching thread for invisible seams or contrasting thread to create decorative design features.
Hand Sewing Flat Seams
When you’re hand sewing flat seams, you’ll create smooth, professional finishes that completely enclose raw fabric edges for maximum durability.
Master the art of invisible stitches—where precision meets perfection in every handcrafted seam.
These traditional techniques require careful trimming of seam allowances and precise folding, but they’ll give your garments a clean look that’s nearly invisible from the outside, with a finish that is professional.
Flat Felled Seam Overview
Flat felled seams create the gold standard for seam durability in hand sewing.
This historical technique fully encloses raw edges within two lines of stitching, making it perfect for unlined garments and workwear.
Unlike regular flat seams, felled seam types completely contain the seam allowance enclosure, preventing fraying while delivering professional results that’ll outlast machine alternatives.
Choosing Right Fabric
Your fabric choice makes or breaks flat seams in hand sewing.
Heavy-weight fabrics like denim and canvas work best for flat felled seams due to their weave type and fabric drape.
Light to mid-weight cottons with good colorfastness handle well too.
Avoid stretchy knits – their fiber content creates puckering.
Consider fabric weight and fabric properties when selecting materials for your hand sewing techniques.
You can find a variety of heavy fabric options online.
Seam Allowance Trimming
Smart trimming tools make all the difference when reducing bulk in your seam allowance.
You’ll want to trim one side to half-width, letting the edges "kiss" inside without overlapping. This technique prevents fabric fray while maintaining clean seam finishes.
Consider your application specifics—delicate fabrics need gentler trimming, while sturdy materials handle aggressive bulk reduction. Your pressing techniques will thank you later, as this approach ensures a professional result with minimal bulk.
Creating Invisible Stitches
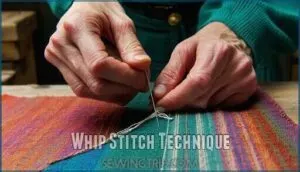
You’ll achieve professional-looking seams when you master the whip stitch technique, which catches only a few fabric threads to create nearly invisible stitches from the garment’s exterior.
Your thread choice determines whether the stitches disappear completely with matching thread or create subtle decorative details with contrasting colors.
Whip Stitch Technique
The whip stitch transforms rough seam allowances into perfectly flat finishes through careful fabric handling and proper technique.
Your needle choice affects thread tension, while consistent stitch angle guarantees invisible results.
Master these fundamentals for flawless seam finishes:
- Bring thread up from behind the folded seam allowance
- Catch only a few fabric threads at an angle
- Maintain knot security throughout each stitch
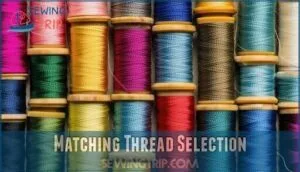
Matching Thread Selection
Choosing the right thread color transforms your whip stitches from visible to virtually invisible.
Thread Color Theory suggests matching fabric undertones rather than surface colors. Consider Lighting Considerations when selecting—indoor light reveals different hues than natural sunlight.
Fiber Content Matching makes certain your thread behaves similarly to your fabric. Many sewists also use clear monofilament threads for truly invisible seams.
Proper Thread Weight Choice and color matching elevate your invisible seams from amateur to professional-grade sewing techniques.
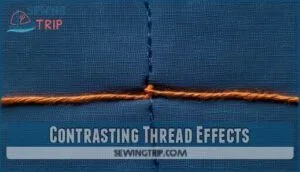
Contrasting Thread Effects
Sometimes you’ll want your stitching to steal the spotlight instead of hiding.
Bold stitching with contrasting thread creates stunning decorative seams that transform ordinary flat seams into design features.
Choose thread colors that pop against your fabric for maximum impact.
These accent seams showcase your sewing skills while adding visual interest.
Visible stitching becomes part of your garment’s personality when done purposefully to create design features.
Pressing Seams Properly
You’ll achieve professional-looking seams by pressing them correctly at each stage of construction, using steam and proper technique to meld stitches into the fabric.
Without this essential step, your hand-sewn seams won’t lay flat and will appear uneven, no matter how carefully you’ve stitched them, which is why proper technique is crucial for a good outcome, and essential step should not be overlooked.
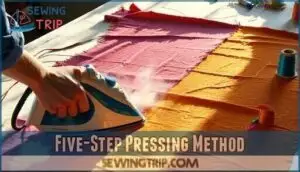
Five-Step Pressing Method
Perfect seams start with the Five Step Pressing Method that transforms amateur work into professional results.
First, meld stitches by pressing flat with steam. Next, open seam and press from wrong side, then right side.
Press seam allowance in one seam direction, maintaining fabric protection throughout. Finally, press from right side to guarantee everything will lay flat perfectly.
This method ensures that the seams are well-protected and professionally finished, which is crucial for a polished final product.
Steam Function Importance
Steam brings magic to your pressing game, making fabric fibers flexible so they’ll lay flat as they cool.
This steam durability creates superior wrinkle reduction compared to dry heat alone.
For best results, consider using a reliable steam iron.
However, moving your iron side-to-side while steaming can stretch fabric out of shape. For fabric protection and perfect seam shaping, press straight down with steam, then lift—never drag across your seam allowance.
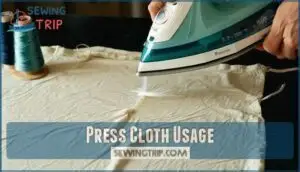
Press Cloth Usage
Your press cloth acts as a protective barrier between your iron and delicate fabrics, preventing shine and scorching while maintaining proper heat settings.
This simple tool transforms your pressing results from amateur to professional.
- Choose 100% cotton or silk press cloth for best fabric protection
- Place cloth between iron and garment to prevent residue transfer
- Keep press cloth slightly damp for enhanced steam application
- Match cloth material weight to your project’s fabric thickness
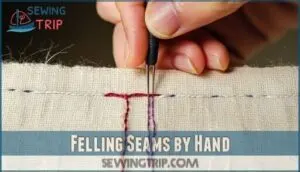
Felling Seams by Hand
You’ll fold the wider seam allowance over the trimmed edge and secure it with precise whip stitches that catch just a few fabric threads.
This hand-felling technique creates a reinforced seam that’s nearly invisible from the outside, giving your garments the same durable finish found in quality ready-to-wear clothing.
Folding Seam Allowances
Now that you’ve properly pressed your seams, it’s time to master the art of folding seam allowances for hand-felled finishes.
Start by trimming one seam allowance to half its original width—this prevents bulk while maintaining structure.
Fold the wider allowance over the trimmed edge, completely enclosing raw edges to prevent fraying.
| Fabric Type | Allowance Width | Folding Method | Edge Treatment | Final Result |
|---|---|---|---|---|
| Cotton | 5/8 inch | Clean fold | Enclose completely | Crisp finish |
| Wool | 1/2 inch | Gentle press | Minimal handling | Smooth drape |
| Linen | 3/4 inch | Steam fold | Secure edges | Flat profile |
| Silk | 3/8 inch | Light touch | Delicate handling | Professional look |
| Denim | 5/8 inch | Firm press | Double-fold | Durable seam |
The table provides a summary of the different fabric types, their respective allowance widths, folding methods, edge treatments, and final results, helping you achieve a professional look with your seams.
Hand Stitching Methods
With your seam allowances properly folded, you’ll choose between traditional methods for hand stitching.
The whip stitch creates invisible stitches by catching just a thread or two of fabric. This meditative sewing approach requires consistent tension and even spacing.
Different seam types benefit from specific sewing methods, with decorative hand-stitching offering both durable seams and beautiful fabric manipulation results.
Securing Folded Seams
Once you’ve folded your seam allowance over, securing it properly prevents fabric distortion and guarantees seam security.
Maintain consistent stitch tension while angle stitching through the folded edge—too tight creates puckering, too loose won’t hold.
Your whip stitches should catch just a few threads of the main fabric, creating invisible seam reinforcement. This seam finish technique works across various seam types.
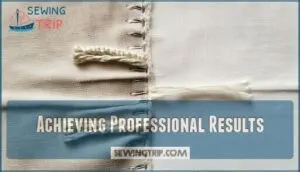
Achieving Professional Results
You’ll create perfectly flat, invisible seams by maintaining consistent stitch tension and carefully adapting your technique to match your fabric’s properties.
Professional results come from controlling bulk through precise seam allowance trimming and selecting the right thread weight for your specific fabric type, which leads to professional results.
Maintaining Even Stitches
Consistent spacing between your hand sewing stitches creates that polished, professional look you’re after.
Your needle angle and thread tension work together like dance partners – when they’re in sync, magic happens.
Here’s your practice drill checklist:
- Maintain 4-8 stitches per inch for secure seam finish
- Keep thread tension steady throughout each stitch
- Hold needle at consistent 45-degree angle
- Mark stitch length guides on fabric if needed
Reducing Bulk and Fray
Strategic trimming transforms bulky seams into sleek finishes.
Cut one seam allowance to half-width, leaving the other full.
This creates the foundation for proper folds without excessive thickness.
| Fabric Type | Trimming Method | Fray Prevention |
|---|---|---|
| Cotton | Standard trim to 1/4" | Pink or serge edges |
| Wool | Aggressive trim, remove bulk | Overlock raw edges |
| Silk | Minimal trim, preserve structure | French seams preferred |
| Synthetic | Medium trim for flexibility | Heat-seal if appropriate |
The table outlines specific trimming methods and fray prevention techniques for different fabric types, including Cotton, Wool, Silk, and Synthetic, to ensure a professional finish.
Adapting Technique for Various Fabrics
Different fabrics demand unique approaches to achieve perfect flat felled seams.
Heavy fabrics like denim require wider seam allowances and stronger pressing, while delicate silks need gentler handling and narrower margins.
Consider fabric weight, weave density, and fiber content when adjusting your technique.
Stretchy materials need careful tension control, and textured fabrics may require modified seam finishes for superior results to ensure a professional finish with perfect flat felled seams.
Frequently Asked Questions (FAQs)
How to make a flat felled seam by hand?
The secret to perfectly flat hand-sewn seams lies in your technique.
Sew your seam, trim one allowance by half, fold the wider side over, then whip stitch the edge down using tiny, angled stitches.
How do you make seams lay flat?
You’ll achieve flat seams through proper pressing techniques.
Steam and press each seam in five steps: meld stitches, open from wrong side, press right side, fold allowances one direction, then press final position.
What is a flat felled seam in sewing?
Like a secret handshake between fabric pieces, you’ll create a flat felled seam by trimming one seam allowance.
Folding the wider one over it, then stitching down for a clean, reinforced finish.
How to keep seams straight when sewing?
Mark your seam lines with washable fabric markers or tailor’s chalk before cutting.
Use a ruler to measure consistent seam allowances.
Pin perpendicular to the seam line, removing pins as you sew to maintain accuracy.
How do curved seams affect hand felling techniques?
Curved seams require extra attention when hand felling.
You’ll need to clip or notch the seam allowances at regular intervals to prevent puckering, then ease the fabric gently as you whip stitch around the curve.
What needle sizes work best for different fabrics?
Threading the perfect needle is like finding the right key for every lock.
Use size 8-10 needles for lightweight fabrics, 7-8 for medium weights, and 6-7 for heavy materials.
You’ll achieve smoother stitching with proper sizing.
Can flat felled seams work on stretch materials?
You can use flat felled seams on stretch materials, but you’ll need a ballpoint needle and flexible thread.
The key is maintaining gentle tension while stitching to prevent breaking the fabric’s stretch properties.
How to repair damaged hand-sewn flat seams?
First, carefully examine the damaged area to identify loose stitches or frayed edges.
Remove any compromised threads, then re-stitch using the original whip stitch technique, matching thread color and maintaining consistent tension throughout.
Whats the best seam finish for corners?
Sharp corners demand precision while gentle curves forgive mistakes.
You’ll want French seams for lightweight fabrics or flat-felled seams for heavier materials.
Trim seam allowances close, press carefully, and consider hand-whipstitching for invisible finishes.
Conclusion
Mastering these techniques is like having a secret weapon in your sewing toolkit.
When you consistently apply proper pressing methods, maintain even tension, and select appropriate seam types for your fabric, hand sewing seams that lay flat becomes second nature.
Your projects will showcase professional-quality construction that rivals machine work.
Remember to trim excess bulk, choose matching thread for invisible results, and practice these methods regularly.
Soon you’ll create beautifully finished seams that enhance any handmade garment.

