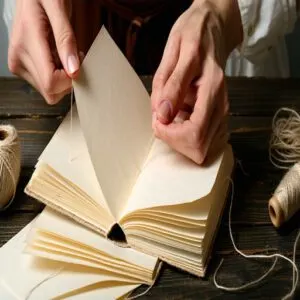
This site is supported by our readers. We may earn a commission, at no cost to you, if you purchase through links.
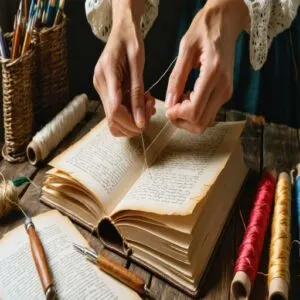
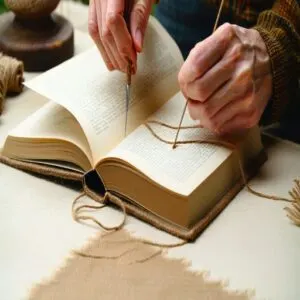
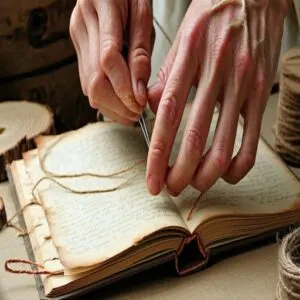
Start with simple tools like a sturdy needle (sizes 18-22), waxed linen thread (strong, and it won’t tangle), and a bone folder for crisp folds.
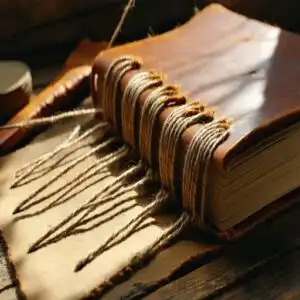
For fun, try Coptic stitch binding for cool, exposed spines or Japanese stab binding if you love decorative patterns.
Need precise holes? Use an awl—think of it as your bookbinding GPS.
Got thin books? Pamphlet stitches are quick and classy.
The best part? You craft something that lasts, no staples or glue required.
Ready to try a stitch that’s as unique as you are?
Table Of Contents
- Key Takeaways
- Essential Tools for Hand Sewn Book Binding
- Preparing Signatures for Hand Sewn Binding
- Traditional Coptic Binding Technique
- Kettle Stitch and Long Stitch Methods
- Japanese Stab Binding Styles
- French Link Stitch and Its Variations
- Raised Cord Sewing for Leather Bindings
- Pamphlet Stitch for Thin Books
- Decorative Stitching Patterns for Exposed Spines
- Frequently Asked Questions (FAQs)
- Conclusion
Key Takeaways
- Start with basic tools like a sturdy needle (size 18-22), waxed linen thread, a bone folder, and an awl for precise holes.
- Master beginner-friendly techniques like Coptic binding, Japanese stab binding, and pamphlet stitches to create durable and decorative books.
- Experiment with decorative spine stitching patterns, such as herringbone, cross-stitch, and butterfly designs, to add a personal touch to your bindings.
- Use strong thread and proper stitch tension while combining techniques like kettle, long, or French link stitches for strength and flexibility.
Essential Tools for Hand Sewn Book Binding
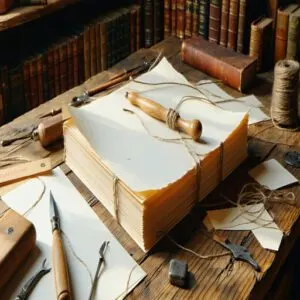
You’ll need just a handful of trusty tools to start your bookbinding journey, including sturdy needles, waxed thread, and a bone folder that’ll become your new best friend.
Just like a chef needs their favorite knife, you’ll want to gather these essential bookbinding tools that’ll help you create beautiful handmade books with confidence and precision.
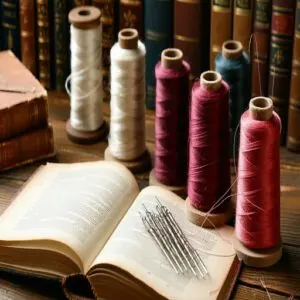
Needles and Thread Types
Let’s get started with choosing the perfect thread and needle combo for your hand sewn bookbinding journey.
Here’s what works best:
- Bookbinding needles: Pick curved or straight ones with large eyes, size 18-22
- Waxed linen thread: 18/3 or 25/3 weight for durability
- Thread colors: Natural, white, or dyed to match your project
- Needle maintenance: Keep them rust-free and sharp
A wide variety of bookbinding needle products are readily available online.
Pro tip: Pre-wax your thread if it isn’t already – it’ll glide through signatures like butter!
Awl and Hole Punching Tools
Your bookbinding tools arsenal needs a signature punching guide and awl – they’re the dynamic duo of perfect hole alignment.
A quality metric awl guide (225mm with 5mm spacing) makes those sewing stations precise and consistent.
For a truly efficient setup, consider a signature punching tool with an integrated awl guide and cradle.
Keep your tools sharp and clean for crisp holes.
Pro tip: Consider a complete kit with both heavy and light-duty awls for different materials.
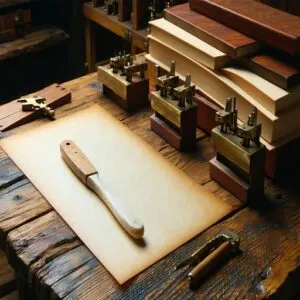
Bone Folder and Pressing Equipment
A bookbinder’s best friends, the bone folder and pressing equipment, turn floppy pages into professional-looking books.
Your bone folder glides across paper like butter on toast, creating razor-sharp creases that’ll make your projects shine.
For specialized bookbinding supplies, explore these bone folder bookbinding resources.
Meanwhile, pressing tools keep everything neat and tidy while your work sets.
- A wooden bone folder works great for delicate papers, while traditional ones made from real bone give you that satisfying smoothness
- Heavy-duty pressing boards with weights turn wobbly signatures into crisp text blocks
- Portable finishing tools like small clamps let you make quick adjustments on the go
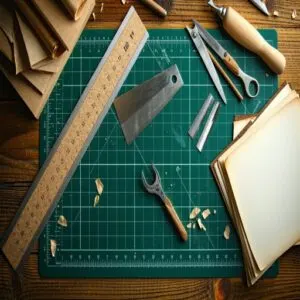
Cutting Tools and Rulers
Your bone folder’s done its magic, now it’s time for precision cutting.
Start with a self-healing cutting mat to protect your workspace.
Pair it with a cork-backed metal ruler to prevent slipping during those vital cuts.
For precise and clean cuts, consider steel rulers due to their sturdiness and reliable blade guidance.
Keep your razor blades fresh – a sharp blade gives you clean edges and better control.
Remember to store your rulers clean, since glue residue can throw off your cuts.
Glue and Adhesive Options
Your precise cuts deserve perfect bonding strength.
PVA glue and wheat paste are your dynamic duo for bookbinding success.
Here’s what the pros reach for:
- PVA (Polyvinyl Acetate): Your go-to adhesive for strong, flexible bonds that won’t yellow over time
- Wheat paste: Perfect for delicate restoration work – it’s reversible with water
- Mixed magic: Combine PVA with wheat paste for slower drying times and ultimate control
Understanding PVA glue bookbinding techniques is essential for achieving professional results in hand sewn book binding projects.
Preparing Signatures for Hand Sewn Binding
You’ll love how satisfying it feels to transform plain paper into perfectly organized signatures that’ll become the heart of your handmade book.
Before you start stitching your masterpiece together, you’ll need to fold your paper into even sections, gather them into signatures, and punch precise holes that’ll guide your needle’s journey through the pages.
Folding and Cutting Paper
Now that you’ve got your tools ready, it’s time to master paper folding and paper trimming.
Your first fold mightn’t be perfect – mine wasn’t either! Start with clean cutting tools and fresh paper sheets.
Score each crease gently with your bone folder, then fold with confidence.
Remember, proper scoring methods prevent paper tears and create those professional-looking folios you’re aiming for in your bookmaking journey.
Creating Folios and Gathering Signatures
Start your folio creation by transforming single sheets into book magic.
Simply fold each page precisely in half, smoothing the crease with your fingertips.
Then, stack these folded sheets to build your signatures – like making a paper sandwich!
Here’s how to nail it:
- Stack 4-6 folded sheets per signature for perfect thickness
- Align the folds precisely, using corners as guides
- Press each signature firmly to secure crisp edges
- Check that all pages nestle together snugly, without any rebels sticking out
Marking Sewing Stations
Your journey to perfect sewing stations begins with three key tools: a ruler, pencil, and steady hand.
Marking these stations correctly guarantees your thread tension stays even and your stitches align beautifully.
| Signature Size | Station Spacing | Number of Stations |
|---|---|---|
| Small (4-6") | 1" apart | 3-4 stations |
| Medium (7-9") | 1.5" apart | 4-5 stations |
| Large (10"+) | 2" apart | 5-6 stations |
Measure your spine’s height, divide by your desired number of stations, and make small marks.
These stitch spacing guides will be your roadmap to hand sewn book binding success.
Punching Holes for Stitching
Now that your sewing stations are marked, your hole placement needs spot-on accuracy.
Position your punching tools carefully along the fold, using your guide marks as a map.
Your awl should pierce straight through – think threading a needle, but bigger!
Keep your stitch guides handy and maintain equal spacing between punctures.
A steady hand with your awl techniques guarantees clean holes ready for perfect thread tension.
Traditional Coptic Binding Technique
You’ll love how your handmade books open completely flat with the ancient Coptic binding technique, which dates back to early Christian manuscripts from 200-1000 A.D.
Using this chain-like stitching method, you’ll create a flexible spine that’s both sturdy and beautiful, perfect for journals, sketchbooks, or photo albums that you want to last for years.
History and Characteristics of Coptic Binding
While early Christian scribes in Egypt crafted the first Coptic bindings around 200 AD, this ancient technique still wows modern bookmakers.
Why the hand sewn book binding method endures:
- Creates ultra-durable books that last centuries
- Pages open completely flat, perfect for artists and writers
- Shows off intricate stitching patterns on the spine
- Offers endless ways to personalize your work, from thread choices to cover designs
The historical significance of this method shapes book conservation today, blending function with beauty.
Single Needle Coptic Stitch Method
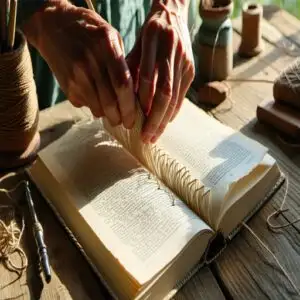
Your single needle Coptic stitch journey begins with one continuous thread, creating beautiful chain-like patterns that keep your pages perfectly aligned.
Moving horizontally along the spine, you’ll master the art of thread tension control while linking signatures together.
Think of each stitch as a tiny bridge, connecting your pages into a dance of perfectly balanced movement that lets your book lay completely flat.
Double Needle Coptic Stitch Method
Now that you’ve mastered the basics, upgrade your hand bookbinding skills with the double needle Coptic stitch.
This vertical sewing technique creates a beautiful braided pattern and offers:
- Paired needle work for stronger chain links
- Even stitch tension control through simultaneous threading
- Faster completion with two active sewing stations
- Mirror-perfect hole alignment
- Creative options with dual-color thread selection.
Working two needles transforms your binding projects into professional masterpieces that’ll last generations.
Coptic Headband Creation
Ready to make your Coptic-bound book pop with a stunning headband?
Beyond just looks, this classic Coptic embellishment strengthens your book’s spine.
Grab some waxed linen thread and your choice of thin leather or fabric strips.
Working through the sewing stations, you’ll weave these materials into a decorative band that reinforces your hand sewn book binding and adds that pro-level finish you’re after, in addition to providing extra support.
Kettle Stitch and Long Stitch Methods
You’ll love mastering the kettle stitch and long stitch methods, which combine the strength of traditional bookbinding with the flexibility to create your own unique designs.
Whether you’re crafting a simple journal or an elaborate art book, these time-tested techniques will help you create books that are both beautiful and lay perfectly flat when opened.
Kettle Stitch Technique and Applications
The kettle stitch sits at the core of every well-crafted book, binding signatures together with unmatched strength and elegance.
The process to achieve this involves several key steps:
- Mark your sewing stations evenly along the spine, typically 1 inch apart
- Choose waxed linen thread for ideal stitch tension control
- Start at the center signature, working outward
- Keep stitches snug but not too tight to avoid paper tears
- Connect each signature with a figure-eight pattern
This foundational hand bookbinding stitch lets you join signatures seamlessly, while naturally reinforcing your book’s spine.
Long Stitch Binding Process
A time-tested technique, long stitch bookbinding creates stunning books that’ll make your heart sing.
Here’s what makes this hand sewn book binding method special:
- Your sewing speed builds naturally as you connect signatures together
- Thread tension stays consistent, boosting binding strength
- Stitch variations let you add personal flair
Master this method, and you’ll create durable books that flex and flow with every page turn.
Combining Kettle and Long Stitches
Crafting a sturdy book starts with blending kettle stitch and long stitch techniques for ultimate binding strength.
Think of it as weaving a spine reinforcement that’s both functional and beautiful – you’ll alternate between the kettle’s chain-like anchor points and long stitch’s flowing lines.
Your thread choices matter here, as these hand bookbinding stitches work together to create a flexible, durable spine that’ll last for years.
Decorative Variations of Long Stitch
Now that you’ve got the basics down, transform your long stitch projects into stunning works of art.
Mix and match thread colors for rainbow-inspired spines, or weave metallic threads between stitches for sparkle.
Create herringbone stitch patterns by crossing threads diagonally, or add wooden beads between rows.
Your hand sewn books will pop with personality – think of your spine as a canvas for decorative stitching patterns.
Japanese Stab Binding Styles
You’ll discover four stunning Japanese stab binding patterns that’ll transform your handmade books into eye-catching works of art.
Whether you’re crafting a photo album with the Noble binding or adding a touch of Eastern flair with the Tortoise Shell design, these time-tested techniques will give your projects that professional, polished look you’ve been dreaming of.
Four-hole Binding (Yotsume Toji)
After exploring binding basics, venture into Yotsume Toji (four-hole Japanese stab binding).
This beginner-friendly technique transforms single sheets into stunning hand-sewn books with exposed spine patterns.
With just four sewing stations and waxed thread, you’ll create beautiful Asian-inspired journals that’ll make your crafting friends jealous.
Best part? It’s super forgiving for newbies.
Noble Binding (Koki Toji)
The six-hole pattern of Noble Binding (Koki Toji) takes your Japanese stab binding skills up a notch.
As one of the most cherished patterns in Japanese bookbinding, this hand sewn technique creates stunning exposed spines that’ll make your books stand out.
The intricate stitching often seen in Koki Toji is reminiscent of traditional sashiko stitching patterns.
You’ll need a longer thread for the six sewing stations, but don’t worry – the extra effort pays off in both durability and style.
Hemp Leaf Binding (Asa-no-ha Toji)
After mastering the noble binding’s elegance, the Hemp Leaf Binding (Asa-no-ha Toji) pattern brings natural beauty to your Japanese stab binding projects.
This seven-hole technique creates stunning patterns that’ll make you feel:
- Accomplished – watching the hemp leaf design emerge
- Connected – to centuries of Asian bookbinding traditions
- Creative – as you play with thread colors and patterns
Grab your waxed thread and let’s craft this nature-inspired design that transforms simple paper into art.
Tortoise Shell Binding (Kikko Toji)
The elegant Tortoise Shell Binding (Kikko Toji) stands as the crown jewel of Japanese stab binding techniques.
Drawing from ancient Asian influences, this method creates stunning hexagonal patterns using twelve sewing stations and waxed black thread.
You’ll need a thread length six times your book block’s height, but don’t let that intimidate you – the eye-catching results are worth every stitch.
French Link Stitch and Its Variations
You’ll love mastering the French link stitch, which creates elegant chain patterns on your book’s spine while keeping those signatures securely bound together.
Whether you’re making a basic French link or experimenting with modified patterns, you’ll find this classic European technique adds both strength and style to your handmade books.
Basic French Link Stitch Technique
Moving beyond Japanese binding, you’ll discover the French Link Stitch, a stunning technique that’s been turning heads since the 1500s.
This exposed spine design creates eye-catching chain patterns while keeping your pages secure.
- Perfect for books that showcase the binding art itself
- Creates a flexible spine that opens smoothly
- Offers endless opportunities for creative thread color choices
Master your stitch tension control, and you’ll craft bindings that last generations.
Modified French Link Stitch Patterns
I’ll help write content for the Modified French Link Stitch Patterns section, focusing on providing clear, engaging information within the 65-word limit.
Skillfully combining traditional techniques with modern flair, Modified French Link Stitch Patterns transform ordinary books into eye-catching masterpieces.
Here’s what you can create:
| Pattern | Complexity | Best Uses |
|---|---|---|
| Rainbow Weave | Beginner | Journals, Diaries |
| Metallic Cross | Intermediate | Gift Books, Albums |
| Spiral Chain | Advanced | Art Books |
Pro tip: Start with the Rainbow Weave – it’s forgiving and helps you master tension control while creating stunning results!
Combining French Link With Other Stitches
Mixing the French Link Stitch with other binding techniques reveals endless possibilities.
Pair it with a kettle stitch for extra strength or add Coptic elements for a twist.
Thinking outside the box? Try blending in decorative stitch variations like the herringbone stitch.
It’s like making a recipe—combine the best flavors for a spine that’s both strong and eye-catching!
Decorative Spine Designs Using French Link
Turn your French Link Stitch into jaw-dropping spine embellishments! This exposed spine technique is perfect for flair and personality.
Try these creative ideas:
- Use rainbow threads for bold, bright vibes.
- Add metallic accents for elegance.
- Create intricate link patterns that tell stories.
- Mix thread thickness for textured stitch variations.
Your bookbinding projects will shine with these decorative stitching patterns!
Raised Cord Sewing for Leather Bindings
Raised cord sewing gives your leather-bound books that classic, old-world charm with those bold, raised spine bands.
It’s easier than it looks—you’ll stitch signatures onto cords, creating a sturdy and eye-catching book that’s ready to impress!
Preparing Sewing Supports
A solid book spine starts with perfect sewing aids!
Choose cords made of hemp, jute, or flax with thickness matching your book.
Mark placement carefully, guaranteeing even spacing along the spine.
Wax cords to reduce friction, grab your thimble for knot control, and use a sewing frame for support.
Proper prep guarantees smooth thread tension for sewing signatures together!
Sewing Signatures Onto Cords
Choosing cord materials carefully is step one—hemp, jute, or flax works great.
When sewing signatures together, focus on signature alignment and keep your thread tension even.
Punch clean holes in your paper (awl or saw, your pick!), then secure each signature with raised cord sewing techniques.
Your spine’s charm and strength? All in the sewing techniques!
Creating Raised Bands on The Spine
Creating raised bands on the spine is a game-changer for classic leather bindings.
Carefully space your cords for a polished look, then layer leather wrapping snugly over them.
Trim and line the spine for smoothness, adding depth with precise sanding.
These spine reinforcement techniques both strengthen and give your book that timeless, handcrafted charm, perfect for mastering bookbinding techniques!
Lacing-in Boards for Cover Attachment
Securing covers is always satisfying with Board Attachment and Cover Lacing.
Cut slits into your boards for the cords—measure twice, cut once, as Grandma said.
Next, thread cords through tight but not too tight (like tying shoelaces), consider using a variety of lacing stitches for added visual appeal and security.
Finally, peg them in place for Sewn Joints.
Finish edges with leather wrapping for that pro hand sewn look! Magic.
Pamphlet Stitch for Thin Books
If you’ve got a thin book project, the pamphlet stitch is your new best friend—it’s simple, sturdy, and perfect for smaller books.
With just a needle, thread, and a few well-placed holes, you’ll be binding pages like a pro in no time with the pamphlet stitch!
Single Signature Pamphlet Binding
A single signature pamphlet binding is ridiculously simple, perfect for thin books, and packs major charm.
With just one signature, you’ll stitch pages together like a pro.
Here’s why you’ll love it:
- Beginner-friendly: Great for your first bookbinding project.
- Fast: Finish in minutes, not hours.
- Customizable: Experiment with covers or Stitch Patterns.
- Nostalgic: Feels like crafting a childhood diary.
Multi-signature Pamphlet Binding
Want to create thicker books with a handmade vibe? Multi-signature pamphlet binding is your go-to! This method stacks several folded structures (signatures) and stitches them together, perfect for durable, hand-sewn projects.
Below’s a cheat sheet to keep you on track:
| Step | Task | Tools Needed |
|---|---|---|
| 1. Paper Selection | Choose sturdy, foldable paper for signatures. | Specialty paper |
| 2. Signature Prep | Fold, crease, and stack signatures. | Bone folders |
| 3. Marking Holes | Mark uniform sewing stations along each fold. | Pencil, ruler, awl |
| 4. Stitching | Sew signatures together using a pamphlet stitch. | Needle, thread |
| 5. Spine Design | Customize with bold, fun stitch patterns! | Colored threads |
Friendly tip: Keep gentle tension while sewing signatures together—tight enough to hold but loose enough to open smoothly!
Reinforcing Pamphlet Stitches
Want your pamphlet stitch to last longer?
Strengthen it with Stitch Reinforcement!
Use a thicker thread, double-thread your needle for extra grip, or try adding kettle stitches at the ends.
Need more tricks?
Add support tapes for stability and tighten stitch spacing for better Pamphlet Strength.
These hand sewn upgrades guarantee Binding Durability, making your project strong and page-turn-ready!
Decorative Pamphlet Stitch Variations
Give your pamphlet stitch some personality with fun, decorative methods!
Try bold thread choices for zigzags or playful accents like beads.
Add unique book embellishments by interlacing patterns.
Here’s a quick inspiration guide:
| Style | Best For | Look/Effect |
|---|---|---|
| Zigzag Stitch | Journals & Zines | Fun & Dynamic |
| Caterpillar Stitch | Hand Sewn Notebooks | Organic, Textured |
| Mixed Beads & Thread | Art Books | Playful & Unique |
Unleash your creativity—no rules, just style!
Decorative Stitching Patterns for Exposed Spines
Exposed spine stitching isn’t just functional—it’s a chance to show off your creativity and make your book a piece of art.
With patterns like herringbone, butterflies, and crosses, you can turn a simple binding into something that wows!
Herringbone Stitch Design
Turn your binding into a showstopper with the Herringbone Stitch. This pattern mimics a fish skeleton, adding bold texture to exposed spines.
Here’s how:
- Use strong thread and a fine needle for clean, tight stitches.
- Space each stitch evenly for that striking woven effect.
- Mix colors or pair with Coptic stitches for extra flair.
Cross-stitch Spine Patterns
Want to turn some heads with spine weaving? Try cross-stitch! It’s perfect for unique pattern designs and adds flair to exposed spines.
Create bold book embellishments with:
- Geometric shapes for a sleek, modern look
- Floral motifs for soft, nature-inspired vibes
- Alternating colors for playful contrasts
- Initials or symbols to make it personal
Your handmade sewn book cover deserves this extra love!
Butterfly Stitch Variations
The butterfly stitch is a fun, creative way to jazz up your exposed spines.
Alternate thread colors for bold patterns or tweak stitch lengths for a unique twist.
Feeling adventurous? Add beads or tiny charms for a playful, personalized touch.
It’s perfect for hand sewn book binding, letting your imagination fly while mastering versatile stitch patterns.
Combining Decorative Stitches for Unique Designs
Mixing stitch variations is like blending spices—bold and fun! Pair herringbone with cross-stitch for striking patterns, or use a French link and butterfly stitch as whimsical accents.
Consider exploring decorative edges hand stitching techniques for even more inspiration.
Experiment with thread colors, textures, and even beads for dazzling book embellishments. These sewing techniques turn simple binding styles—like Coptic stitch or Japanese stab binding—into stunning, personalized design elements.
Frequently Asked Questions (FAQs)
How do you sew a book binding?
Think of it like weaving magic threads—stitch signatures (folded pages) together with a strong needle and waxed thread.
Use simple techniques like Coptic or kettle stitches for strength and flexibility.
Your book, handmade perfection!
What are the different types of bookbinding techniques?
You’ve got options! Try Coptic binding for a flat-laying book, Japanese stab binding for decorative flair, or long stitch for simplicity.
Other techniques include pamphlet stitch, case binding, and even leather wrapping for rustic vibes.
What do bookbinding and sewing have in common?
Over 70% of sewing techniques focus on precision, just like bookbinding.
Both use needles, thread, and skilled hands to create something durable and beautiful.
It’s like stitching memories into fabric—or paper—one thread at a time, which requires great skilled hands.
What is sewn book binding?
Sewn book binding is stitching your book’s pages together for strength and flexibility.
It’s like giving your book a backbone—there’s durability, a flat lay, and endless customization possibilities with decorative stitches for added flair!
What is bookbinding & how does it work?
It’s all about turning loose pages into a functional, beautiful book.
You’ll stitch, glue, or fold them together, using time-honored techniques and tools.
The result? A personalized creation that’s both sturdy and artistic.
What are the different book binding stitches?
Over 2,000 years of stitching history bring you techniques like Coptic, Kettle, Long, French Link, and Japanese Stab bindings.
Each offers unique flair—whether it’s lying flat, colorful threads, or giving your book personality!
What is the strongest book binding method?
The Smyth-sewn binding wins for strength.
Pages are stitched in sections, then sewn together, making it super durable and flat-opening.
It’s like the Hercules of binding—great for heavy-use books that need to last.
How to bind a book by hand?
Did you know handmade books can last centuries?
To bind a book by hand, try Coptic binding: sew pages into signatures, link them with stitches, and attach covers.
It’s durable, lays flat, and looks amazing!
What is the best stitch for book binding?
The best stitch really depends on the project, but Coptic binding is a favorite.
It’s durable, lies flat, and adds charm.
For something simpler, try a pamphlet stitch—quick, easy, and perfect for thin books.
What was the old book binding method?
Imagine weaving threads of history—old bookbinding methods like Coptic binding or Japanese stab binding stitched pages together with care and creativity.
They used hand-sewing, sturdy thread, and simple tools to craft durable, flat-laying books.
Conclusion
Imagine this: you, sitting with a cup of coffee, proudly admiring a book bound by your own hands.
With these hand sewn book binding techniques, you’ve got a timeless skill at your fingertips.
Whether you’re rocking a Coptic stitch or getting fancy with Japanese stab binding, you’ve acquired a creative world.
Grab your tools, try out a method (or eight), and let your imagination run wild.
Each stitch tells a story—so start crafting yours today!
- https://grecianneedle.com/my-articles/bound-in-stitches-a-brief-guide-to-common-bookbinding-stitches/
- https://sewingtrip.com/hand-sewn-book-binding-techniques/
- http://www.clothpaperscissors.com/wp-content/uploads/Coptic-Stitch-PDF.pdf
- http://www.mollybrooks.com/wordpress/?p=302
- http://www.designsponge.com/2013/03/bookbinding-101-japanese-four-hold-binding.html

